


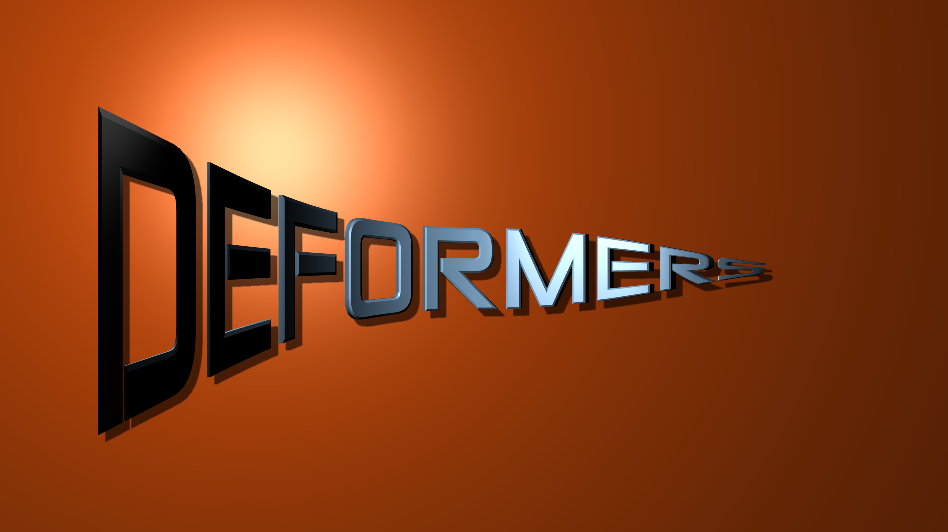
In this section we will cover the various tabs and parameters that are available in Title Studio when Deformers are applied to an object. Deformers are effects in Title Studio that allow you to distort or warp a 3D Container or Shape track to create dynamic effects in otherwise flat objects.
Deformers that come factory installed with Title Studio are:
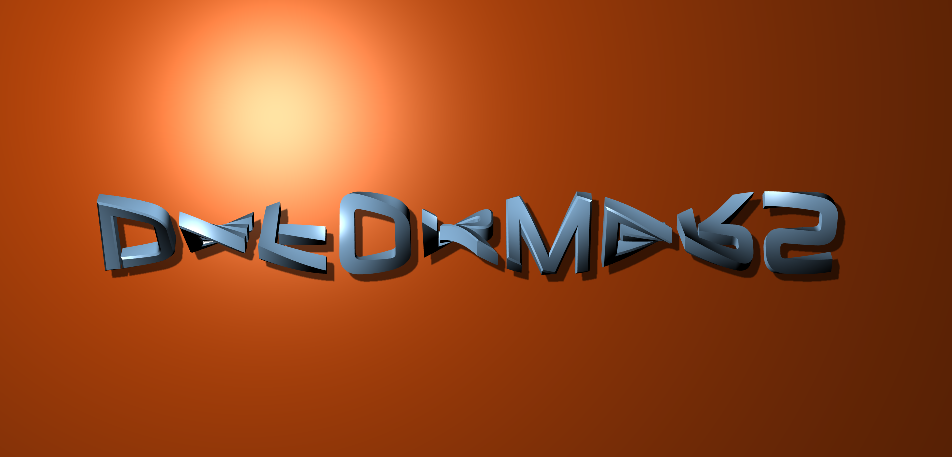
- Bend-Taper-Twist: Lets you bend the image back, taper or stretch the side edges, or twist the right and left sides.
- Curl: With this deformer you can curl or roll a 3D Object
- Flatten: Allows you to compress a 3D Object into a 2D Object. It can also be used to further extrude 3D Objects.
- Mesh Chaos: Creates unique water-like ripples and distortions to stretch and deform an object.
- Mesh Shatter: Allows you to shatter and break apart 2D and 3D objects.
- Model Displacer: Displaces pieces of an object, allowing you to control how the various pieces dispurse.
- Pre-Transform: Offsets the position of an object in 3D space
- Pulse: Creates a pulsing effect that can simulate continuious breathing or more elastic expansion and contraction of an object.
- Ripple Z Rings: Creates ripples in z-space along an object that simulate the motion of a flag blowing in the wind, or ripples on the surface of water.
- Slice/Stretch: Allows you to slice or stretch a 3D Object at a specific point and manipulate the position of each piece.
- Un-Deform: Allows you to specify a region where previously applied deformers are suppressed.
Applying a Deformer
Deformers can be applied to either the Shape Track or the Scene Container itself. Deformers applied to a scene container will affect everything within that container, while deformers applied to a specific shape track will only affect that track. You can drag a deformer form one Shape Track to another if you want to move the effect to a different object. Likewise, it is also possible to copy and paste a deformer from one shape track to another.
The first thing you will need to do is create a new scene container with at least one shape track.
- Select the track you would like to apply the deformer to. For example a text layer or extrusion.
- From the Shaders menu drop down, select the deformer you would like to add. NOTE: Deformers may only be applied to the main track. If you have selected the material or transform tracks, the deformers will be grayed out.
- When applied, a new deformer track will be nested inside of your shape track. NOTE: This new track will automatically be assigned the name of the specific deformer but can be renamed by selecting the track and pressing enter.
- Effect parameters and attributes will appear in the controls tab whenever the deformer track is selected. The available parameters depend on which deformer you use.
By adjusting the various parameters and setting keyframes, you can create unique animations.
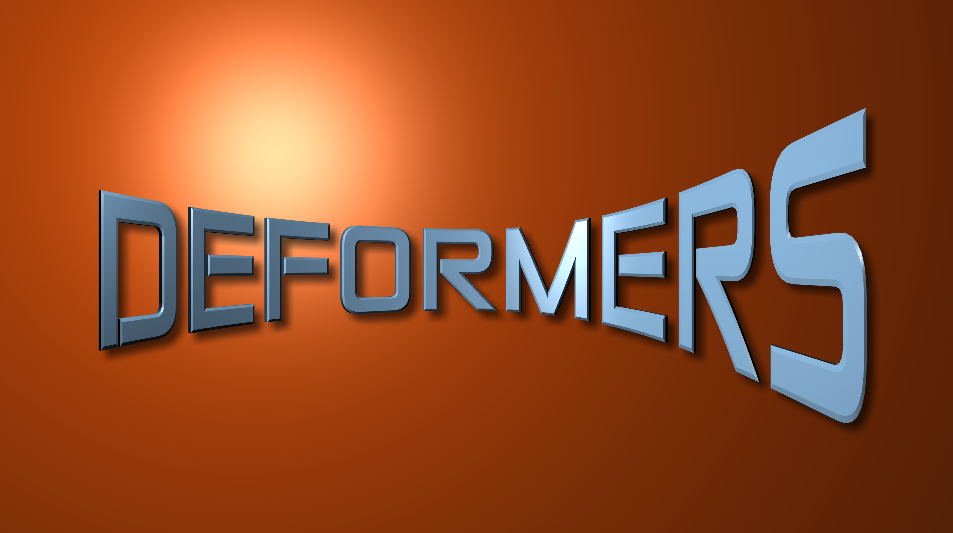
Bend-Taper-Twist:
With Bend-Taper-Twist we can bend the image back, taper or stretch the side edges, or twist the right and left sides.
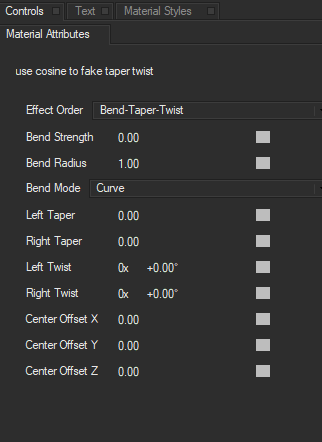
Effect Order allows us to set the priority of the deform order. By default the effect will be bent, then tapered and finally twisted. By adjusting the order from the dropdown menu, we can create subtle alterations in the effect, by, for example bending after a taper effect has been applied.
Bend Strength bends or stretches the source image. Set to 0, the image is unchanged. Increasingly negative values bend the image more and more back from the center. Positve values stretch the image.
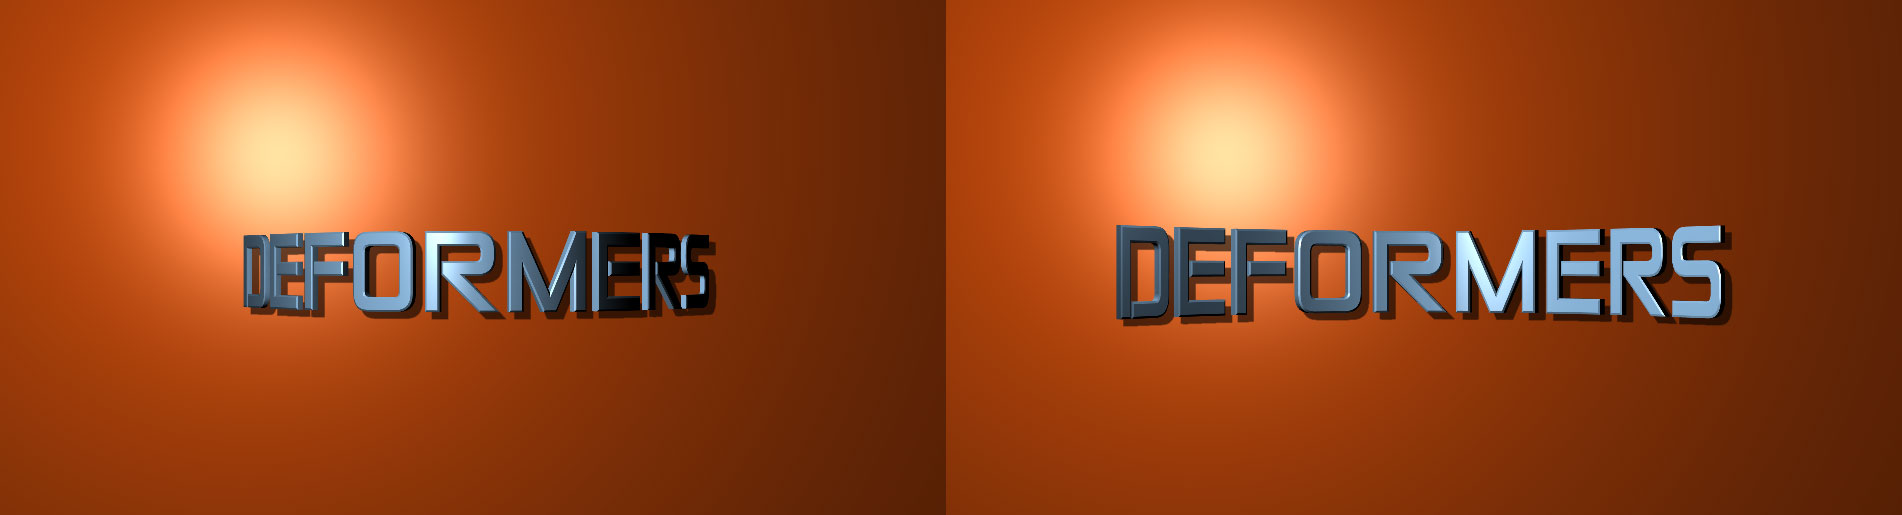 A Bend Strength value of -20 bends the object backwards, while a Bend Strength value of 20 bends it forward.
Bend Radius determines the tightness of the bend. Higher values will create a more pronounced bend, while lower values will flatten out the image.
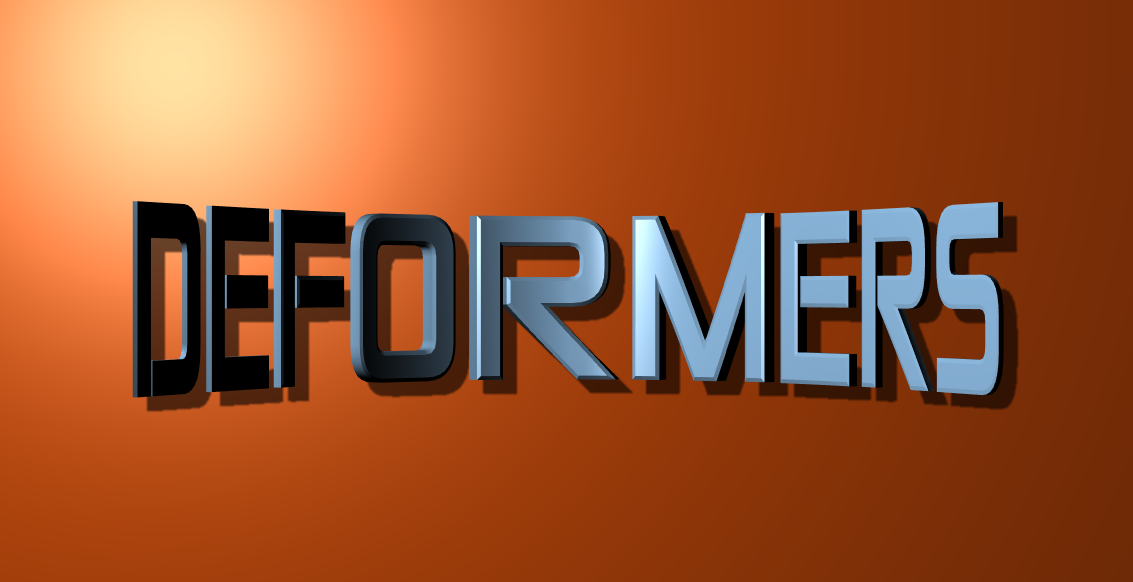
Left Taper squeezes or expands the left edge of the image. Set to 0, the image is unchanged. Values greater than 0 expand the left edge of the image vertically. Values less than 0 squeeze the left edge of the image, tapering off to a point.
Right Taper squeezes or expands the right edge of the image. Set to 0, the image is unchanged. Values greater than 0 expand the right edge of the image vertically. Values less than 0 squeeze the right edge of the image, tapering off to a point.
 Left Taper Value = 2, Right Taper Value = -2
Left Twist twists the left side of the image.
Right Twist twists the right side of the image.
By adjusting the Center X, Center Y and Center Z parameters we can move the position of the deform effect along the X, Y and Z planes.
Curl
As the name suggests, the Curl Deformer can be used to curl or “roll up” an object. The curl can be animated to show an object unrolling, or the parameters can be adjusted to credte unique folds and bends. Unlike Bend-Taper-Twist, the curl deformer does not curl in multiple directions at once.
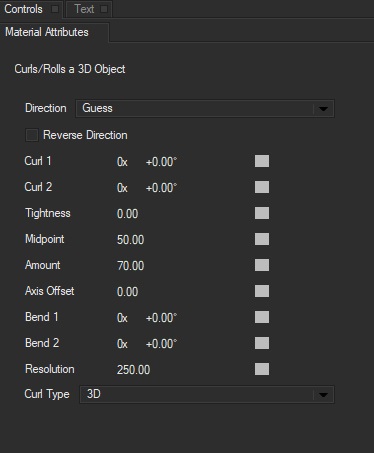
Direction allows us to determine what direction in 3D space the object will curl when using the Curl deformer. It provides a number of direction options that allow for creating unique effects. The available options specify what edges of the object are curled along which 3D axis.
- Guess: gives a commonly desired result by curling along the longest axis in the direction of the shortest axis
- Guess 2: curls along the longest axis in the direction of the second shortest axis
- Left/Right + Y: Curls the left or right edge along the Y axis.
- Left/Right + Z: Curls the left or right edges along the Z axis.
- Top/Bottom + X: Curls the top or bottom edge along the X axis
- Top/Bottom + Z: Curls the top or bottom edge along the Z axis
- Front/Back + X: Curls the front or back edge along the X axis
- Front/Back + Y: Curls the front of back edge along the Y axis
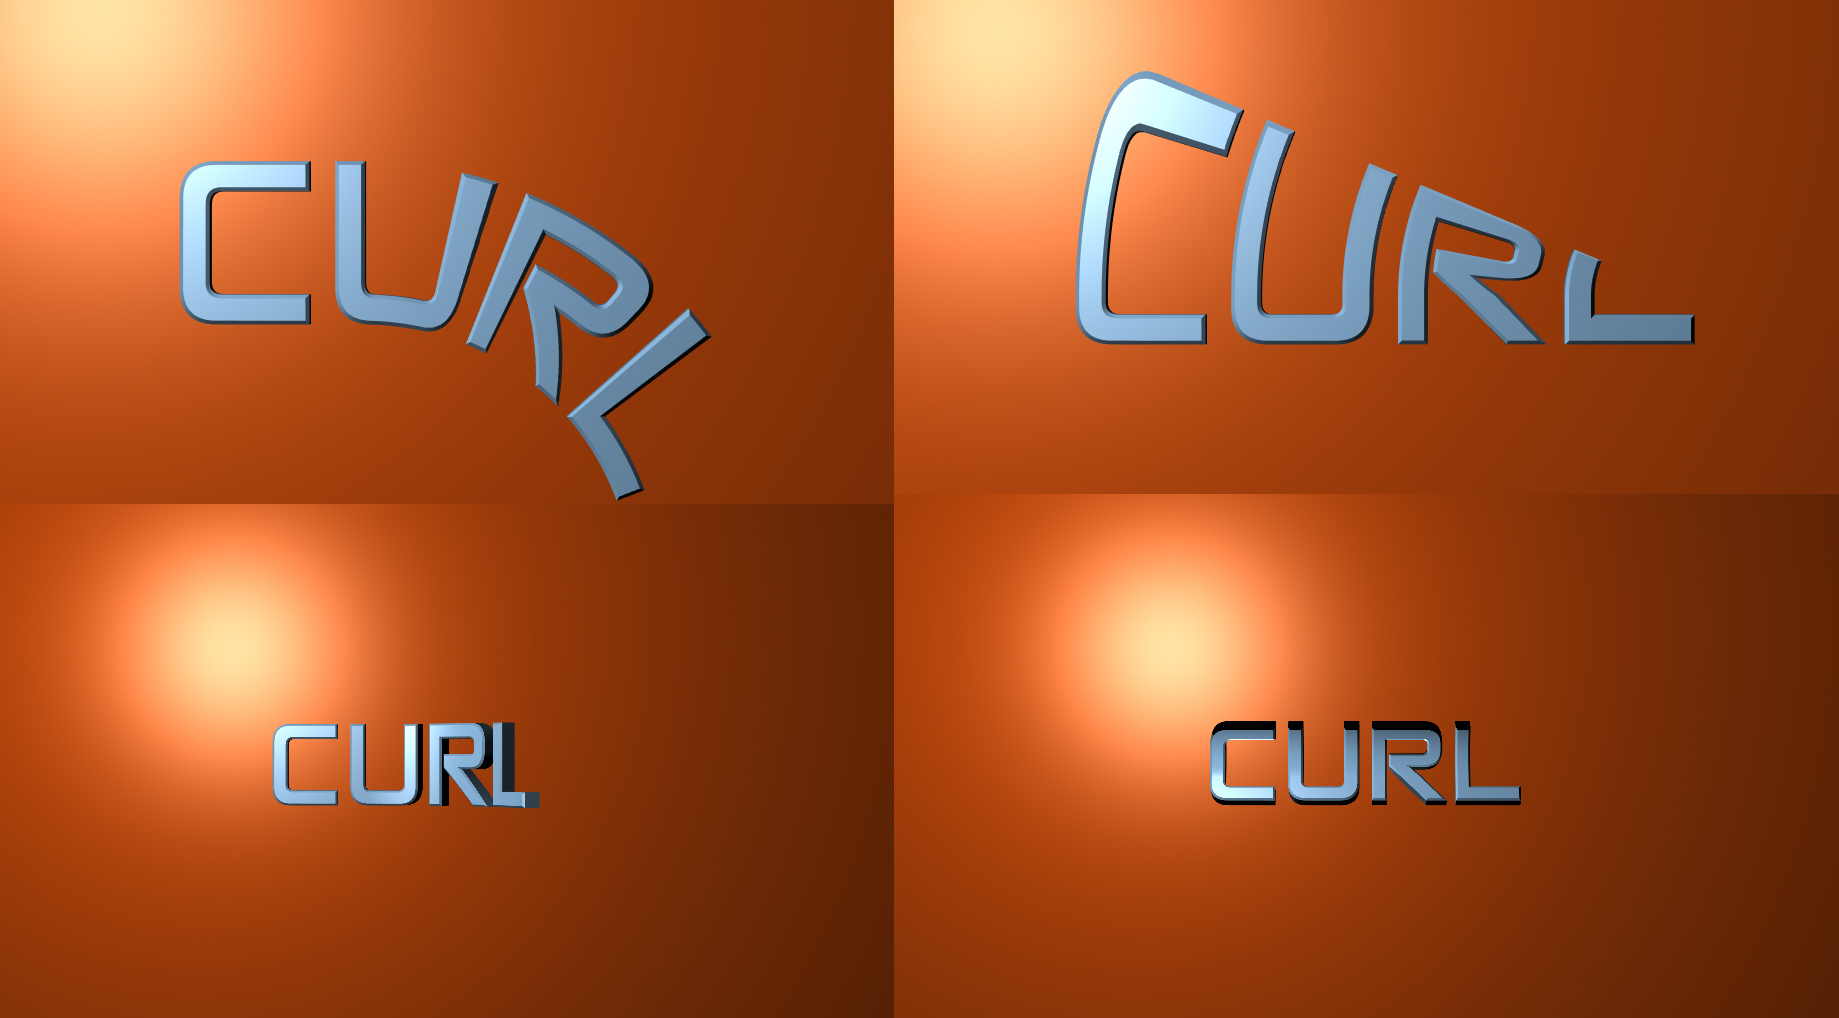
Reverse Direction: reverses the direction of the curl in terms of which edge (Left, Right, Top, Bottom) begins the curl. For example a Left/Right curl begins on the right edge and moves left by default but it begins on the left edge and moves right with the Reverse Direction checkbox enabled.
Curl 1 and Curl 2: used to define a primary and a secondary curl when changed from their default values of zero, with positive values curling the edge of the object forward and negative values curling the edge back in 3D space.
Tightness: tightens or loosens the Curl(s) by increasing or decreasing the size of cylindrical area(s) the object is rolled into as it is curling. A higher Tightness value rolls the object into a smaller cylinder while larger values roll it into a larger cylinder, with more or less of the object rolled farther into the cylinder depending on its size.
Midpoint: will only seem to have an effect if Curl 2 is changed from its default to create a secondary curl. In this case Midpoint determines the positioning of Curl 2 in relation to Curl 1
Amount: offers a way to control the overall progression if the curl effect in a single parameter. This allows for easy creation of animated curl effects where an object rolls or unrolls over time. The Amount parameter defaults to a value of 70 (rather than zero) so that the preceding parameters can be adjusted to design the curl while the effect is visible. For many commonly desired effects the Amount parameter will be animated over time in the final effect. For example in order to have an object begin as curled and to unroll to its un-curled state over time the Amount parameter is animated from some higher number back to zero. And in order to have an object begin un-curled and roll up over time the Amount parameter is animated from zero to some higher number.
Axis Offset: allows for scaling the curl cylinder larger or smaller without rolling more or less of the object further into the cylinder – instead it will cause the curled part of the object to scale and distort to the new size.
Bend 1 and 2: controls provide a way to to bend the object at the point of Curl 1 and Curl 2. The bend(s) are applied along the alternate access from the curl.
Resolution: controls how many curl points the deformer uses to internally calculate the curl. In most cases there is no reason to change this parameter from its default, but in some cases it is possible to make the curl appear smoother by increasing the Resolution value.
Curl Type: allows for the selection of two different choices:
- 3D: The default choice of 3D will curl the object while maintaining its thickness
- Flat: Flatten the object at the curl point
Flatten: Flattens the entire object.
Mesh Chaos: Allows for more control over the explosive chaos of the shatter.
Mesh Shatter: Allows for the control over the shatter mesh.
Polygon Count: the Shatter deformer shatters 3D objects based on the polygons / vertices that make up the geometry mesh of the shape, so the Polygon Count value (tesselation) of the object has a significant effect on the appearance of the shatter effect. Higher Polygon Count values result in more overall shatter pieces that are smaller, while lower Polygon Count values result in fewer large overall pieces. Lower Polygon Count values also result in faster performance.
Crackability: determines the size of the pieces with higher values resulting in smaller pieces and lower values resulting in larger pieces. Also, very low crackability values can result in some parts of the object not being affected by the shatter at all.
Crack Adjust: affects the shatter in different ways depending on which Crack Mode is being used
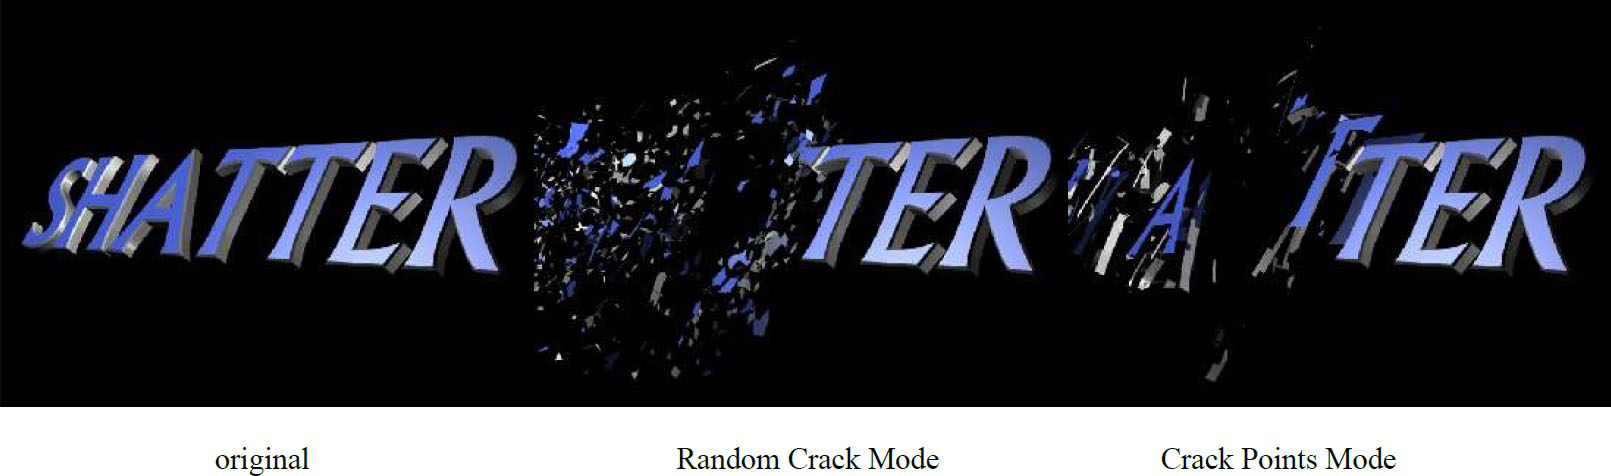
Crack Mode: Each Crack Mode has a unique way of influencing how the object will shatter in terms of how many places it cracks and where it cracks while shattering ;
- Random: creates apparently randomly placed cracks. In this mode, the Crack Adjust parameter has no effect.
- Crack Points: creates cracks that include cracks in areas of the geometry where various parts are connected. For example in an extruded shape crack points would include the place where the front face meets the bevel, where the bevel meets the depth face, etc.
- Falloff Crack Points: is similar to Crack Points, but falloff means the crackability decreases farther from the Crack Points which can be used to create a more realistic shatter effect in some cases.
- Horizontal Lines makes horizontal cuts through the mesh creating alternating horizontal lines of bigger and smaller pieces and the Crack Adjust parameter can be used to increase or decrease the number of lines.
- Angular Cut breaks the mesh at all points where the mesh edges are a certain angle, while Crack Adjust and Crackability determine what angle that is and how close to the angle they have to be in order to break.
Velocity Mode: determines the direction the shatter pieces will move in relation to the object as it shatters.
- Random
- Outward
- Inward
- Spiral CW (Clockwise)
- Spiral CCW (Counter-Clockwise)
- Left-Right
- Left
- Right
- Up
- Down
- Back
- Forward
Velocity Minimum: determines the minimum velocity for the slowest of the shatter pieces.
Velocity Variation: determines how varied the velocity is between all the pieces, and also acts as a maximum velocity control.
Explosive Force: provides an easy way to alter the overall velocity curve so there is a burst of speed as the piece first shatters away from the main shape
Spin Speed: controls the overall speed of rotation of the pieces which makes the explosive feeling of the shatter more convincing.
Gravity: exerts a pull on the shatter pieces (unless it is set to zero), and although it is outside of the slider range it is possible to scrub the numeric entry field or enter negative values to apply reverse gravity. To have no velocity to the shatter (so the object seems to crumble) set both Velocity Minimum and Velocity Variation to zero, and make sure there is some gravity value applied.
It is possible to have the shatter effect progressively wipe from one part of the object to another rather than having the whole object shatter at once. This can be done by choosing one of the Scatter Wipe modes. There areS**c**a**tte**r**W**ipe**M**odepopup menu offers 12 options for determining the direction the wipe will move in relation to the object.
- None: no wipe, object will shatter all at once.
- Left – Right
- Right – Left
- Top – Bottom
- Bottom – Top
- Back – Front
- Front – Back
- Random
- Small – Large: small pieces first, followed by large.
- Large – Small: large pieces first, followed by small
- Inside – Out
- Outside – In
Wipe Time: determines how long the wipe takes from start to finish, with higher values resulting in longer wipes and lower values resulting in shorter wipes.
The Scatter Option parameter is relevant when applying a Scatter Wipe to an object that includes multiple parts (like Extruded Text characters); for example, the Scatter Option Smooth choice results in a wipe that moves across all the parts as if they were one large whole, while the Discreet choice results in a wipe that acts as several individual wipes that move simultaneously across each part.
Displace: allows for pushing the shatter pieces out away from (or in toward) the center of the object. Positive Values push the pieces outward and negative values pull the pieces inward. This displacement is in addition to whatever shattering is going on based on other deformer parameters.
Keep Threshold: allows for making it so some percentage of the shatter pieces stay in place rather than shattering away from the original object. Adjusting this parameter with various combinations of Crack Modes, Crackability, and Crack Adjust can give some interesting results.
Spin Direction: determins which direction the shatter pieces will rotate as they shatter from the original object.
- Random All: all pieces randomly rotating.
- Tumble Forward: all pieces tumbling on the X axis in one direction.
- Tumble Both: some pieces tumbling on the X axis in one direction and some tumbling on the X axis in the opposite direction.
- Spin Forward: all pieces spinning on the Y axis in one direction.
- Spin Both: some pieces spinning on the Y axis in one direction and some spinning on the Y axis in the opposite direction.
- Rotate Forward: all pieces rotating on the Z axis in one direction.
- Rotate Both: some pieces rotating on the Z axis in one direction and some rotating on the Z axis in the opposite direction.
Spin Speed: determines how fast and in which direction the shatter pieces rotate – positive values will cause a piece to rotate in one direction while negative values will result in that piece rotating in the opposite direction, and the rotation will be faster the further away from zero the value is.
Spin Character: defines a gradient that maps the difference in spin speed between the largest and smallest shatter pieces, allowing for having the larger pieces spin faster.
Since Spin Character relates to Spin Speed, it is suggested to adjust these 2 parameters together in relation to each other.
Time Scale, Time Mode, and Manual Time
By default the shatter effect is set to auto-animate (with Time Mode set to Automated) so no interpolation keyframes are necessary for the object to shatter over time. When the shatter is Automated, Time Scale allows for slowing down or speeding up the overall speed of the shatter. As the parameter name indicates, Time Scale affects the whole time scale of the effect, so it will also affect the timing of a Scatter Wipe (if it is enabled) as well as the Spin Speed of the pieces, and even the effects of Gravity – so it is suggested that these other speed & time related parameters should be adjusted in conjunction with Time Scale. There are 4 Time Mode choices which are ;
- Automated: auto-animation that obeys Time Scale parameter.
- Manual: animation progresses according to the Manual Time parameter and ignores Time Scale parameter.
- Manual Move: the Velocity based movement and Scatter Wipe time progress according to the Manual Time parameter, but the Spin Speed behaves as Automated.
- Manual Spin: the Spin Speed progresses according to the Manual Time parameter, but the Velocity based movement and Scatter Wipe time behave as Automated.
Since the Automated Time Mode always does a forward shatter, using the Manual Time modeis suggested for creating reverse shatter effects.
Random Seed
The Random Seed parameter allows for tweaking the shatter to get a different result without changing any of the other significant parameters that create the look of the effect. This can be useful to help alter the shatter for a particular frame(s) while auto- animating, and it is also very useful for cases where there are multiple objects each using the same Shatter – since an identical appearance can be avoided by simply using different Random Seed values for each instance of the effect. This is a parameter that is left static in most common uses, since animating it will not result in a smoothly animating shatter.
The Pulse deformeroffers several different deformations (in some cases similar to those found in other deformers) and offers a quick way to apply these deformations using repetitive auto-animation back and forth within a user determined range to allow for convenient creation of pulse like animations without requiring keyframing. The Pulse animation oscillates between the original undeformed object and the deformed object.
Effect Type: determines which kind of deformation will be applied to the object.
- Bulge, Deform, and Lumpy: are variations of a Bulge or sphereize type of effect.
- Bend, Twist, and Spin do exactly what the parameter names suggest with the Bend and Twist deformations being like those described previously in the Bend-Taper-Twist deformer, and the Spin choice applying a simple spin on the Y axis.
- Bounce: moves the object up and down on the Y axis
- Approach: moves it back and forth on the Z axis.
Pulse Type: determines the animation curve of the pulse cycle as the deformation animates from the original undeformed object to the most deformed state (determined by Amplitude parameter) and back again. There are 9 Pulse Type choices;
- Breathing: creates a pulse where the animation accelerates as it moves away from an extreme and decelerates as it gets closer to an extreme, with a slight pause between each back and forth.
- Elastic: pulse is similar to Breathing except with no pause between each back and forth animation.
- Beat: pulse decelerates as it moves away from the original undeformed object and uses linear interpolation (even speed) as it animates from the extreme back to the original – with no pause.
- Bop: decelerates as it moves away from the original undeformed object and accelerates as it animates from the extreme back to the original – with a pause between pulses.
- Uneven: is like elastic but the amplitude of the pulse varies so that some pulses are stronger than others.
- Jerky: is like Elastic with a pause added midway between the undeformed and most deformed states, and the interpolation is such that it eases in and out of the extra pause.
- Random: will cause the deformation to jump between various values. Using this Pulse Type the Amplitude parameter has no effect (the Random Pulse automatically uses amplitude values between zero and 100). The animation jumps between values using Hold style interpolation – meaning that it snaps between states rather than smoothly animating between them.
- Snap: will snap back and forth between the original undeformed object and the most deformed state. The animation jumps between values using Hold style interpolation – meaning that it snaps between states rather than smoothly animating between them.
- Paused: disables the pulsing auto-animation and the Frequency and Phase parameters have no effect using this Pulse Type. The other parameters such as Amplitude can still be used to adjust the static effect.
Amplitude: determines how much of the deformation is applied at the most deformed point in the pulse animation. Although it is outside of the slider range it is possible to scrub the numeric entry field or enter negative Amplitude values to reverse the direction of the deformation.
Frequency: determines the frequency of pulses, with higher values resulting in more frequent pulses and lower values resulting in less frequent pulses.
Phase: allows for offsetting the phase of the auto-animated pulse. It is also possible to manually drive the pulse (and animate its frequency) by setting the Frequency parameter to zero and animating the Phase parameter with keyframes.
Center Offset X and Y: allow for offsetting the center of the deformation in X and Y space.
Radius Adjust: determines the the size of the area in which the deformation is applied.
NOTE: When using the Spin Effect Type, Radius Adjust has no effect.
Ripple Z Rings:
Ripple Z Rings is similar to the Ripple Deformer seen in other 3D Objects. It allows us to apply a ripple effect along the Z plane of the object to create waves and distortions in our object.
Center X and Y: determine the X/Y center point for the ripple effect. By adjusting the values, we can reposition the center point anywhere in our effect.
Stretch: allows us to distort and elongate the ripple in either direction resulting in an oval shape ripple.
Center X/Y and Stretch can work together to create wave-like effects, including a horizontal or vertical wave.
Ripple Phase: offsets the phase of the ripple auto- animation allowing for more control over when and where the waves appear.
Animation Speed: determines the speed of the ripple auto-animation with negative values animating the ripples outward from the center and positive values animating in the reverse direction, with values farther away from zero being faster and values closer to zero being slower.
TIP: It is also possible to manually drive the ripple by setting the Animation Speed to zero and animating the Ripple Phase parameter with keyframes.
Wave Height: or amplitude adjusts the height of the individual waves, with higher values resulting in larger waves.
Wave Frequency: determines the frequency of the waves, or how far apart from each other they are.
Amplitude determines the height of the waves and Frequency determines the frequency of waves. Adjusting one of these parameters has some effect on the other so it is recommended to adjust them in relation to each other to get the desired result.
Slice/Stretch: Allows you to slice or stretch a 3D Object at a specific point and manipulate the position of each piece.
Un-Deform: Allows you to specify a region where the ripple deformer is suppressed.