


Note in Continuum 2019 and beyond the Legacy PixelChooser parameters are hidden to simplify the visual layout. Projects created in older versions of Continuum (11 or earlier) will still render any legacy PixelChooser settings when the Render Legacy PixelChooser option is enabled, but editing the individual legacy PixelChooser settings is no longer supported beyond turning them on/off as a whole.
Overview
The BCC PixelChooser was fully re-engineered in BCC10 to add support for integrated mocha mask tracking and for more intuitive and robust shape and color masking/matting. However, in order to ensure compatibility with older projects the Legacy PixelChooser is still preserved where necessary and this document describes use of the Legacy PixelChooser. Click here for full documentation on the new PixelChooser
The PixelChooser is included in many Boris filters and provides several methods to selectively filter an image. You can use the PixelChooser to create a matte between filtered and unfiltered pixels, either by specifying a geometric region or by using the image’s luma or color information.
The PixelChooser is commonly used as a mask. For example, in distortion filters (such as BCC Ripple or BCC Wave, you can use the PixelChooser as a mask on the distortion amount, allowing distortions with an embossed quality. In Light filters the PixelChooser defaults to controlling the amount of light, but can be used to control other things such the light mix, attenuation or source light. Many filters have their own controls for what the PixelChooser can do and how it is used.
Function
Presets and Common Controls
BCC filters come with a library of factory installed presets plus the ability to create your own custom presets and preview them with the BCC FX Browser™.
BCC filters also include common controls that configure global effect preferences and other host-specific effect settings.
For more information about working with presets and other common controls, Click Here.
- Note: The PixelChooser is also available as a standalone filter in the Key & Blend category.
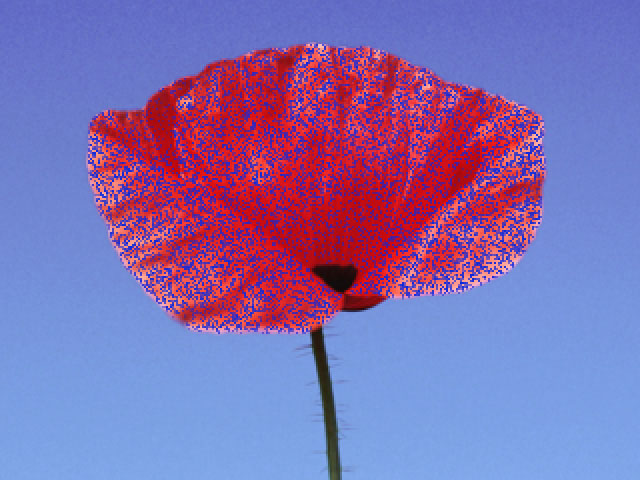
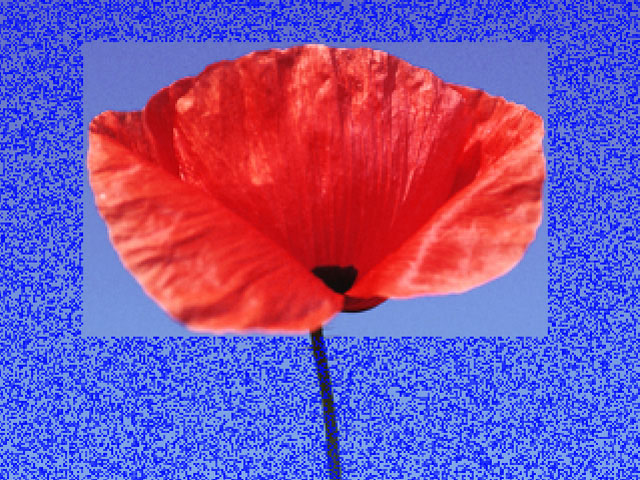
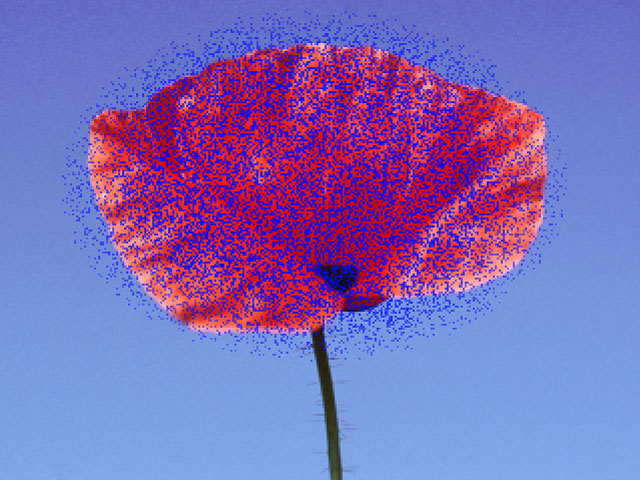
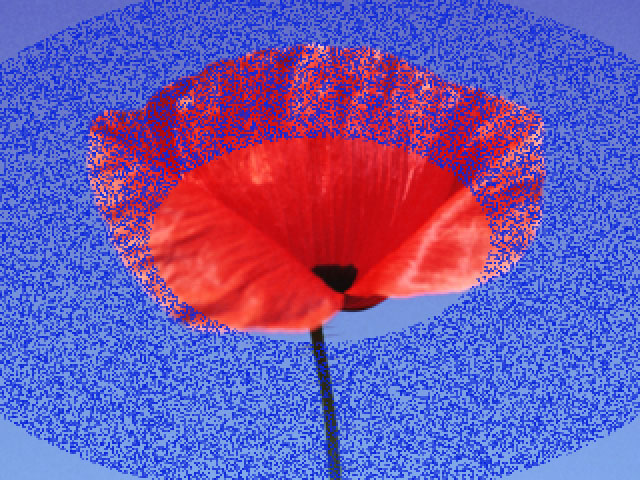
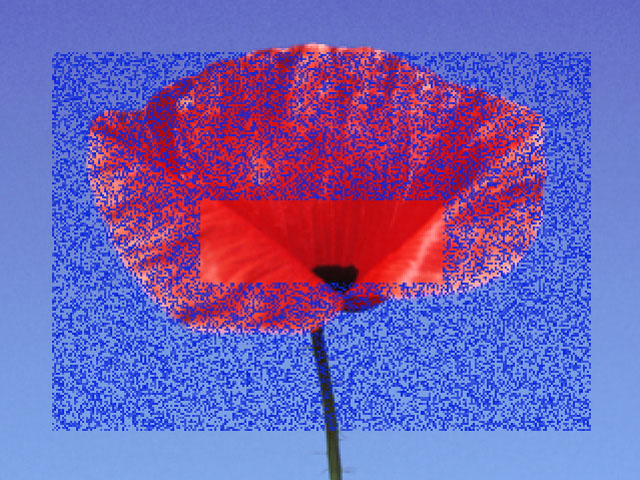
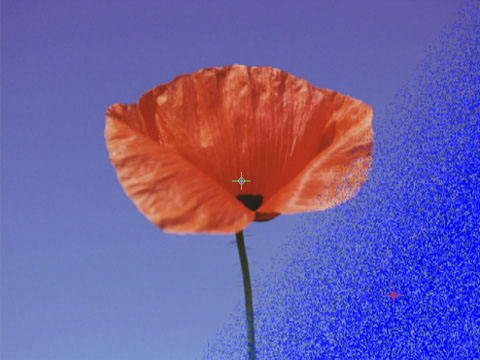
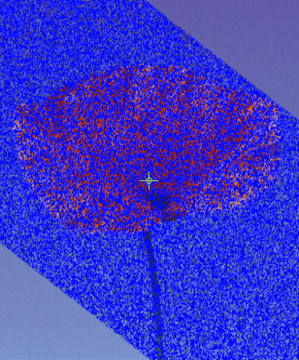
In this example, the PixelChooser selects pixels based on the image’s Red channel. Therefore, the Spray Paint Noise filter is applied only to pixels whose Red value is highest.
 |
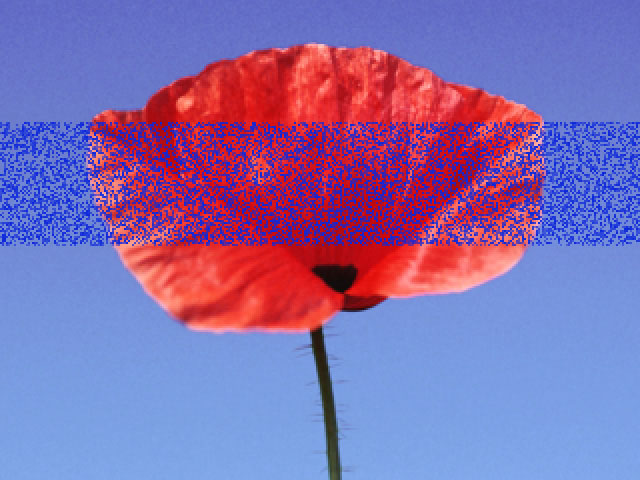
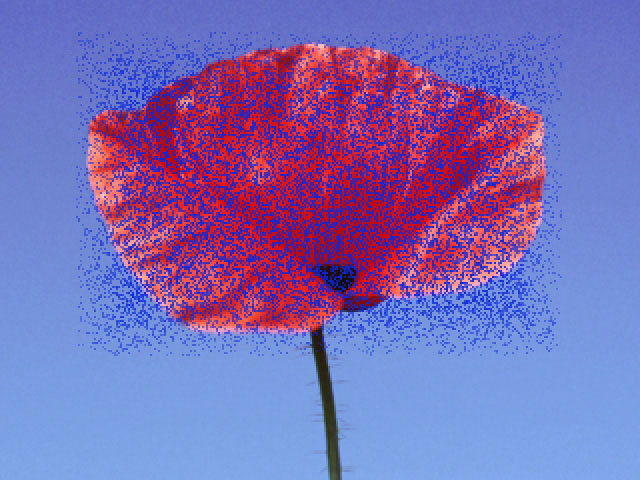
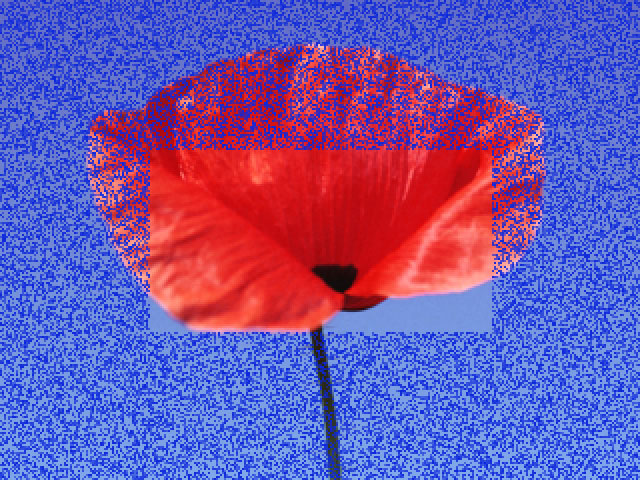
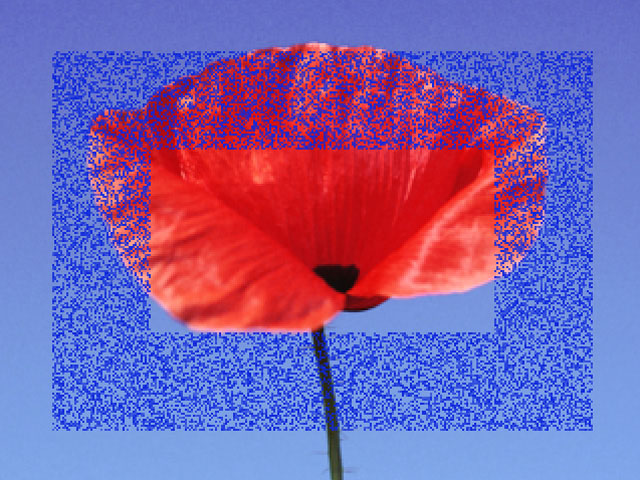
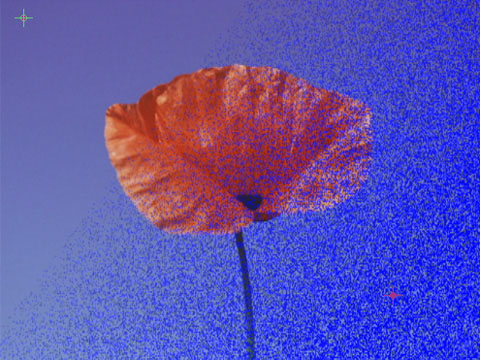
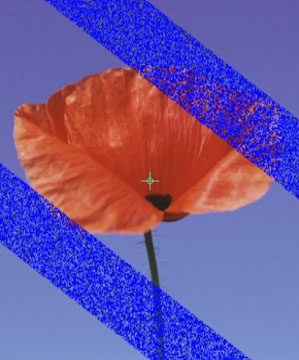
In this example, the PixelChooser’s region controls are used to specify a rectangular area in which to apply the filter.
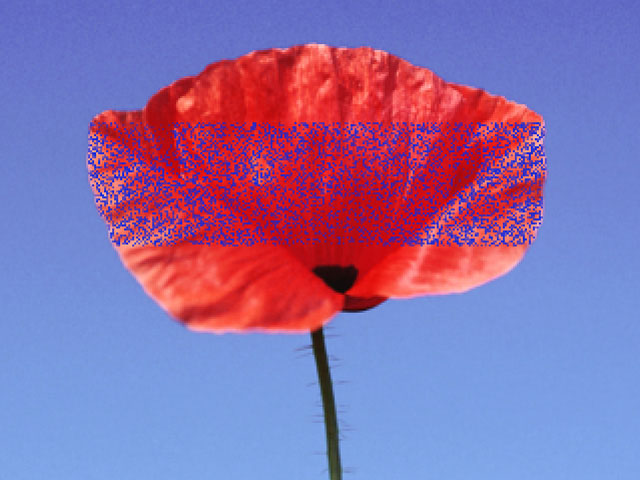
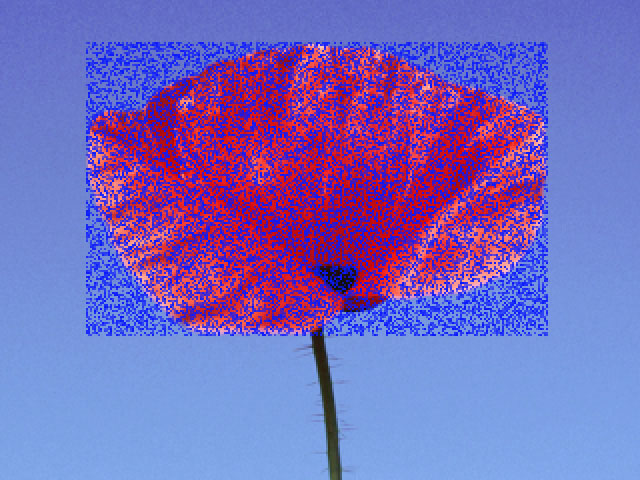
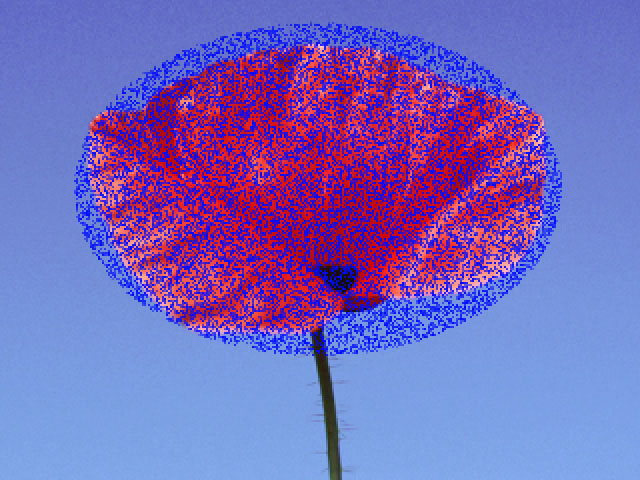
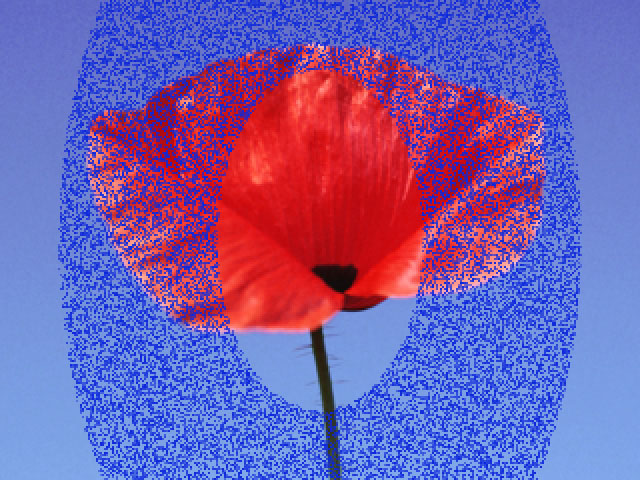
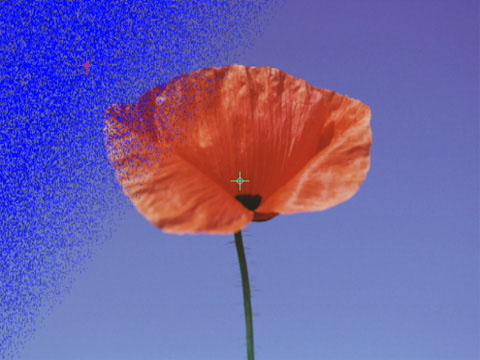
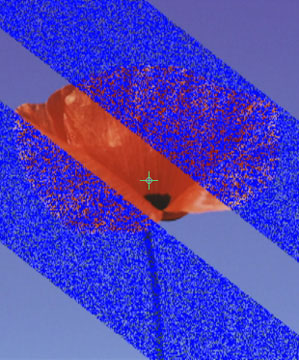
In this example, both the matte controls and region controls are used to select pixels. When the PixelChooser is selecting pixels based on both their channel values and their location on the screen, pixels are chosen only if they are fully meet both of the selection criteria.
 |
The PixelChooser performs the same basic operations in most filters:
- The PixelChooser examines each pixel in the image and decides how to process each pixel based on its location and/or the channel values in that pixel.
- If the PixelChooser decides that a pixel not does meet the selection criteria, the source pixel is copied to the output and left unfiltered. Unfiltered pixels are black in the matte.
- If the PixelChooser decides that a pixel fully meets the selection criteria, the filtered pixel replaces the source pixel in the output. Filtered pixels are white in the matte.
- If the PixelChooser decides that a pixel partially meets the selection criteria, a mix of the source pixel and filtered pixel appears in the output. Partially filtered pixels are gray in the matte.
Working with PixelChooser Presets
After you apply a filter and adjust the PixelChooser parameters, you can save and load settings using the Preset menu in the PixelChooser parameter group. Unlike other BCC presets which are only compatible with the filter in which they were created, PixelChooser presets allow you to move parameters between filters. For example, you can load a PixelChooser preset created in the Cartooner filter into a Blur filter.
Loading PixelChooser Presets
Apply the appropriate filter to your media.
Click the Load button (“L”) directly below the PixelChooser parameter group banner.
- A dialog box opens that allows you to select the file to load. Choose the appropriate effect and click Save or press Return (Macintosh) or Enter (Windows).
The saved parameter settings are recalled and applied to your effect.
Saving PixelChooser Parameters as Presets
Apply the appropriate filter to your media and adjust the PixelChooser parameters.
Click the Save button (“S”) directly below the PixelChooser parameter group banner.
A dialog box opens that allows you to select the file to load. Choose the appropriate effect and click Save or press Return (Macintosh) or Enter (Windows).
Working with the PixelChooser Menu
The PixelChooser****menu offers several display options for BCC PixelChooser effects.
- Off displays the filtered effect without the PixelChooser settings.
- On displays the filtered effect with the PixelChooser settings.
- View Chosen Pixels displays the matte created between the filtered and unfiltered pixels in black and white. The black regions of the matte represent the unfiltered pixels, and the white regions of the matte represent the filtered pixels. Gray areas represent partially filtered pixels. This is useful when you are adjusting an area that is difficult to see, for example a subtle Blur filter applied to a rectangular region.
- Mask Unchosen Pixels displays a 50% red mask over the unfiltered pixels.
- View Matte Source shows the source of the PixelChooser matte, which may be different from the source of the filter.
Working with the Apply PixelChooser Menu
If you are using the controls in the PixelChooser parameter group, the Apply PixelChooser menu determines when the PixelChooser controls are applied to the image. This menu is not included with all filters.
- Choose Post-Effect for the PixelChooser to affect the image before the filter is applied.
- Choose Pre-Effect for the PixelChooser to affect the image after the filter is applied.
- Choose Both affects the image before and after the filter is applied.
PixelChooser Intensity
PixelChooser Intensity controls the intensity of the PixelChooser. At the default of 100, the control is ignored. Reducing Intensity from 100 increases the pixels that are chosen. At 0, all pixels are chosen, which means the PixelChooser has no affect. At negative values, pixels that were partially chosen move towards an unchosen state; a value of –100 inverts the PixelChooser.
Region Parameters
The PixelChooser’s Region parameters specify an area in which to apply a filter. You can use a region-based matte as a garbage matte, then combine it with a channel-based matte. For details on creating a channel-based matte, see “Matte Parameters” later in this help file.
The Mask menu allows After Effects users to use masks created in After Effects to define a region in the BCC PixelChooser.
The PixelChooser allows you to select masks created in After Effects. This is useful for adding animated masks to your BCC filters.
Create a mask in After Effects and set the Mask Mode menu to None in the After Effects timeline. Apply a BCC filter containing the PixelChooser and set the PixelChooser menu to On. In the Mask menu, choose the mask you created in After Effects. The region defined by the AE mask is used by the BCC filter’s PixelChooser.
The Shape menu determines the shape of the region where the filter is applied. Each type has its own set of parameters which control the size and location of the region. These choices are described in the following sections.
- All filters all pixels in the image, regardless of their location.
- Inside Rectangle filters the image inside a rectangle-shaped region.
- Outside Rectangle filters the image outside a rectangle-shaped region.
- Inside Oval filters the image inside an oval-shaped region.
- Outside Oval filters the image outside an oval-shaped region.
- Distance to Point filters the image between two specified distances from a center point.
- Distance to Edge filters the image within two specified distances from the edge of the frame.
- Clock Wipe filters the image in a region between two radial lines emanating from a center point.
- Linear Gradient creates a linear gradient between the filtered and unfiltered regions in the image. When Linear Gradient is selected, only the point controls and the Reverse Range checkbox in the region group are active.
- Distance to Line filters pixels based on the distance to the line between the two points.
- Distance to Key Point is similar to Distance to Point except it uses the Key Point instead of the Center Point control. This Region Type is not available in all filters.
- Distance to Effect Center is similar to Distance to Point except it uses the Effect Center point instead of the Center Point control. This Region Type is available in the Bulge, Ripple, Polar Displacement, Ripple and Twirl filters.
- Distance to Light Source is similar to Distance to Point except it uses the Light Source instead of the Center Point control. This Region Type is not available in all filters.
- Distance to Pan Point is similar to Distance to Point except it uses the Pan Point instead of the Center Point control. This Region Type is available in the Rain and Snow filters.
- Distance to Peak Point is available in the Wave filter. It is similar to Distance to Point except it uses the Peak Point instead of the Center Point control.
- Distance to Position Point is available in the Fire filter. It is similar to Distance to Point except it uses the Position Point instead of the Center Point control.
Inside Rectangle and Outside Rectangle
Inside Rectangle and Outside Rectangle filter the image inside or outside a rectangle- shaped region, respectively.
 |  |
| Inside Rectangle | Outside Rectangle |
Point 1 determines the location of the upper left corner of the rectangle, while Point 2 determines the location of the lower right corner.
Scale allows you to scale the rectangle-shaped region.
Stretch/Direction distorts the rectangle-shaped region by stretching it either horizontally (for positive values) or vertically (for negative values).
Increasing Region Blend softens the edges of the region.
|  |
| Region Blend=0 | Region Blend=40 |
The Reverse Range checkbox functions similarly to an invert matte command, except that Reverse Range does not invert pixels affected by the Region Blend control. Region Blend always subtracts pixels from the matte. If Region Blend is 0, Reverse Range simply inverts the matte. If Region Blend is greater than zero, the matte is inverted, then the Blended pixels are partially transparent. Reverse Range does not apply to certain Shape Types.
Inside Oval and Outside Oval
Inside Oval and Outside Oval filter the image inside or outside a oval-shaped region, respectively.
 |  |
| Inside Oval | Outside Oval |
Point 1 determines the location of the upper left corner of a rectangle in which the oval is inscribed, while Point 2 determines the location of the lower right corner.
Scale allows you to scale the oval-shaped region.
Stretch/Direction distorts the oval-shaped region by stretching it either horizontally (for positive values) or vertically (for negative values).
Increasing Region Blend softens the edges of the region.
|  |
| Region Blend=0 | Region Blend=40 |
The Reverse Range checkbox functions similarly to an invert matte command, except that Reverse Range does not invert pixels affected by the Region Blend control. Region Blend always subtracts pixels from the matte. If Region Blend is 0, Reverse Range simply inverts the matte. If Region Blend is greater than zero, the matte is inverted, then the Blended pixels are partially transparent. Reverse Range does not apply to certain Shape Types.
Distance to Point
Distance to Point filters the image between two specified distances from a center point. You can use Distance to Point to create a circular or doughnut-shaped region.
Point 1 controls the location of the center point of both the inner and outer circles.
From determines the radius of the circle which defines the inner edge of the region. Set From to 0 to produce a circular region, or increase this value to create a doughnut shape. Negative From values produce the same effect as a value of 0 unless you are using Region Blend.
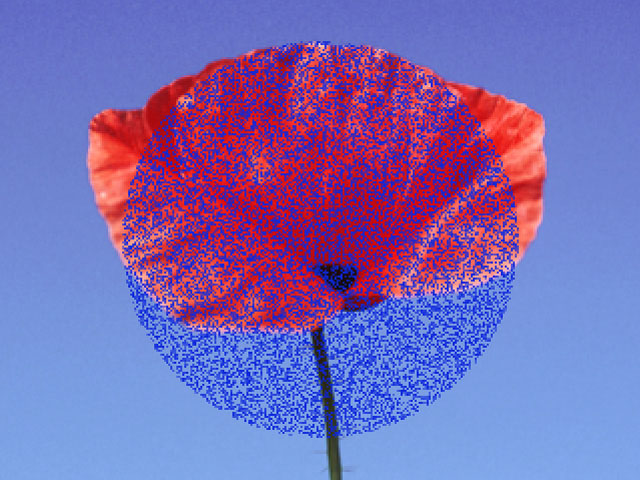 |  |
| From=0 | From=100 |
To controls the radius of a circle which forms the outer edge of the region. Increasing To can extend the radius beyond the edges of the screen, in which case the region encompasses all pixels outside the inner circle.
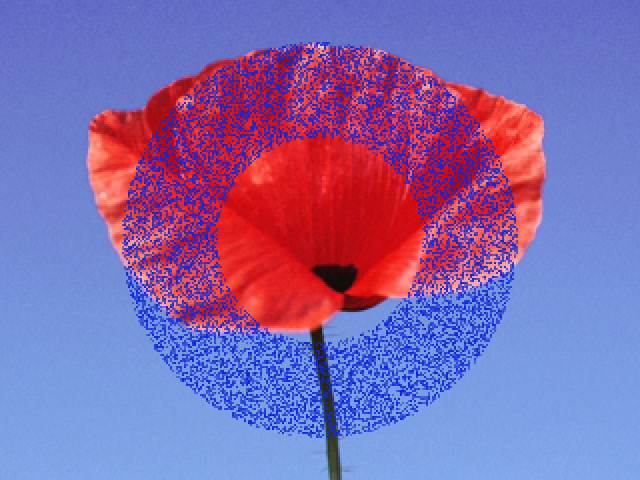
|  |
| To=200 | To=350 |
- Note: If the From value is greater than the To value, no pixels are chosen.
Scale adjusts the size of the filtered region. This value is expressed as a percentage of the region’s original size.
Stretch/Direction distorts the region by stretching it either horizontally (for positive values) or vertically (for negative values).
Increasing Region Blend softens the edges of the region.
- Note: Region Blend softens the edges of the matte by removing pixels from both the inside and the outside edges of the region defined by From and To. Therefore, even when From is 0, increasing Region Blend removes some pixels from the center of the region, creating a transparent or semi-transparent hole. If you want a solid circular region, decrease the From value until you achieve the desired effect.
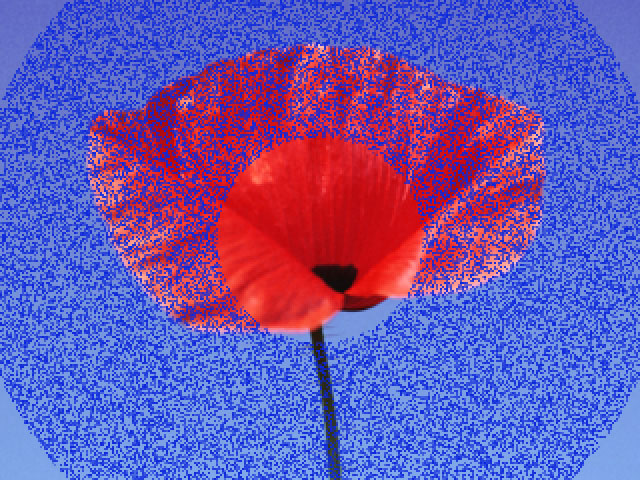
 |  |
| Stretch/Direction=20 | Stretch/Direction=-20 |
The Reverse Range checkbox functions similarly to an invert matte command, except that Reverse Range does not invert pixels affected by the Region Blend control. Region Blend always subtracts pixels from the matte. If Region Blend is greater than zero, the matte is inverted, then the Region Blended pixels are made partially transparent.
Distance to Edge
Distance to Edge filters the image within two specified distances from the edge of the frame. You can use Distance to Edge to produce a rectangular region with or without a rectangular hole in the center.
From determines the distance between the outer edge of the region and the edge of the image. Set From to 0 to include all of the pixels on the edge of the screen, or increase this value to move the edges of the region towards the center of the image.
 |  |
| From=0 | From=50 |
To determines the distance between the inner edge of the region and the edge of the image. Increase the To value to include more pixels from the center of the image. If the From value is greater than the To value, no pixels are chosen.
|  |
| To=100 | To=200 |
Increasing Region Blend softens the edges of the matte by removing pixels from both the inside and the outside edges of the region defined by From and To. Therefore, even when From is 0, increasing Region Blend removes some pixels from the outer edges of the region, creating a transparent or semi-transparent border. If you want the region to extended to the edges of the image, decrease the From value until you achieve the desired effect.
The Reverse Range checkbox functions similarly to an invert matte command, except that Reverse Range does not invert pixels affected by the Region Blend control. Region Blend always subtracts pixels from the matte. If Region Blend is 0, Reverse Range simply inverts the matte. If Region Blend is greater than zero, the matte is inverted, then the Blended pixels are made partially transparent.
Clock Wipe
Clock Wipe filters the image in a region between two radial lines emanating from a center point. By animating the angles of these lines, you can create a clock wipe.
Clock Wipe Transition
 |  |  |
| Time 00:00:01:00 | Time 00:00:02:00 | Time 00:00:03:00 |
Center sets the coordinates of the center point.
From and To control the angles between the edges of the region and the horizontal axis.
- Note: The default settings are set up to create a basic clock wipe that starts at 3:00 and moves clockwise similar to the wipe in the examples above. To achieve this effect, just animate the To setting from 0° to 360.
Increasing Region Blend softens the edges of the region.
The Reverse Range checkbox functions similarly to an invert matte command, except that Reverse Range does not invert pixels affected by the Region Blend control. Region Blend always subtracts pixels from the matte. If Region Blend is greater than zero, the matte is inverted, then the Blended pixels are made partially transparent.
Creating Wipes with the PixelChooser
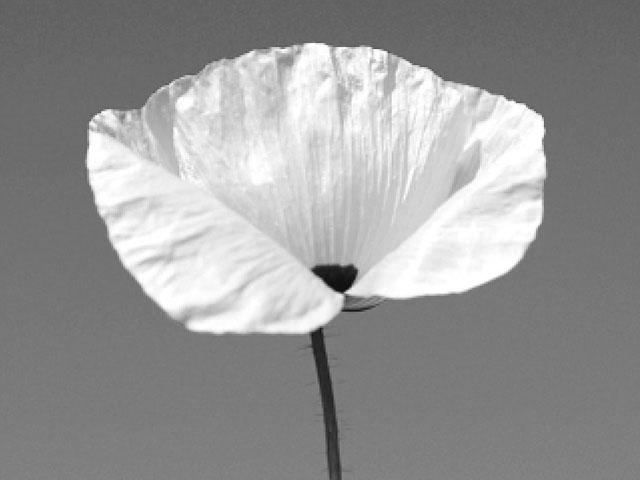
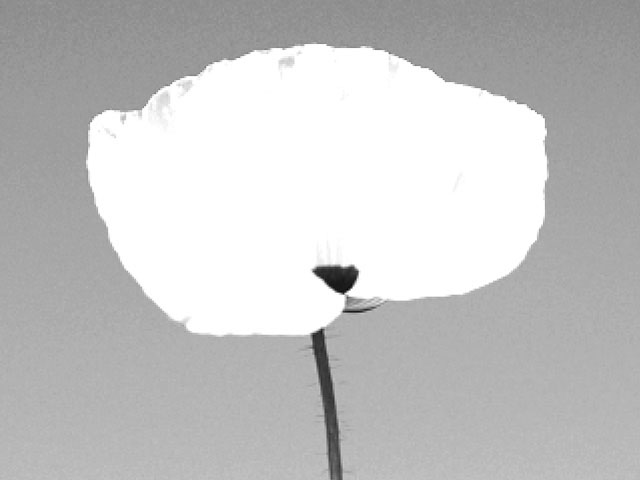
You can easily create wipes from one image to another using the PixelChooser’s region controls and the Make Alpha Key filter.
Create two tracks in the timeline and place the starting image on the top track and the transition media (the ending image) on the bottom track.
Apply the BCC Make Alpha Key filter to the top track. Set the Alpha From Channel menu to Full On.
You can now animate the PixelChooser’s region controls to create a wipe between the source image and the transition image. To create a soft-edged wipe, adjust Blend.
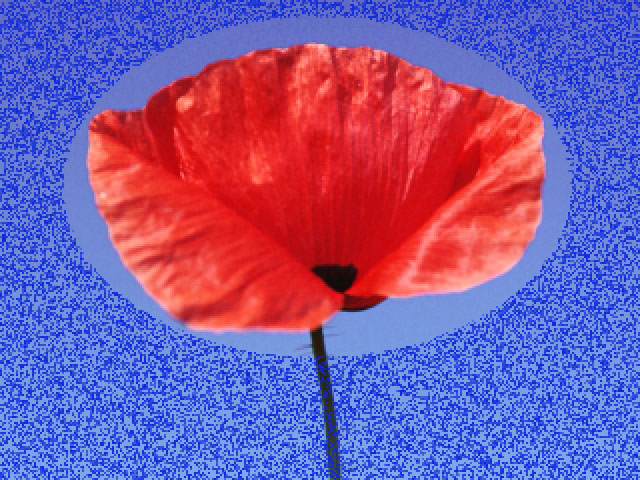
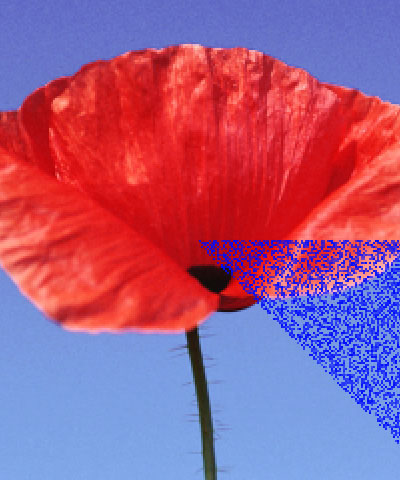
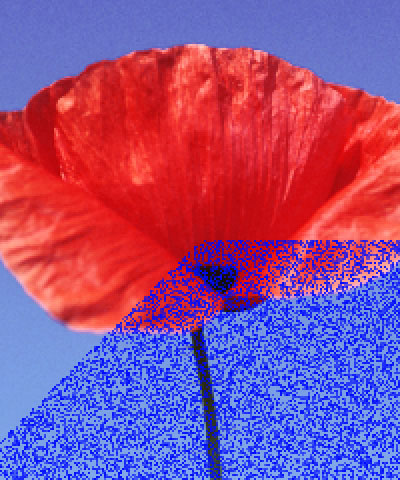
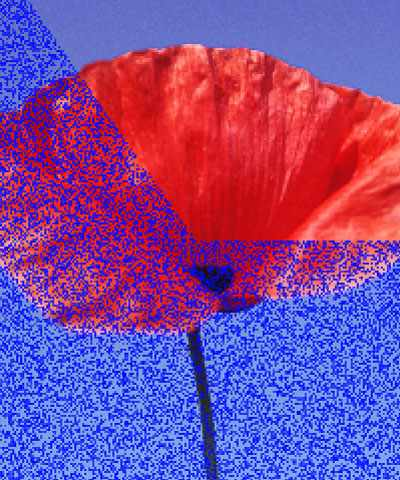
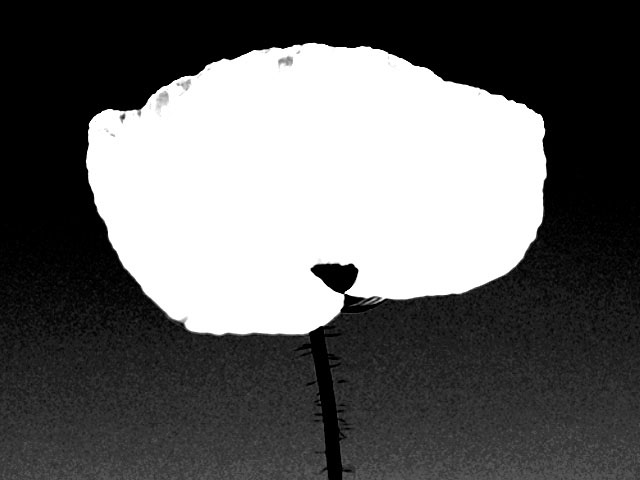
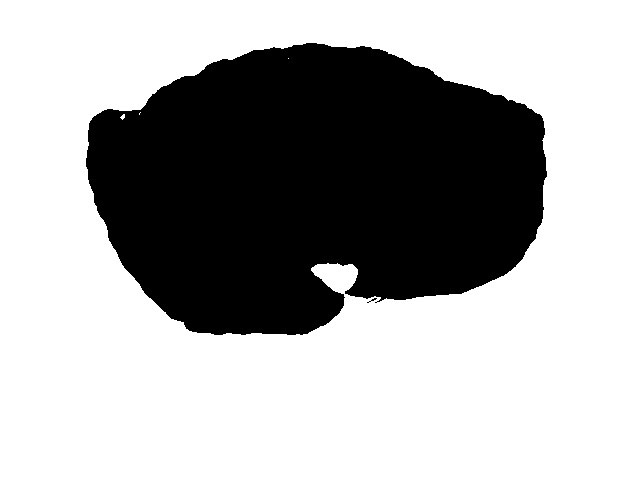
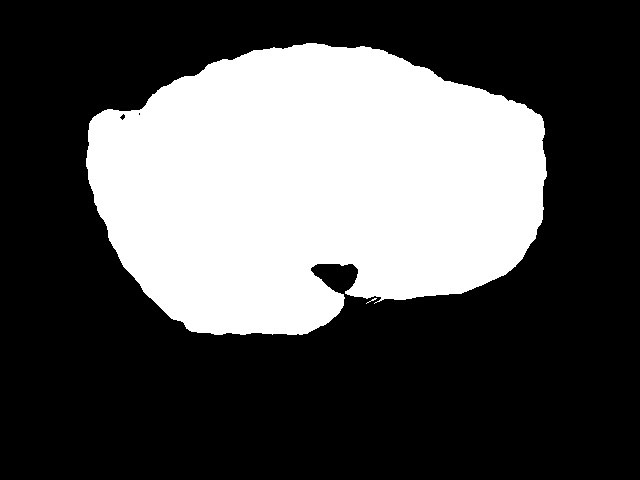
The following example was created using the Distance to Point region type, setting the center point in the top left corner, and animating the To value until the flower fills the screen.
PixelChooser Wipe
 |  |  |
| Time 00:00:00:15 | Time 00:00:01:00 | Time 00:00:01:15 |
Linear Gradient
Linear Gradient creates a linear gradient between the filtered and unfiltered regions in the image. The line is defined with a point and a direction.
The gradient starts at the Gradient Start point.
The length of the gradient is determined by the Gradient Distance parameter. Points that are this far or further in the gradient direction are Scaled to source width.
 |
The Gradient Direction sets which direction the pixels move from the Gradient Start.
Reverse Range inverts the matte created by the filter.
 |
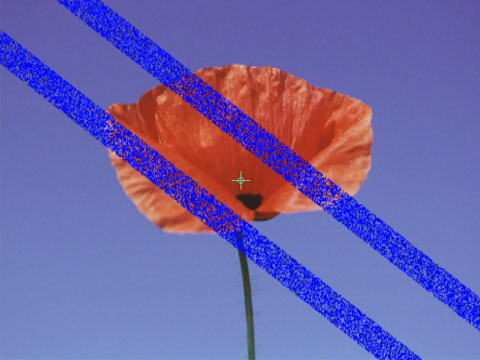
Distance to Line
Distance to Line filters pixels based on their distance from a line between the two points.
Point 1 selects the start point of the line. The line passes through Line Start at the angle selected by Direction.
From sets the distance between the line and the inner edge(s) of the filtered region(s). Set From to 0 to produce a single linear region centered on the line, create a linear region on either side of the line or increase this value to create two parallel filtered regions, one on either side of the line. Negative From values produce the same effect as a value of 0 unless you are using Region Blend.
 |  |  |
| From=0 | From=5 | From=15 |
To sets the distance between the line and the outer edges of the filtered regions. Increasing To can extend the outer edges of the filtered regions beyond the edges of the screen.
 |  |
| To=10 | To=60 |
- Note: If the From value is greater than the To value, no pixels are chosen.
Scale adjusts the size of the filtered region. This value is expressed as a percentage of the region’s original size.
The Direction control determines the angle of the line.
Increasing Region Blend softens the edges of the matte by removing pixels from both the inside and the outside edges of the region(s) defined by From and To. Therefore, even when From is 0, increasing Region Blend removes some pixels from the inner edges of the region(s), creating a transparent or semi-transparent area around the line. If you want the region to be solid in the center, decrease the From value until you achieve the desired effect.
The Reverse Range checkbox functions similarly to an invert matte command, except that Reverse Range does not invert pixels affected by the Region Blend control. Region Blend always subtracts pixels from the matte. If Region Blend is 0, Reverse Range simply inverts the matte. If Region Blend is greater than zero, the matte is inverted, then the Blended pixels are made partially transparent.
Distance to Key Point
Distance to Key Point is similar to Distance to Point except it uses the Key Point instead of the Center Point control. Use Distance to Key Point to create a circular or doughnut-shaped region.
The Point 1 position controls determine the location of the center point of the inner circle.
The Point 2 position controls have no affect when Distance to Key Point is chosen.
- Note: The remaining parameters work in the same way as the corresponding Distance to Point controls.
Distance to Effect Center
Distance to Effect Center is similar to Distance to Point except it uses the Effect Center point instead of the Center Point control. You can use Distance to Effect Center to create a circular or doughnut-shaped region.
The Point 1 position controls determine the location of the center point of the inner circle.
The Point 2 position controls have no affect when Distance to Effect Center is chosen.
- Note: The remaining parameters work in the same way as the corresponding Distance to Point controls.
Distance to Light
Distance to Light is available in some filters that use simulated light sources to affect the image. This option is similar to Distance to Point, except it uses the Light Source point instead of a center point control to define the center of the filtered region. You can use Distance to Light to create a circular or doughnut-shaped region.
The Point 1 position controls determine the location of the center point of the inner circle.
The Point 2 position controls have no affect when Distance to Light is chosen.
- Note: The Distance to Light parameters work in the same way as the corresponding Distance to Point controls.
Distance to Pan Point
Distance to Pan Point is similar to Distance to Point except it uses the Pan Point instead of the Center Point control. You can use Distance to Pan Point to create a circular or doughnut- shaped region. This Region Type is available in the Rain and Snow filters.
The Point 1 position controls determine the location of the center point of the inner circle.
The Point 2 position controls have no affect when Distance to Pan Point is chosen.
- Note: The Distance to Pan Point parameters work in the same way as the corresponding Distance to Point controls.
Distance to Peak Point
Distance to Peak Point is available in the Wave filter which does not contain a center point. It is similar to Distance to Point except it uses the Peak Point instead of the Center Point. You can use Distance to Peak Point to create a circular or doughnut-shaped region.
The Point 1 position controls determine the location of the center point of the inner circle.
The Point 2 position controls have no affect when Distance to Peak Point is chosen.
- Note: The Distance to Peak Point parameters work in the same way as the corresponding Distance to Point controls.
Distance to Position Point
Distance to Position Point is available in the Fire filter. It is similar to Distance to Point except it uses the Position Point instead of the Center Point control. You can use Distance to Position Point to create a circular or doughnut-shaped region.
The Point 1 position controls determine the location of the center point of the inner circle.
The Point 2 position controls have no affect when Distance to Position Point is chosen.
- Note: The Distance to Position Point parameters work in the same way as the corresponding Distance to Point controls.
Matte Parameters
The Matte parameters allow you to filter an image based on the values in one or more of its channels. These parameters also provide three different methods of creating a matte from these channels.
For even more precise control, you can use a region-based matte as a garbage matte, then combine it with a channel-based matte.
The Matte Channel menu determines which channel is used to create a matte.
- None filters all pixels in the image, regardless of their channel values.
- Luma selects pixels according to their Luminance values.
- Red, Green, and Blue select pixels according to their corresponding RGB color channel values.
- Alpha selects pixels according to their Alpha channel values.
- Hue, Saturation, and Lightness select pixels according to their corresponding HSL color channel values.
- RGB Diff, HSL Diff, Hue Diff, and Chroma Diff choose pixels based on the difference between their channel values and the channels values of the chosen Color. RGB Diff uses RGB values in calculating differences, HSL Diff uses HSL values, Hue Diff uses only the Hue values (in HSL color space), and Chroma Diff uses Hue and Saturation values (in HSL colorspace).
The Matte Layer menu allows you to assign any clip or layer to create the matte between unfiltered and filtered pixels.
The Matte Type menu setting determines which type of adjustments can be made to improve the matte. Each type has a different set of controls which are described in the following sections.
Levels
The Levels Matte Type allows you to adjust the contrast in the matte by adjusting the input black and white levels.
Black/Level /From controls the number of pixels in the matte that are pure black. Increasing Black Level pushes dark gray pixels to black.
 |  |
| Black Level=0 | Black Level=100 |
White/To controls the number of pixels in the matte that are pure white. Decreasing White Level pushes light gray pixels to white.
|  |
| White Level=255 | White Level=200 |
Threshold
The Threshold Matte Type allows you to adjust the balance of black and white pixels in the matte. You can then smooth the resulting matte by adding intermediate gray pixels.
Black/Threshold/From sets a level in the chosen color channel. Pixels whose channel values are above the Threshold level are pure white in the matte, and those with channel values below the level are pure black. For example, if Matte Channel is set to Red and Threshold is set to 100, then all pixels whose red channel value is higher than 100 are white in the matte. All pixels whose red channel value is lower than 100 become black in the matte.
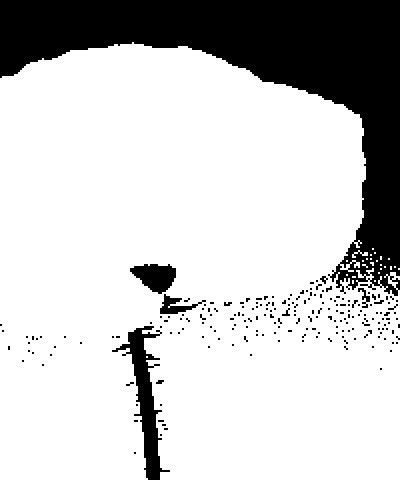 | 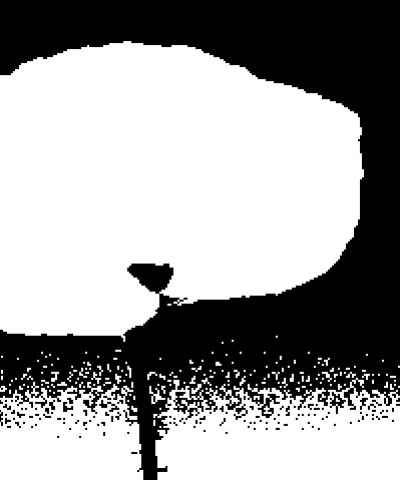 |  |
| Threshold=120 | Threshold=130 | Threshold=140 |
Matte Softness softens the edges of the matte by creating gray areas for pixels whose values are near the Threshold value. Set Matte Softness to 0 for a harsh, high-contrast matte with no gray pixels, or increase it to soften the edges of the filtered region.
 |  |
| Matte Softness=0 | Matte Softness=40 |
Range
The Range Matte Type allows you to choose a range of channel values within which pixels are filtered. You can then soften the edges of the resulting matte.
Black/Threshold/From and White/To define the lower and upper limits of a range of values in the chosen color channel. Pixels whose appropriate color channel values fall within this range appear white in the matte, while the remaining pixels are left black.
 |  |
| From=0, To=140 | From=140, To=255 |
- Note: If From is higher than To, no pixels are filtered. Decreasing From below 0 and/or increasing To above 255 only has an effect if you are using Region Blend.
Increasing Matte Softness softens the edges in the matte.
- Note: Matte Softness softens the edges of the matte by removing pixels from all of the edges of the matte defined by From and To. Therefore, even if From is 0 and To is 255, increasing Matte Softness removes some pixels from the matte, creating transparent or semi-transparent areas. You can use negative From values and/or To values higher than 255 to expand the matte to counteract this effect if necessary.
Blur Matte applies a basic blur to the matte created by the PixelChooser. This can help smooth edges in the matte.
Choke Matte applies a choke to the matte created by the PixelChooser. Positive Choke Matte values tighten the matte around the opaque regions, while negative values pull the matte away from the edges of the opaque regions.
The Invert Matte checkbox reverses the range of the matte.