


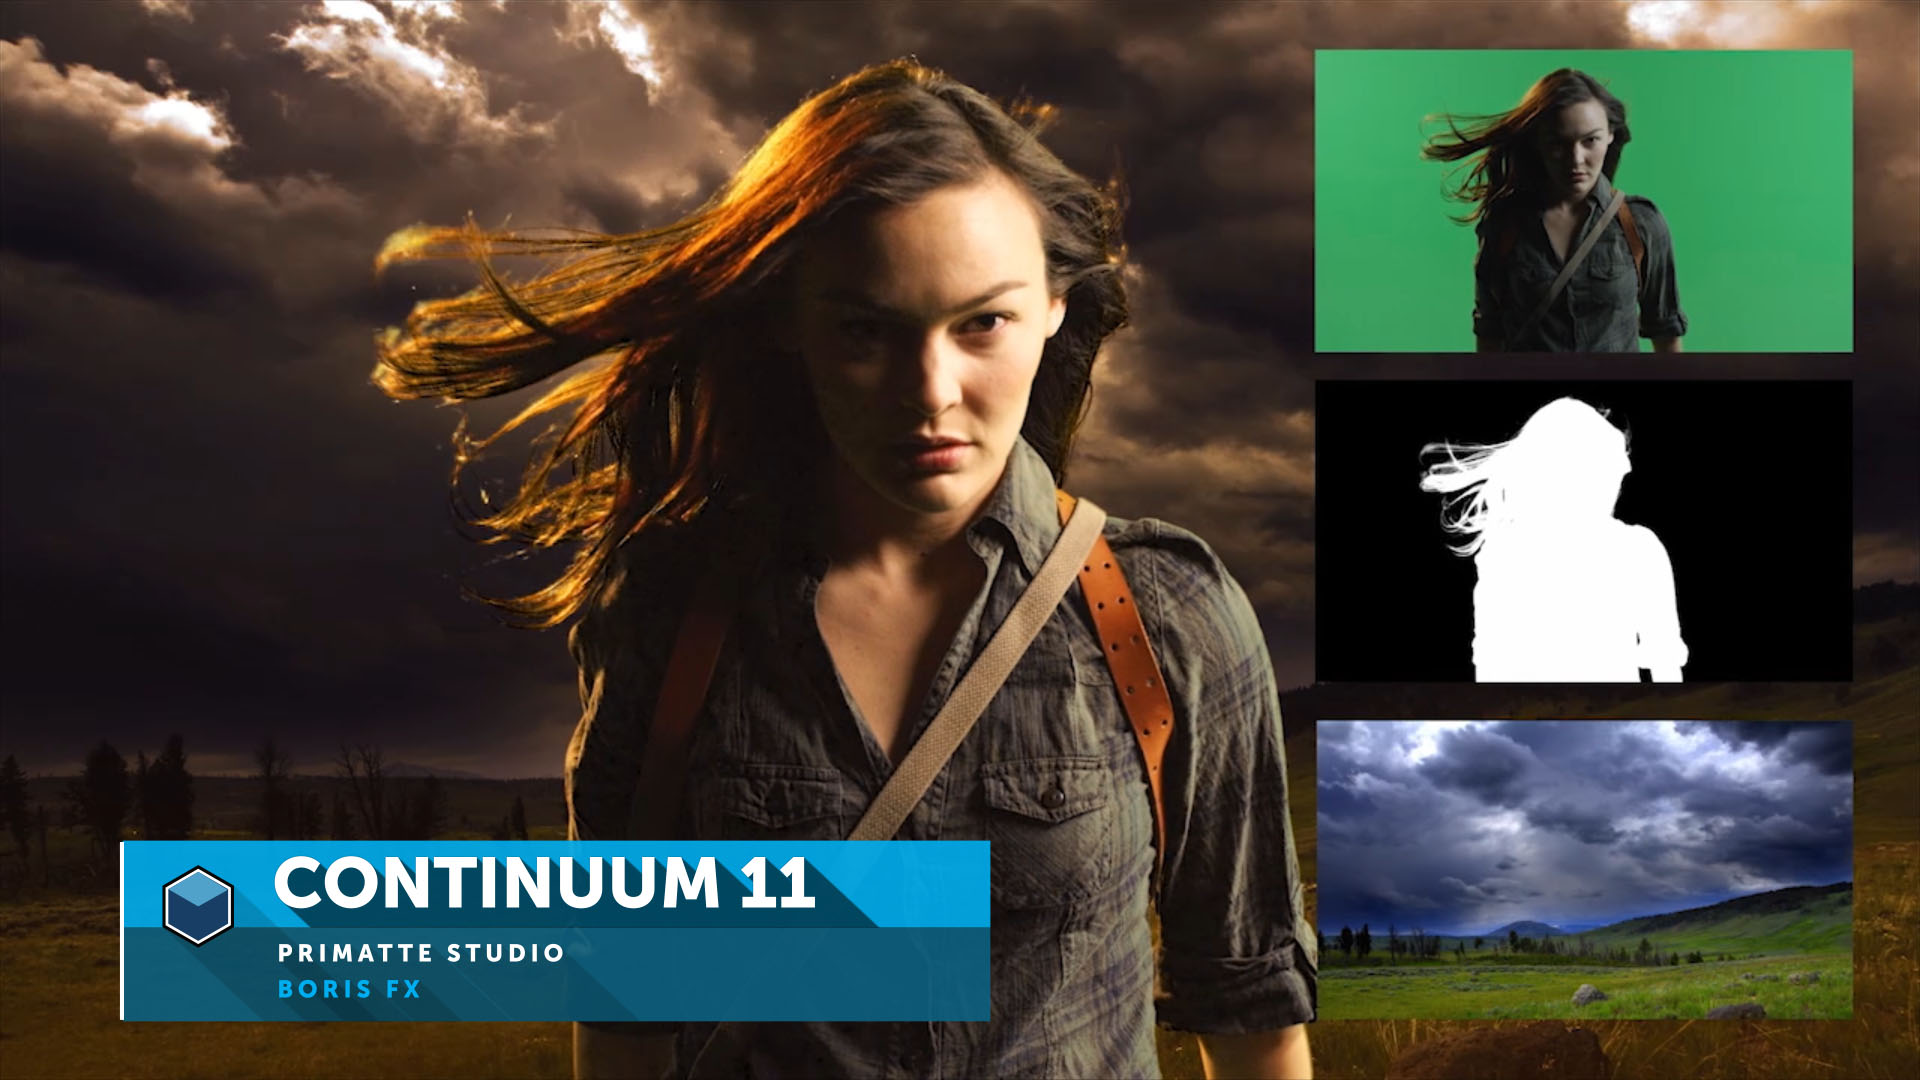
Overview
The core technology behind this filter is the Academy Award (nominated) Primatte keying algorithm, which was developed by Photron and licensed by BorisFX.
Surrounding this core algorithm are many features that have been developed over the years by the engineering group at BorisFX, including the Academy Award (winning) Mocha masking and planar tracking solution for foreground cleanup and background garbage masking.
Also included in the Primatte Studio filter are several compositing tools to further the creation of a photorealistic composite. Independent color adjustments can be made both globally to the foreground and separately along the edge of the isolated foreground element to balance the color of the foreground against the new background.
With the arrival of Continuum 2021, Primatte Studio has been updated to include the brand new BCC Edge Cleaner filter to give users spatial and temporal control over keyed edges.
Another compositing feature, Light Wrap, which can be used to blend pixels from the background along the edges of the isolated foreground object has been integrated into the filter.
To ease and speed workflow, many of the more commonly used features in Primatte Studio are included in the on-screen toolbar in most hosts, which frees users from having to return to the host Control Panel to switch between key sampling modes, cleanup modes and views. And included at the top of the filter, as with most filters in the Continuum package, is the Compare Mode, which in this filter offers a particularly handy interactive split-view so that users interact with the key while monitoring the matte and the final composite at the same time.
We believe this combined solution of multiple technologies will provide you with every tool that you need to generate compelling composites from independent foreground and background objects.
Quick Start Guide
Host Differences
BCC Primatte Studio relies on a process of interactively sampling the image to refine the result. Most hosts running Continuum support Overlay widgets (aka H.U.D. interactors, or On-Screen-Controls) which allow custom UI interactions directly on the clip preview pane. Primatte Studio makes heavy use of this Overlay capability when possible in order to achieve the most efficient and precise keying workflow. Some hosts, however, such as Vegas, do not support H.U.D. Overlays and thus rely on a different UI metaphor for sampling the image. Most of this document makes reference to sampling via overlays, but in hosts such as Vegas the same result can be achieved by setting the Sample Point location on screen and using the Take Sample button to actually update the key result with image data from that point. In hosts such as Vegas the size of the sampled region is controlled via the Sample Shape menu.
Note that due to host limitations in Resolve, at least as of version 14.1 of Resolve the Primatte Studio Toolbar widget is not displayed in Resolve, although the filter is otherwise usable as in other hosts.
Workflow Overview
- Step 1 – Analyze the Background
- Step 2 – Clean-up the Background
- Step 3 – Clean-up the Foreground
- Step 4 – Spill Suppression
- Step 5 – Refining the Matte
- Step 6 – Compositing the Result
Step 1 – Analyze Background
After applying the BCC Primatte Studio filter to a source clip, the first step should always be to click the Auto-Analyze button so that Primatte can auto-compute the best starting point for the key. Once the initial target for the key has been set, we are free to modify and refine the result. You can find the Auto Analyze button both in the filter’s control panel or at the top of the Primatte Studio toolbar in the viewer window.
Generally speaking, Primatte will produce a very good starting point using auto-analysis. The auto-analysis mode uses advanced image analysis tools to identify blue/green background colors, estimate foreground color properties, and then generate an initial key which is ready for fine tuning as necessary. The auto-analysis tool should be thought of as a way to quickly dial in the key, but it does not in any way limit the tweakability or quality of the final key. It is not a “dumbed down” approach, but rather the recommended starting point for even the most sophisticated users. Think of it as a short cut to jump start the sampling process that would otherwise need to be done from scratch. In rare situations where the Auto-Analysis does not provide a good starting point, such as when keying colors other than blue or green, you can bypass auto-analysis and manually sample the background by setting the Sampling Mode to Manual Sample BG or Manual Sample BG Basic and then clicking and dragging over the background region of the image in the viewer. Sampling the background is a process that needs only to be done once – sampling multiple areas will not produce an additive result. Each time you Auto-Analyze or use the Manual Sample BG or Manual Sample BG Basic modes it resets the “center” key properties.
If the background of the clip that you are working with has a lot of variance in the lighting, you can enable the Adjust Light option. This feature attempts to even out the lighting of the background, which often helps when struggling to key out uneven background lighting.
Another helpful feature in Primatte Studio for refining the background selection is the Grain Reduction tool in the Advanced group. Should you find that you’re working with a source clip that has a lot of grain which is being picked up by the keyer, this can be reduced by setting grain Reduction to Small, Medium or Large and adjusting the Grain Tolerance parameter.
From here, we should enable the Compare mode, which is located at the top of the filters control panel. The Compare mode has an independent split-view option, which in this case will enable us to view the final matte we are generating on one side of the viewer while also seeing the matte status on the other side. This will help while we fine tune the result as the matte status will display very clearly where unwanted semi-transparent pixels exist in both the foreground and background.
Step 2 – Clean-up the Background
After using Auto-Analyze, the filter will automatically switch the Primatte sampling mode to Clean BG Noise. In the Matte Status view, click and drag over any grey pixels in the background to make them fully transparent. Sometimes it’s easier to use the rectangle / marquee select mode for this clean-up work and you can select this option by choosing it from the Sampling Shape menu or directly from the toolbar. Continue to click and drag over any grey pixels in the background until it is solid black or as close to black as possible without eroding the foreground key. Remember, we can always use the Matte Cleanup controls to further remove transparency from the background and / or the integrated mocha background masking tool to generate animated garbage masks to remove unwanted background elements such as props, boom mics etc.
Step 3 – Clean-up the Foreground
After you clean-up the background the next step is to clean the foreground. To do this, select Clean FG Noise, either from the filter control panel or from the toolbar and again, click and drag over any grey pixels in the foreground until they are solid white in the Final Matte or Matte Status preview modes.
Sometimes images will contain foreground colors that are very close to colors along the matte boundary. For example shiny objects in the foreground (such as earrings) or foreground clothing elements might match a edge colors so closely that it is difficult to clean these foreground regions without damaging the smoothness of the matte edge. There are two main solutions to this problem:
- Use integrated mocha masking (or optionally host masks in AE) to generate an animated “Inside Mask” which will allow the foreground element to remain fully opaque – either with or without spill correction.
- Enable the Hybrid keying mode to allow the creation of two separate mattes which are merged to create a final matte. One matte will maintain smooth, high quality edges while the other matte will ensure that interior foreground regions are fully preserved. When using the Hybid approach, first dial in a high quality edge matte by sampling the foreground and background as usual in steps 1-3, but without worrying about preserving the problematic foreground regions. The goal in this first phase is to get the edges right. Once satisfied with the edges, you then proceed to phase 2 by turning on the Hybrid Enable option in the Advanced parameter group. Now use the Foreground Cleanup tools to fully restore the problematic foreground regions which effectively creates a second matte which is focused on the foreground completeness rather than the edge quality. Lastly you can tweak the blending the two hybrid mattes by adjusting the Hybrid Blur and Hybrid Erode parameters as necessary.
Step 4 – Spill Suppression
By this stage, you should have a very good key so we no longer need to view the Matte Status and this view can be switched to Final Composite. It helps to keep both the Final Matte and Final Composite views visible in the Compare Mode settings as the next stage is to eliminate as much as possible any background spill that was not handled automatically by the Primatte auto-compute function so for now we’ll leave the Compare Mode enabled.
Start by switching the Sampling mode to Spill Sponge. You may find that it’s easier to attenuate the background spill using the Point Shape instead of the Rectangle Shape. With the Point Shape selected, click and drag in the foreground image where you clearly see that the background key color is spilling over onto the foreground. Usually a few clicks is all that is necessary to remove the spill. Keep in mind that you can use undo to step back through the clicks so if you find have gone too far with spill suppression you can use the usual undo shortcuts (CMD/CTRL + Z) to step back or forward through the changes. [Note to Avid Users – due to host-side limitations, the keyboard shortcuts for undo/redo do not work after sampling in Avid until you click on another window outside of the preview window, at which time they then work normally.]
Sometimes, after working with the Spill Sponge, you may find that you need a finer level of control to tune the level of spill in the image. To do this use the Spill + (plus) and Spill – (minus) options, which can be found in the Sampling Mode pop-up of the filters Control Panel and also in the toolbar. With Spill – (minus) Primatte will increase the amount of spill that is being removed from the image with each successive click. With Spill + (plus) Primatte will decrease the amount of spill that is being removed from the image with each successive click. Please keep in mind that these controls will adjust the spill levels by very fine amounts so you may have to make several clicks on the image to produce a visible change.
Once the spill regions have been isolated using the above sampling techniques, the Spill parameter group offers additional controls for fine tuning the type of spill color correction applied. Depending on the individual shot, it can help to change the Spill Replace mode in this group to either Solid Color or Softened Background. If you choose the Solid Color option, you can define the color that is used via the color chip. If you choose the Background option, you must the background layer in the Background input pop-up, which is located at the bottom of the filter. [Pro Tip – you can visualize which areas of the image are receiving spill correction by changing the Spill Replace Mode to Solid Color and temporarily setting an extreme replacement color such as bright yellow or magenta.] The overall strength of the spill correction can be adjusted with the Spill Replace Amount control.
Step 5 – Refining the Matte
After spill suppression is complete, you can fine tune the semi-transparent edge of the foreground to make it either more transparent or more opaque. Use the Matte + (plus) and Matte – (minus) functions to restore transparency or opacity to the foreground. Just like the aforementioned Spill + / – controls, this fine-tuning function adjusts the matte by small increments.
Sometimes you may find it necessary to further enhance the matte to remove areas in the background that are beyond the range of the keying algorithm due to severely uneven background lighting, marks on the background screen, extreme spill, noise, or other problems in the shot.
An example of this may be dark marks on the floor of a green / blue screen and in this example the best option is to utilize the controls in the Matte Refinement section. Soften Matte, Shrink (Black Level), and Grow (White Level) can be used in conjunction with each other to help suppress unwanted alpha in background regions, to fill unwanted holes in foreground regions, or to gently soften the matte edges.
Another example of this may be where props or other unwanted items, such as boom mics etc, need to be removed from the scene. This is best handled via the use of garbage masks. Primatte Studio includes independent foreground and background garbage mask tools, including the integrated mocha feature which can be used to generate animated spline shapes that can tracked automatically using the mocha planar tracker. When using this filter in the After Effects host, you may also use animated or static host native spline mask shapes directly from within the filter.
Step 6 – Compositing the Result
With the work to generate a solid key complete, the final step in the process is to composite the keyed foreground over a replacement background. Many times, the foreground element will have differences in color and lighting as compared to the background element against which it is being composited. To achieve a more photorealistic composite, the keyed foreground can be color corrected to blend in better with the background.
The Color Correction group in BCC Primate Studio includes a wide array of sophisticated color correction tools, which should provide a wide range of control over the color of the foreground element. Along with the familiar Saturation, Brightness, Contrast and Gamma controls, there are also controls to adjust the Temperature and Tint of the shot. Moving the Temperature slider to the left (negative values) will yield a cooler result, while moving the slider to the right will warm up the shot. Moving the Tint slider to the left (negative values) will add a green tint, while moving the slider to the right will add a magenta tint.
There are independent controls in the Primatte Studio control panel for both global adjustment of the color of the foreground and adjustment of the color along the edges of the foreground. Each of these groups operate independently and offer the same degree of control over the color for global correction and edge correction.
Sometimes, to complete the composite, it can help to blend some of the background image over the edges of the foreground and this can be done from within the filter via the integrated Light Wrap option. Enable Light Wrap, set the background layer in the Background pop-up selector and then tweak the controls in the Light Wrap group to taste. Use the Mix With Original control to blend back the Light Wrap with the foreground – a setting of 50 is often a good place to start. The Apply Mode pop-up can be used to further enhance the composite – the default blending mode is Lighten but sometimes it may help to select one of the other modes, such as Add, Screen, Overlay or Soft Light.
Presets and Common Controls
BCC filters come with a library of factory installed presets plus the ability to create your own custom presets and preview them with the BCC FX Browser™.
BCC filters also include common controls that configure global effect preferences and other host-specific effect settings.
For more information about working with presets and other common controls, Click Here.
Compare Mode
The BCC Compare Mode provides a convenient mechanism to compare the effect result with the original source layer. It provides several variations on basic split-screen views with the filtered clip placed next to the unedited original.
The Compare Mode is a particularly useful feature in Primatte Studio as you can view any combination of final composite or preview modes on either side of the compare boundary and you can continue to use on-screen image sampling on either side of the boundary to refine the key no matter what preview or compare mode options are selected.
For more information on other standard Compare Mode features,Click Here.
Keying Functions
Auto Analyze button: Primatte Studio is a 3D keyer and pressing the Auto-Analyze button instructs the filter to build a 3D color model based on the colors in the source clip. The resulting polyhedrons are then manipulated (expanded, contracted, pinched etc) to generate the desired matte result. The Auto-Analyze button is almost always the best way to start your key. There are two manual sampling options available for rare instances when the Auto-Analyze approach does not give the expected result – Manual Sample BG and Manual Sample BG Basic. The only common scenario where the manual sampling approach is recommended is when keying out non-typical colors (i.e. colors other than blue or green). Clicking Auto Analyze will reset any previous key properties.
Sampling Shape: Use this to select between the two available image sampling shapes:
- Point: In this mode, as the cursor is dragged over the image, a visible dotted snake trail of white dots is generated. The pixels under this snake trail are sampled when adjusting the key properties.
- Rectangle [In hosts which support overlays]: In this mode, as the cursor is dragged over the image, a marquee shape is generated. The pixels that are contained within the shape are sampled when adjusting the key properties.
- 5×5 Rectangle [In hosts which do NOT support overlays]: Samples a 5×5 rectangle centered around the current Sample Point location.
- 50×50 Rectangle [In hosts which do NOT support overlays]: Samples a 50×50 rectangle centered around the current Sample Point location.
Sampling Mode: Use this pop-up to select the desired sampling operation. See the Quick Start guide section for more details on how these options are used:
- Manual Sample BG: Use this to manually define the initial key shape with advanced analysis to help automatically adjust for detected foreground colors elsewhere in the image. It is generally recommended to use Auto Analyze instead, but the manual sampling may be useful in non-standard situations such as keying out colors other than blue or green. Every time a Manual Sampling click is made, the key properties are fully reset based upon the new sample color so this is not an additive process, but is just intended to set the base key properties which would then be refined by switching to other sampling modes.
- Manual Sample BG Basic: A completely manual version of the initial core key sampling, similar to the the Manual Sample BG described above but without any advanced analysis made to refine the initial key based on colors elsewhere in the image.
- Clean BG Noise: Use this to clean-up any semi transparent pixels in the background
- Clean FG Noise: Use this to clean-up any semi transparent pixels in the foreground
- Matte Sponge: Use this to add selected colors to the matte
- Spill Sponge: Use this to add colors to the spill corrector
- Make FG Transparent: Use this to bring transparency back into selected foreground colors
- Restore Detail: Use this to restore fine detail in selected foreground colors that may be lost in the key
- Spill + : Fine tuning control to allow more spill in the selected foreground colors.
- Spill – : Fine tuning control to remove more spill from the selected foreground colors
- Matte + : Fine tuning control to increase the density of the selected matte colors
- Matte – : Fine tuning control to reduce the opacity of the selected matte colors
- Detail + : Fine tuning control to restore lost detail in the selected matte colors
- Detail – : Fine tuning control to remove fine details from the selected matte colors
- Custom: Specialized sampling mode used to precisely modify the key properties of selected colors. When Custom is enabled and you sample a color in the image, it does nothing immediately, but it sets that color as the target for any changes to the three Custom refinement sliders.
Take Sample [In hosts which do NOT support overlays]: Use this to update the current keying calculation with the image data sampled at the current Sample Point location.
Sample Point [In hosts which do NOT support overlays]: Use this to set the location of where the image will be sampled when the Take Sample button is pressed in hosts that do not support overlays.
Custom Spill: Increase or decrease the amount of spill correction applied to the currently selected Custom color. (Only active if the Custom sampling mode is selected and has been used to sample a color.)
Custom Transparency: Increase or decrease the amount of transparency applied to the currently selected Custom color. (Only active if the Custom sampling mode is selected and has been used to sample a color.)
Custom Detail: Increase or decrease the amount of detail in the currently selected Custom color. (Only active if the Custom sampling mode is selected and has been used to sample a color.)
Adjust Light On: Helps compensate for very unevenly lit screen colors. If you have are having difficult adapting to a widely varying screen color just by using the normal Clean BG sample mode, enabling the Adjust Light option can help smooth out the unevenly lit screen.
Adjust Light Strength: Controls the strength of the Adjust Light processing.
Spill group
The Spill parameters control they type and strength of the spill correction applied to the regions identified as spill regions during the initial sampling stages.
Spill Replace Mode:
- Complement – Each color identified as spill is nudged toward its natural complement depending on the strength of the spill for that color.
- Solid Color – Each color identified as spill is nudged toward a uniform solid color depending on the strength of the spill for that color.
- Softened Background – Each color identified as spill is nudged toward a color taken from a softened version of the background image at the same location depending on the strength of the spill for that color. Requires the Background layer to be selected (at the bottom of the effect).
Spill Replace Color: Defines the solid color towards which spill regions are pushed when the Spill Replace Mode is Solid Color.
Spill Replace Amount: Defines the overall strength of the spill correction. This can be set to 0.0 to completely disable the spill correction (i.e. returning the original RGB channels) while still preserving the new alpha channel from the key.
Matte Refinement group
The Matte Refinement group controls various post processing operations applied to fine tune the details of the matte.
Matte Refinement On: Completely enables or disables all operations in the Matte Refinement group.
Soften Matte: Adds additional feathering of the matte edge. Useful in moderation to help smooth edge discontinuities due for example to source noise.
Soften Inward: Controls whether the feathering of the matte causes the matte to shrink only versus allowing the matte to grow outwards in response to the feathering.
Shrink (Black Level): Causes the matte to shrink inward and/or to fill partial holes in background regions. Only affects intermediate matte values.
Grow (White Level): Causes the matte to grow outward and/or to fill partial holes in foreground regions. Only affects intermediate matte values.
Gamma: Remaps the relative brightness of intermediate matte regions. Only affects intermediate matte values.
Choke: Applies either positive choke (to further erode a matte) or negative choke (to grow/restore matte edges). This is often used in combination with the Soften Matte control. Small positive chokes can be used to clean up unevenly keyed edges. Large negative chokes are sometimes used in combination with large Soften Matte settings to create initial “quick mask” results that will key out most of an unevenly lit background while preserving a narrow border of unkeyed pixels near the foreground which is then addressed with a second application of this keying effect that can then focus specifically on just the edge regions since the bulk of the background will have been removed in the first “quick mask” approach.
Edge Cleaner Group
Edge Cleaner gives users spatial and temporal control over keyed edges. Easily tackle compressed green screen footage that displays jittering edges around areas with fine detail such as hair.
- Cleaning Radius: Adjusts the area of included pixels to be cleaned.
- Temporal Smoothing: Used to enable the smoothing of the filter result over time.
- Alpha Contrast: Adjusts the contrast between the alpha and non-alpha pixels for sharper resolution.
- Strength: Adjusts the intensity of the edge cleaning.
- Edge Sensitivity: adjust to discriminate between edge pixels and the overall image. Higher values will increase the sensitivity of edge pixel selection.
Outside Mask group
The Outside Mask control enable garbage mattes to remove areas that cannot normally be keyed out since their colors are too far from the main screen color such as boom mics, screen markers, or screen edges.
Outside Mask Shape
- Off: Completely disable any outside masking.
- Crop: Enable a simple rectangular cropping.
- Mocha Mask: Enable Mocha planar tracking mattes. See mocha help links inside the mocha UI for more details on using mocha.
- Host Mask: (AE Only) Enable AE host masks.
Crop Top-Left x/y: Set the coordinates up the upper-left crop boundary
Crop Bottom-Right x/y: Set the coordinates up the bottom-right crop boundary
Launch Mocha: Launch the mocha planar tracking tool. See mocha help links inside the mocha UI for more details on using mocha.
Use AE Host Mask: (AE Only) provides options for using Adobe After Effects native host mask shapes:
- Use All: uses all combined host mask shapes
- Choose Single: allows the user to select a single AE native mask shape. When this option is selected, the Select Host Mask pop-up become active and displays a list of the current AE native host mask shapes that are present on that layer. Select a single mask shape from the list to use it.
- Choose By Name: allows the user to select mask shapes based on their naming convention. When this option is selected, the Name Starts With pop-up becomes active and displays a list from which the user can select.
Select Host Mask: (AE Only) Select a single mask form the list of AE masks on the current layer.
Name Starts With: (AE Only) Select ways in which multiple AE masks on the current layer may be selected.
- Anything: selects all masks regardless of the name
- Letters A through I: only masks beginning with the chosen letter are selected
- Mask: all masks shapes that are named Mask are selected
Host Mask Offset: use to reposition the host mask shape along the x/y axis
Feather Outside Mask: Use to soften or feather the edges of the mask shape
Invert Outside Mask: Use to invert the mask when enabled
Inside Mask group
The Inside Mask controls enable hold back mattes to restore regions that are unintentionally being keyed out such as shiny areas of extreme spill or foreground clothing that too closely matches the screen color. It can also be bring back edge regions that are inadvertently being fully or partially keyed when other techniques such as Hybrid mode are not working.
Inside Mask Shape
- Off: Completely disable any inside masking.
- Mocha Mask: Enable Mocha planar tracking mattes. See mocha help links inside the mocha UI for more details on using mocha.
- Host Mask: (AE Only) Enable AE host masks.
Launch Mocha: Launch the mocha planar tracking tool. See mocha help links inside the mocha UI for more details on using mocha.
Use AE Host Mask: (AE Only) provides options for using Adobe After Effects native host mask shapes:
- Use All: uses all combined host mask shapes
- Choose Single: allows the user to select a single AE native mask shape. When this option is selected, the Select Host Mask pop-up become active and displays a list of the current AE native host mask shapes that are present on that layer. Select a single mask shape from the list to use it.
- Choose By Name: allows the user to select mask shapes based on their naming convention. When this option is selected, the Name Starts With pop-up becomes active and displays a list from which the user can select.
Select Host Mask: (AE Only) Select a single mask form the list of AE masks on the current layer.
Name Starts With: (AE Only) Select ways in which multiple AE masks on the current layer may be selected.
- Anything: selects all masks regardless of the name
- Letters A through I: only masks beginning with the chosen letter are selected
- Mask: all masks shapes that are named Mask are selected
Host Mask Offset: use to reposition the host mask shape along the x/y axis
Feather Inside Mask: Use to soften or feather the edges of the mask shape
Invert Inside Mask: Use to invert the mask when enabled
Mask Apply: Controls whether the inside mask affects just the opacity or both the opacity and spill. When masking a region that is completely in the foreground you would want the masking to remove any changes to both opacity and to spill to restore the original RGB values. However in regions near edges that naturally have some spill but which need opacity restored, this control lets you preserve opacity while preserving the spill correction to avoid any color discontinuities with neighboring pixels.
- Opacity Only
- Opacity and Spill
Color Correction group
The Color Correction group provides a range of foreground color correction tools for aid in matching foreground and background colors to create a more convincing final composite. A separate set of correction tools for just the foreground edge is found in the Edge Color Correction group.
Color Correction On: Completely enables/disables all foreground color correction.
Temperature: Control the overall temperature of the foreground. Moving the Temperature slider to the left (negative values) will yield a cooler result, while moving the slider to the right will warm up the shot.
Tint: Control the overall tint of the foreground. Moving the Tint slider to the left (negative values) will add a green tint, while moving the slider to the right will add a magenta tint.
Saturation: Control the overall saturation of the foreground.
Brightness: Control the overall brightness of the foreground.
Contrast: Control the overall contrast of the foreground.
Gamma: Control the overall gamma of the foreground.
Light Wrap group
The BCC Light Wrap reflects a background image around the edges of a foreground image to form a border. This creates the illusion that light from the background image is reflected onto the foreground image which in turn creates a more convincing composite by making it appear as if the images were shot in the same environment. To use the Light Wrap feature you MUST set the Background layer control at the bottom of the effect.
Vegas Pro Workflow Tip: To use the Light Wrap feature in Vegas Pro you must apply the filter in Custom Composite Mode. For more information on working with Custom Composite Modes in Vegas, Click Here.
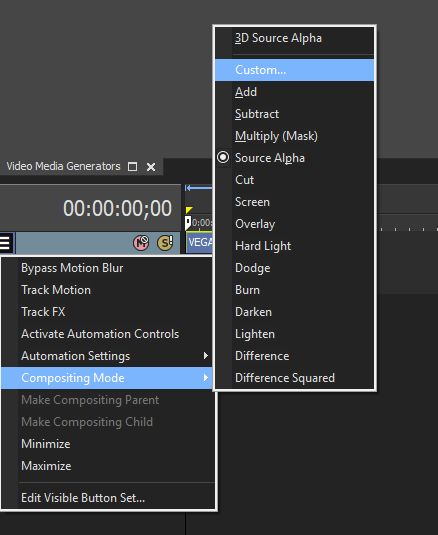 Using Custom Composites in Vegas Pro
Light Wrap On: Enable/Disable the Light Wrap pass.
Lightness: Sets the lightness value of the reflected/wrapped image. Negative values make the reflection darker and positive values make the reflection lighter.
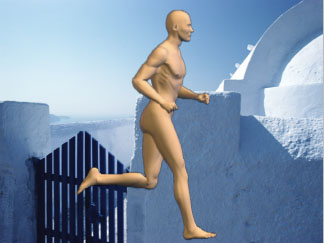 |  |  |
| Lightness= -1 | Lightness=.5 | Lightness=1 |
Softness: Softens the edges of the border image that is reflected or wrapped.
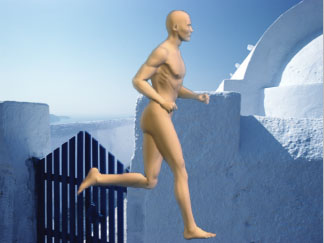
Width: Controls the width of the reflection or wrap that is generated. Higher numbers result in a larger border. The following examples show the View menu set to Wrap On Black.
 |  |
| Width=3 | Width=20 |
Apply Mode menu: Determines the method that is used to composite the border. For descriptions of all the possible Apply Modes, Click Here.
Mix with Original: Blends the original and modified results. Use this parameter to control the effective amount of the light wrap adjustment.
Edge Color Correction group
The Edge Color Correction group provides a range of color correction tools applied only to the very edge pixels of the foreground for aid in matching foreground and background colors to create a more convincing final composite. A separate set of correction tools for the overall foreground is found in the Color Correction group.
Edge Color Correction On: Completely enables/disables all foreground edge color correction.
Width Edge: Control how wide a region along the matte edge is affected by the edge color correction.
Temperature Edge: Control the temperature of the foreground edge. Moving the Temperature slider to the left (negative values) will yield a cooler result, while moving the slider to the right will warm up the shot.
Tint Edge: Control the tint of the foreground edge. Moving the Tint slider to the left (negative values) will add a green tint, while moving the slider to the right will add a magenta tint.
Saturation Edge: Control the saturation of the foreground edge.
Brightness Edge: Control the brightness of the foreground edge.
Contrast Edge: Control the contrast of the foreground edge.
Gamma Edge: Control the gamma of the foreground edge.
Advanced group
The Advanced group controls specialized controls which are generally only needed in special cases where the basic keying controls are insufficient.
Grain Reduction: Control the amount of grain reduction applied prior the key – use sparingly.
- None
- Small
- Medium
- Large
Grain Tolerance: Controls the Grain Reduction threshold by determining which regions are treated as grain and which are not.
Hybrid Enable: Enables the special Hybrid keying mode which effectively performs two separate keys and then combines the results to enable preserving good edge quality while still avoiding holes in similarly colored foreground regions. See the Workflow Guide,**Step 3 (Clean-up the Foreground) above for more details on usage.
Hybrid Blur: Controls the size of the blur used prior to the erosion of the secondary key when using the Hybrid keying approach. Larger blur amounts allow larger erosion which prevents the foreground cleanup from damaging the edge quality, but which then limits the hybrid mode’s ability to protect foreground regions that are near the edge.
Hybrid Erode: Controls the depth of the edge erosion (shrinking) of the secondary key when using the Hybrid keying approach. Larger erosion amounts allow more shrinking which prevents the foreground cleanup on the secondary key from damaging the edge quality, but which then limits the hybrid modes ability to protect foreground regions that are near the edge.
BG Color – KF Only: This parameter can be keyframed to adjust the “center” key color in cases where the screen color/lighting changes significantly over time. The overall shape of the 3D key sampling is preserved, but this shape is repositioned in color space to account for the changing central key color.
Background: Specify the background layer that will be used for the final composite. This must be set when either the Spill Replace Mode is set to Softenened BG or when the Light Wrap group is enabled.
Reset Toolbar[In hosts which support overlays]:Resets the location and open/closed state of the Primatte HUD toolbar widget in case it is ever “lost” offscreen.