


 |  |
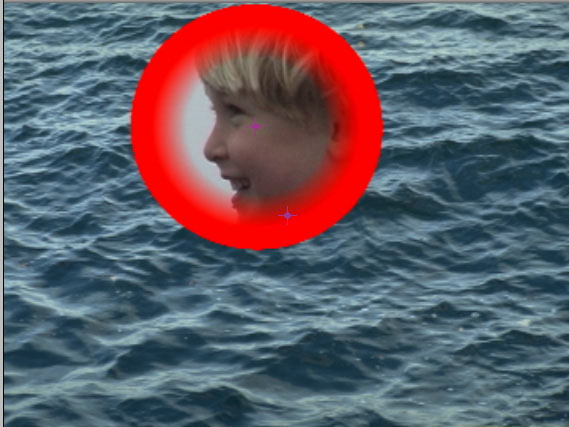
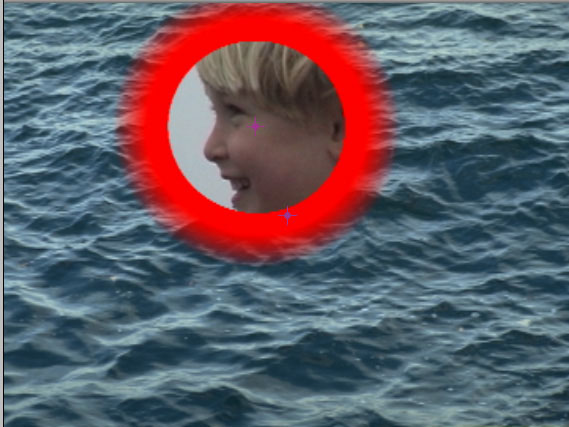
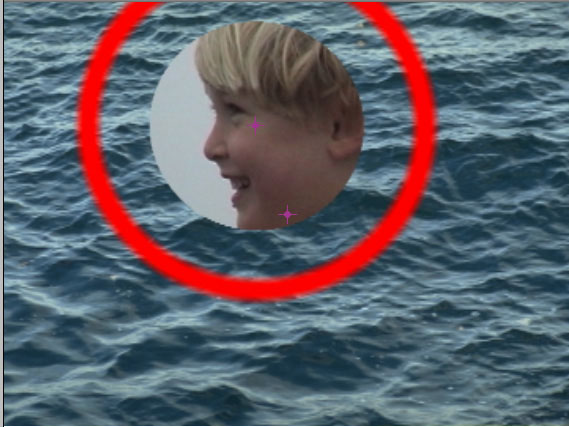
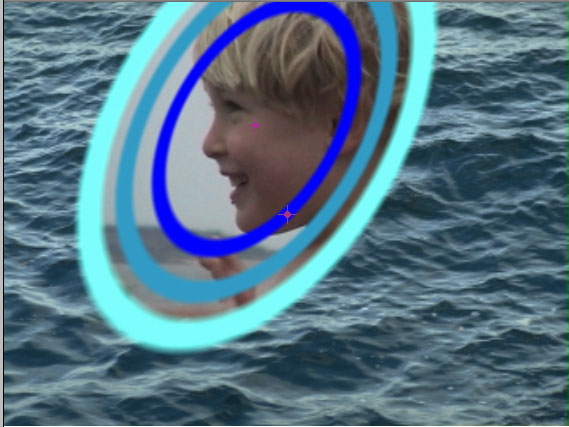
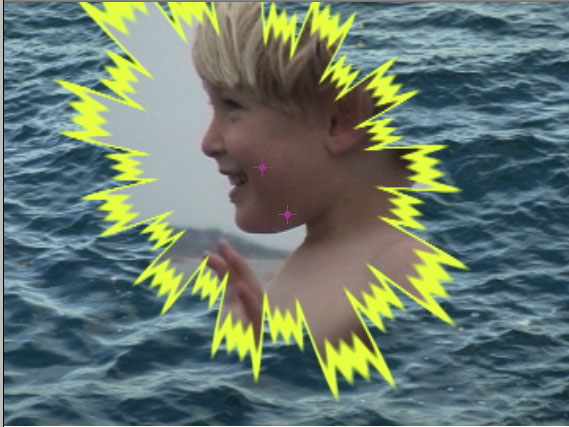
| Default Radial Wipe | Radial Wipe with Influence |
Overview
BCC Radial Wipe produces a radial wipe transition, and contains many controls for unlimited creativity, including Influence controls and preset edge patterns. At the default value, this wipe is similar to a Circle wipe.
Function
Presets and Common Controls
BCC filters come with a library of factory installed presets plus the ability to create your own custom presets and preview them with the BCC FX Browser™.
BCC filters also include common controls that configure global effect preferences and other host-specific effect settings.
For more information about working with presets and other common controls, Click Here.
The Animation menu controls whether the filter auto-animates or is animated manually. Choose from the following options.
Manual is the most flexible setting. Use Manual if you are applying the filter as a composite instead of a transition, or do not have enough control with the other settings. When Manual is chosen, you create the wipe by manually animating parameters such as Wipe Amount, Radius and Direction, depending on the wipe. When Manual is chosen, Percent Done has no affect.
Auto animates the incoming clip from offscreen at the start of the transition, to fully onscreen at the end of the transition. Choosing Auto has the same affect as choosing Pct. Done with a 0 value keyframe at the start of the effect and a 100 value keyframe at the end. When Auto is chosen, Percent Done has no affect.
Note: In some instances Auto may result in the incoming clip reaching fully onscreen before the effect finishes. In this instance, choose Pct. Done and animate the Percent Done parameter instead of using Auto.
Pct. Done animates the incoming clip from transparent (at a value of 0) to opaque (at a value of 100). When Pct. Done is chosen, the Percent Done parameter allows you to adjust the animation.
Note: If an option other than Manual is chosen, the filter automatically adjusts the animation parameters. If this does not produce the desired look at the ends of the effect, set Animation to Manual and manually adjust the effect instead.
When the Invert Wipe Checkbox is selected, the alpha channel created by the wipe inverts.
The Center position controls set the center point of the wipe on the X and Y axis, respectively.
Radius controls the radius of the wipe (a value of 100 is scaled to the image width) when Manual is chosen from the Animation menu. When Auto or Percent Done are chosen in the Animation menu, this parameter has no affect.
The Scale Others to Radius checkbox is only active when the Animation menu is set to Manual. If this checkbox is selected, most controls in the remaining parameter groups scale to the Radius setting. For example, Border Thickness decreases as the Radius scales to 0.
Softness controls the softness of the wipe.
Stretch Parameter Group
The parameters in this group contain three controls that stretch the shape of the wipe into an ellipse.
Stretch stretches the shape. Values greater than 100 stretch the shape in the direction determined by Stretch Angle. Values less than 100 shrink the shape in the chosen Stretch Angle direction.
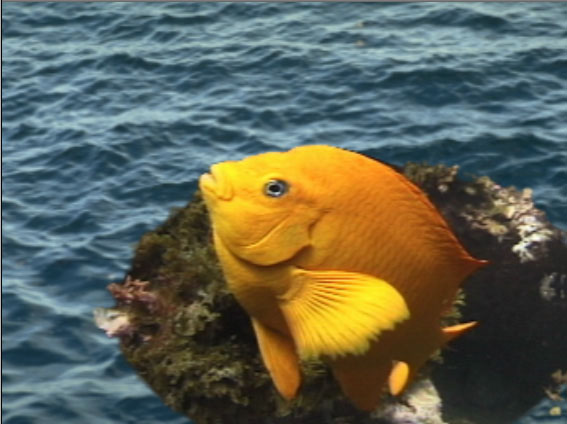
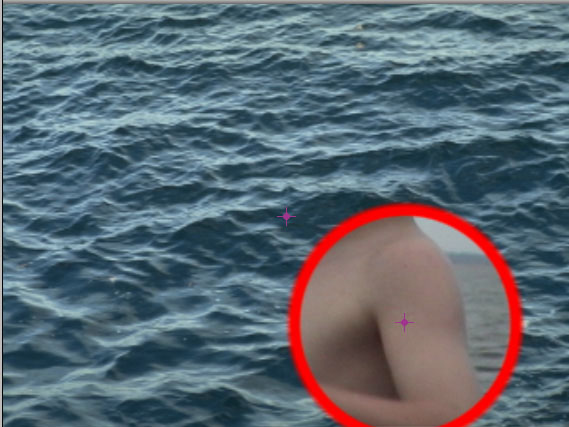
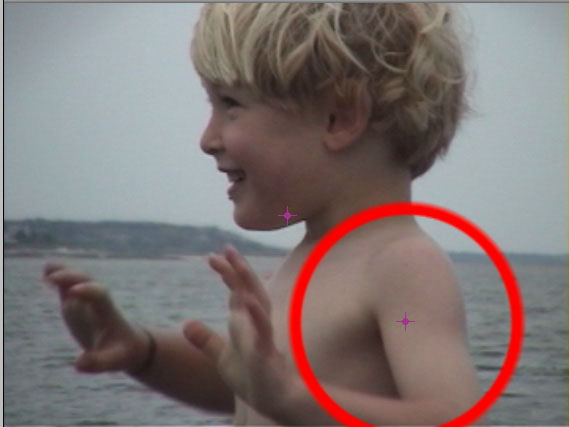
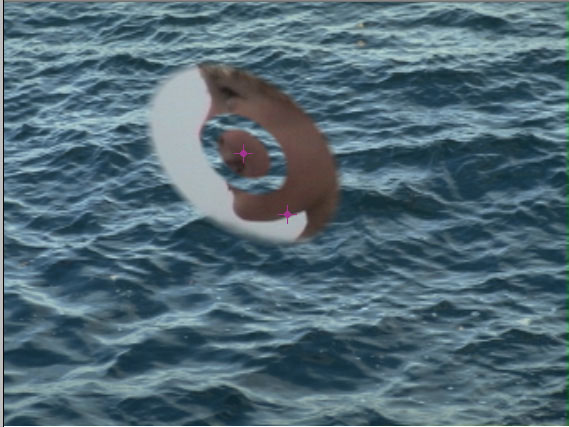
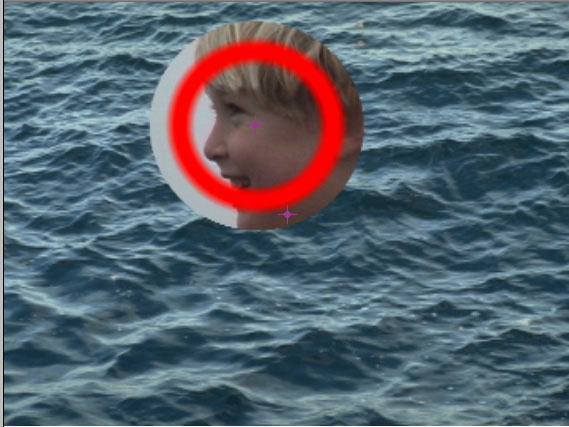
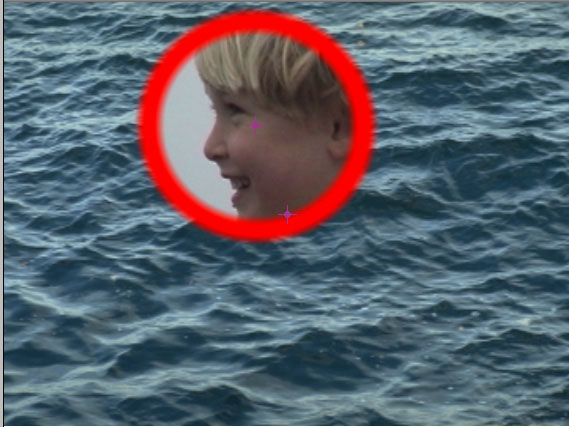
The following example shows a wipe with Influence applied to the incoming (fish) media. and Stretch set to 155.
 | 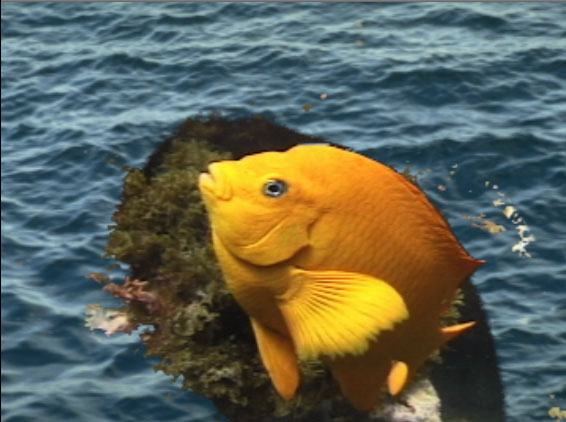 |
| Stretch Angle=120 | Stretch Angle=200 |
Rotation Rate auto-animates the Stretch Angle value, causing Stretch to rotate. The units are measured in degrees per second.
The Output menu controls the output of the wipe. You can also use this menu to preview the matte, or preview the source channel used by the filter to create the effect. Not all of its options are relevant in all situations. Choose from the following options. The following examples show the BCC Radial Wipe.
- Mult. Alpha multiplies the alpha channel created by the filter with the source alpha channel. Only areas that are opaque in both alpha channels are opaque in the output. This results in an image whose opacity at each point is at most its input opacity. For an opaque input image, this is the same as Replace Alpha.
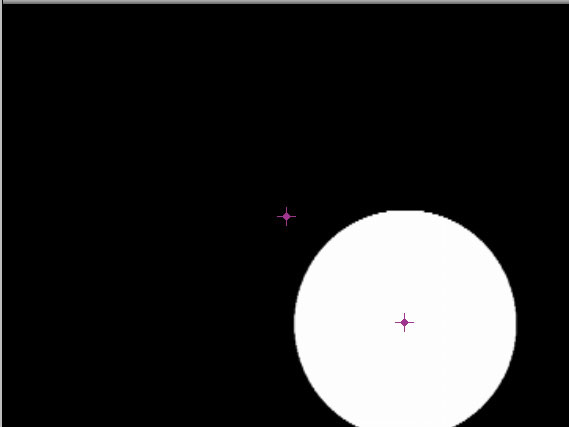
- View Matte displays a grayscale preview of the alpha channel created by the filter, as shown at right. Opaque regions are white, and transparent regions are black.
 |
- Replace Alpha replaces the source alpha with the matte created by the filter. For an opaque input image, this is the same as Multiply Alpha
 |
- Screen Alpha screens the alpha channel created by the filter with the source alpha channel. Areas that are opaque in either alpha channel are opaque in the output.
- Diff. Alpha subtracts the alpha channel created by the filter from the source alpha as shown at right.
- Zoom scales the input image to the size of the alpha channel created by the wipe. The image is positioned at the center of this alpha channel at its correct aspect. Zoom’s scaling is based on the computed alpha channel and is not sub-pixel animated. In some instances, adjusting parameters such as Influence and Texture can cause Zoom settings to appear jumpy.
- When Zoom Independent is chosen, the effect is the same as Zoom, but each axis of the source scales independently.
 |
 |
 |
- When Borders Only is chosen, the wipe renders only the borders.
- Borders w Source renders the borders over the source image. As shown in the example at right, the wipe’s alpha channel is ignored.
 |
Working with the Border Parameter Group
The parameters in the Border group adjust the first border you create. To create only a single border, use the parameters in this group. You can create up to three independent borders.
The Borders On checkbox is an easy way to enables all the borders contained in this and the Border parameter group. If this checkbox is deselected, no borders are rendered, even if the Borders On checkbox from the previous Borders parameter group is enabled.
Master Thickness scales the thickness of all borders.
Master Opacity sets the opacity for all the borders, expressed as a percentage.
Master Offset offsets the position of all borders relative to the wipe progress.
Working with the Additional Borders Parameter Group
Each Transition Wipe effect can include up to three independent borders. The Additional Borders parameter group contains controls for two additional borders. To create only two borders, you can use only the controls in this group. To make three borders, create the first border using the parameters in the Border Parameter Group and use this group for the additional and master border controls. Borders are composited in order; if all three borders are used, Border 3 is composited over Border 2, which is composited over Border 1.
The Border On checkbox enables the first border. If this checkbox is disabled, no border is created and the remaining parameters have no affect.
Border 1 Thickness sets the thickness of the first border, in pixels.
Border 1 Opacity controls the opacity of the border, expressed as a percentage.
The Border 1 Color controls set the color of the border.
The Border 1 Layer menu generates the border from another timeline layer instead of the chosen Color. If you do not assign a layer to this menu, the specified Color is used.
Radial Wipe
 |
 |
 |
Border Layer menu set to Outgoing
- Note: You can create interesting composites by using moving video as your border.
Border 1 Softness adjusts the softness of the border and is scaled to the width of the border. When Softness is 100, the border is fully opaque at its center.
Border 1 Balance controls the balance of softness between the inside and outside edge of the border. Positive values increase the softness at the outside edge, and decrease softness at the inside edge.
Radial Wipe
 |  |  |
| Border Balance=-99 | Border Balance=0 | Border Balance=100 |
Border 1 Offset moves the border relative to the edge of the wipe. Negative values move the border to the left; positive values move the border to the right. You can use the Border Offset parameter to make a border appear as a drop shadow.
Radial Wipe
 |  |  |
| Border Offset=-5 | Border Offset=0 | Border Offset=10 |
Radial Wipe
 |  | 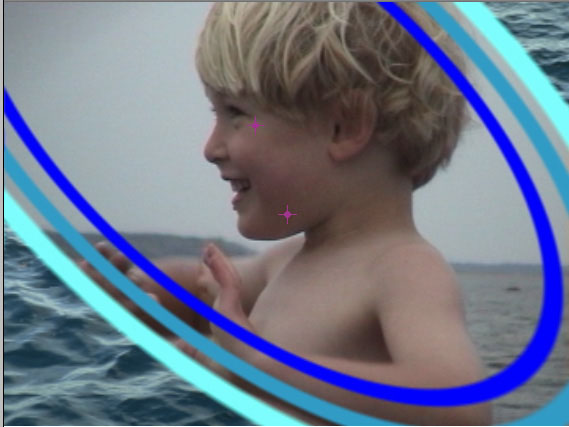 |
| Stretched and rotated Radial Wipe with Three Borders |
The Border 2 On and Border 3 On checkboxes enable the second and third borders. These are ignored if the Master Borders On checkbox is deselected.
The remaining Border 2 and Border 3 individual border controls are identical to the corresponding Border 1 parameters (Border parameter group).
Working with the Pattern Parameters
The Pattern parameters let you superimpose an angular pattern on the wipe to produce a more complex effect. The pattern distorts the edges of the wipe, making it less even. You set the Pattern type in the Pattern menu. When Off is chosen in the Pattern menu, the other Pattern parameters have no affect.
- Note: Using a pattern has very little affect on render time.
The Pattern menu sets the type of pattern. The available patterns depend on the wipe shape that you use. Experiment with these options to find one that works for you.
- When Off is chosen, no pattern is applied and the parameters in the Pattern Settings parameter group have no affect.
- Noise creates a wavy noise pattern.
- Noise Symm 2, Noise Symm 3,Noise Symm 4, Noise Symm 6, Noise Symm 8, Noise Symm 12 or Noise Symm 16 create noise that is symmetric, with the number indicating the repetitions.
- Smooth Fractal Noise or Rough Fractal Noise create a noise pattern by directly using the Fractal Noise algorithm. Because the noise pattern wrap s, the noise is always symmetric; at some settings the noise exhibits noticeable points at 0 and 180 degrees.
- Sine 1, Sine 2 and Sine 3 are variants of a sine wave pattern.
- Triangle and Wave are shape patterns. Pattern Variation has no affect when you choose Triangle.
- Opposing Noise superimposes two different noise patterns. Pattern Detail affects both patterns, while Pattern Variation affects the detail of the second pattern relative to the first.
- Opposing Waves superimposes two different sine waves.
- Sine Variable Noise superimposes a sine wave with noise.
- 3 Sines superimposes three sine waves. At a Pattern Variation value of 0, all three use the same wavelength.
- 3 Sines with Noise superimposes three sine waves with noise. At a Pattern Variation value of 0, all three use the same wavelength.
- 3 Spectra superimposes three Spectral waves. At a Pattern Variation value of 0, all three use the same wavelength.
- 3 Spectra with Noise superimposes three Spectral waves with noise. At a Pattern Variation value of 0, all three use the same wavelength.
- Variable Wave Bunch creates a group of waves of random amplitudes. Increasing Pattern Variation varies the number of different wavelengths, making the effect look more like noise.
- Narrow Wave Bunch, Medium Wave Bunch, or Wide Wave Bunch create a group of waves of varying number. Pattern Variation changes the shape of the waves by adjusting the starting point of the noise sequence.
 |  |  |
| Rough Fractal Noise | Sine 1 | 3 Spectra with Noise |
Pattern Amount controls the amount of distortion created by the chosen pattern from the Wipe Pattern menu. At a value of 0, no pattern is created.
- Note: Large amounts of distortion, especially with the Noise patterns, can result in an aliased look or overly sharp points. These can be corrected using the Choke or Blur in the Post Process parameter group.
Pattern Detail controls the amount of detail in the pattern. Depending on the chosen pattern, this parameter controls the number of cycles of the wave or the amount of detail in the pattern.
- Note: Since waves must fit around the wipe shape, Pattern Detail cannot smoothly animate any of the wave patterns, and Pattern Variation cannot smoothly animate patterns that use multiple waves. All parameters can smoothly animate for the noise-based patterns.
Pattern Rotation adjust the amount of rotation for the chosen pattern. The affect increases as Pattern Detail increases, especially for the wave patterns. This parameters only affects the Multi Stretch Wipe and Radial Wipe.
Pattern Variation randomizes the pattern. The nature of the variation depends on the chosen pattern.
Pattern Motion auto-animates the position of the pattern. The nature of the animation depends on the chosen pattern.
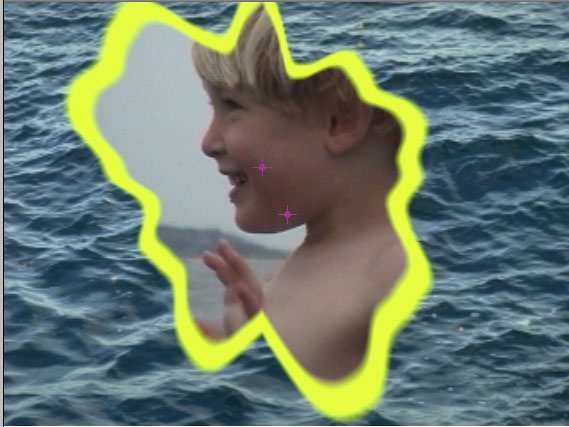
Working with the Influence and Influence Map Parameters
The Influence and Influence Map parameters allow a channel in the incoming or outgoing clip to influence the wipe. The influence layer pushes the wipe border in or out based on the value of each pixel.
- Note: Using a moving video texture such as water as both an Influence layer and a border can produce a pleasing stylized effect. A custom gradient still image is also a useful source for the Influence.
- Note: Using the Influence controls slows the filter.
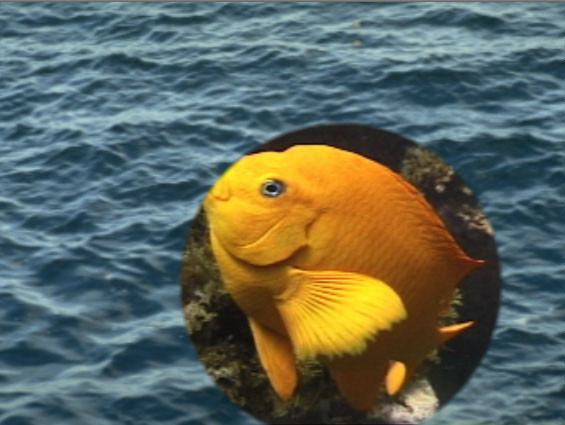
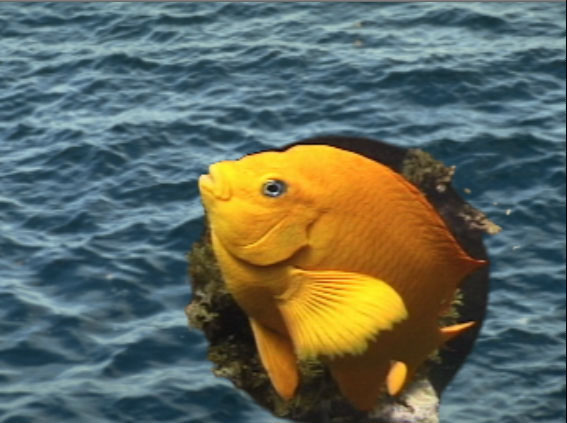
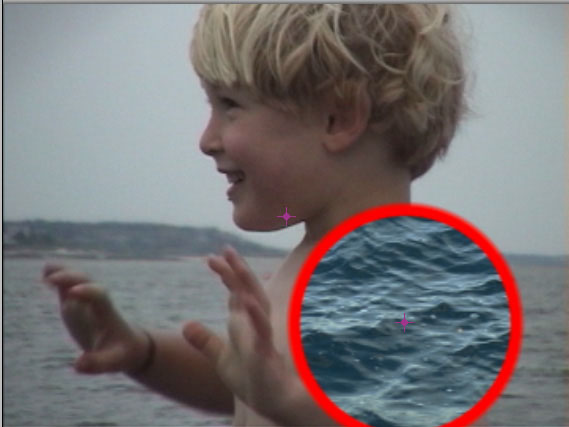
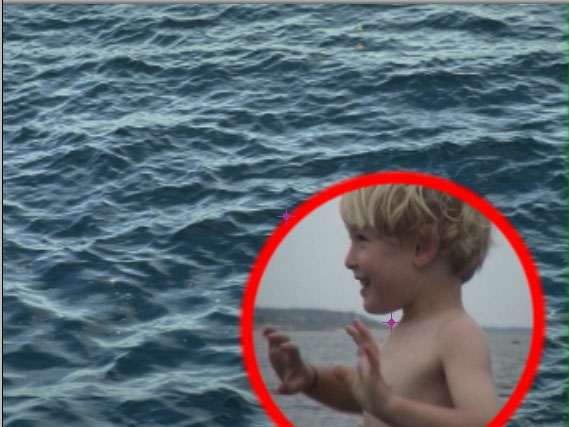
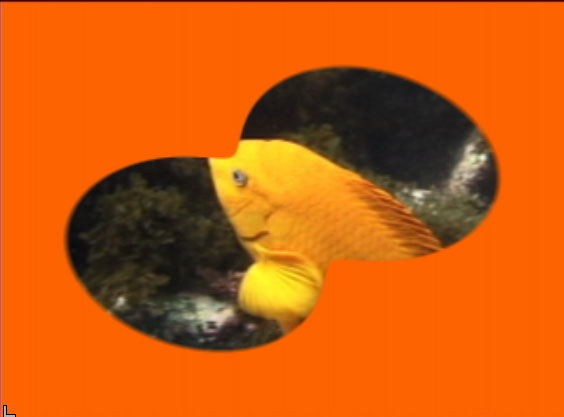
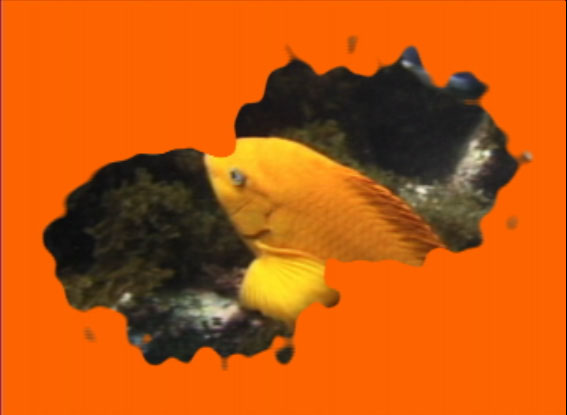
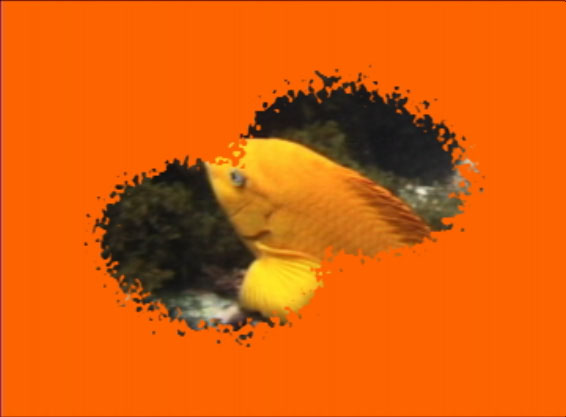
The following examples show a Linear Wipe with Influence used on different images.
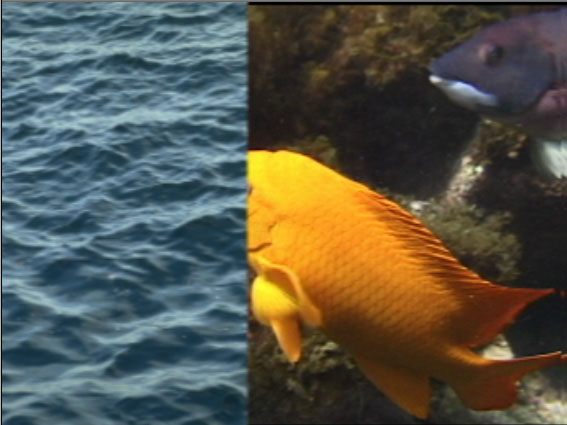 | 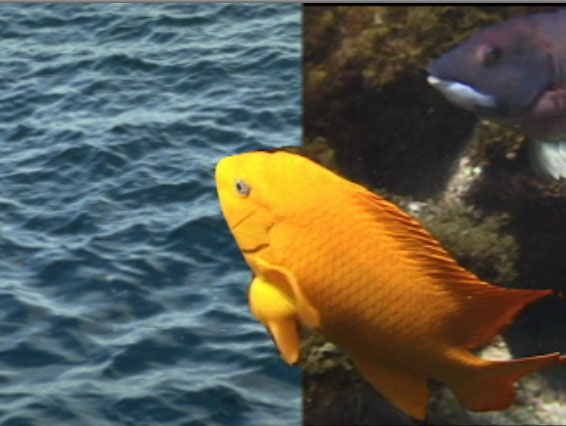 | 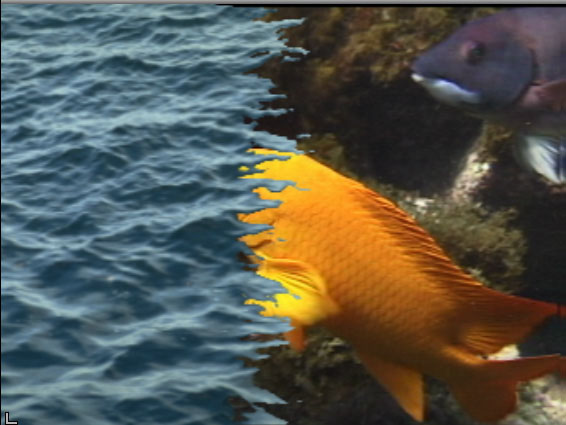 |
| Influence=Off | Influence=Incoming Fish | Influence=Outgoing Water |
The Influence menu allows you to turn the Influence On or Off. When Off is chosen, the other parameters have no affect. Choosing View lets you see the influence map after it is processed by controls in the Influence Map group.
Influence Intensity adjusts the intensity of the influence. Increasing values create more intensity.
The Inf. Layer menu lets you choose the layer that is used for the influence. If you do not assign a layer to this menu, the other parameters have no affect.
The Channel menu allows you to choose the channel that is used for the influence.
- Alpha, Luma Red, Green, and Blue create influence based on the value of the corresponding channel. Higher values create more influence.
- Choose Luma Inverted or Alpha Inverted to create influence based on the inverse of the value of the corresponding channel. In this case, lower values create more influence.
- If Luma Difference, Luma Lightest, or Luma Darkest is chosen, the filtered layer (the outgoing clip when the effect is a transition) is combined with the chosen Influence Layer to create the channel.
Inf. Threshold works in conjunction with the Inf. Softness parameter to set the value in the Influence Layer above which pixels are considered fully on. Pixels whose channel values are above the Influence Threshold level are fully on; those with channel values below the level are off. For example, if the Channel menu is set to Red and Inf. Threshold is set to 100, then all pixels whose red channel value is higher than 100 create influence.
Inf. Softness softens the edges of the influence by softening pixels whose values are near the Inf. Threshold value. Set Inf. Softness to 0 for a harsh, high-contrast influence, or increase it to soften the edges of the filtered region.
Blur applies a blur to the edges of the Influence channel before creating the wipe.
Choke applies a choke to the wipe. Positive Choke values tighten the matte, while negative values expand the matte.
If the Bidirectional Influences checkbox is deselected, a positive influence value always reveals more image, and a negative value hides more. If this checkbox is selected, the influence can go in both directions.
Working with the Texture Parameters
The Texture controls are similar to the Influence controls. They allow the wipe to be influenced by a Fractal Noise Map, a White Noise map, or both. The Texture controls differ from the pattern controls in that they operate on a pixel-by-pixel basis. The Texture controls can create holes in the wipe, while the Pattern controls do not create holes.
- Note: Using the Texture controls slows the filter.
The Texture menu controls which type(s) of texture map influences the wipe.
- When Off is chosen, no texture is used.
- Fractal Noise uses a simplified version of the algorithm used by the Noise Map filter to generate the texture.
- White Noise uses the algorithm used by the Pixel Noise filters combined with a high quality blur. The blur amount is set by the Noise Softness parameter.
- Fractal and White Noise combines both types of texture.
Multi Stretch Wipe
 |  |  |
| Texture=Off | Texture=Fractal | Texture=White Noise |
Texture Intensity scales the intensity of both the Fractal and White Noise. Negative values reverse the effect, causing pixels that would become more transparent to become more opaque and vice versa.
Fractal Intensity adjusts the intensity of the Fractal Noise texture if Fractal Noise or Fractal and White Noise are chosen in the Texture menu.
Fractal Scale scales the size of the details in the Fractal Noise texture if Fractal Noise, White Noise or Fractal and White Noise are chosen in the Texture menu.
The choices in the Fractal Type menu set the general appearance of the Fractal Noise texture. Choose Smooth, Bubbly or Stringy.
Fractal Flow Rate set the speed of the motion of the Fractal Noise texture pattern.
Fractal Flow Direction sets the direction of the motion of the Fractal Noise texture pattern.
Fractal Morph Start controls the look of the Fractal Noise texture at the first frame of the effect.
Fractal Morph Rate determines the rate at which the Fractal Noise texture surges and rotates inward as the filter auto-animates.
Setting the Downsample menu to 2 speeds rendering by creating a smaller (downsampled) Noise map. This can make the filter appear rougher, which is useful for some effects.
Noise Intensity controls the intensity of the noise texture.
Noise Softness controls the softness applied to the noise texture.
Noise Seed determines the value input to the random number used by the filter to create the noise. Adjust this value when you like the overall appearance of the noise but want to change the random configuration.
Noise Morph Rate controls the rate at which the noise texture evolves over time. This allows you to auto-animate the noise texture. You can also animate this parameter between a static and evolving noise texture by animating this parameter
If the Bidirectional Textures checkbox is deselected, a positive texture value always reveals more image, and a negative value hides more. If this checkbox is selected, the texture can go in both directions.
Working with the Post Process Parameter Group
Gamma controls the value of the middle tones while leaving the white and black of the image unaltered. The Gamma adjustment is made to the derived alpha. Increasing gamma spreads the alpha so that the matte created by the wipe is more opaque. The affect of Gamma is much more noticeable at high softness values.
Alpha Offset controls an offset that is added to the output alpha. You can create a transition by animating from -255 to 255. At a value of -255, the entire image keys out. At a value of 255, the entire image is opaque.
Post Blur blurs the alpha channel after the matte is created. Use Post Blur to soften the edge in the matte for sources with high contrast edges.
Choke applies a choke to the matte. Positive values tighten the matte around the foreground image, while negative values pull the matte away from the edges of the foreground image.
- Note: PostBlur and Choke are particularly useful if you used the texture, pattern, or influence controls to make a wipe with a nice shape but too many sharp details.
- Note: Borders are computed before Blur and Choke are applied, so using both borders and blur or choke on the same effect may create unexpected results.
Working with the Composite Parameter Group
The controls in this group let you composite an underlying clip with the source image, and allow brightness, contrast, and apply modes to be used in the blended region.
- Note:Composite controls only affect images without an alpha channel if you use some Softness value (for example, make the Wipe Edge soft). If the image has an alpha channel, these settings affect partly transparent pixels even without Softness.
- Note: The most common use of the Composite settings is to boost the brightness and contrast of the blended region when creating a soft wipe. You can also achieve unusual composites by using an Apply mode.
The Background menu allows you to choose a layer to composite below the source image.
The Blend menu lets you choose an apply mode to use in the blended region. For more information about the Apply Modes, Click Here.
Blend Brightness adjusts the brightness used in the blended region.
Blend Contrast sets the amount of contrast used in the blended region.
Mix w Original blends the source and filtered images. Use this parameter to animate the effect from the unfiltered to the filtered image without adjusting other settings, or to reduce the effect of the filter by mixing it with the source image.
Animation Tuning Group
These parameters control the overall timing of the transition. On hosts which permit on-screen heads up display widgets (such as AE, Premiere, and Avid) you should never need to modify these sliders directly since they can be configured in a more convenient and intuitive manner by manipulating the widgets directly in your comp/preview pane. On hosts without heads up display widgets you can use these sliders directly to fine tune your animation timing, taking advantage of the View Ease Curve option to help visualize the animation rates.
**Ease In:**Control how quickly or slowly the effect amount increases at the beginning of the transition.
Ease Out: Control how quickly or slowly the effect amount decreases at the end of the transition.
View Ease Curve: (Only visible/enabled in hosts that don’t support heads up display widgets for manipulating these controls directly on screen.) Enable this control to display a preview graph of the the animation curves rendered into in the composite window*.*
Beat Reactor
The BCC Beat Reactor is an animation control suite which drives effect properties based on the contents of an audio track. This lets you seamlessly tie visual FX to an audio soundtrack without the need for ANY manual keyframing.
For more information on the Beat Reactor, Click Here.