


![]()
As of Continuum 2019, the older Legacy BCC Motion Tracker as has been deprecated. This page contains documentation for the legacy BCC Motion Tracker found in Continuum 11 and older. For motion tracking in Continuum 2019 and beyond, please refer to the main BCC Mocha Motion Tracker documentation.
Overview
- Note: This document describes how to use Motion Tracker that is embedded in the BCC/FEC filters that are installed with Boris RED software… However, you can also use the native Motion Tracker that comes with Boris RED and which is located under Filters menu. Each tracking approach offers some unique features either for more nuanced tracking or more refined application of the tracking data. On how to use the native RED Motion Tracker please refer to the documentation in RED’s Help/User Guide under Effects Gallery section.
The Motion Tracker parameter group allows you to track the motion of an object in a media file. You can then use the motion path data to control another aspect of the effect. The parameters that can be affected depend upon the filter. For example, apply a Pyramid Blur filter to a clip and use the Motion Tracker parameters to track a logo on a T-shirt. Use the PixelChooser parameters to apply the Pyramid Blur to obscure the logo. The Motion Tracker parameter group is included in many filters that include the PixelChooser parameter group. This allows you to apply the filter to an area using a shape choice in the PixelChooser Region parameter group’s Shape menu.
Note: This help file describes the way the Motion Tracker Parameter Group works in Boris RED. The Motion Tracker parameter group works differently in other hosts.
- Note: You need to view your effect in at least Half Resolution in the Composite window when you are tracking, or you will get an error message telling you to track at higher resolution.
Brief Description of Controls
The Motion Tracker parameter group includes the following controls. It is important that you also read the detailed sections “Understanding the Tracking Process” and “Tips when using the Motion Tracker” following this section.
Clicking the Reset button resets any saved Motion Tracker data:
- Warning: Resetting the Motion Tracker causes you to have to recompute your whole track, which could take time on a long clip with a large search region.
The External Data checkbox will automatically be checked after loading an external tracker data file. This checkbox indicates if you have external tracker data in your project. Turning off the checkbox will clear your tracker data which cannot be undone.
Clicking the Help button opens this .pdf format help file which is specific to Boris RED:
The Use “Tracking Source Layer” (selected by default) sets the layer to track, which may be different from the source of the filter. In RED, the Tracking Source Layer is set in the timeline:
When the Track On-the-Fly check-box is selected and you press Play, the filter calculates the tracking data. When you select this check-box, the chosen effect does not display. Once you finish tracking, deselect this check-box to play the applied effect:
- Note: See the “Understanding the Tracking Process” section below to learn how to Track on the Fly.
The Tracker Center KF position controls set up the area to track. Use the Tracker Center KF control to set up your tracking region, then adjust the Tracker Center KF position control if necessary for finetuning.
- Warning: The Interpolation for Tracker Center KF X and Tracker Center KF Y must be set to Hold or Constant.
- Note: See the “Understanding the Tracking Process” section below to learn how to use the Tracker Center KF to adjust tracking during an effect.
Target Width sets the size of the area to track. Increasing this value increases preview time but can increase the accuracy of the tracking. A white outline indicates the selected area.
The Apply menu determines which parameter the Motion Tracker data affects. The choices depend on the filter. When None is chosen, the Motion Tracker data has no affect.
The Offset X and Offset Y parameters allow you to offset the effect on the X and Y axis respectively. This is useful if you want to track one area, then apply the effect to a different area. For example, you want to blur out an athlete’s name on a T-shirt but don’t want to blur the player’s number. However, the player’s number offers more contrast and is therefore easier to track. You would track the number, then offset the effect to obscure the name.
Working with the Motion Tracker Preprocess Parameters
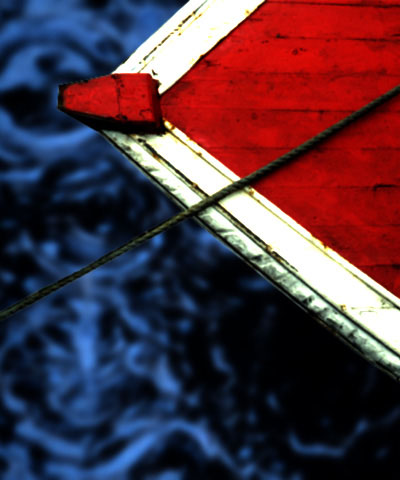
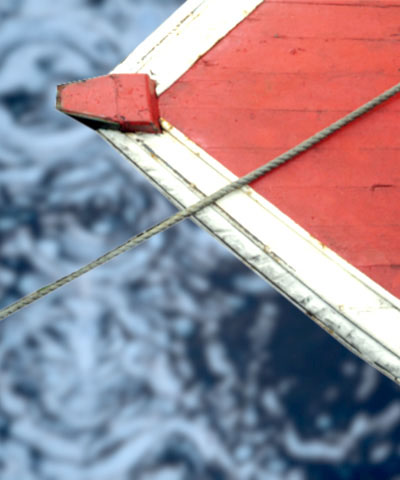
A good target region contains a high-contrast object with good vertical and horizontal edge definition. Ideally, you should find a pattern that is visible in every frame. If your image does not contain a high-contrast object to track, you can adjust the Preprocess parameters to make your source image easier to track. For example, you could increase the contrast for better results.
The View Preprocessed Source check-box (under Preprocess tab) lets you view the preprocessed source image as you adjust it. Wh this check-box, the chosen effect does not display in the Effect Preview window. Once you finish adjusting the Preprocess parameters, deselect this check-box to view the applied effect.
- Warning: You should deselect the View Preprocessed Source check-box before you select the Track On-the-Fly check-box and begin tracking.
The Input Black, Input White, Gamma and Blur-Sharpen parameters adjust contrast and eliminate noise. Video shot at night or in poorly lit settings often contains noise in the dark areas which can interfere with accurate tracking. Increasing Input Black removes this noise by treating all areas darker than the Input Black setting as black. Washed out or overexposed images do not contain the full range of levels. Increasing Input Black and/or decreasing Input White can also boost the contrast of the image.
Input Black sets the channel values of the input image that are treated as pure black by the filter. For example, if Input Black is set to 50, all pixels with a value of 50 or less are output to a value of 0. The remaining values (50-255) are remapped to produce a smooth gradient from black to white:
 |  |  |
| Input Black=0 | Input Black=75 | Input Black=125 |
Input White sets the channel values of the input image that are treated as pure white by the filter. For example, if Input White is set to 200, all pixels with a value of 200 or more are output to a value of 255. The remaining values (0-200) are remapped to produce a smooth gradient from black to white:
|  |  |
| Input White=255 | Input White=175 | Input White=125 |
Gamma controls the slope of the curve used to convert from the input color values to output values in pixels brighter than Input Black and darker than Input White. Increasing Gamma from the default of 100 lightens the image and decreases contrast, while decreasing Gamma darkens the image and increases contrast:
 | |  |
| Gamma=50 | Gamma=100 | Gamma=150 |
Blur-Sharpen blurs or sharpens your image. Decreasing negative values blur the image, which is useful to smooth noise that might interfere with tracking; increasing positive values sharpen the image, which can enhance objects that might be too blurry to track.
Tracker Time Offset shifts the tracker location through time which can be used in conjecture with trimmed clips to adjust by the trim amount and properly align the tracker.
Understanding the Tracking Process
Motion Tracking is a powerful feature but it can be complicated. To understand best how to track, you need to understand Tracking on the Fly, and the Tracker Center KF control.
**Setting up your Effect:**The first step in motion tracking is to set the Tracking Source Layer in the timeline. Then set up your tracker region in Track on the Fly mode.
- Warning: You need to view your effect in at least Half Resolution in the Composite window when you are tracking, or you will get an error message telling you to track at higher resolution.
- Make sure the Use Tracking Source Layer check-box is selected (it should be by default) and then set the Tracking Source Layer in the timeline to the layer you are tracking.
Place the CTI on the first frame of your effect.
Select the Track on the Fly check-box.
If the Animate/Static mode button is set to Animate (red key icon) then you should change the interpolation type for the Tracker Center KF X and Y to either Hold or Constant before adjusting the location of the tracker point picker on the first frame. If the Animate/Static button is set to Static (grey key icon) it is generally advisable to set a Hold interpolation for the first keyframe since it makes the later adjustments of the track easier to perform.
Use the on screen Tracker Center control or type in the Tracker Center KF numerical fields to set to the center of the object you want to track.
Adjust the other Motion Tracking parameters as necessary, for example to set up the target region. See “Tips for Setting Up the Target Area” for more information.
Press the spacebar or Play to track your effect.
If you need to create more keyframes later in your effect, for example if your Place the Tracker Center KF on tracker loses focus and you need to adjust the Tracker Center, we recommend the center of the object to track you set the new keyframes to Hold interpolation. See “Adjusting Tracking with Hold Keyframes ‘ for more information.
Understanding Tracking on the Fly
When the Track On-the-Fly check-box is selected and you press Play, the filter calculates the tracking data.
Understanding the Onscreen Tracking Marks
When Track on the Fly is enabled, the program renders a line along the bottom of the Composite window indicating the location of tracked frames. The line references the length of the original source clip. It is important to note that this line is actually rendered onto the image when you are in Track on the Fly mode. Make sure to turn off Track on the Fly before you render to disk or export your effect.
A Red mark along the bottom of the Composite window indicates the current position of the CTI.
Blue marks indicate keyframe locations. A keyframe location is any frame whose position differs from that of the previous frame. A frame where the center position differs from the previous frame is also considered a keyframe.
Note: The blue onscreen marks are internal to the Motion Tracker. While the Motion Tracker considers these frames to be “keyframes”, these are different than the keyframes that are visible in your timeline.
Green marks indicate the frames that have been tracked and are current (i.e. the location of the tracker center has not changed since the tracking data was generated).
Magenta marks indicates frames which were tracked, but for which the tracker point has changed. This usually indicates a region that needs re-tracking (unless you are manually positioning the Tracker Center KF without making keyframes in your timeline):
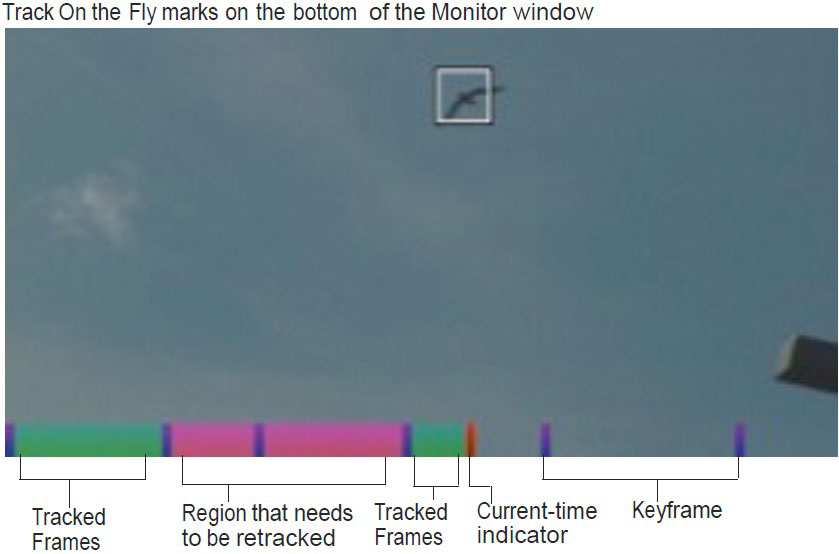 |
- When you track an effect, marks for each tracked frame draw on the left of the CTI because there is tracking data for these frames.
Understanding Error Messages when Tracking on the Fly
The most common error message you will see during tracking is a “Please Move the CTI…” error message. There are several things you can do while tracking that cause this error message to appear.
- If you scrub forward in the effect past the end of the tracked region.
- If you play, but don’t play every frame.
- If you have partly tracked an effect, disabled Track on the Fly, and moved the CTI past the tracked region before re- enabling it.
- This message will sometimes appear when you press the space bar to stop playback. When this happens, the tracker render for the current frame is interrupted. You just need to back up one frame (and follow the onscreen directions to clear the cache) to continue.
When you get this error message, perform the following steps:
Move the CTI to a previously tracked frame in your effect.
Clear the cache that RED has created for the effect. To clear RED render cache before continuing tracking, toggle a check-box off and on or change an unused parameter in the effect. If you try to re-track without completely clearing the cache, the motion tracker will not work when it reaches the frame that displayed the error message because the frame that displayed the error message has already been cached.
Working with the Tracker Center KF Control
The Tracker Center KF position control sets up the area to track. Use the Tracker Center KF control to set up your tracking region, then adjust the Tracker Center KF position control if necessary for finetuning.
Understanding How Keyframes Work in the Motion Tracker
It is sometimes necessary to “help the tracker along” when it loses the object by keyframing the Tracker Center KF control. The motion tracker treats any frame as keyframed if the Tracker Center position at that frame is different from the track center at the previous frame. Keyframes appear in blue along the bottom of the preview when Track On The Fly is on.
If you have two Track Center KF keyframes with different values and are not using Hold interpolation, the tracker will treat each point between these keyframes as being at a keyframe.
- Note: The onscreen marks are internal to the Motion Tracker. While the Motion Tracker considers the frames represented by the blue marks to be “keyframes”, these are different than the keyframes that are visible in your timeline.
Adjusting Tracking During the Effect
It may be necessary to adjust the tracking during an effect, as the tracking can become inaccurate when the tracked object changes orientation or is obscured by another object. The best way to deal with this is by keyframing the Track Center KF control. Note that the onscreen Tracker Center KF crosshair control does not follow the tracked object, but you can reset it to the location of the tracked object at any point in the effect.
Adjusting Tracking without Keyframes
It is also possible to adjust tracking without using keyframes. However you should be careful working this way because if you make a mistake your effect could jump.
You can move the CTI to the point where you lost tracking, adjust the tracker, and continue tracking, You will notice that the tracked frame markers turn from green to magenta when you do this. This indicates that the Tracker Center KF is different from the current value.
This method works unless you go back to an earlier frame with the Track On The Fly check-box on. If you go back, the tracker re-tracks that frame using the new (incorrect for that frame) value of Tracker Center KF, and the final render will jump. Since you haven’t saved the Tracker Center KF value for the start of the effect, you will have to re-enter it and re-track.
- Note: If you use this method, we recommend that you close the Motion Tracker group as soon as you finish tracking, so you don’t inadvertently change the tracker data.
- Note: The onscreen marks are internal to the Motion Tracker. While the Motion Tracker considers the frames represented by the blue marks to be “keyframes”, these are different than the keyframes that are visible in your timeline.
Adjusting Tracking with Hold Keyframes
We recommend that you set keyframes to Hold interpolation for most adjustments. At the frame where the effect loses tracking, put a new Hold keyframe at the location of the object and continue tracking.
If the object goes behind another object for several frames, you can put a Hold keyframe at each frame where the object is obscured.
You can also put a Linear keyframe where an object becomes obscured and a hold keyframe where the object becomes visible again. The tracker will use the interpolated values as the location of the tracked object while it is invisible. You can add new keyframes as needed to adjust the motion while the object is concealed.
Tips For Using the Motion Tracker
Read the following tips to help understand how to best work with the Motion Tracker in Boris RED.
Tracking Resolution Requirement
You need to view your effect in at least Half Resolution in the Composite window when you are tracking, or you will get an error message telling you to track at higher resolution.
Understanding Boris RED’s Cache
While you preview your effect, Boris RED maintains a disk cache so that the next time you preview the effect, it plays faster. This can present some problems for the motion tracker, which draws the colored marks at the bottom of the Composite window and reports all of its errors as the disk cache is created.
For example, one situation to avoid is the “Please Move the CTI…” error message displayed in the Composite window when you track out of order. You can get this message if you are in Track on the Fly mode and you park the CTI on a frame you have not yet tracked. An error message displays, and Boris RED actually caches the rendered frame containing the error message. You need to follow the instructions in the error message to clear the cache and make sure that the tracking does not then skip this frame when you re-track.
RED’s cache will also cause the rendered frame marks on the bottom of the Composite window to be incomplete if you track and scrub without changing any parameters in the effect.
Tips for Setting Up the Target Area
- A good Target area contains a high-contrast object with good vertical and horizontal edge definition. Ideally, you should find a pattern that is visible in every frame.
- The Target Width should be large enough to accommodate a good target image. However, processing time increases as the size increases, so do not make the Target Width unnecessarily large.
- If your image does not contain a high-contrast object and you have trouble tracking, apply the BCC Unsharp Mask or BCC Brightness Contrast filter to the Source track to increase the contrast for better results.
- The Motion Tracker will track more accurately when you preview in Full Quality rather than Draft Mode.
Trimming Motion Tracked Effects
When you trim a clip that has been motion tracked, the filters do not purge the tracked data. This means that if a clip is trimmed from the end, you do not need to do anything. If a clip is trimmed from the beginning (if you slide the clip, which is the equivalent of trimming from the beginning and end), you should press the Reset button to invalidate all of the motion tracker data and re-track your effect.
Trimming in RED can be done by dragging keyframes or by adjusting the media. The main complexity occurs when you use a tracking source layer, as any adjustments need to be done to both the layer and to the layer set in Tracking Source Layer.
If you are using another layer to track, that layer is probably someplace else in the timeline, so you still need to worry about manually synchronizing the layers.
Tracking Part of an Effect
There may be times when you want the effect to follow the tracked object for only part of the effect. If you want the tracking to follow the object to a certain point in the effect and then hold at that point, stop the tracking when it reaches that point. The rendered effect will follow the object for as long as it has tracked, and then hold.
If you want the effect to hold steady for a while, and then pick up the object at a particular frame and start tracking it, follow the steps below.
Park the CTI on the frame where you want to pick up tracking and add a Linear Tracker Center KF keyframe.
Go back to the beginning of the effect, and add another linear keyframe, setting its value to be a fraction of a pixel different from the value in step 1.
Track your effect. The tracker will now think that there are keyframes at every frame up to the one you set in step 1, so it won’t use any tracking data at that point in the effect. Once it reaches the second keyframe, it will track normally.