


Replaced by BCC Particle Illusion
We recommend use of BCC Particle Illusion instead of BCC Particle System. BCC Particle Illusion contains thousands of curated particle effects, mocha motion tracking, 3D particles with integrated camera, Fluid Dynamics, 3D model emission, 3D deflectors, particle trails, and more.
Overview
BCC Particle System is an auto-animated particle generator that provides in-depth control over individual particles as well as the overall shape and movement of the system. This filter offers extensive options for adjustment, enabling you to create a wide variety of useful effects. You can control the size, shape, color, velocity, and movement properties of the particles; adjust the size and shape of the particle production area; set points which attract or repulse the particles as they move; control the camera perspective; adjust how particles interact with the edges of the effect; and customize the animation.
Function
Presets and Common Controls
BCC filters come with a library of factory installed presets plus the ability to create your own custom presets and preview them with the BCC FX Browser™.
BCC filters also include common controls that configure global effect preferences and other host-specific effect settings.
For more information about working with presets and other common controls, Click Here.
- Warning: Particle System is especially memory-intensive. It is particularly helpful to work in Draft Mode when creating a Particle System effect.
The Particle Shape menu sets the shape of the generated particles. The choices are Reference Boxes, Streaks, Pixel Streaks, Lines, Blurs (blurred solid circles), Bubbles (open circles), Shaded Spheres, Wide Sparkles, Long Sparkles, Round Noise, and Reference Pointers.
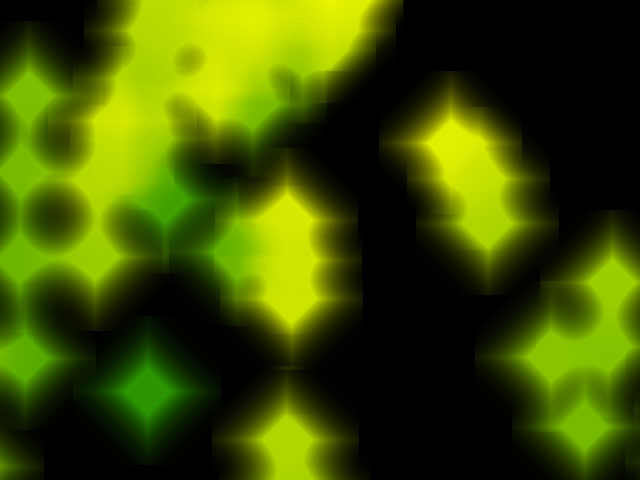 | 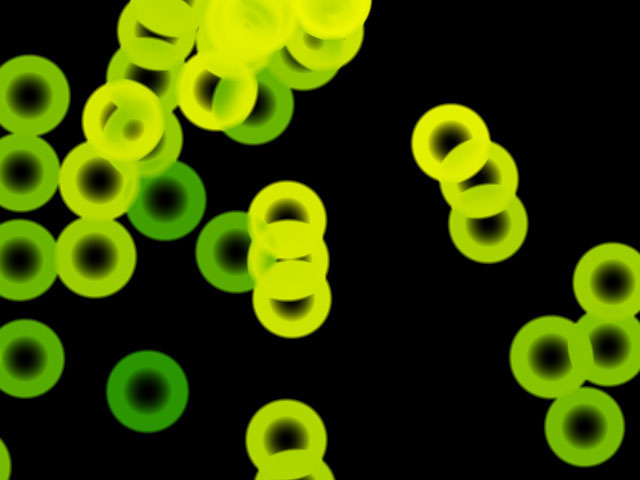 |
| Wide Sparkles | Bubbles |
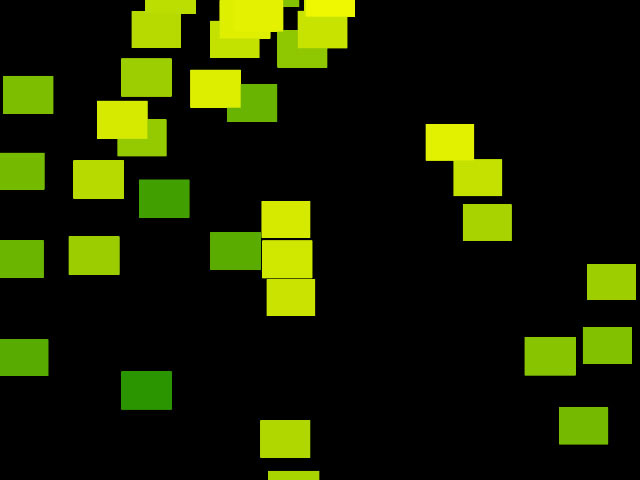 | 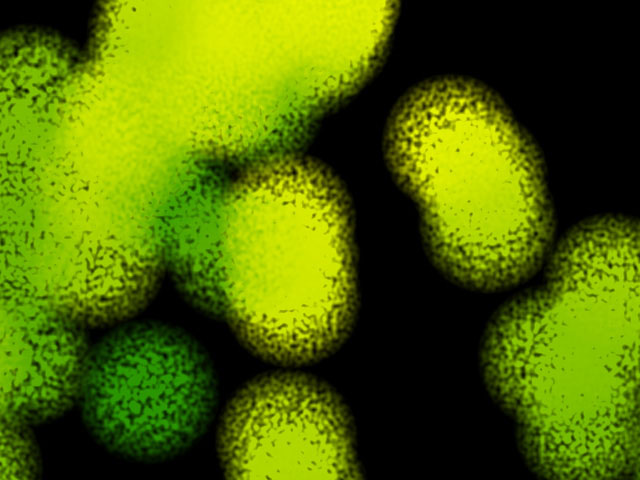 |
| Reference Boxes | Round Noise |
Shape Character adjusts the appearance of the particles. The affect of this setting depends on which Particle Shape is chosen.
- With Reference Boxes, Wide Sparkles, and Pointers, increasing positive Shape Character values stretch the particles horizontally, while decreasing negative values stretch the particles vertically.
- With Pixel Streaks, Pixel Trails, and Antialiased lines, increasing positive Shape Character values lengthen the particles, while decreasing negative values shorten them.
- With Blurs, increasing positive Shape Character values soften the edges of the particles, while decreasing negative values create harder edges.
- With Bubbles, increasing positive Shape Character values enlarge the size of the transparent area in the center of the particles, while decreasing negative values shrink this area.
- With Shaded Spheres, increasing positive Shape Character values increase the opacity of the shaded edges of the particles, while decreasing negative values decrease the opacity.
- With Long Sparkles, increasing positive Shape Character values lengthen the four points of the sparkles, while decreasing negative values shorten the points.
- With Round Noise, increasing positive Shape Character values increase the resolution of the noise, while decreasing negative values decrease the resolution.
The Composite with Layer menu allows you to composite the particle system over a layer in the timeline, or to retain an alpha background by selecting the None option.
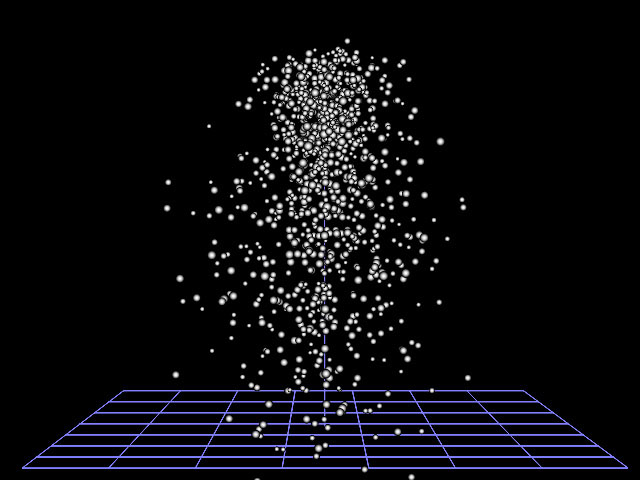
The Show Reference menu determines which onscreen position controls are visible. Choose Floor: Draft Only, Floor and Attractors: Draft Only, Attractors: Draft Only, Floor: Render, Floor and Attractors: Render, Attractors: Render or None. When you use the Draft Only options, the curves are not visible in the rendered effect. However, you must preview in Draft mode in Avid for these options to display. When you use the Render options, the curves will appear in the rendered effect.
- Warning: Set the Show Reference menu to None before rendering or the onscreen position controls will render with the effect.
- Note: The Floor and Attractors are described in “Interaction Parameter Group” and “Attractors Parameter Group” later in this document.
Birth Rate controls the number of particles produced over a constant time.
 |  |
| Birth Rate 50 | Birth Rate 250 |
The Life Span parameter determines how long each particle lasts before it decays. You can use longer life spans to create trailing effects, as in the examples below.
 |
| Life Span 15 |
 |  |
| Life Span 30 | Life Span 60 |
Production Parameter Group
The Production Boundary menu allows you to set a boundary for the particle production area using the alpha channel from a layer in your timeline. Particles only generate within the region that corresponds to the opaque portion of the Production Boundary layer’s alpha channel. If the chosen layer has no alpha, this setting has no affect.
Center X and Y sets the coordinates of the particle source point.
Center Z controls the apparent depth of the particle system. Higher values move the system closer to the viewer, while lower values move the system farther away.
Width and Height stretch the particle source along the horizontal and vertical axis, respectively. Increasing one of these parameters stretches the source in one dimension and creates a particle source that is a straight line. Increasing both stretches the source in two dimensions and creates a particle source that is a plane. When the particle source is a plane, the particles appear to generate randomly within the space, rather than flowing from a specific point or line.
 | 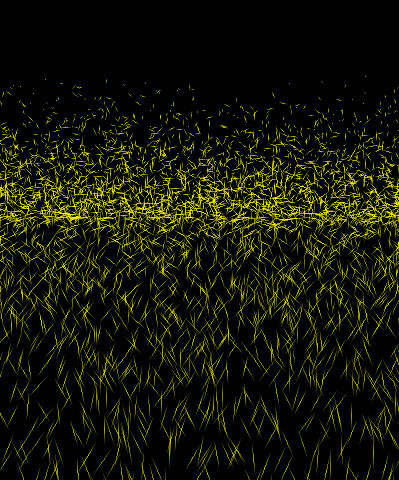 |  |
| Width=0, Height=0 | Width=50, Height=0 | Width=0, Height=50 |
Depth controls the movement of the particles in Z-space. Decreasing Depth from the default value of 0 makes the particles appear to approach the viewer as they flow from the source. As a result, particles appear to grow in size as they approach the viewer. Increasing Depth makes the particles appear to move away from the viewer as they flow from the source. In this case, particles appear to shrink as they move away from the source.
Position Randomness varies the positions of the particles. Higher values create a wider range of possible particle positions, while lower values create a narrower range of possible positions. Set Position Randomness to 0 creates a grid of particles.
Initial Velocity controls the velocity of the particles as they leave the source. A high Initial Velocity gives particles more momentum as they leave the source, meaning that they travel farther in the initial direction before they decay or are affected by factors such as gravity or attractors. At the default values, the particles leave a point and move upward until gravity pulls them down. Increasing Velocity allows the particles to achieve more height before falling. Decreasing Velocity gives the particles less momentum, so they fall more quickly.
Tumble, Spin and Rotate move the particle flow around the X-, Y- and Z-axis, respectively. These parameters only affect the direction of particles as they leave the source, but do not affect the particle system as a whole. Try adjusting these parameters while the Floor is displayed, then compare these parameters with Camera Tumble, Camera Spin, and Camera Rotate (see page 39) which move the entire system as they are adjusted.
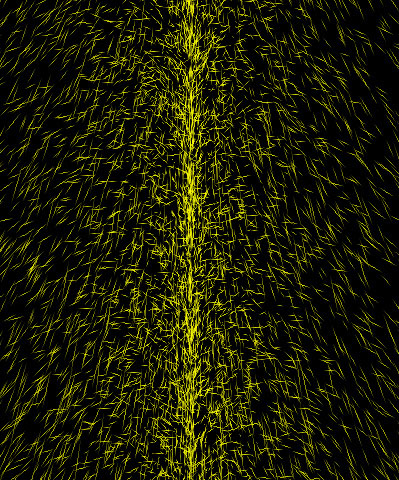
Spread Amount affects the overall tightness of the particle pattern as the particles leave the source. Decreasing this value brings the particles closer to the source as they descend, while increasing it spreads the particles and causes them to flow farther from the source.
 |  |
| Spread Amount=35 | Spread Amount=150 |
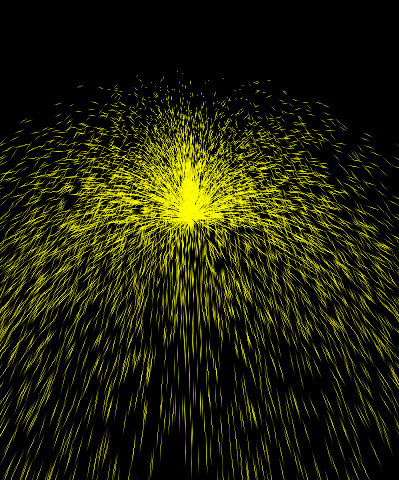
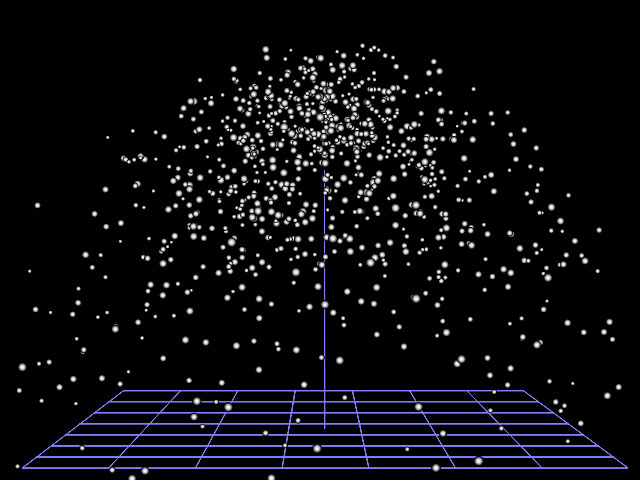
The Spread Mode menu controls for the overall shape of the particle system.
- The default selection, 3D, generates particles which flow out through a cone-shaped region in all directions.
- Fountain is similar to 3D, but adds more particles flowing straight upward in the manner of water droplets flowing from a fountain.
- Flat Fan sprays particles in a two-dimensional fan shape on two opposite sides of the source.
- Sine Cannon shoots particles out of a generator swinging in a circle around the source point.
- Circular sprays particles out from the edges of a circle.
- Spiral creates particles that spiral around a central source, much like hurricane winds spiraling around the eye of the storm.
Spread Character can be used to finetune the shape of the particle system created by the selected Spread Mode. The effect of this parameter depends on the selected Spread Mode.
- In the 3D and Fountain Spread Modes, Spread Character alters the shape of the cone through which the particles flow.
- In Flat Fan mode, Spread Character decreases the randomness of the particles and making them spray out from the source point in a more ordered manner.
- In Circular mode, Spread Character causes more particles to spread toward the center of the circle rather than only spraying out from the edges.
- In Sine Cannon mode, Spread Character affects the speed of the swinging generator.
- In Spiral mode, Spread Character makes the spiral pattern tighter or wider.
Movement Parameter Group
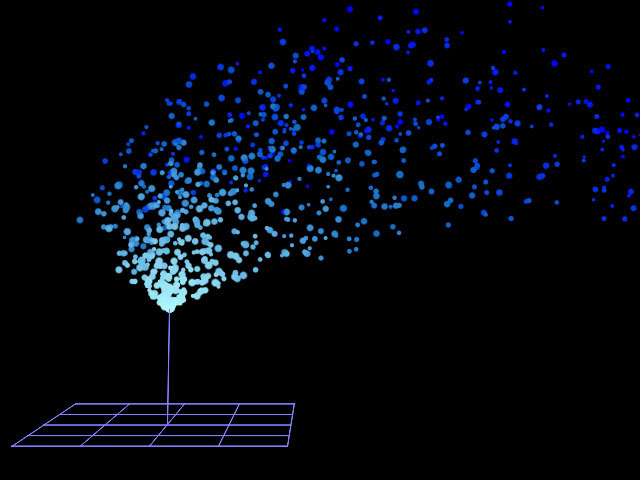
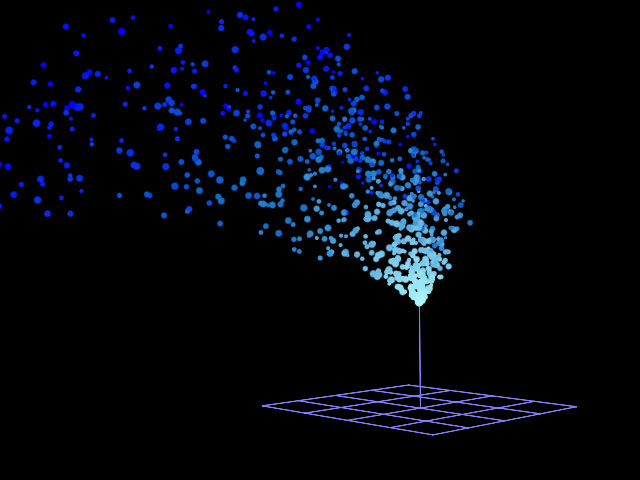
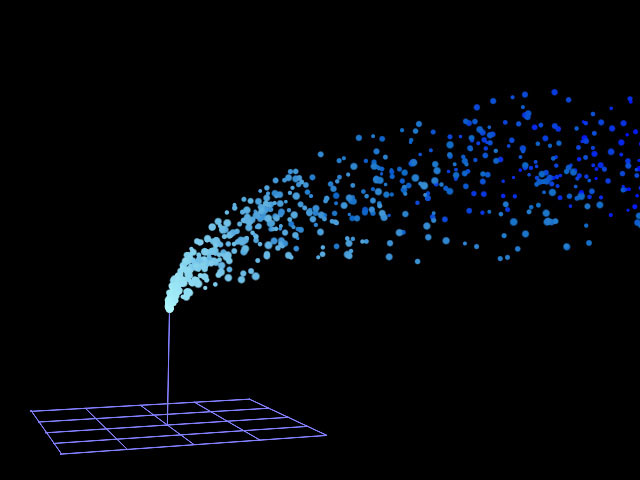
Gravity applies a secondary force to the particles’ movement as they flow outward from the source. Gravity can either counteract or strengthen the particles’ initial velocity. By default the Gravity Angle is set to 180° (straight down) in order to simulate the effect of gravity in nature, but the strength and direction of the Gravity can be adjusted to produce other effects (such as wind) as well.
Increasing the Air Resistance value adds resistance to the particles, and causes them to decelerate as they disperse.
Velocity Variance varies the speeds of individual particles. Increasing this value creates a wider range of possible particle velocities. Leaving this parameter at the default setting of 0 ensures that all particles will travel at exactly the same speed.
Amplitude controls the shape of the particle’s paths as they leave the source point. At the default value of 0, the particles follow a straight line. Positive values cause the particles to follow a sinosoidal (sine wave) path. Negative values cause the particles to follow a negative sinosoidal path, meaning that the wave dips before it peaks. The amplitude, or height, of the wave increases as the Amplitude value moves away from zero. More extreme Amplitude values produce increasingly erratic particle paths which make the system appear more chaotic.
Amplitude Variance adjusts the range of possible Amplitude settings among individual particles in the system. A high Amplitude Variance value produces a wider range of wave heights among the individual particle paths, creating greater a disparity between the highest and lowest waves. An Amplitude Variance of 0 ensures that all particle paths have the same Amplitude setting.
Frequency adjusts the frequency of the sine wave, and therefore the number of waves that the particles create over the course of their life span. A Frequency value of 0 produces no wave motion, so particles travel in a straight line until affected by gravity or other factors. More extreme Frequency values produce very wavy particle paths which make the system appear more chaotic.
Frequency Variance adjusts the range of possible Frequency settings among individual particles in the system. A high Frequency Variance produces a larger range of wave frequencies among the particle paths, creating a greater disparity between the fastest and slowest waves. A Frequency Variance of 0 ensures that all particle paths have the same Frequency setting.
Appearance Parameter Group
The Compositing menu determines how the particles are composited on each other when they overlap. These choices all correspond to apply mode settings. For descriptions of all the possible Apply Modes, Click Here.
The following controls determine the color and opacity of the generated particles, divided into three groups. The Start settings affect the particles as they are produced at the source, the End settings affect the particles as they reach their final destination or decay point, and the Midpoint settings allow you to affect particles differently between the Start and End points. If all the options are used, the effect creates a gradient between Start, Midpoint, and End settings.
Each of the three groups contains the following parameters.
The Color Use menus offer several means by which the particles’ color is derived.
- Source Point causes each particle to use the color of the source layer at the point where the particle originates. If the effect’s source coordinates correspond to a red region in the source layer, the particle is red.
- Source Update causes each particle to use the color of each point on the source image that the particle passes through. If the particle passes from a blue region in the source to a red region, the particle’s color will change from blue to red.
- Source within System is similar to Source Point, except that Source within System picks colors from the source based on the particles’ positions relative to the particle system instead of relative to the source layer.
- Random Source causes the particles use the color of a randomly chosen point in the source image.
- Random Source 2 uses another randomly chosen color from the source image as the particle color.
- Custom Color sets the particle color to the color you have chosen with the Custom Color control.
- Source as Gradient: Left to Right creates a gradient from the Color Source Layer menu image that blends from left to right.
- Source as Gradient: Top to Bottom creates a gradient from the Color Source Layer menu image that blends from top to bottom.
Custom Color selects colors for the Start, Midpoint, and End ranges of the effect. You must set the Color menu (described above) to Custom Color to use this parameter.
The Color Source Layer menus chooses any layer in your timeline to use as a source for particle colors. At the default setting, None, the source image is used.
Start Opacity sets the opacity level of the particles. A value of 100 makes all particles in the range completely opaque, and a value of 0 makes all particles completely transparent (invisible). You can set different Opacity values in the Start and End ranges to create effects in which particles stream outward from the source and disappear.
Start Size adjusts the size of the particles. Note that the Size parameter has no affect on Particle Shapes that are line shapes (Pixel Streaks, Pixel Trails, and Antialiased Lines), but does affect the size of all two-dimensional Particle Shapes (Blurs, Bubbles, Shaded Spheres, 2D Boxes, and Sparkles).
In addition to the Opacity and Size parameters, a Use Midpoint checkbox lets you use Midpoint color and brightness settings that are different from Start and End settings.
For example, suppose you have a stream of particles whose colors change from red at the source, to yellow, to blue at the end. You have also set Opacity to 75% at the start, and 25% opaque at the end. With the Use Midpoint checkbox on, you have to adjust the Midpoint Opacity to 50% to create a smooth Opacity gradient. With this checkbox turned off, the effect interpolates between the Start and End Opacity settings to create a smooth gradient.
Midpoint Location moves the Midpoint along the gradient between the Start and End values. A value of 0 places the Midpoint close to the generation point, and particles reach the Midpoint Color, Size, and Opacity values soon after birth. A value of 100 places the Midpoint nearer the End point, and particles reach the Midpoint Color, Size, and Opacity values toward the end of their life span.
Midpoint Variance increases the range of Midpoint Location values among the particles. With a Midpoint Variance setting of 0, all particles reach the Midpoint settings at the same location. As you increase the Midpoint Variance value, the Midpoint Location varies more from particle to particle. Therefore, at higher values, some particles reach the Midpoint settings early on, while others reach the Midpoint settings near the end of their life span.
When the Sparkle Fade checkbox is selected, the particles’ opacities vary as the effect progresses, creating a sparkling particle effect. Leave this option deselected to maintain the opacity of the particles throughout the effect. If Sparkle Fade is selected, Sparkle Fade Speed determines the rate at which the particles’ opacities change. When Sparkle Fade is deselected, Sparkle Fade Speed has no affect.
If the Sparkle Fade checkbox is selected, Sparkle Fade Speed determines the rate at which the particles’ opacities change. When the Sparkle Fade checkbox is deselected, Sparkle Fade Speed has no affect.
System Opacity affects the opacity levels of the entire particle system, after individual Start, Midpoint and End opacity values are taken into account. This slider provides a means of adjusting and animating the opacity of the effect as a whole without changing individual parameters for each range.
System Size Variance sets the range of particle sizes for the entire particle system, after individual Start, Midpoint, and End size values are taken into account. A value of 0 ensures that all particles conform to the chosen Size values for their ranges. Increasing Size Variance creates more disparity between the smallest and largest particles in each range.
System Brightness Variance sets the range of possible brightness values among the particles. Increasing this value creates a system in which some particles are bright and others are dim, and increases the disparity between the brightest and dimmest particles. Leaving this parameter at the default of 0 ensures that all particles have the same brightness value.
Custom Shape Parameter Group
These parameters allow you to use another layer to create a custom particle shape. To use a custom shape, place the clip that you want to use on a track below the filtered layer. Then choose this layer from the Custom Shape menu.
The Shape Mode menu controls the orientation of the particles as they fall and the color of the particles. The choices fall into two groups, the Source modes and the Color modes. The Source modes use the colors in the Custom Shape layer for the particles colors. The Color modes use the settings specified by the Appearance parameters to color the particles. Each group has three options, Upright, Weighted, and Tilting.
- Upright applies the orientation of the Custom Shape layer to the particles.
- Weighted makes the custom shape “bottom-heavy” so that it falls bottom-first as it follows its path. This has an effect somewhere between Upright and Tilting.
- Tilting randomly rotates the shape slowly as it falls.
The Shape Animation menu determines how the layer information is used to create the custom particle shape when the Custom Shape layer changes or animates over time.
- Current Time uses the particle shape at the custom shape layer’s current time regardless of the particle’s birth time or life span. Therefore, the particles’ animation is synchronized with the animation of the custom shape layer.
- Starting at Particle Birth causes each particle to begin its life using the first frame of the custom shape layer and then animate. The particles all animate in the same way, but the movement is staggered since some particles start later than others. This option takes more rendering time than the others.
- First 15 Random Frames creates particle shapes that are chosen randomly from the first 15 frames of the Custom Shape layer and remain constant throughout the particle’s lifespan.
Camera Parameter Group
The Camera View checkbox turns on and off the virtual camera. It can be helpful to turn the camera off when adjusting the positioning controls.
Camera Zoom moves the entire particle system toward or away from the viewer. At a value of 0, the system is infinitely far away and becomes invisible. Increasing this value moves the system closer to the viewer. Unlike the Depth parameter (in the Movement section), Camera Zoom moves the whole system in Z space and does not affect the depth of particles as they flow from the source.
Field of View adjusts the angular width of the camera’s lens. Higher values exaggerate the perspective, distorting the effect. Lower values reduce the perspective, creating a flatter effect.
Camera Tumble, Camera Spin, and Camera Rotate move the camera around the particle system (including the Floor) on the X, Y, and Z axis respectively. Adjusting these parameters creates the appearance of the entire system rotating in 3D space.
Increasing Angle Subtlety causes camera adjustments to have a less pronounced effect, allowing you to finetune camera movements.
The Pivot Point menu sets the point around which the camera tumbles, spins, or rotates.
- World Center uses the center of the entire system as the camera’s pivot point.
- Camera uses the camera’s own center as the camera’s pivot point.
The Floor Follows menu sets how the floor moves in relation to the camera and the particles’ point of origin.
- Pivot Point positions the floor relative to the camera, enabling you to see the effect of pivoting the camera in space.
- Horizontally with Producer keeps the floor attached to the point of origin, but allows you to change the distance between the two by moving the point of origin up or down.
- Producer Point keeps the floor attached to the particles’ point of origin.
The Point Positioning checkbox determines whether the point controls (including the source point and any attractor points) are affected by the movement of the camera. Selecting this option allows you to alter the perspective view of the particle system while retaining the locations of all position points. Deselecting this option causes the entire system, including the attractor and source position points, to move with the camera.
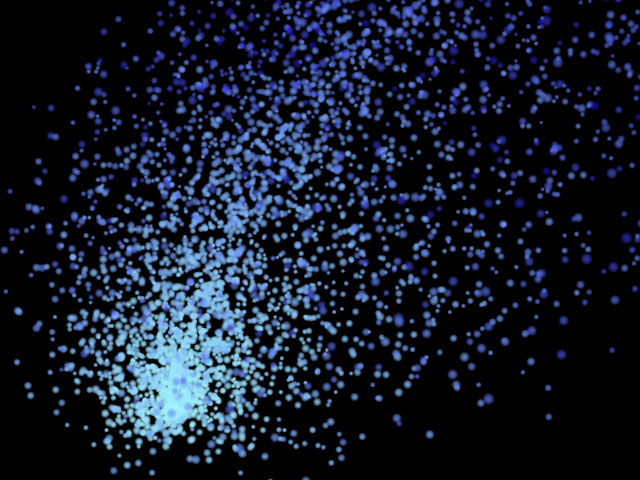
This example shows a particle system with no camera movement applied. Particles are drawn toward an attractor point in the upper right-hand corner.
 |
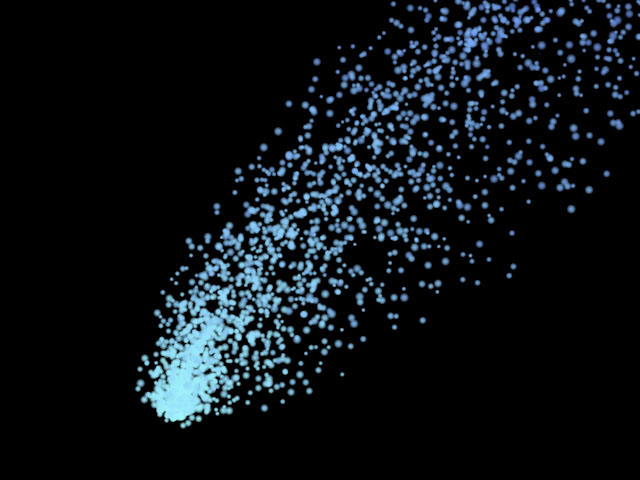
In this example, the camera is spun with Point Positioning Ignore Camera deselected; therefore, the generation and attractor points spin along with the camera. Notice that the apparent position of the attractor point has changed and particles are drawn toward the upper left-hand corner.
 |
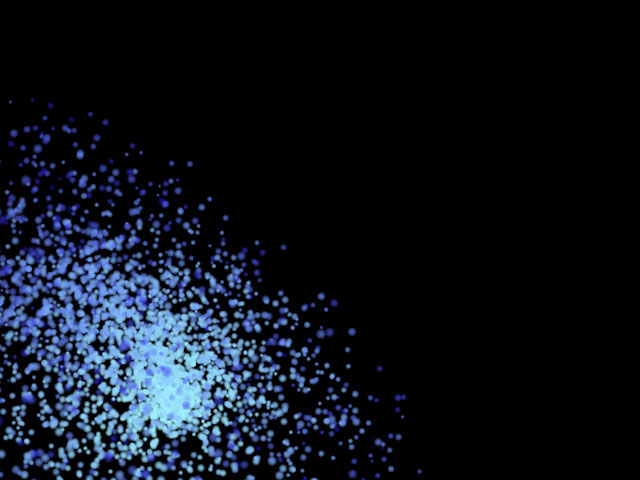
Here, the camera is spun with Point Positioning Ignore Camera selected. In this case, the attractor acts on the particle system after the camera has moved. Thus, the apparent position of the attractor remains constant while the camera view spins.
 |
Translate X, Translate Y, and Translate Z set the location of the virtual camera on the X, Y, and Z axis, respectively. Use these controls to make minor adjustments to the apparent position of the particle system. Translate X, Y, and Z can also move the viewer through the effect in 3D space.
The Translation checkbox determines whether the Translate X, Y, and Z adjustments are applied to the camera before or after Camera Tumble, Spin, and Rotate. When Translation is selected, Translate X, Y, and Z position the camera along the X, Y, and Z axis of the effect. When deselected, the Translate controls position the camera on its own X, Y, and Z axis. For example, suppose Camera Rotate is 90. If Translation is selected, increasing Translate X moves the camera toward the right of the screen. If this option is deselected, increasing Translate X moves the camera toward the top of the screen.
Attractors Parameter Group
These parameters allow you to add up to two points of attraction or repulsion to the particle system and to control the strength of these points.
Each attractor has a Power control which sets the strength of the attractor on the particles. Positive values pull particles toward the attractor, while negative values push particles away, making the point a repulsor. The strength of the attraction or repulsion increases as Power value moves away from 0.
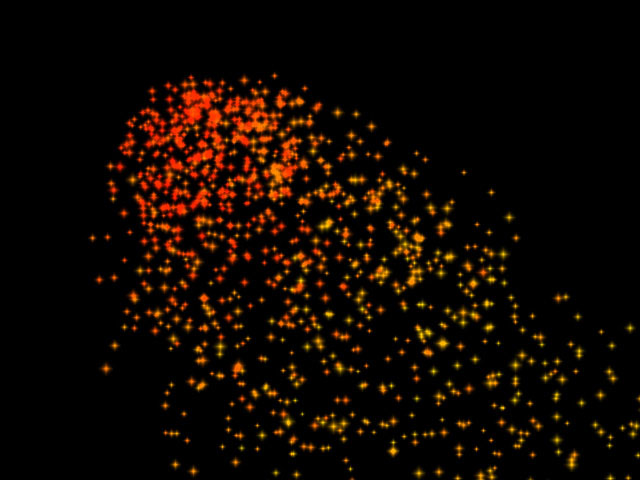
This example shows a particle effect in which the source point is placed near the bottom left corner, and an attractor point is place in the top right corner.
Gravity is 0 and Power is 25.
 |
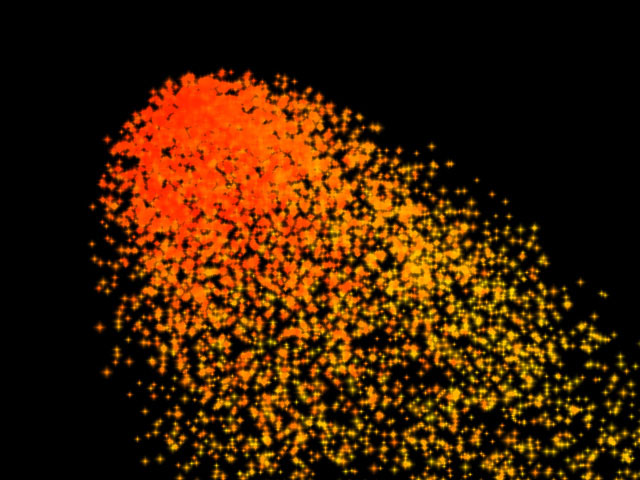
Here Power is increased to 100, so the attractor point exerts a stronger pull on the particles.
 |
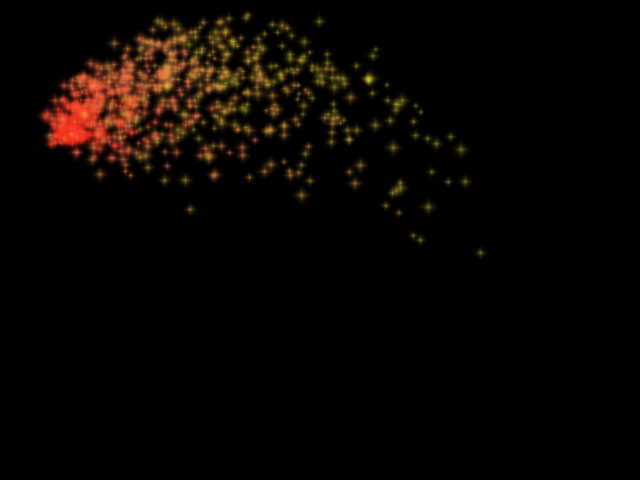
In this example, Power value is set to –15, making the attractor point a weak repulsor which pushes particles away.
 |
The attractor affects particles in a circular- or ring-shaped region centered around the attractor point. Radius sets the radius of the outer edge of the region. Falloff Radius sets the radius of the inner edge. By setting Falloff Radius to a value lower than the Radius value you can create a ring shaped affected region around the attractor point.
Gradient controls the relative strength of the attractor throughout the affected region (whose size is determined by the Radius and Falloff Radius). When Gradient is 0, all points in the affected region are affected equally by the attractor. Increasing positive values concentrate the strength of attractor toward the center of the region. Decreasing negative values concentrate the strength of the attractor towards the outer edges of the region.
Attractor X, Attractor Y and Attractor Z set the location of the attractor point on the X, Y, and Z axis, respectively.
Selecting the Attractor 2D Mode checkbox ignores the depth and Z positioning of the attractors. When this option is selected, the attractors affect particles in only two dimensions.
Interaction Parameter Group
The Floor Properties menu determines how the particles interact with the floor as they hit it. Choose Ignore if you are using the floor purely as a visual reference, and do not want its presence to affect the particles’ behavior at all. The remaining settings create effects in which the particles interact with the floor.
- Stick causes particles to stick to the floor and accumulate.
- Slide causes particles to slide outward across the floor as they hit.
- Bounce causes particles to bounce off the floor as they hit.
Floor Height adjusts the distance between the floor and the particles’ generation point.
If the Floor Properties menu is set to Bounce, you can adjust the height of the bouncing particles with the Bounce Friction control. Reducing Bounce Friction allows particles to bounce higher. Increasing Bounce Friction slows the particles, so they bounce lower.
- Note: Bounce Friction also affects particles bouncing off the Interaction Layer (see below).
The Render menu chooses which particles in the system are displayed and rendered. You may opt to render the Complete System (all particles), Above Floor (only particles above the floor), or Below Floor (only particles that fall below the floor).
The Interaction Layer menu allows you to choose a layer in the timeline or the particles to interact with.
The Layer Mode menu controls how the particles interact with the chosen Interaction layer.
- Stick causes the particles to stick to areas corresponding to portions of the Interaction Layer with high values in the chosen Layer Use Channel.
- Fall causes the particles to briefly stick to areas corresponding to portions of the Interaction Layer with high values in the chosen Layer Use Channel, then slide off.
- Slide causes the particles to slide off of areas corresponding to portions of the Interaction Layer with high values in the chosen Layer Use Channel.
- Bounce causes the particles bounce off of areas corresponding to portions of the Interaction Layer with high values in the chosen Layer Use Channel. When this option is selected, Bounce Friction adjusts the height of the bouncing particles.
The Layer Use Channel menu sets the channel in the Interaction Layer used to interact with the particles according to the Layer Mode setting.
The Layer Edges menu sets how the edges of the Interaction Layer interact with the particles.
- None treats the edges of the interaction layer like transparent areas.
- Solid treats the edges of the interaction layer like opaque areas.
Floor Size adjusts the size of the floor.
Floor Grid Resolution sets the number of grid squares in the floor. A value of 5 creates a grid with 5×5 squares, or 25 squares. A value of 10 creates a grid with 10×10 squares, or 100 squares, and so on.
Floor Color sets the color of the floor.
Animation Parameter Group
The Start on Frame parameter has two functions, depending on whether the Manual Animation checkbox is selected or deselected.
- With the Manual Animation checkbox deselected, Start on Frame starts the beginning of the auto-animated effect a number of frames past the start of the clip to which it is applied. Setting Start on Frame to 20 starts the animation twenty frames past the beginning of the clip.
- With Manual Animation selected, Start on Frame allows you to manually animate the effect. In this case, a value of 0 represents zero frames into the effect, 15 represents 15 frames into the effect, and so on. Selecting the Manual Animation option locks the effect to the selected Start on Frame value. You can then animate the Start on Frame value to pause, slow down, or speed the effect, or to animate forward and backward in time.
The Keyframe Animation menu sets how keyframes are affected by changes to the timing of the effect.
- Follow Start Frame causes keyframes to apply to the effect based on their actual location in the timeline. When Current Time is chosen, the Start on Frame and Use Manual Animation settings do not affect the action of the keyframes.
- When Absolute Time is chosen, keyframes apply to the effect based on the timing of the effect (as determined by the Start on Frame and Use Manual Animation settings).
If the Use Particle History checkbox is selected, changes made to parameters such as Air Resistance or Gravity affect all particles throughout their life spans, regardless of when the particles are created or disappear. If this option is deselected, the particles are affected only by the current settings at their time of birth. Thus if Use Particle History is deselected, changing the Gravity value only affects particles created after the value is changed.
Time Limit sets the duration of the particle production period. A value of 10 causes particle production to occur for ten frames and then stop, and so on. This can be useful to create explosions, such as fireworks, in which particles are produced for only a short time and then disperse for the remainder of the effect.
Time Scale allows you to adjust the timing of the effect by stretching or speeding time. Decreasing Time Scale below the default value of 100 stretches time. Thus, the effect appears to take place in slow motion, with particles taking more time to reach their destination or die. Time scale values greater than 100 speed time, moving the particles more quickly.
Selecting the Reverse Time checkbox reverses the animation of the effect, whether it animates automatically or manually. With Reverse Time selected, particles move toward the generation point and disappear rather than emitting from the source point and dispersing.
Increasing Delay from the default value of 0 causes particles within a certain distance of the production area to remain invisible. Delay can be used to create effects with no visible production center, since particles do appear until they have dispersed to some extent.
Increasing Precision increases the accuracy of particle movement, which is helpful when creating effects with strong attractor points. Higher values increase rendering times.
Random Seed determines which value is input to the random number generator used by the effect. Adjust this setting if you like the general appearance of the effect but want to change the random arrangement of the particles.
- Warning: You can animate Random Seed instead of animating particle movement to produce a randomly shifting particle effect. However, animating Random Seed while the particles are moving may create jumps in the effect, and is not recommended.
The Partial Render checkbox allows you to define a region in Z space in which particles are rendered. Farthest Z determines the location of the far end of the region, while Closest Z determines the location of the near end of the region.
The Optimize Algorithm checkbox helps speed rendering times without affecting the apparent quality of the image. Deselect this option if there are jumps in the render.
The Animate Production Boundary checkbox improves quality if the Production Boundary is animated.
The Animate Interaction Layer checkbox improves quality if the Interaction Layer animates.
- Warning: Animate Production Boundary and Animate Interaction Layer checkbox are memory-intensive features. For this reason, you may want to use lower Lifespan values when either option is selected.
Motion Tracker
The BCC Motion Tracker allows you to track the motion of an object, then use the motion path to drive other geometric properties of the effect without the need for keyframing.
For more information on the Motion Tracker, Click Here.