


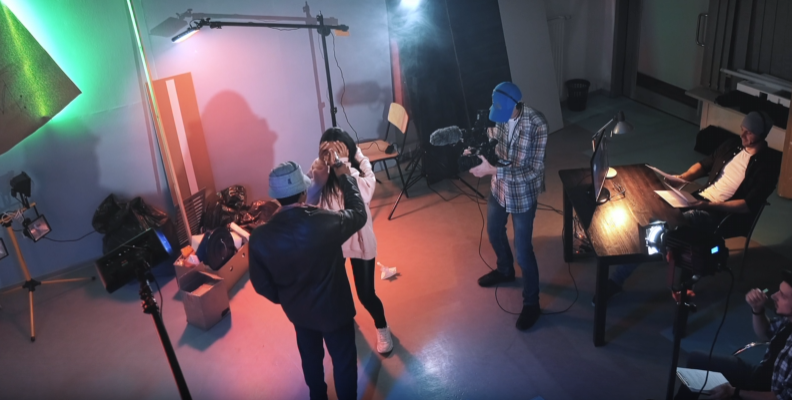
Creating a high-quality video involves more than just pressing the "Record" and "Stop" buttons. In fact, that's only one part of the process, and most would argue that the real magic happens in the phases that follow afterward.
The term "enhance video quality" can have multiple meanings.
Sometimes, cutting out unnecessary parts of a video clip means enhancing its quality. Other times, it refers to a technical improvement, such as sharpening or upscaling.
In this guide, we'll help you learn how to enhance video quality, what that means in different scenarios, and much more. So, without further ado, let's get started.
What Causes Bad Video Quality - How to Enhance Video Quality
First, it's important to note that not everyone is a skilled videographer and familiar with the terminology used in the world of filmography and video editing.
This means when you're being told by someone to enhance video quality, their idea of this "enhancement" could be a myriad of things.
In this part of the guide, you'll find various sections covering different types of video quality improvements for various scenarios, and we recommend you become familiar with each one.
It All Starts During Recording - the Production Phase
The more carefully you plan the production process, the less you'll have to do in post.
When it comes to improving video quality, you can do a lot by focusing on using the right equipment, planning the shots, recording in the right video resolution (preferably the highest one you can use for high-quality raw footage), paying attention to external factors, such as consistency of light sources (like the sun), being mindful of audio quality so that you don't have to eliminate some shots due to unwanted sounds, and so on.
There's a lot to think about and carefully plan out in the production phase, but the more time you spend doing that, the less time you'll need to spend on corrections and alternative solutions later on.
Using the Right Video Format
Social media platforms are extremely popular and definitely a major part of every creator's life.
Since they use various formats, you need to keep this in mind when recording, as your average YouTube video format will not be suitable for Instagram's Reels section, and vice versa.
Get familiar with video formats and aspect ratios, then carefully plan the shots while keeping in mind where you'll be posting the content.
Upscaling the Video's Resolution
Video enhancer programs and plug-ins are becoming more and more available in almost all video editing tools. Online video enhancer tools exist, and you can even find a free video enhancer like Clideo, for example, that will help you improve video quality if its resolution is the issue.
Sometimes, your video is properly recorded, it has all the right graphics elements added to it, and the shots are carefully planned out, but the only issue is that it has a lower resolution.
Although this was a serious problem once, nowadays we can use artificial intelligence (AI) to "fix" this to some degree.
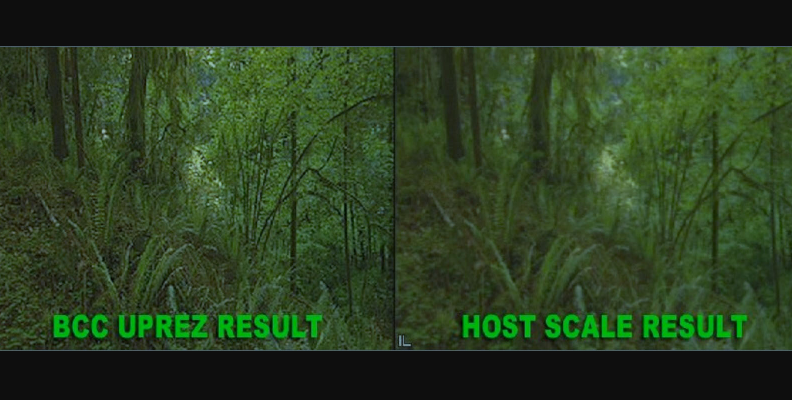
Upscaling resolution can work, but you need to use quality plug-ins and software known for enhancing video quality without creating any visual artifacts. One of our recommendations is BCC UpRez a tool available in Boris FX's renowned Continuum pack.
If you were on the lookout for reliable video quality enhancers, look no further. BCC UpRez is easy to use and contains everything you need to improve the quality of your video clips.
We have a guide on how to Upscale Video in Premiere Pro using BCC UpRez if you opt for this product and want to learn how to use it properly to convert low-quality video clips into high-quality footage.
Enriching the Video with Graphics & Titles
Sometimes, the term "low-quality video" can be used to describe a product in which the creator didn't put much effort, but not regarding the resolution or overall picture quality. In fact, most video content nowadays is optimized for viewer convenience, and so your video file may be called a low quality video due to the fact that it's missing quality graphics and titles.

Sometimes, you need to grab and hold your viewer's attention by constantly showing them useful information on the screen, as well as pointing out important details without asking for a lot of effort on their end.
For example, large, colorful, and properly formatted titles on the screen help the viewer keep track of what the person within the video is talking about. Pauses with zooms and outlines help them see small details that they otherwise have to do manually.
All of this is added convenience and will "enhance video quality" in your viewers' eyes, although the right term is added production value.
Luckily, most video editing software nowadays, like Adobe Premiere Pro, for example, allows you to do all of these things for free.
Properly Adjusting Video Length
When it comes to improving video quality, one of the easiest things you can do is focus on proper video length. This means cutting out unnecessary parts of the video that would take some of the viewer's time without explaining or showing anything useful and conclusive.

An important thing to note about this is that it's often difficult to just "ditch" most of the video material you recorded, as you value your effort and know how much time and organization it took to record it. However, you should always be thinking about the final product, and remember that your audience is most important, as they will be the ones watching and providing feedback.
If you've noticed some of the social media video content trends lately, you'll recognize that almost all creators are trying to "squeeze in" the message in as little time as possible. This is often due to the unbelievable amount of content pushed on a daily basis by people around the world, meaning you have to compete for your viewer's time and attention with many other creators at the exact same time, so grabbing their attention as quickly as possible is crucial.
In conclusion, make sure every second of your video provides something useful to your viewers, with no empty content.
Adding Special Effects and Transitions
Special effects and transitions are like the icing on the cake when it comes to video editing and crafting visually appealing videos. Even though some creators think of these as extras, we believe they're a fundamental and absolutely necessary part of every creative video clip.
Transitions and effects add the "eye candy" part to your videos, and they can often contribute a lot to keeping your viewer's attention. Without them, the content can often feel a bit dry and dull, and we definitely don't want that.
Take a look at our helpful guide on how to add video transitions in Premiere Pro.
If you've gotten comments that you need to enhance your video's quality and you haven't used any special effects and transitions to make the viewer's experience more enjoyable, this is definitely something to consider.
Speaking of which, Sapphire by Boris FX is a great starting point that will help you produce high-quality videos by using quality visual effect presets.

Fixing Noise/Grain Caused by Bad Lightning
One of the most common reasons you would hear someone say that a video has "bad quality" is if they can see visible noise or grain. If the video is noisy/grainy, which could be caused by not enough lightning or recording with the wrong settings, you need to put in some extra work in the post-production process to get it back on track.
Thankfully, this is possible with modern technology.
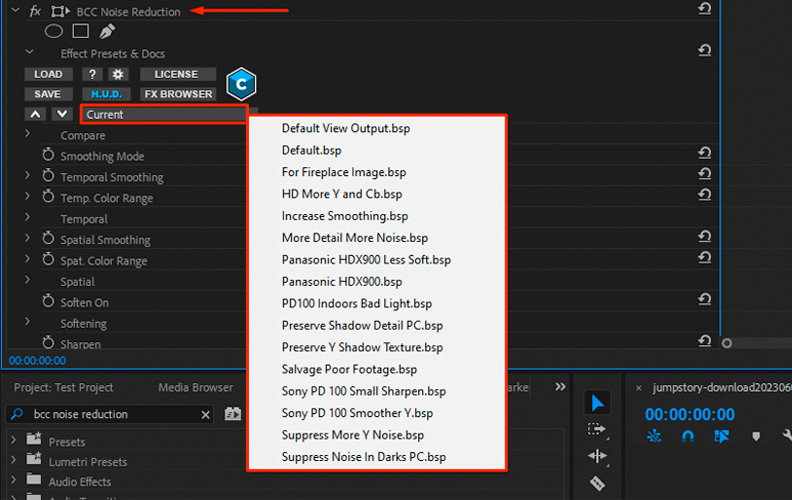
You can remove grain from your videos using the BCC Noise Reduction tool available in Boris FX's Continuum pack.
For more information on this, take a look at our helpful guide explaining grain, what causes it, and how to remove it from your videos.
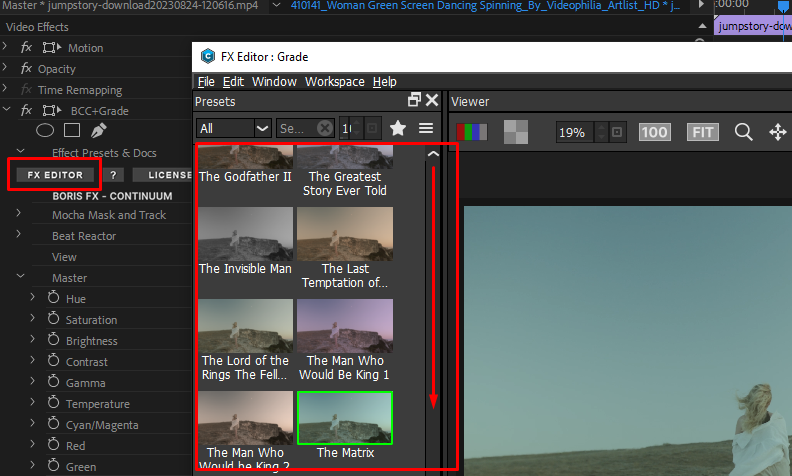
Color Grading and Color Correction Matter
Have you ever watched a film or a video and just thought to yourself how good it looks and how enjoyable it is to watch it because of that?
Well, believe it or not, all of the magic happens in post-production during the color correction and color grading processes.
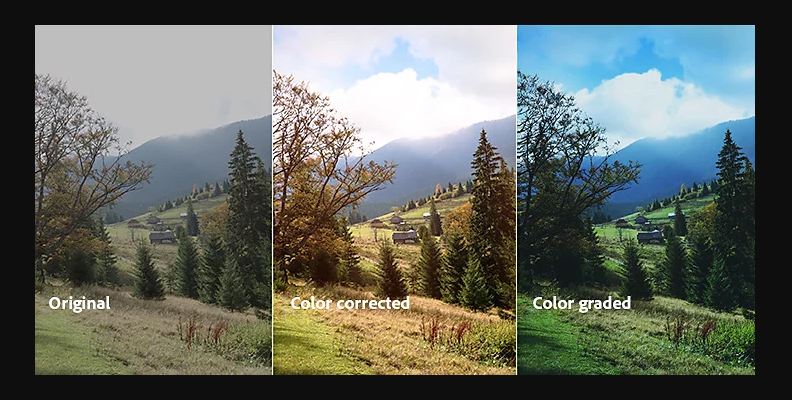
Aesthetics play a very important role in whether or not viewers will comment on your video that it is high quality.
Take a look at our detailed Color Grading guide for more information on this topic.
Do Not Disregard Sound and Audio Effects
Half of your video quality is determined by the sound, believe it or not. Audio can make such subtle yet powerful impacts on your viewer's overall experience, and that alone can be a good enough reason for someone to say that your video's overall quality is high.
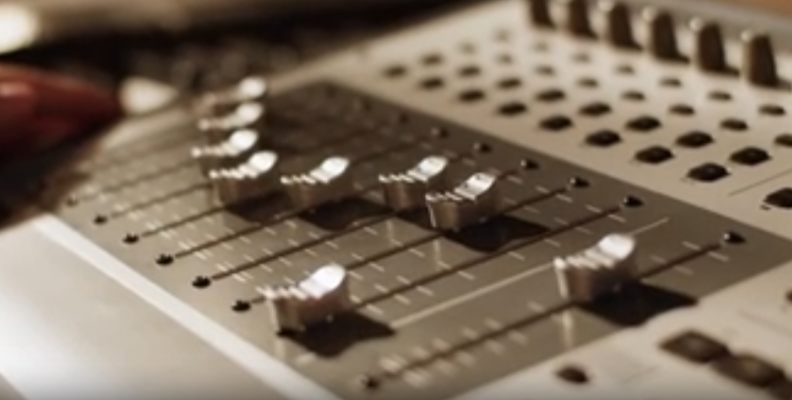
Some of the most important things are to ensure that you have clean audio without any unwanted peaks or noises that may cause discomfort and no distracting sounds in the background that might make it difficult for your viewer to understand what you're saying in the video.
Then, if you're adding any visual effects, make sure to create corresponding sound effects (SFX). A "whoosh" video transition is much more satisfying to see when accompanied by the right sound effect. The same goes if you're trying to create a funny or suspenseful moment. There are audio effects for every purpose, and if you want to improve video quality, you should not disregard them.
Background noise, too much echo, or uneven levels are also common problems that affect a viewer's attention. Feel free to take a look at CrumplePop. Clear and crisp sound is just a few clicks away, even without previous audio experience.

Final Words
That covers everything you need to know about enhancing the video quality of your projects that you'll either shoot, produce or edit in the near future.
Hopefully, this was enough information to help you out and bring your work to the next level.
Thank you for reading, and good luck!


