


Video editing requires immense attention to detail, up to the point where your method of transitioning from one shot to another can speak volumes about your skill to a trained eye.
If too "roughly" carried out, video transitions can disrupt the viewer's focus. Make them too unnoticeable, and you won't have something to keep the viewer's attention in place. Just like everything in the art of videography, video transitions should be carried out carefully and with a plan.
As a crucial element dictating the video's flow and impacting the entire viewing experience, video transitions are one of the first things editors must learn to create and use.
Thankfully, this guide contains everything you should know to master and significantly improve your next Adobe Premiere Pro project with video transitions. You'll do this by confidently implementing them where they're needed in all the right ways and winning your audience with creativity.
Without further ado, here's what you need to know.
What is a Video Transition, and Why Do You Need One?
Before we move forward, it's important to explain what video transitions are.
When you put two shots together on your timeline within Adobe Premiere Pro or any other editing software, and let the playhead move across them, the moment your screen "switches" from showing the first shot to showing the second one is a moment of transition.
However, this is a default "transition" that happens naturally since the first shot ended and the second one began.
A video transition with effort and attention to detail could contain a myriad of effects, like the "Transform" effect, motion blur, screen shake, and even an audio effect to make all of it more eye-catching for the viewer. It could also contain a timelapse effect or a simple camera pan, depending on the context, purpose, and desired outcome that the editor has planned for the audience.
In simple terms, a video transition describes a creative technique of connecting two shots, carried out with a specific storytelling purpose, for better overall "flow" or sometimes just a visual "wow factor" to win the viewer's attention.
Sometimes, video transitions can give the viewer a specific feeling or carry over a message that enhances the storytelling and is required in order for them to understand some part of it better.
For example, connecting two shots with a timelapse effect and a "dreamy" or sped-up sound is more than enough to let the viewer know that time is passing without having to write it anywhere. The same applies to jump cuts, which quite often symbolize the passage of time. No need to make the viewer watch a long shot to realize you want to show time passing by when using these.
These are only some out of the many when it comes to video transitions. Some of the most used methods for creating transition effects are:
- Jump Cuts & Timelapses (as mentioned above)
- Fade In / Fade Out
- Fade To Black / White
- Whip
- Cross Dissolve Transition
- Pan
- Zoom In / Out
- Glitch
- Film Roll
- Object Block + Pan Combo
- Lens Cover Transition
- Dissolve
There are endless creative ways to transition from one shot to another, and modern editing programs like Adobe Premiere Pro make it possible.
Audio Transitions To Complement Video Transitions
Video transitions look cool and have many benefits, but they aren't complete without audio transitions.
Sometimes, the video clip you're creating the transition for will benefit a lot more from a sound effect to accompany the visuals. Whether that's a simple "whoosh" sfx or a submerging sound effect for when the camera goes underwater, audio transitions and video transitions go hand in hand very often.
Audio transitions are also regularly used in music videos. Sometimes, they are synced to the beat, which makes the rapid change of shots a lot more satisfying. This is also called "sync cutting" or editing to the beat.
How to Add Video Transitions in Premiere Pro to Your Video Clips
Now that you know more about video transitions, what they are, when you should use them, and what some of the most popular types are, it's time to learn how to add them to your video clips in Adobe Premiere.
In this section, you'll learn how to create default video transitions, a default audio transition, and some other extra transition effects that you may find handy.
To begin, you first need to decide what type of transition is suitable for your specific video. As mentioned earlier, not every transition fits any type of content.
Note: If these default transitions aren't enough, or you've already mastered them and are looking for something more advanced, skip this section and go to the next one, where we cover adding more complex video transition effects using renowned plug-ins by Boris FX.
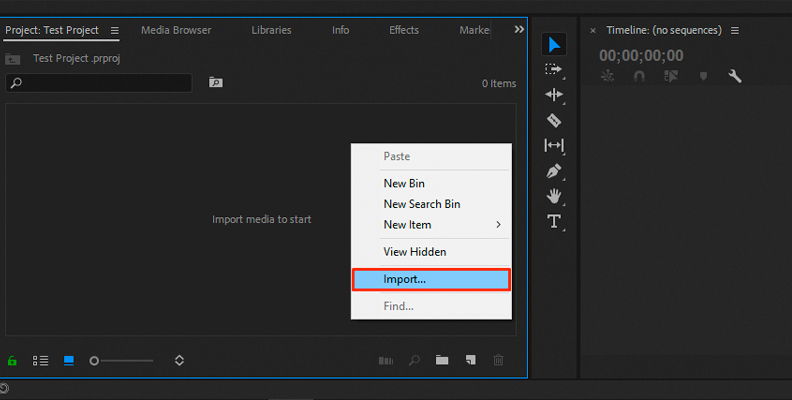
Step 1: Open Adobe Premiere Pro and Import Video Clips
The first step is to load up your video editing software, in this specific case Adobe Premiere Pro, and import at least two video clips.
To do so, create a new project, then open the "Project" panel and right-click anywhere on an empty area to open the context menu. Choose "Import" from the menu, then select your video clip(s).
![how to add video transitions in premiere pro]()
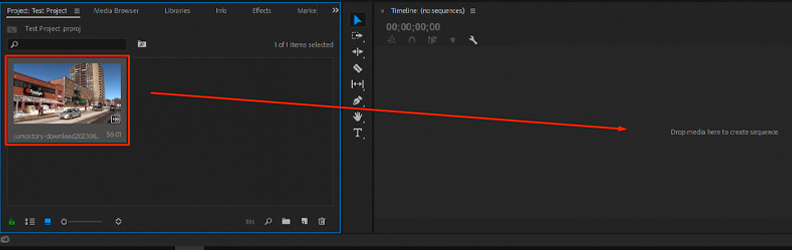
Step 2: Add The Video Clip(s) to Your Timeline
Once the videos are imported, you need to add them to the timeline. To do so, simply click on a video within the Project panel, then hold and drag it over your timeline to create a sequence.
![]()
Once you have two or multiple clips on your timeline, you can add transitions.
Step 3: Setting Default Transition and Adding Transition Effects to Your Videos
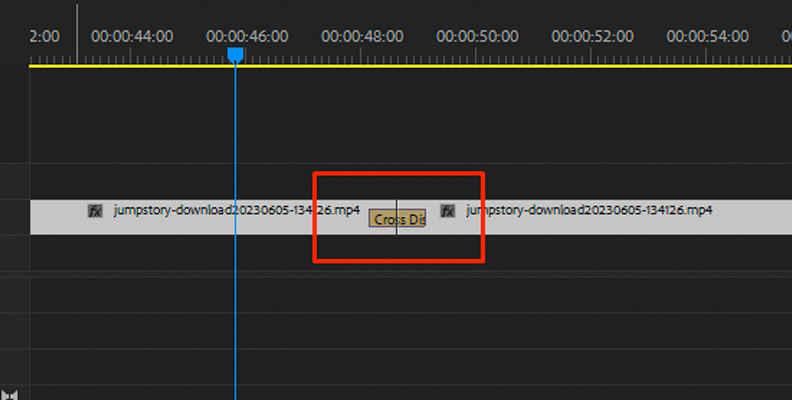
Now, Premiere Pro has something called a default transition effect, which is an option to "mark" a specific video effect as a default transition effect. Then, you can apply these default video transitions by simply using a keyboard shortcut.
If you select both clips on your timeline by holding down the Shift key on your keyboard and left-clicking each video, you can then use the Control + D shortcut to apply the video effect set as your default video transition.
![]()
In this specific case, the default transition is the Cross Dissolve Effect, but you can change this easily.
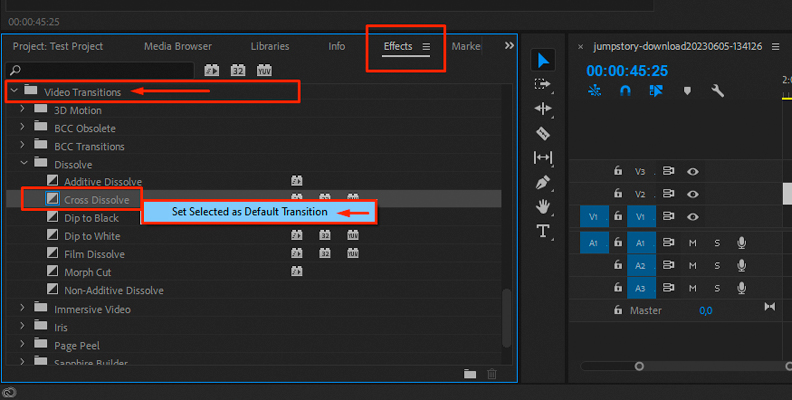
Click on the Effects Panel to open it, then expand the Video Transitions folder. Open a subcategory folder, for example, the "Dissolve" one that contains all transitions of that nature, then right-click on any effect and choose "Set Selected As Default Transition" as shown in the image below.
![]()
In our case, the Cross Dissolve is already set as a default transition, but if you want to change it, you can revisit the Effects Panel and repeat the same steps, ultimately setting a different effect as a default video transition.
Step 4: Adding an Audio Transition Effect
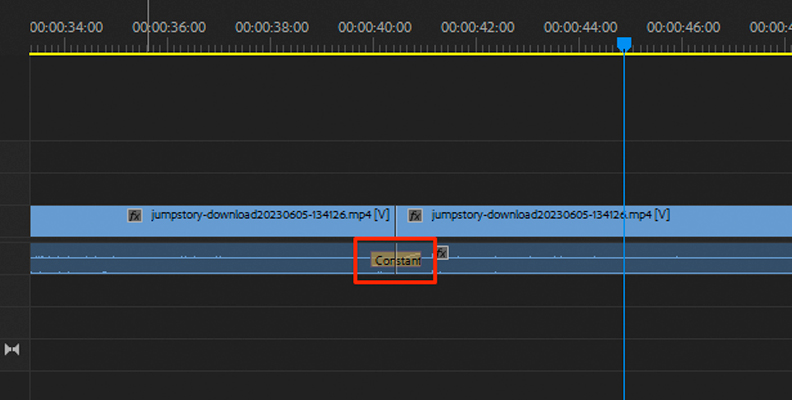
If your video clips have audio, you can use the Control + Shift + D shortcut to apply a default audio transition.
![]()
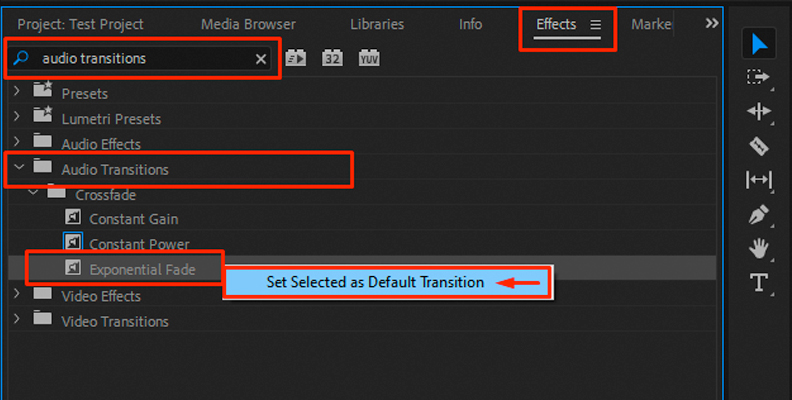
Once again, the whole process is identical, and you can change the default audio transition by following the same steps like you did in the previous section.
![]()
Step 5: Adding a Custom Sound Effect for an Audio Transition
Sometimes the default audio transitions in Premiere Pro are not suitable for our video type.
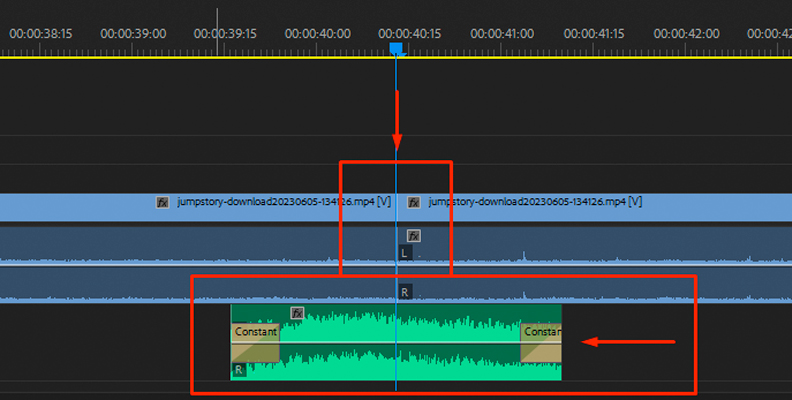
If you want to add a "whoosh" effect for example, and combine it with the "whip" or quick "zoom-in" video transition, all you have to do is import the sound into your project, and then add it to your timeline on an audio track at the very moment the transition happens, which is almost always in-between both clips.
![]()
How to Add Video Transitions in Premiere Pro with Boris FX
Now that you know how to add a default transition in Adobe Premiere, it's time to look into something more advanced that will take the creativity of your videos to the next level.
For this purpose, we recommend Sapphire by Boris FX, a plug-in available for Premiere Pro and many other popular video editing programs. There's a free trial available on the website. Once you download and install it, follow these steps to add mind-blowing and fully customizable transitions with just a few clicks.
Step 1: Find the Effects in the Effects Panel
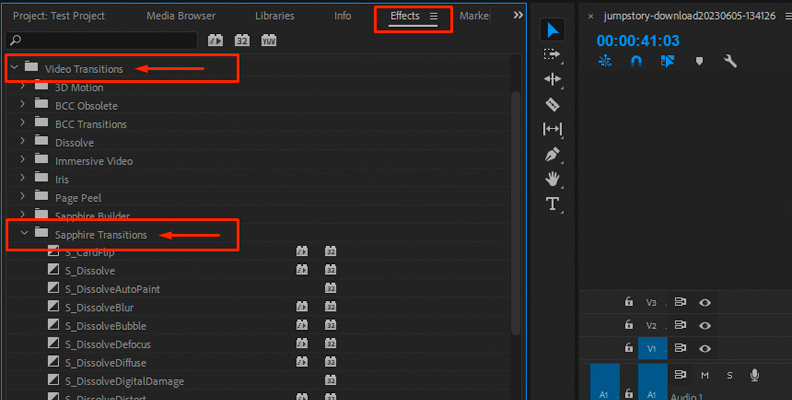
Upon downloading and installing the Sapphire pack, open the Effects panel within your project view and expand the "Video Transitions" folder. Then, expand the "Sapphire Transitions" folder.
![]()
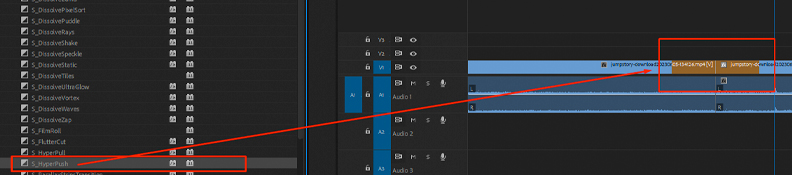
Step 2: Add the Transition Effect to Your Clips
From here, choose any transition out of the dozens available that you wish to try, and drag and drop it over two video clips on your timeline. You'll notice that the transition effect automatically "snaps" proportionally over the videos right where the transition is supposed to happen.
![]()
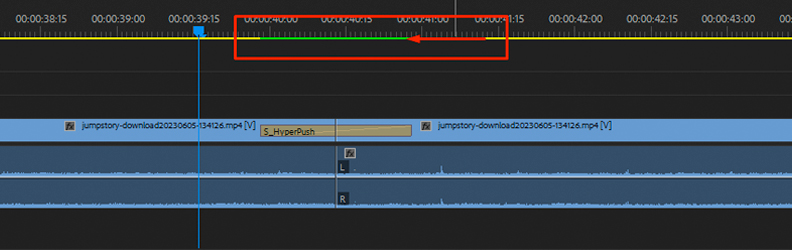
Now the transition is applied, but it requires rendering in order for you to play it smoothly. Simply select your timeline and press the "Enter" button to initiate a render. When done, the red bar above the transition will turn green. Now you can playback the transition smoothly.
![]()
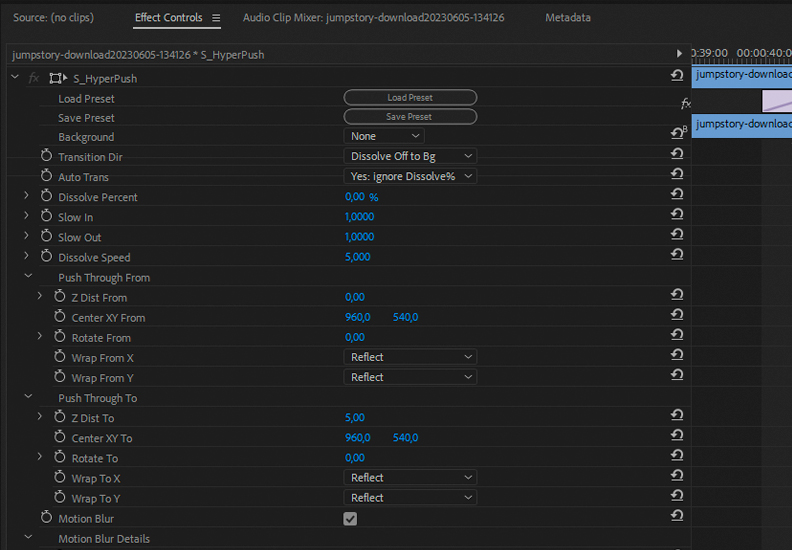
Step 3: Adjust Settings in the Effect Controls Panel
If you're an advanced editor feeling "techy", you can click on the transition and open the Effects Control Panel where dozens of settings can be adjusted to make sure the transition effect for your specific video is perfect.
![]()
You can do this for every transition that's part of the Sapphire package, so rest easy knowing that you can customize everything to the smallest detail and get the perfect result.
Step 4: Save, Export, and Enjoy Your Videos
When done adding and editing your transitions, simply save the project, render, and preview for any last changes, then export and enjoy your videos.
That's all there's to it when it comes to adding top-tier video transition effects with Boris FX's Sapphire package.
Final Words
That's all you need to know about video transition effects in Premiere Pro.
Hopefully, this knowledge will make your next project stand out, as transitions are a very important part of videography, and are very commonly seen in today's content.


