


The Lens Flare is one of the most commonly used visual effects in digital photography editing. It's also quite common to find the use of a lens flare filter in videos, especially cinematic edits and music videos.
If you're willing to step up your photo-editing game and add a new tool to your kit, this tutorial should provide all the information you need.
Without further ado, let's get straight into what you need to know about the lens flare effect and how you can use it to enhance your work.
What is the Lens Flare Effect
One of the main reasons the lens flare effect is so frequently used is that it's natural, just like the motion blur effect.
We encounter lens flare on a daily basis when looking at something bright, like the sun or a bright light source, so when it's used in an image or a video, it just makes the result more realistic and natural.
Of course, most of the time, when a digital artist or photo editor adds a lens flare to their image, they might slightly "boost" it for a more dramatic effect, but the final result will look good to the eye nonetheless.
So, to define it, the lens flare effect occurs when a ray of bright light hits a lens system, like the human eye or a camera lens, and then scatters, creating an "unwanted" artifact in the image. However, this "unwanted" artifact is actually what we want when we're trying to add lens flare to an image in Photoshop or any other software.
Often, artists rely on the lens flare filter to overemphasize how bright a specific light source in their image or video is. Looking at a bright light source will not always cause you to see the light scatter and create artifacts, but it does look impressive in a movie or a photograph, so we tend to use it regardless.
A lens flare layer in your photo can also contribute to a happier, warmer, and more positive atmosphere, which is needed for specific settings/scenarios.
With that said, there are a few different types of lens flare that we define based on how the artifact caused by the light scattering manifests. We categorize them so that it's easier to describe what exactly we want to add to our photo/video when we opt for a lens flare filter.
The next section covers this in detail.
What Are The Different Types Of Lens Flare
As mentioned earlier, there are a few different types of lens flare. You may find some artists refer differently to each one, but these are the generally well-known names for the four different types: "Ghosting", "Starburst", "Veiling", and "Anamorphic Lens Flare".
Here's a brief explanation for each one, so you can get a better idea of what you may need for your next project.
Ghosting
This is one of the most common occurrences of a lens flare, and it manifests in the form of artifact-like rings or circles, spreading out from the main light source. Unlike the starburst type, you can get this naturally in your photos without the need to adjust anything.
Starburst
This type of lens flare occurs when the photographer takes the shot with an intentionally lowered aperture, meaning less light gets to reach the sensor. So, instead of large and "soft" circles, like in the "Ghosting" lens flare type, you get smaller but crispier, starburst-like artifacts from the light sources, and that's where the name comes from.
Veiling
This type of lens flare occurs when the main light source causing the flare is outside of the shot. We cannot directly see it, but its rays still manage to hit the front of the lens, therefore creating a veil of light that covers the entire scene. This type of lens flare is also the easiest one to misuse, as too much of the "veil" can make the photo look washed out, or "faded" as most would like to call it.
Anamorphic Lens Flare
This type of lens flare is used the most in cinematography, but it's also the most difficult one to create naturally (without using software to add it artificially) because it requires a specific anamorphic lens. If you've watched Star Trek or anything directed by JJ Abrams, you're likely familiar with this type of lens flare.
Step-by-Step How to Get the Lens Flare Effect in Photoshop
You can add lens flare in Adobe Photoshop for free without having to rely on any plug-ins or third-party files. To do that, follow the steps below.
Create a New Photoshop Project and Import Media
Once you launch Photoshop on your computer, you need to create a new project or access an already-existing one. However, we recommend creating a new project as you will be learning while following these steps, and it's best not to make any unwanted changes to an already-started project.
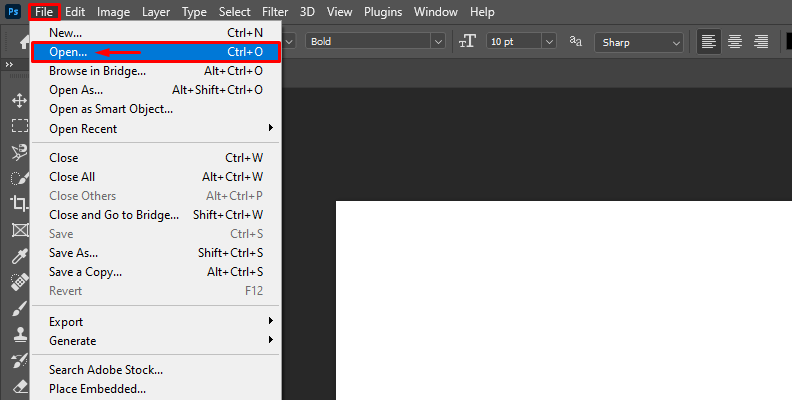
So, now that Photoshop is launched, you can click on "File" and then "Open..." which will, in turn, launch the Windows File Explorer. From there, simply choose an image and import it into the software.
![lens flare in photoshop]()
Duplicate Your Original Image to Create a Lens Flare Layer
It should be common practice to always create a duplicate layer and not work on the original, background image layer within Photoshop after importing any media. This way you can always revert the changes, or enable/disable layers to preview the changes you've made.
The more organized your project, the better the results.
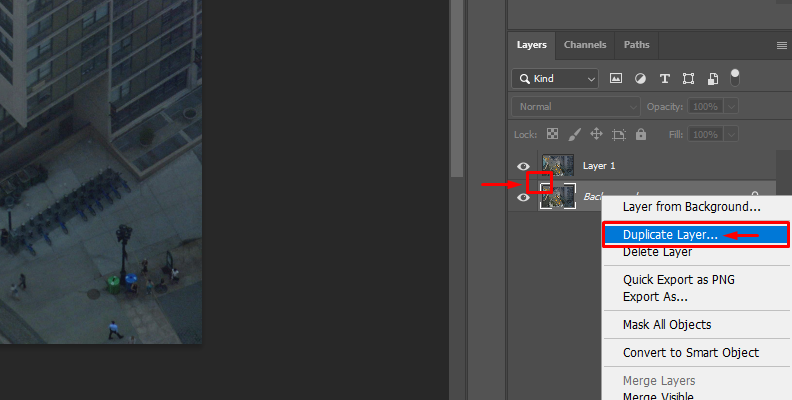
To duplicate your background layer, right-click the original layer named "Background" in the right-side layers panel menu, then choose Duplicate Layer. You can also select it with your mouse cursor and use the "Ctrl + J" keyboard shortcut for the same function.
![]()
Add the Photoshop Lens Flare Filter to Your Image
You can rename the new layer you just created into "lens flare layer" or "lens flare filter layer" as that's what we'll be using it for. Once again, the easier you can navigate through your layers, the better.
![]()
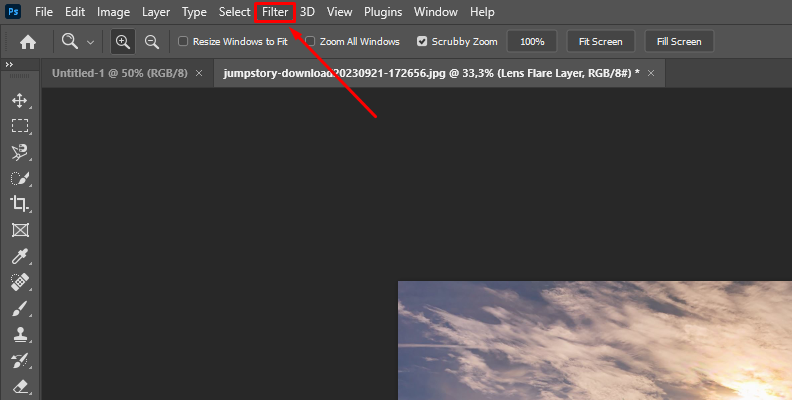
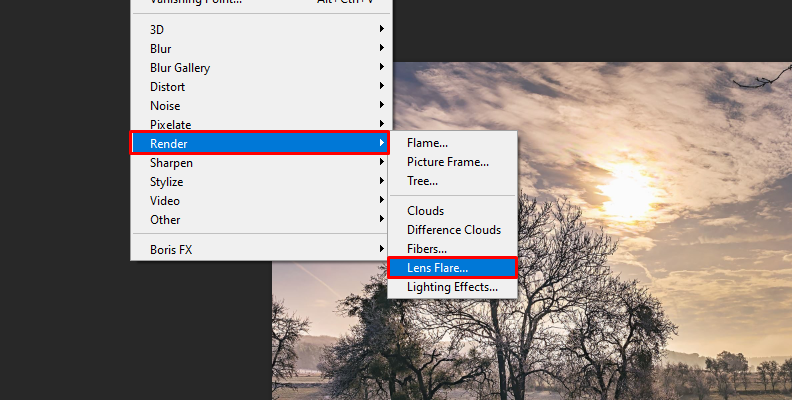
Now, it's time to add the Photoshop lens flare filter. Select the appropriate layer, then click on "Filter" from Photoshop's top bar menu. This will expand a menu from which you need to choose "Render" and then "Lens Flare" as shown in the images below.
![]()
The last step is to position the lens flare using the small window that will show up in Photoshop as soon as you choose to apply the effect. You can move the lens flare over your light source by simply clicking with your mouse. Click-and-drag also works if you wish to continuously preview various changes.
![]()
Once you're happy with the positioning, feel free to experiment with the other parameters in the filter menu too. You can change the lens flare type, and also adjust the overall brightness using the brightness slider.


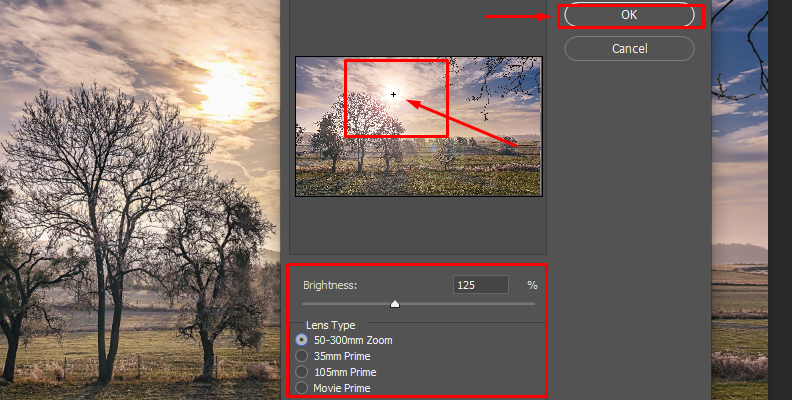
When done, simply press the OK button to apply the lens flare.
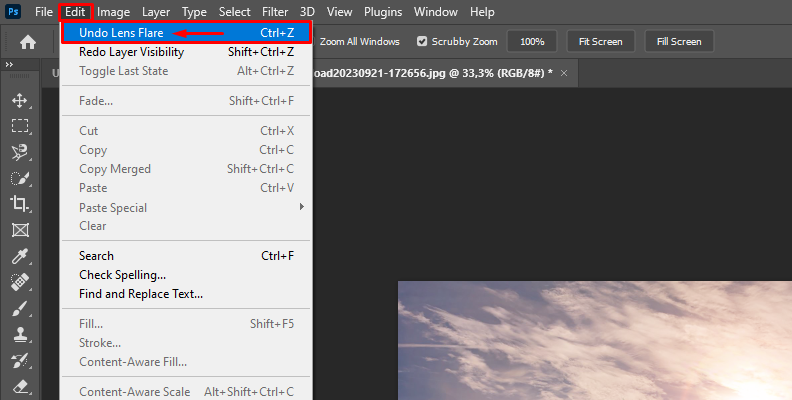
If you forgot something, or you simply wish to see how the same lens flare will look with different settings, click on "Edit" and then choose the undo lens flare option, as shown in the image below.
You can use this method to add multiple lens flares to as many images as you'd like. It's as simple as that.
Taking the "Blank New Layer Approach"
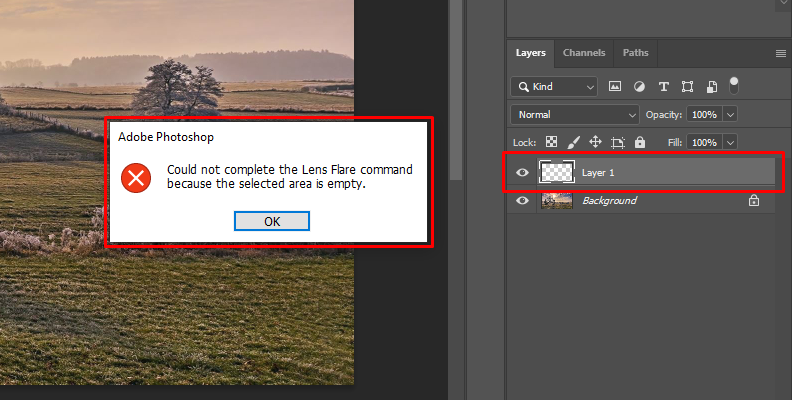
Note: If you create a new layer and it's a blank layer, Photoshop won't allow you to add lens flare effects over it. You will get the "Could not complete the Lens Flare command because the selected area is empty" in the form of an error.![]()
Some people use this approach as they do not want their lens flare layer to be a duplicate layer of the original background layer, but instead give the effect its own layer with nothing else in it. This is viable too, however, you'll need to adjust the blending mode first.
![]()
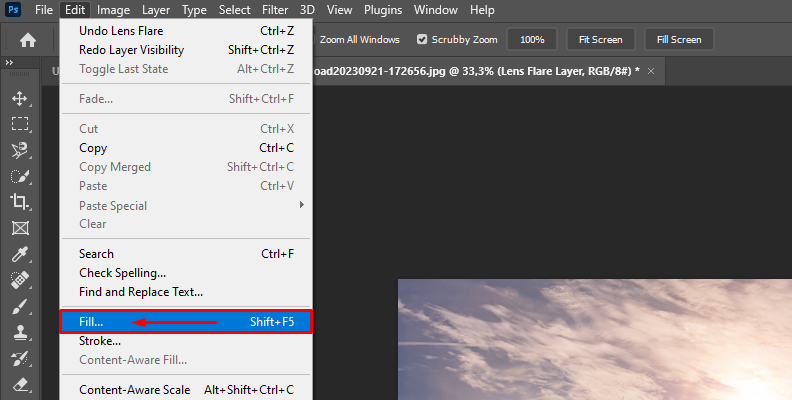
To "fix" this, all you need to do is select the new blank layer you just created and then click "Edit" and "Fill" from the top bar menu.
![]()
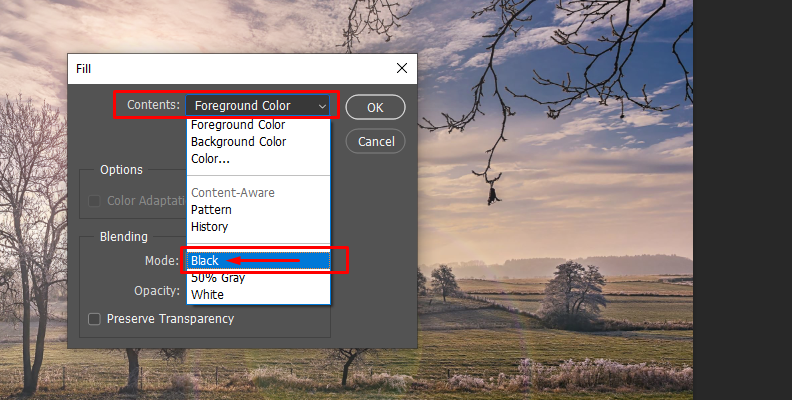
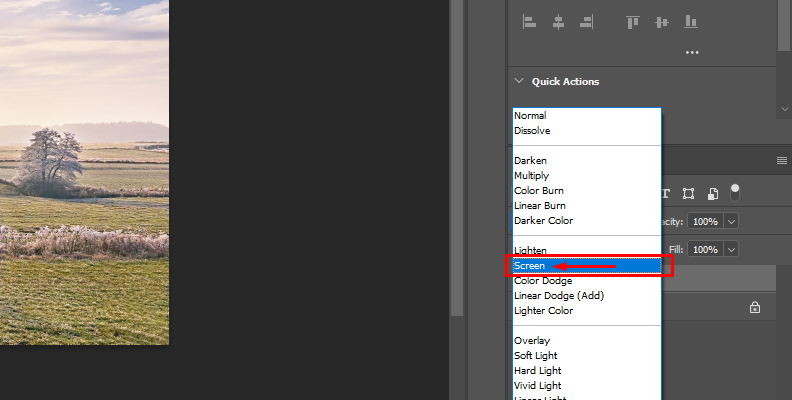
In the "Fill" dialog box, expand the options under "Contents" and choose to fill it with the "Black" option. Now you will have a black layer, so add the Photoshop lens flare effect to it, and then simply change the layer blend mode to "Screen" as shown in the image below.
![]()
How to Get the Lens Flare Effect in Photoshop with Optics
Though plug-ins and third-party software are not always needed, they sure do make our jobs much easier and more high quality. If you wish to add a lens flare that looks professional and be able to adjust every bit of detail in just a few clicks, Optics is the right tool to do it with.
So, assuming you already have Optics for Photoshop installed, here's how to use it to add lens flares to your images.
Open Photoshop and Import Media
When Photoshop loads on your PC, create a new project and import the images you wish to add effects to. We recommend creating a new project until you learn how to do this flawlessly.
![]()
Duplicate Your Original Layer
In the menu bar on the right side of Photoshop, also known as the "Layer Panel", click on the original background layer and press "Ctrl + J" on your keyboard. This will duplicate the layer.
![]()
Load Up Optics in Photoshop
![]()
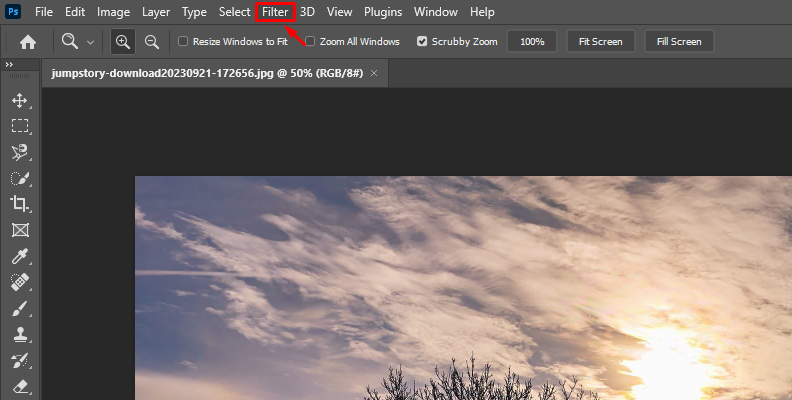
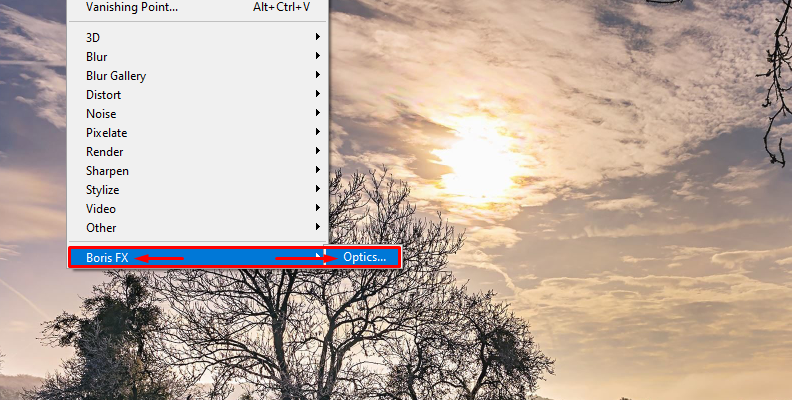
Select the duplicated layer you just created, then click on "Filter" in the top bar menu, as shown in the image below. When the Filter menu expands, choose Boris FX and then Optics.
![]()
Apply Lens Flare Through Optics
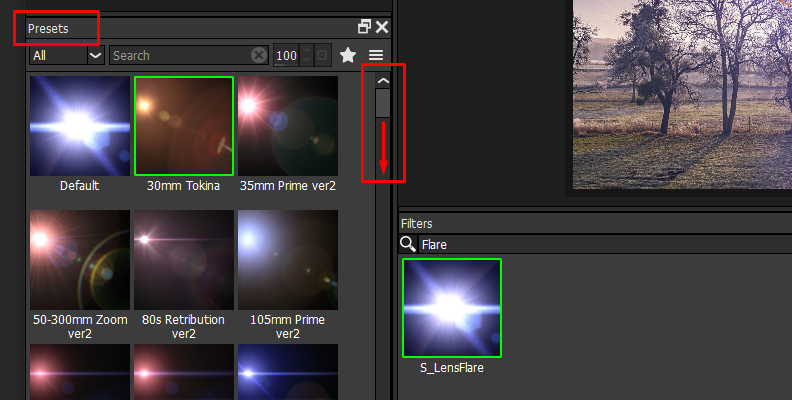
Once Optics loads and you can fully view the interface, use the search bar to type in "Flare". You should see S_LensFlare show up on the list.
![]()
Click on the S_LensFlare effect and you'll immediately see it apply within the preview window. Now, you can adjust the position of the center, meaning setting it according to the light source in your photography. You can also adjust the direction of the artifacts by repositioning the smaller icon.
![]()
On the left side, you can choose many of the different lens flare presets that Optics has to offer.
![]()
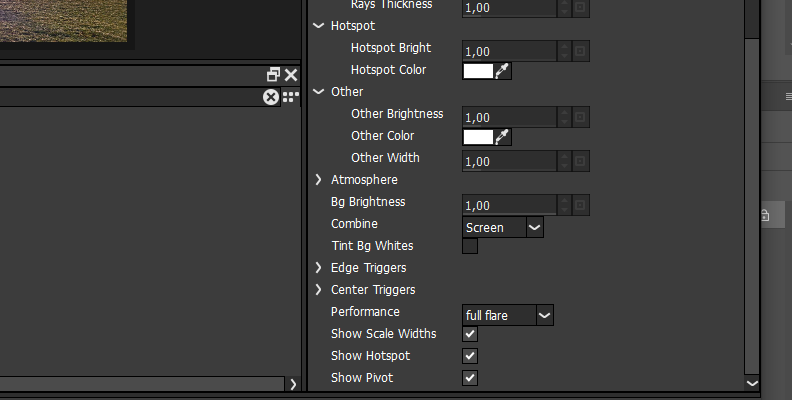
On top of that, you can customize each one using the parameters on the right. Want more warm softness, gaussian blur, or a non-destructive hue shift for your original photo? Optics has it all covered.
![]()
![]()
Want to see it in action?
Here's a helpful video by Boris FX dedicated entirely to lens flares that should cover everything you need to know in detail.
You can now use this approach to add lens flares to your images in Photoshop with ease, without ever spending much time doing it.
Download the free trial version for Optics and see why its effects have been used in so many blockbuster products.
That's all there's to it!


Final Words
With that said, you now know the importance and use case of lens flares, as well as how to add them for free in Photoshop.
Hopefully, this will take your editing skills to the next level and help you produce much more refined content in the future.
Good luck!


