


It's undeniable that lightning is one of the most important things when it comes to taking photos and recording video content.
However, it's also one of the most difficult things to achieve, as one slight change of weather or a cloud over your area can ruin your plans just like that.
Luckily, the Lens Flare Effect can save the day, as it's a very versatile and easy-to-add effect in almost every modern editing software.
The lens flare effect can simulate a bright light, change the look of your camera lens as if you were recording under different circumstances, add sun flare overlays that weren't there on the recording day, and much, much more.
So, let's get right into it, shall we?
What is The Lens Flare Effect
At its core, the lens flare effect is just the visual effect of bright light entering the camera's lens and scattering across the shot. When this light scatters, you get a visual effect that something shines very bright, like the sun, for example, and this alone can create a very artistic visual effect.

However, if you go out to shoot a scene and the sun doesn't shine as bright because clouds suppress it, you won't be able to get the artistic effect naturally and will instead have to add it artificially within your editing software, in this case, Premiere Pro.
Lens flare, just like motion blur, is an effect that we naturally have in our vision. When you look at something very bright, the light scatters and you cannot see clearly. You also start seeing so-called "artifacts" which can obstruct your vision but are often desired for the artistic touch in photography and videography.
Sometimes, your shot can naturally have the lens flare effect added to it by simply capturing something that is very bright, but artificially adding more lens flare can result in an emphasized artistic effect that you might need for your specific task.
The object "producing" the lens flare effect, also often referred to as the flare center, doesn't always have to be shown in the shot. Instead, we can just see the scatters and "artifacts" caused by it, which is great because it allows us to manipulate the reality of the shot, like deciding which way the sun rays are coming from, even if the sun wasn't actually there.
Modern editing software and plug-ins make this very easy to do, so let's take a look at how you can add and manipulate the lens flare effect in Adobe Premiere Pro for the best results.
How to Add Lens Flare For Free in Premiere Pro
Adobe Premiere Pro features numerous effects in the standard, built-in effects pack. One of them is the Lens Flare effect, and adding it is very easy if you follow the steps below.
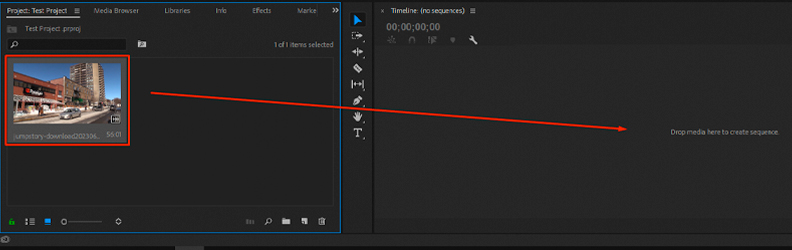
Step 1: To begin, open Adobe Premiere Pro on your PC and create a new project. Import a video from your Desktop into the project, then drag it to your timeline to automatically create a sequence from it.
![]()
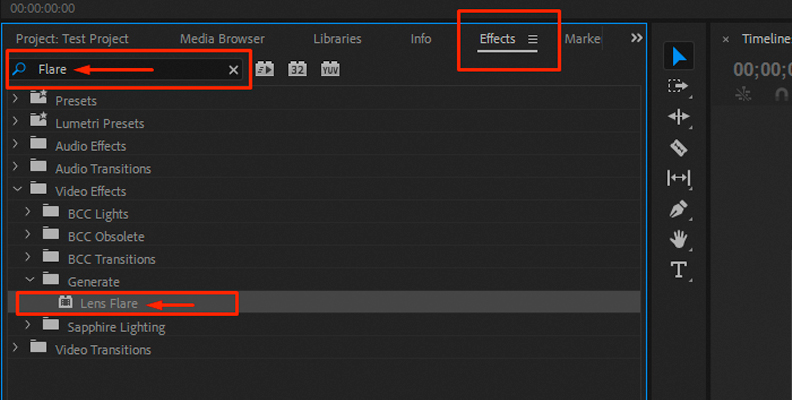
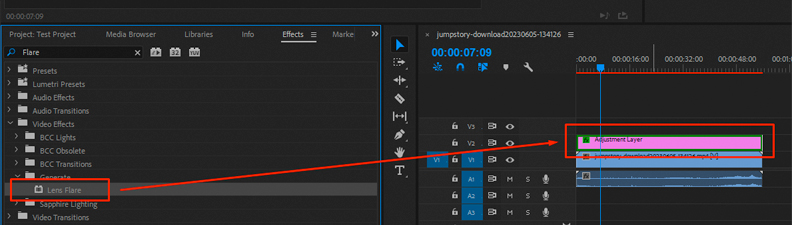
Step 2: Click on the "Effects" panel and type "Lens Flare" in the search bar to find the effect.
![]()
Step 3: Click and drag the effect over the video on your timeline. You should immediately notice the difference as the flare center will now be visible within your shot.
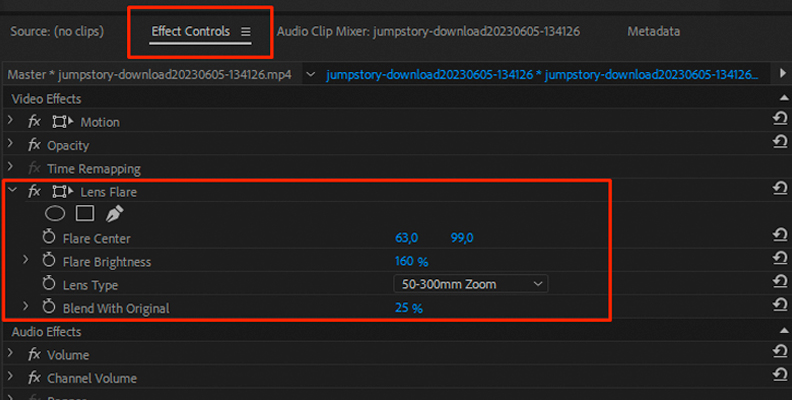
Step 4: Click on the video on your timeline, then open the "Effect Controls" panel. Expand the "Lens Flare" effect and start modifying the settings while closely previewing the changes.
The "Flare Brightness" setting, if set at a higher value, will make for a really bright light source. The "Flare Center" setting will allow you to reposition the light source. The "Blend With Original" will help you fit the effect more naturally into your scene.
![]()
Using Adjustment Layers
You can also create an adjustment layer and add lens flare to it instead of the original video so that when you are modifying important settings, like the blending mode, it won't alter the original material.
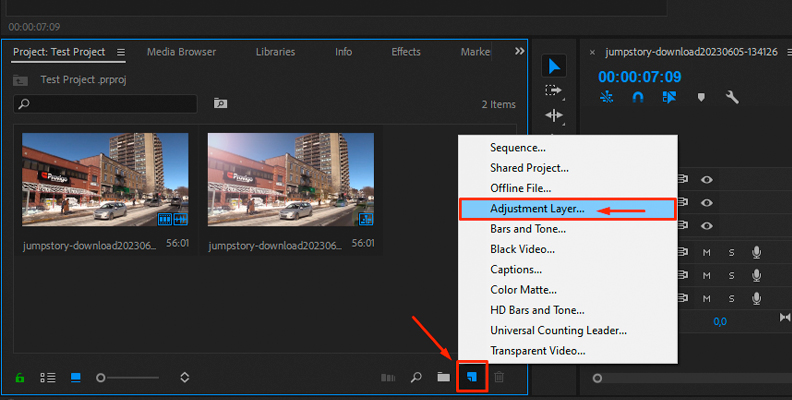
To do this, click on the "New Item" icon in your project view, then choose "Adjustment Layer" from the list of options.
![]()
Drag the adjustment layer on a video layer that's one above your main video, and apply the effect to it.
![]()
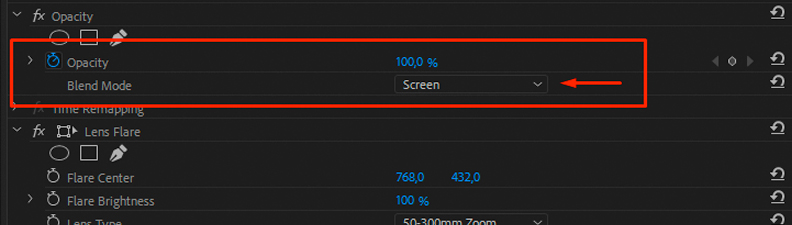
Now, click on the adjustment layer, open the effect controls panel, and try different settings. Change the Blend Mode, for example, and see which setting works best.
![]()
After applying the effect, playing around with the flare brightness, positioning, and intensity is all it takes to get the perfect result for your clip.
Creating Transitions
In Adobe Premiere Pro CC, you can also use the lens flare effect to create fancy transitions. This is quite simple to do, so follow these steps to create your first lens flare transition for in-between shots.
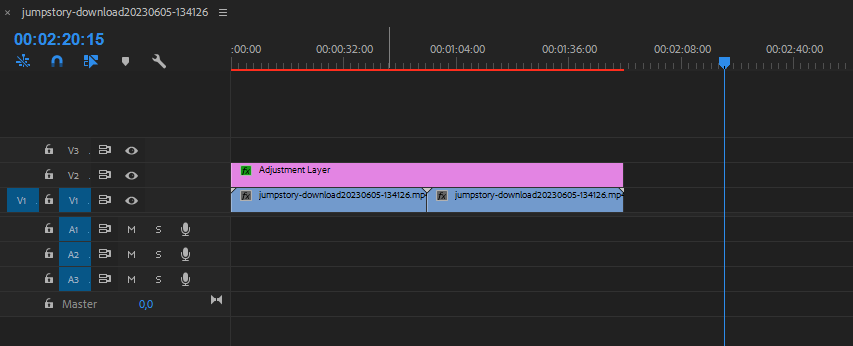
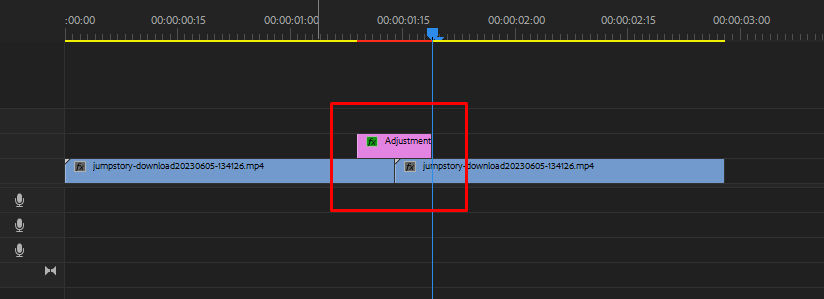
Step 1: Place the two videos you want to use on your timeline, then create an adjustment layer and place it on top of both. Add the "Lens Flare" effect to the adjustment layer.
![]()
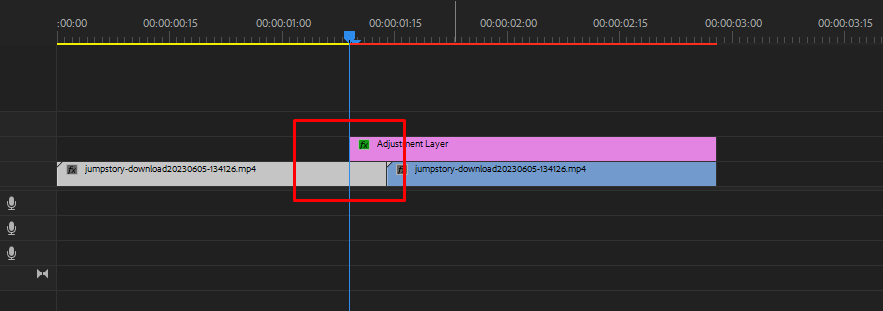
Step 2: Move the playhead to the frame where the first video ends and the second starts, then hold the SHIFT button on your keyboard and press the left arrow key once. This will move the playhead five frames behind. Collapse the start of the adjustment layer up until this point.
![]()
Step 3: Move the playhead back to the center where both videos meet, then hold the SHIFT button on your keyboard and press the right arrow key this time. This will move the playhead five frames forward. Collapse the end of the adjustment layer up until this point.
![]()
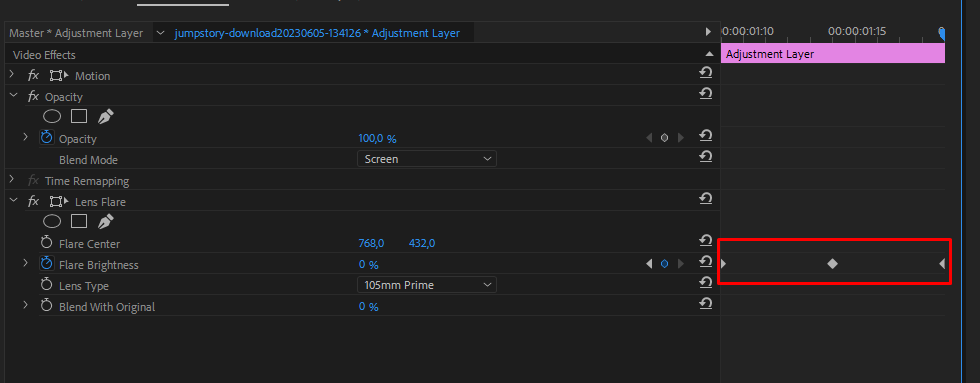
Step 4: Position the playhead in the center again, then open the Effect Controls panel and expand the "Lens Flare" effect panel. Click the blue stopwatch icon and set the Flare Brightness setting to 200%.
Step 5: Move the slider to the beginning of the adjustment layer, and set the value of Flare Brightness to 100%. Move the slider to the end of the adjustment layer, set the value of Flare Brightness to 0%, and change the Lens Type to 105mm Prime.
![]()
Now the effect is animated so that it begins with a normal lens flare at the start of the adjustment layer, and just when the shot changes to the second one, you'll get the highest lens flare brightness which masks the transition and then fades to zero brightness.
You can modify and add custom values to get the desired effect if our setup doesn't directly work for your needs.
How to Add Lens Flare With Continuum in Premiere Pro
Continuum is a pack by Boris FX with a free trial version and is available for multiple platforms. So, regardless if you prefer using Adobe's Premiere Pro or After Effects, Avid, Blackmagic Resolve, or VEGAS Pro, this pack is compatible with all hosts.
What makes this pack special are the unlimited transitions, filters, and special video effects available within, one of which is the Lens Flare effect.
If you have Continuum installed, follow these steps to apply a lens flare effect to your clip within Premiere Pro.
Step 1: Open Premiere and import one or multiple video clips to your project. Then, drag one of them to your timeline to create a sequence.
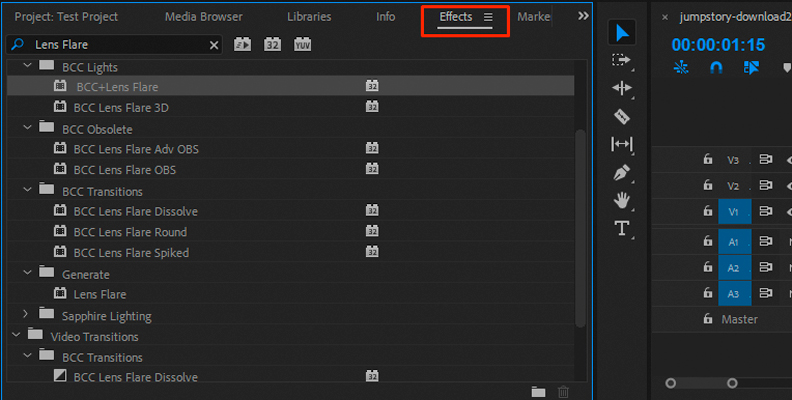
Step 2: Open the Effects section and use the search bar to type in "Lens Flare". You will see the many options starting with BCC in their name. Choose "BCC+ Lens Flare" and drag it over a clip that's on your timeline.
![]()
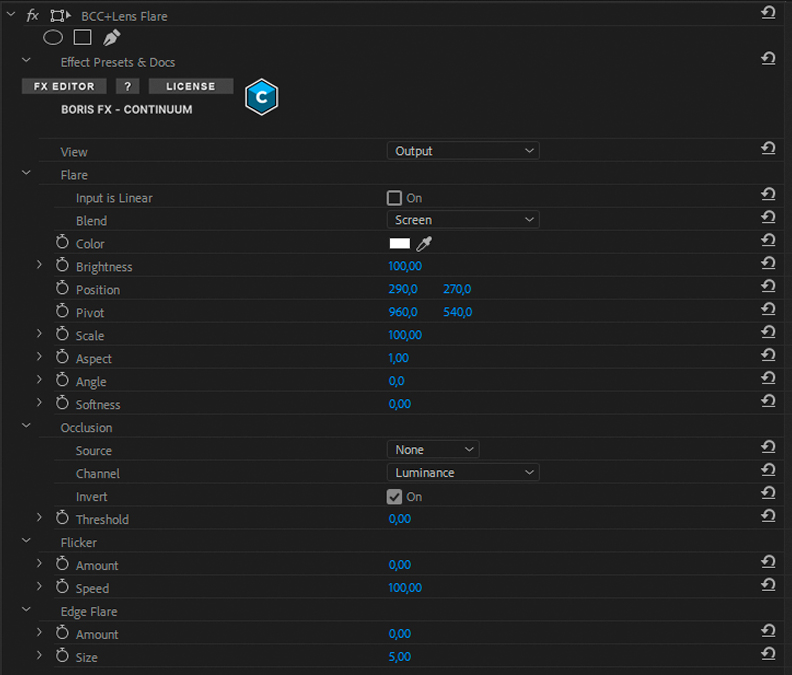
Step 3: Click on the clip on your timeline and open the Effect Controls panel. You'll notice that the BCC Lens Flare effect has a lot more customization options than the built-in one featured in Premiere.
![]()
From here, it's up to you to control the different types of parameters and get the best flares for your footage. You can also animate the flare in case an object passes through your shot that's supposed to look like it's the light source.
You can also pick a different camera lens for a more unique look, add focus, haze, exposure, change direction, change the blending mode, adjust the flare brightness, and much more using the Continuum effects.
This pack is also the easiest way to create lens flare transitions too, as there are built-in ones ready to drop on your videos and enhance their look.
Final Words
That covers all you need to know about the frequently-used lens flare effect. If you are a video editor, chances are you'll need to rely on this effect at least once in the near future, so it's good knowing how to properly utilize it.
Hopefully, the tips in this tutorial will help you take your work to the next level.


