


Noisy video footage is something every content creator has come across at least once. Video noise happens when you shoot in dark or low light conditions, be it in a dark room, at night, or in night clubs. It can also occur when you manually set a high ISO in your camera, making the camera sensible to capture more light but introducing noise and grain.
Did you know that it’s possible to remove grain from video? Many video editing software have built-in solutions to help you remove grain; not only that, but you can also find professional third-party noise reduction plugins specialized in video noise reduction, such as Continuum by Boris FX.
Today I want to help you reduce noise and grain in Premiere Pro CC to achieve pristine video quality, first by removing noise using a native solution in Premiere Pro and then by applying Boris FX's professional noise removal solutions.
Let’s dive in!
What is Noise Reduction
Noise reduction is the process and technique used in video post production to correct and remove the grain. This applies to any solution you can find to remove noise, from fixing your camera settings to enhanced lighting to getting more light into your filming location or using filters and removing grain effects in your video editing software.
In post-production, almost every plug-in has a different way of reducing noise. Some will blur the image, others will make it darker to remove grain, and some will take samples from the video noise to remove noise only when it matches the samples provided.
How to Reduce Grain & Noise in Premiere Pro
Premiere Pro does not have dedicated built-in video noise reduction plug-ins, and some video editors prefer to remove noise in After Effects. However, Premiere Pro has one built-in effect that, with the proper noise reduction setting, allows you to remove noise and grain from your videos.
The effect you’ll use in this first part of the guide is called Median. It comes with Premiere Pro CC, so you don’t need to buy or download anything. It might look confusing at first, but I’ll show you the ideal settings so you’ll never have to worry about ditching noisy footage again.
Professional filmmakers might find this method limiting, but if you want a quick solution using the tools you already have, Median will do the job.
Step 1. Import Your Video and Create a Sequence
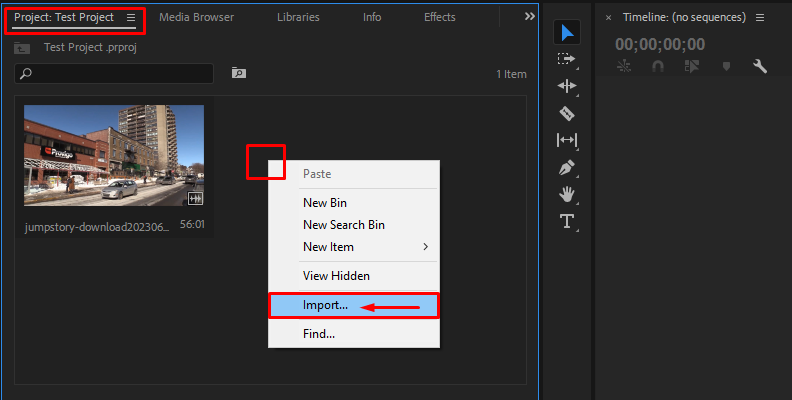
First, you’ll need to import your noisy footage to Premiere Pro. Import your footage in File > Import or use the keyboard shortcut CTRL + I on Windows or CMD + I on MacOS. Select the files you want to edit to bring them to your project area.
![how to reduce grain in premiere pro]()
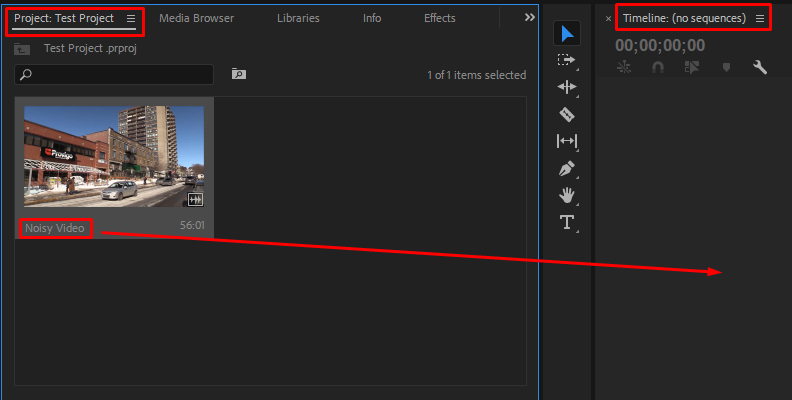
Create a sequence by dragging the noisy video to the Premiere Pro timeline.
![]()
Step 2. Add Median Effect to Your Video Clip
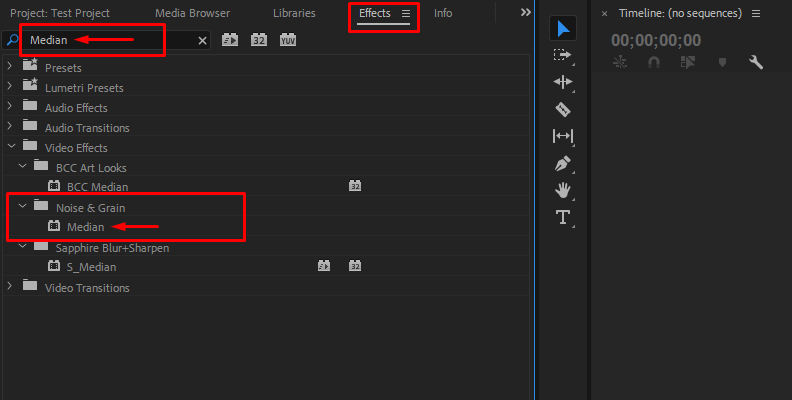
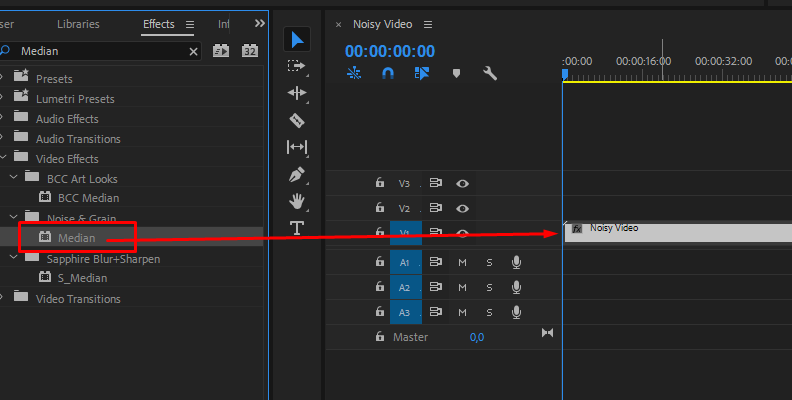
Go to your Effects panel, search for Median, or find it under Effects > Video Effects > Noise & Grain > Median. Drag the Median effect to the noisy clip on the timeline. You’ll notice Median is now in the Effects Control panel with the other applied effects, where you have to adjust the settings to reduce noise.
![]()
![]()
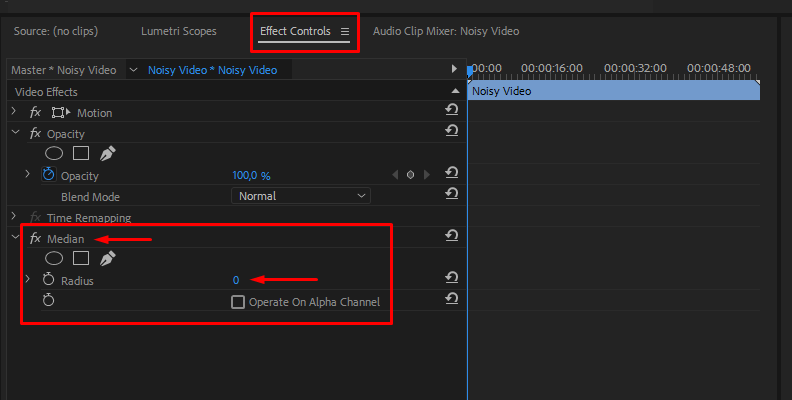
Step 3. Adjust Median Settings
Go to your Effects Control panel and search for Median. Click on the arrow on the left to display its settings. The main thing you want to adjust is the Radius settings. Right now, it’s set to 0. That's why you can’t see any changes in your footage, but as soon as you start increasing the number, you’ll see the Median in action.
![]()
You can start at 2 and increase the value as you see your image getting cleaner, but make sure you avoid unwanted blurriness.
What Median does is blur the image to hide all the grain and noise from the image, but it may look excessively blurry if you increase the Radius too much: the video noise might be gone, but the details in your image will get blurred too.
Let's add a mask to apply Median to all the grainy areas without affecting the rest of your image.
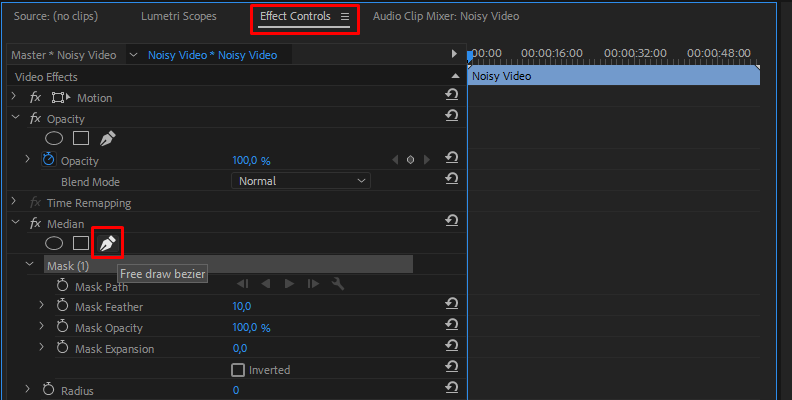
Step 4. Add Masks
Median is a blurry effect that helps you remove noise, but it cannot tell the difference between the video noise and the details in your footage, so the effect will be applied to the entire clip. You can tell Median to act in specific areas with more noise with a mask.
In your Effects Control panel, click on the best-suited mask shape to create a mask in your image. You can also use the Pen tool to free-draw the mask, adding extra points. In your video, you can draw multiple masks for different areas to target only the grain.
![]()
Bear in mind that masks work better for still images rather than moving footage: the mask will stay in the same place while the noise location might change.
Adjust the settings below each once you have all the masks in the image. Decrease the feather setting to make the edges of the mask less sharp so the Median effect can blend in the image more naturally.
Now that you have your mask ready, you can increase the Radius without affecting the rest of your image too much. Find a balance where you can reduce noise without losing too much detail.
How to Reduce Grain & Noise in Premiere Pro with Boris FX Continuum
Premiere Pro offers plenty of tools to get started on video editing; however, as a professional video editor, you may find yourself with multiple issues that require dedicated tools to be solved. If that’s the case, working with dedicated plug-ins can simplify your life and streamline your workflow.
Since there is no native solution to remove video noise in Premiere Pro, you need to rely on third-party plug-ins to achieve the best results. Luckily, Boris FX Continuum Complete from Boris FX is a professional solution with cutting-edge technology that includes over 300+ effects, 40+ transitions, and 5000+ presets, with a noise reduction effect among its many Image Restoration plug-ins.
Step 1. Create A New Sequence
Import your noisy clips to Adobe Premiere Pro from File > Import, and drag the clips to the timeline to create a new sequence.
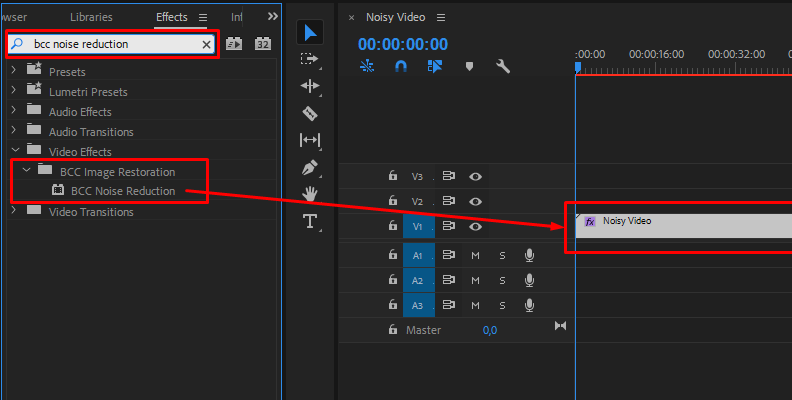
Step 2. Add Boris FX BCC Noise Reduction
Go to your effects panel and use the search box to type Noise Reduction. You can also browse it within the Boris Continuum Complete library under the Image Restoration category. Drag the effect to the clip.
![]()
As soon as you drag it to the clip, you'll notice that the default settings will apply to your video clip. You could leave it like this, or tweak the settings to get a customized video noise reduction.
Step 3. Use BCC Noise Reduction Presets
What’s great about Boris FX plug-ins is that they come with a library of built-in presets ready to tackle the most common issues. Most of the time, you’ll find a solution among the presets, but Boris FX also allows you to adjust the effect and personalize it for a specific camera, location, or project.
Select a preset from the Effects Control panel and use the Compare feature to set the preview mode and see how the effect will improve your video.
Step 4. Adjust Advanced Noise Reduction Settings
BCC Noise reduction allows you to fine-tune more advanced settings. One highlight is the two smoothing modes included: Temporal and Spatial Smoothing.
The Temporal Smoothing will look at pixels through time in consecutive video frames and analyze how to remove video noise from that area. This is great for moving video clips with noise changing in each frame.
The Spatial Smoothing will analyze the pixels in an area of the frame. This mode works better for shots when the camera is still.
Once you select your smoothing modes, you can play with the softening and sharpening settings to balance smoothness and detail.
Preview your new settings and export your video when you’re done with noise reduction.
How to Avoid Grain in Your Shooting
Here’s a list of some tips to avoid grain in your shootings:
Shoot in locations with more sunlight. Outdoors is excellent in terms of light, but other issues can occur, like background audio noise.
Use light lamps to cover darker areas if you need to be indoors or shoot with light backgrounds.
Shoot with the lowest ISO setting in your camera, higher shutter speed, and wider aperture.
Film in higher resolution.
Film light-colored clothes. Shadows and dark colors tend to get noisier than light ones.
Final Thoughts
Knowing how to reduce grain in Premiere Pro or any video editing software you use is crucial for every video editor. If not Premiere, online tools like Neat Video are something you should at least be familiar with.
Boris FX offers noise reduction effects and hundreds of other effects for lighting, color grade, transitions, and more. Our wide array of plug-ins provides everything you might need as a professional filmmaker and content creator.
Good luck, and stay creative!


