


Making video with visual effects seem so convincing it looks effortless actually takes a lot of work. Many elements can go into producing footage that looks and feels real to the viewer and viewers are quick to pick up on anything that doesn’t quite look right.
That means post-production tricks are sometimes needed to achieve the most natural-looking footage.
One of the tools in an editor’s bag to achieve great-looking visuals is the addition of motion blur. It adds a sense of realism and naturalness to your footage and helps convince your viewer that what they're watching really happened. And with a video editing package like Adobe After Effects adding motion blur becomes an easy way to really enhance the footage you have shot.
What is Motion Blur?

In one way, the name is actually self-explanatory. Motion blur is a slight blurring of motion that the human eye can pick up. This is usually when we see something moving fast, either in the foreground or background.
This can occur naturally in everyday settings. If you focus on something close to you while there is movement in the background, the background motion can appear “blurred” in relation to the foreground object you are focussing on.

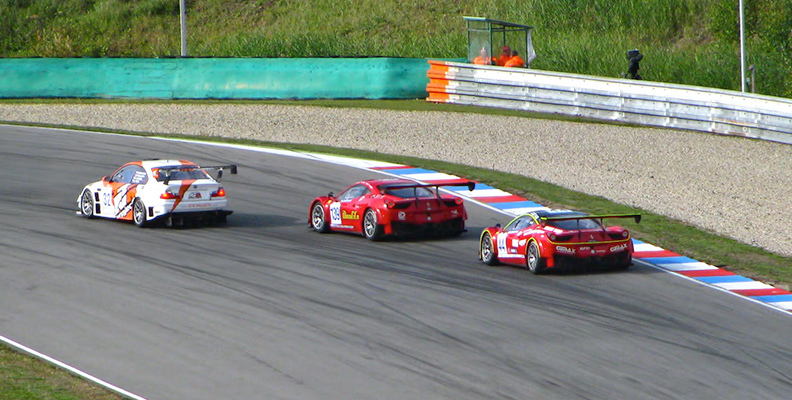
For example, if you imagine standing at a sports game and you focus on the bench in front of you. The players on the field might appear “blurred” because your attention is focused on something close to you.
Similarly, if you focus on the players, objects closer may appear blurred because you’re not concentrating on them.
We don’t generally tend to notice this in day-to-day life because our brains are good at ignoring the blurred bits in favor of what we are focusing on.
If you are aware of what motion blur is and pay attention then it can become obvious, but generally speaking it’s not something most people notice when going about their day.
However, when it comes to recorded footage, especially digital footage, images are captured so sharply that there is no blur. This can make the footage seem jarring and feel unnatural, especially during action scenes or whenever there is fast motion on the screen.
Because the brain is used to the idea of a blur being there, when there isn't - it just doesn't look right. This means the lack of motion blur can make the footage seem artificial and unreal simply because that’s not how we are used to perceiving the real world, even if we don’t normally notice it.
However, with After Effects, motion blur can be added to ensure your footage looks natural and normal to the human eye.
How to Add Motion Blur in After Effects
After Effects has a built-in tool to allow you to add motion blur to your footage. There are three ways of doing this.
1. Enable Motion Blur
Firstly, load your footage into After Effects.
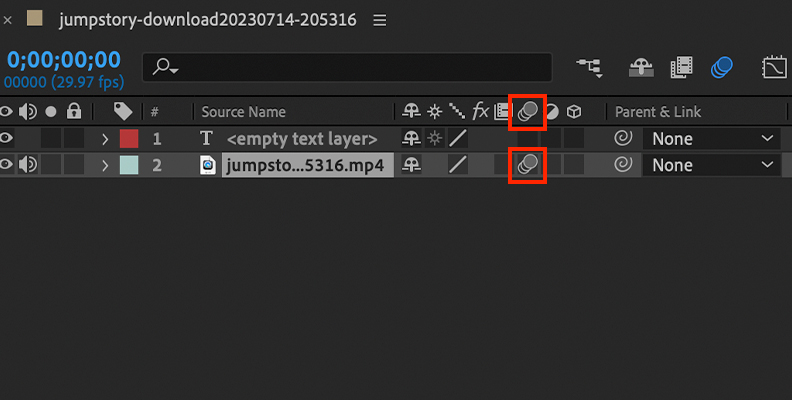
Once it has loaded, select the moving layer that you want to add your motion blur to in your timeline.
When you have selected the layer you can then click the motion blur layer switch.
![]()
You will find this above the layer menu in your toolbar. This is the setting for enabling motion blur.
You can then go to the layer toolbar and click Enable Motion Blur. After Effects will then add motion blur to the selected layer.
Note that it doesn’t need to be just action or live action footage that you can apply this effect to. It can also be applied to text elements, or animation. As long as you can select it as a moving layer then you will be able to apply motion blur.
If you want to apply motion blur to computer generated motion, the best way to to do it is to use pixel motion blur. This synthesizes the effect of motion blur on the computer animation using motion vectors
2. CC Force Motion Blur Effect
The Enable Motion Effect is a straightforward way of adding motion blur to your layers but it is not the only one. If you want to add something that’s a little more stylized or that you have a little more control over, then the CC Force Motion Blur effect can help you out.
As with Enable Motion Blur, select the moving layer you want to apply the motion blur to.
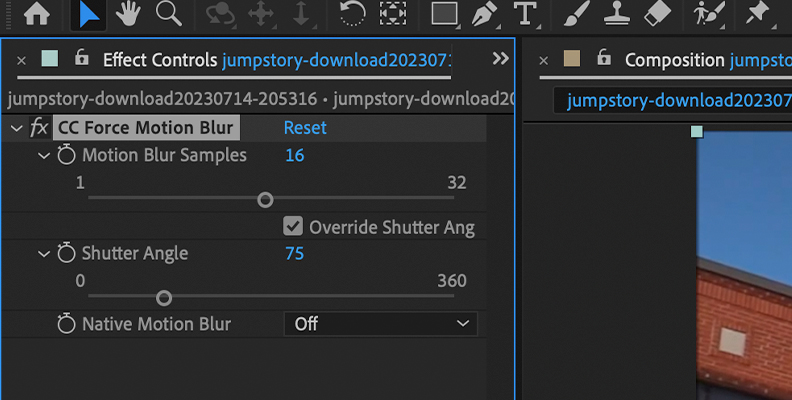
Then go to the Effects menu, choose Time, then CC Force Motion Blur.
After Effects will then open the CC Force Motion Blur dialog box.
![]()
The options here allow you to have more control over the motion blur that’s applied to your footage. These are:
- Motion Blur Samples
- Shutter Angle
- Native Motion Blur
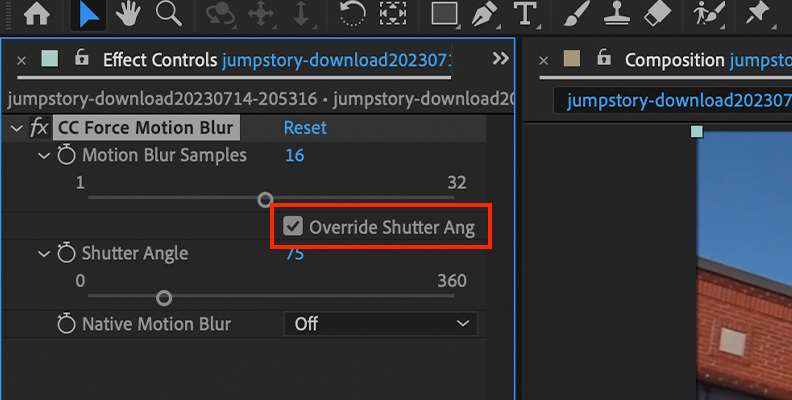
There is also a check box called Override Shutter Angle.
![]()
You want to ensure that this box is checked in order to be certain that the effects you apply override the native shutter speed.
Settings
Since no two pieces of footage are the same, there is no “correct” settings for these. How you choose to set them will depend on the kind of movement you are applying motion blur to, the sort of effect you want to achieve, and how your footage was shot. As a rule it's better not to overdo it with motion blur and a little can go a long way.
Experimenting with the settings will allow you to determine what works for you. Rendering speeds are relatively fast with CC Force Motion Blur so it’s easy to play around and work out what’s going to produce the best results.
Once you have applied your changes, review your footage and confirm everything is just the way you want it.
3. Third-Party Plug-ins
Although After Effects has two good motion blur tools, you can also install third-party plug-ins to allow you to have even more control over the motion blur you want to apply.
Boris FX’s range of tools is industry-quality, and the BCC Motion Blur tool is part of the Continuum Visual Effects Plug-ins pack. This is a powerful motion blur plugin that goes far beyond what is possible with the native tools in After Effects. And of course, as part of the Continuum set of tools you don’t just get the BCC Motion Blur tool but dozens of award-winning effects that make your footage come alive.
You can perform different types of blur, including radial blurs, channel blurs, direction blurs, and different combinations of these techniques. This means that you can have complete control over the type of motion blur you want to apply to your footage.
And because the tool is produced by Boris FX you know that you are getting the very best visual effects in the industry. So if you want to really take your motion blur to the next level and get your footage looking as good as possible, the BCC Motion Blur plug-in from Boris FX is the way to go.
Conclusion
Motion blur is an important way to get action or fast motion on screen to look natural and realistic to a viewer. It’s an easy thing to miss but it can make all the difference when it comes to getting your footage to really look its best and convince the audience.
Fortunately, After Effects makes it easy to add motion blur to any footage, and you can control the detail and type of effects with very little effort. Now you just need the perfect images to go with the effect!


