


Vin Moreale from Boris FX takes you on a quick tour of the Continuum VR Insert filter. Watch to see how you can composite images into 360/VR footage. In this video Vin is using Continuum inside of Vegas Pro. Continuum is compatible with additional hosts such as Adobe AE, Adobe Premiere Pro, and Avid.
Follow along with the transcript:
Hi, I’m Vin with Boris FX, and in this quick tutorial I’m going to show you how to use Continuum’s VR Insert to quickly and easily composite images into 360 degree VR footage inside of Vegas Pro.
Now there are two ways to achieve this effect, and with Continuum 11.0.3, it couldn’t be easier, but don’t worry if you haven’t yet upgraded, or want a little bit more customization, I’ll show you how to do that as well.
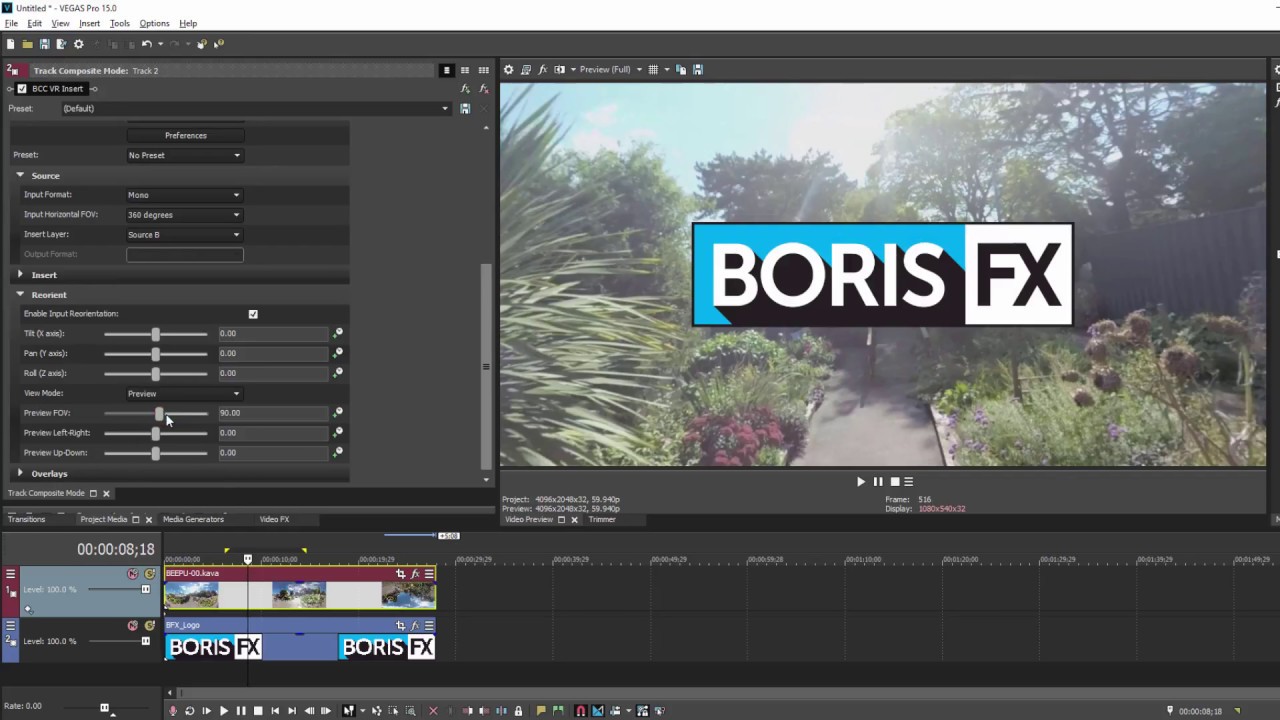
Now to begin with, I’m here in Vegas Pro 15, and I’ve added some 360 footage to my project media. I also have an image file that I’m going to insert into my footage. Now I want to make sure that I have my video footage on one track, and the image I want to insert on the track directly above it. Now, with 11.0.3, as I said this couldn’t be easier. In fact, new with 11.0.3, we find that VR Insert is now part of the regular video effects, and not just a composite effect. Now to insert my image into the footage, all I have to do is drag VR Insert right onto my image layer and… there ya go. It absolutely couldn’t be easier.
Now, the one thing I notice is that options for selecting composite layers are grayed out. I can go in and adjust the positioning and orientation, but I’m limited to the clip that VR Insert resides on.
But if I want more customization options, or if I haven’t upgraded to 11.0.3, I can use the composite version of the filter.
Now what I’m going to show you here will work with any version of Continuum 11 and while there are subtle differences in the workflow depending on which version of Vegas you’re using, the principles are still the same.
To begin with, I’ve added my 360 video and my image clip to my timeline. Now unlike before I’ve placed them on the same track, but this is temporary, as I’ll be moving things around in a bit. I’ve also created a second video track at the top of my timeline.
Now the first thing I want to do is click this box over here to bring up my composite options. I’ll select Custom, which will bring up all of my composite filters. Now these are separate versions of the filters that are specifically designed to work with Vegas’ composite workflow.
From the list, I’ll select VR Insert.
Now, unlike before, I have the ability to select the input source. So, for example, if I select Source A, the filter will insert the clip that I’m currently working with. What I want to do is specify a different source. To do this, I’m going to take my clip layer, and drag the whole thing to my top track. Now it’s important that I drag the track and not the clip itself. The composite options are set for the track, so moving only the clip itself, will give me incorrect results.
Once the track is set, I’m going to drop my image onto the bottom track, edit it to fit. And then I’m going to select Source B. Vegas will now composite my image into my VR footage, allowing me to go in and adjust it’s position and orientation in 360 space.
And that’s all there is to it! Whether you have yet to upgrade, or you’ve just installed version 11.0.3 Continuum VR Insert makes it quick and easy to insert images and video into VR footage right inside of Vegas.