


If you're looking to add some visual dynamism to your content, rotoscoping can help you do just that! With this technique, you can isolate or remove objects and backgrounds, giving you the freedom to unleash your creativity.
Today, we'll explain exactly what rotoscoping is in Adobe After Effects using two powerful tools - Silhouette and Mocha Pro from Boris FX - as well as the Roto Brush, and upgrade your video editing thanks to this unique effect.
Let’s dive in!
Rotoscoping Explained
Rotoscoping is an animation technique pioneered by Max Fleischer in 1915. Rotoscoping consisted of projecting live-action footage onto a glass panel and manually tracing over it frame by frame. It allowed artists to create animations with human-like movements in characters like Koko the Clown, Betty Boop in Poor Cinderella, and later Disney's classic Snow White.
Over the years, rotoscoping turned digital thanks to Bob Sabiston's interpolated rotoscoping method, which made Richard Linklater's film Waking Life possible. Today, the basics of rotoscoping are still the same: tracing over live-action footage frame by frame, but now, the process is much faster than before, thanks to AI technology and tools such as After Effects' Roto Brush.
Rotoscoping allows you to isolate objects to move or replace them, place text behind them, add glows, lightning, and particles, change backgrounds, and create fantasy characters based on human performance.
How to Use Rotoscoping in After Effects
Adobe After Effects is the best Adobe software for rotoscoping. While Premiere Pro is powerful, After Effects is better than Premiere Pro for graphic and visual effects work, so we will be focusing on Adobe After Effects in our step-by-step guide.
With Adobe After Effects, you have several options for rotoscoping. Let’s start with the most straightforward way for rotoscoping in After Effects: the Roto Brush tool. The Pen Tool is suitable for masking manually, but you must do it one frame at a time, which is time-consuming. The Roto Brush tool in After Effects makes the tracing super easy and saves you a lot of time thanks to its AI technology.
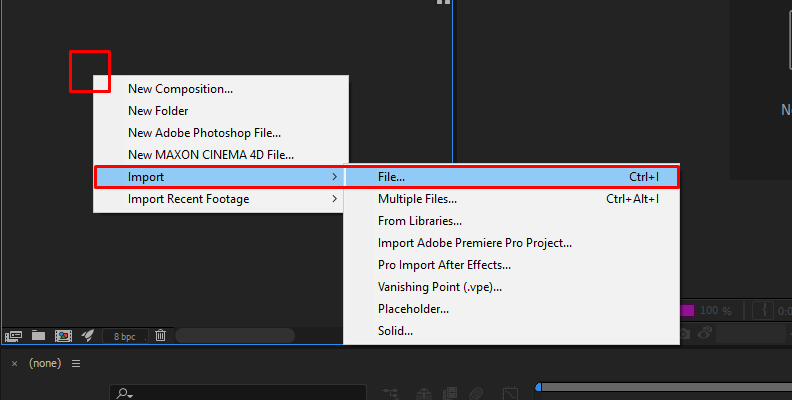
Step 1: Import Your Video Footage into After Effects

In your After Effects main screen, double-click on your Project panel to open the import window and access project files. You can also access it with CTRL+I. Select the video footage you want to rotoscope and click import.
Before you proceed further, ensure the frame rate for your composition is the same as your footage.
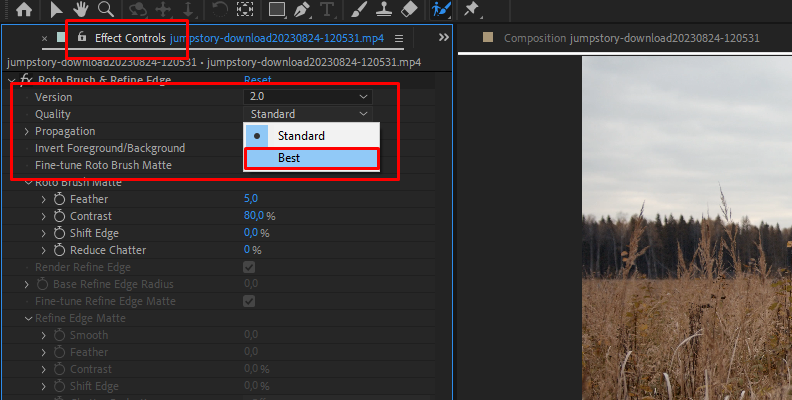
Step 2: The Roto Brush Tool

Select the Roto Brush tool from the top bar menu in the After Effects screen or hit Option/ALT + W. Choose between the Classic, Roto Brush 2 (2.0), or Next-Gen Roto Brush (3.0) version from the Effects Control panel. Next-Gen Roto Brush is the latest and improved version of Roto Brush. Under Version, select Best Quality for better results.
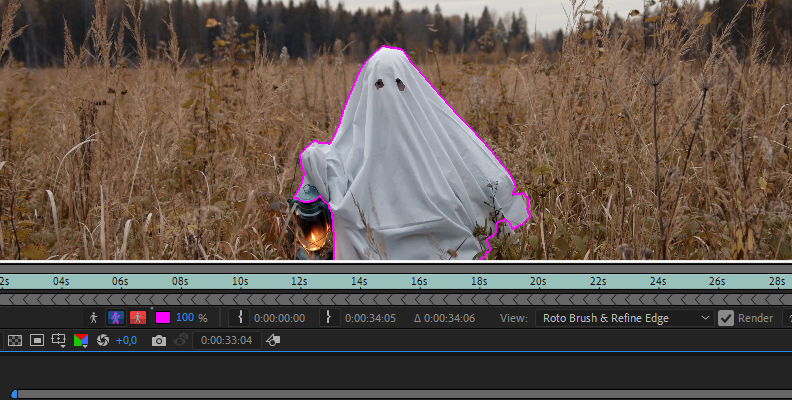
Step 3: Trace with Roto Brush
Tracing with Roto Brush is pretty straightforward. First, double-click on the layer on your composition panel and select a frame to start drawing. I suggest using a frame where the entire subject is visible.
Change the brush size by holding Command/CTRL + dragging the cursor left and right. Start drawing with the brush in the middle of your subject. After Effects will analyze the subject and highlight the outline of the subject with a magenta outline. Hold ALT/Option and paint on the zones you want to delete from the selection. The green brush adds, and the red brush deletes.
You can hit Option/ALT + W to switch to the Refine Edge tool to feather your edges and blend the subject more naturally. Alternate between the Refine Edge and Roto Brush tools until you have the perfect trace.
Step 4: Tracking
To start tracking your traced object, press the spacebar. After Effects will follow the movement of your object frame by frame without needing you to do it manually. However, there might be frames where the mask will need readjustment, especially for complex movements, when objects block the subject, or the traced objects go out of frame.
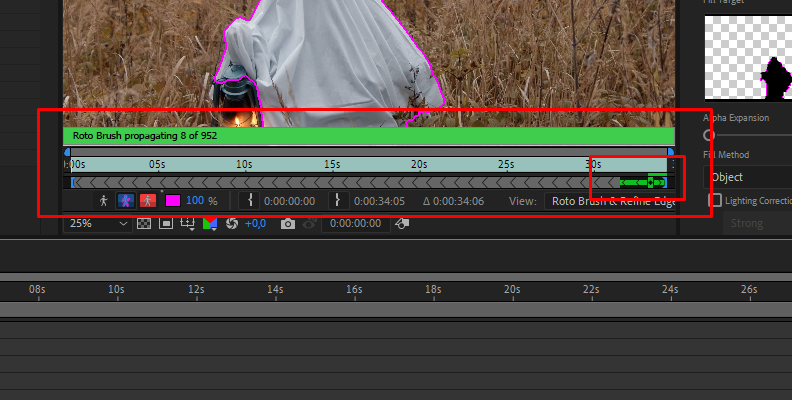
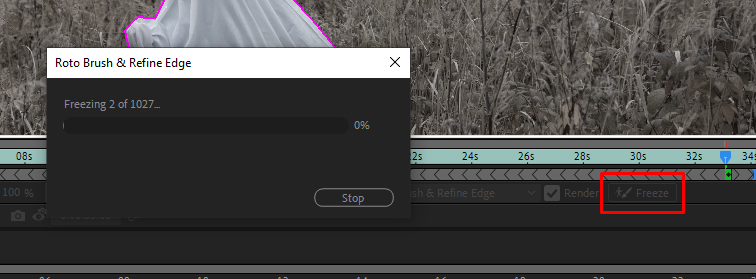
The tracking will take some time, depending on the length of your footage. When it’s done, click Freeze on the Layer panel's bottom right to cache the tracking data.
Step 5: Edit and Render
Now, you can return to your composition and edit your isolated object. Make the rotoscoped object the top layer to apply effects, change the background using green screen, or add color correction. You can get creative to add some stunning effects to your videos.
Rotoscoping in After Effects with Silhouette and Mocha Pro
Roto Brush is great and easy to use, but it is not as versatile as other professional, third-party plug-ins. Luckily, you can create mind-blowing rotoscoping effects for complex objects with tools like Silhouette and Mocha Pro.
Rotoscoping with Silhouette
Step 1: Apply Silhouette to Your Footage
Apply Boris FX Silhouette plug-ins from Effects > Boris FX Silhouette. Go to your Effects Control panel and click on Open Silhouette Interface. Select your type of Project and working depth and click Create Project.
The first thing to do is analyze your footage. Think about what the best way would be to rotoscope, then divide the objects into zones where you will be drawing shapes.
Step 2: Track Objects
Tracking your object before rotoscoping can help you keyframe your object better. In Silhouette, you have three different Tracking options: Point Tracking, Planar Tracking, and the integrated Mocha Tracker. Press Shift + T to access the Tracker tool and choose your tracking method. You must have a layer to apply the tracking data.
Now that you have your object tracked, it’s time to rotoscope.
Step 3: Trace Your Subject
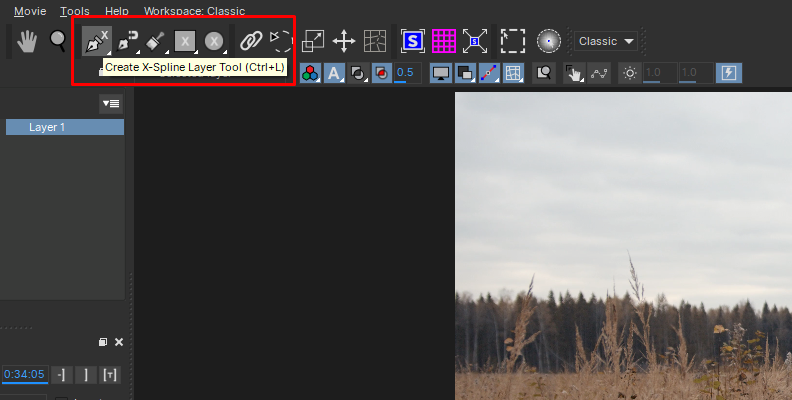
Select a shape tool from the menu on the left. Depending on the object you want to trace, you can choose between B-Spline, X-Spline, Bezier, Magnetic, Square, and Circle shapes. Using the roto tool, start drawing a shape around the subject.
Divide the object into zones. For example, if you are tracing a person holding a box, trace the box and then trace the human body in parts, such as head, arms, legs, etc. Each item you trace will be displayed in the Object list, where you can rename them to stay organized and group them in layers.
To help you with your tracing, hold the space bar and move the mouse cursor to pan the image and the mouse wheel to zoom in and out. This is the most time-consuming process, but taking the time to make accurate shapes from the start will result in a smoother workflow.
Step 4: Exporting Your Work
To export your shapes, only select the Roto node and the layers you want to export. Then go to File > Export > Silhouette Shapes and save the file. Go back to After Effects and select File > Import > Silhouette Shapes. Browse for the file you created in Silhouette and click Open. Silhouette will convert the shapes to After Effects masks.
Rotoscoping with Mocha Pro
Step 1: Apply Mocha Pro to Your Footage
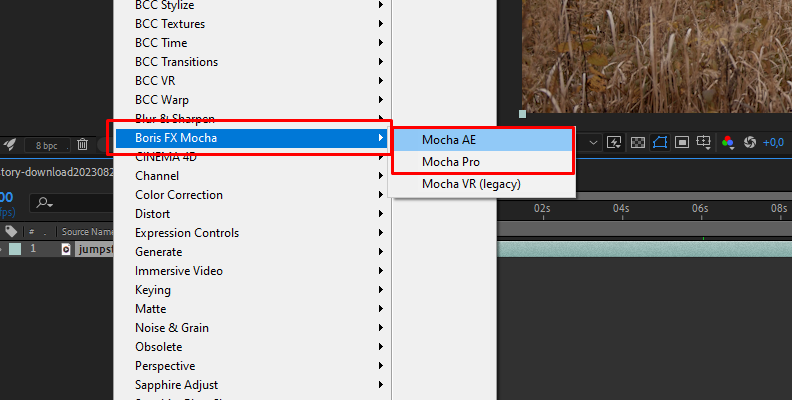
Go to Effects > Boris FX Mocha Pro and launch the Mocha Pro interface from the Effects Control panel. Make sure to work in the Essentials workspace for a simplified workflow.
Step 2: Track the Object Area
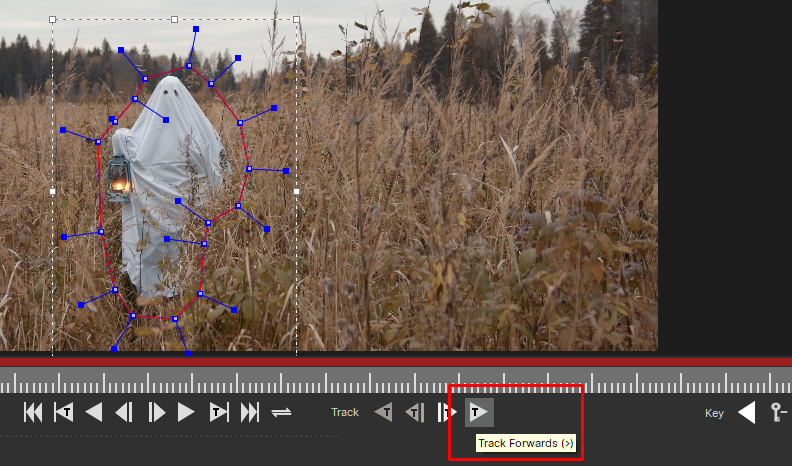
Tracking the area of the object you want to rotoscope will reduce the manual keyframing. Choose a frame where the object is clear. Draw a spline around the object and select Track Forward.
Once you have your tracking data, proceed to drawing your shapes.
Step 3: Refine Shapes
Create a new layer for the rotoscoping shapes and start masking your object. When you finish creating your shapes, link the rotoscoping layer with the tracked layer. Before you do that, ensure to disable tracking from your rotoscope layer by clicking on the cog icon.
To link the rotoscope layers to the one with the tracking data, select a layer and choose the tracking data in "Link to track" under the layers properties panel. Verify your roto work is tracked correctly and adjust if needed.
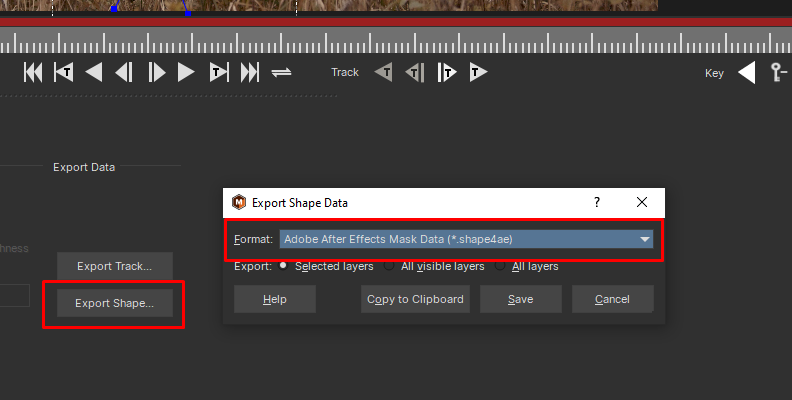
Step 4: Export Shapes
Click Export Shape Data and select Adobe After Effects Mask Data. You can save the file, copy it to a clipboard, and paste it into a layer in After Effects.
Final Words
Even if you're new to VFX, rotoscoping is an accessible technique that you can try and use to expand your visual palette. It may be challenging at first, but with persistence and practice, you'll be able to produce stunning rotoscoping animations and motion design effects that are worth the effort. Don't hesitate to start over and keep trying until you get the results you want.
Good luck!


