A vignette or video vignette refers to a creative effect that subtly darkens or softens the edges of a video frame, drawing the viewer’s focus to the center.
Often used in filmmaking and video editing, vignettes enhance mood, add drama, or create a sense of intimacy. They can evoke nostalgia, highlight key subjects, or guide the audience’s attention away from distractions.
Video vignettes are versatile, working in a range of styles—from cinematic storytelling to modern vlogs. Applied in-camera or during post-production, this technique is a powerful way to elevate visual storytelling, making your video more engaging and emotionally impactful.
In this guide, you'll learn how to create a vignette effect in a few simple steps, so without further ado, let's get straight into it.
What is a Vignette in Video Editing?

A vignette in video editing is a visual effect that adjusts the brightness, focus, or clarity of a video frame's edges, creating a natural or stylized border that emphasizes the central content. It comes from the French word that means "little vine."
This effect subtly darkens, lightens, or blurs the corners and edges, helping to guide the viewer’s focus to the most important area of the frame, typically the subject in the center. While often used as a creative tool, vignettes also serve practical purposes, such as reducing distractions around the edges of a shot.
Vignettes are a staple in visual storytelling because they can evoke a variety of emotions and enhance the narrative. For example, a darker vignette might create an intimate, mysterious, or dramatic mood, often used in scenes with emotional depth. Conversely, a lighter vignette can make a frame feel dreamy, nostalgic, or whimsical, frequently seen in romantic or uplifting sequences.
How to Create a Vignette Effect in Video Editing?
Creating a vignette effect in video editing is a straightforward process that can be done in most editing software, such as Adobe Premiere Pro, Final Cut Pro, or DaVinci Resolve. The key steps involve isolating the edges of the frame and applying adjustments to achieve the desired look.
Begin by importing your footage into the timeline and selecting the clip where you want the vignette. Locate the vignette tool or effect, which is often found under the color grading, effects, or filters section in your editing software. If your software doesn’t have a dedicated vignette effect, you can manually create one using masks or shapes.
To create the effect, apply the vignette to the selected clip and adjust its properties. Most tools will allow you to control the shape (circular or oval), size, and position of the vignette to align it with your subject. Fine-tune the intensity of the effect by adjusting the opacity or feathering to ensure a smooth transition between the vignette and the rest of the frame. This helps keep the focus subtle and natural.
If you want a more dynamic vignette, you can animate its properties. For example, a vignette could expand or fade during a scene to reflect changing emotions or focus points. This can be done using keyframes in your editing software.
Lastly, preview the effect and make adjustments as needed. The goal is to ensure the vignette enhances your visuals without overwhelming them. Experiment with different settings to match the mood and style of your project. With practice, adding a vignette can become a powerful tool for creating visually compelling videos that resonate with your audience.
Create a Vignette Effect with BCC Vignette/BCC+ Vignette
When it comes to manually creating a specific video effect or transition to further grab the viewer's attention or add depth to your content, there are many important elements you need to combine correctly for it to work smoothly. However, this includes a lot of tweaking, previewing, and tinkering, and as expected, can take up some of your time.
This is why creator packs such as Boris FX's Continuum exist. They include hundreds of presets, filters, transitions, and everything else you need to take your videos and even photos to a whole different level in just a few clicks.
In Boris FX's Continuum pack, as mentioned above, there are hundreds of effects, and one of them is the BCC+ Vignette.
Here's how you can use this effect to quickly and efficiently add a perfect-looking vignette to your content in just a few clicks without wasting any time on doing everything manually.
Step 1: Create a New Project and Import Media
The best thing about Continuum is that you can use it in your preferred software of choice, as it's compatible with all popular video editing programs. This means you will never have to change your well-known working environment to take advantage of all its amazing presets, transitions, and filters.
For this specific section, we'll be using Adobe Premiere Pro, but keep in mind that the process is almost identical with all other editing software aside from the minor user interface differences between various programs.
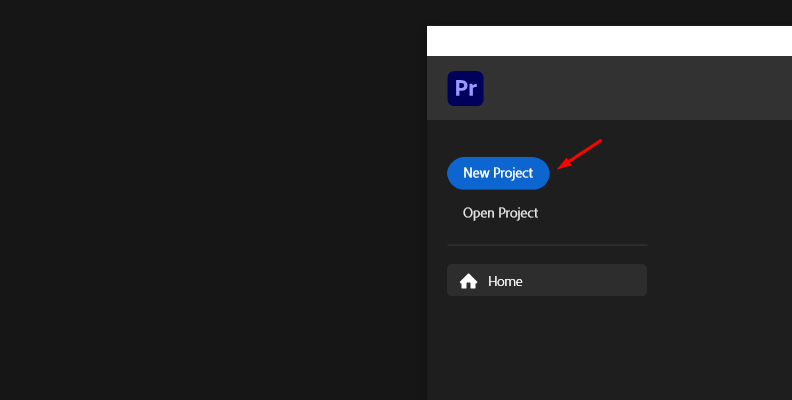
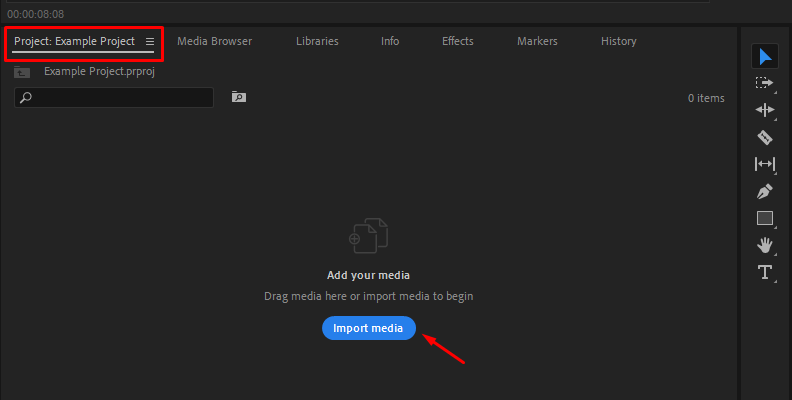
So, once you launch your software of choice, in our case, Premiere Pro, create a new project and import media.
Step 2: Create a Timeline and Locate the Effect
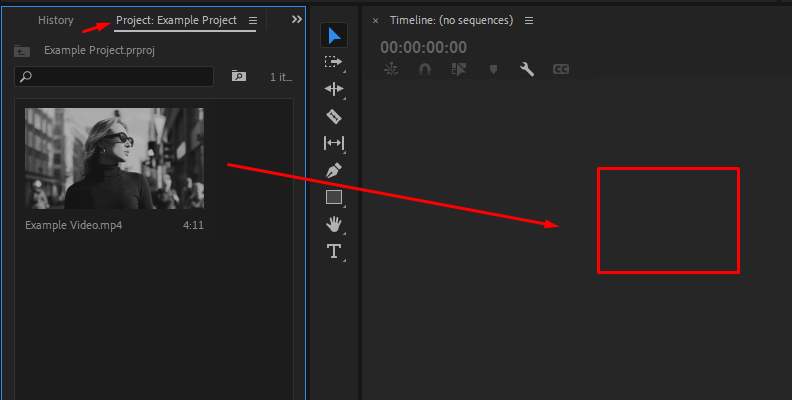
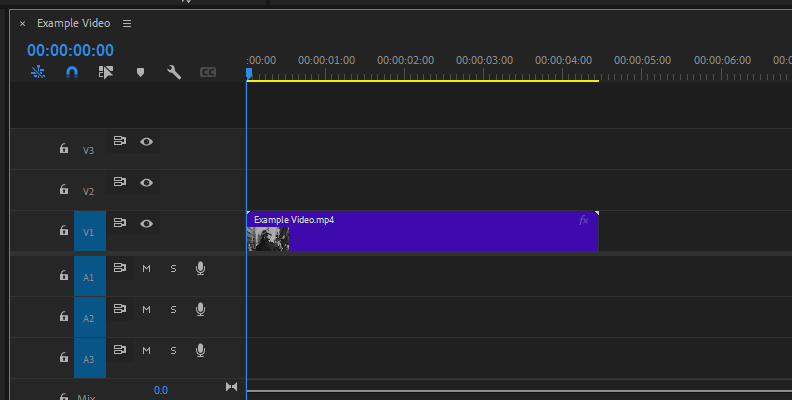
Now that you've imported your media, you need to drag the video or photo onto the timeline to create an editable sequence.
Now, you need to access the "Effects" panel and find the BCC+ Vignette effect.
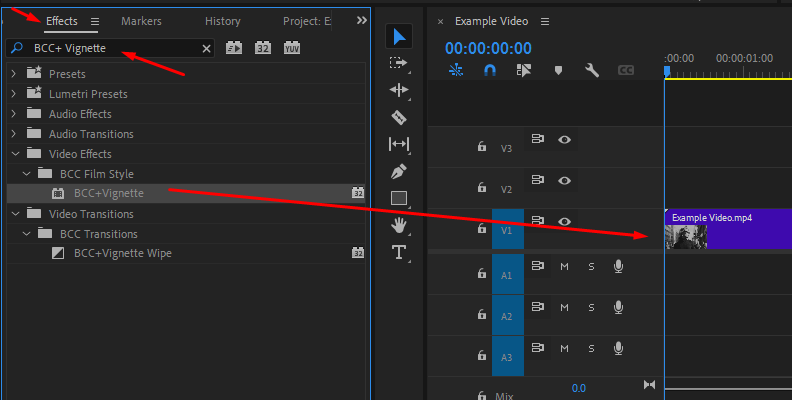
Step 3: Apply BCC+ Vignette and Preview
Once you apply the effect to your video, you'll immediately notice the difference.
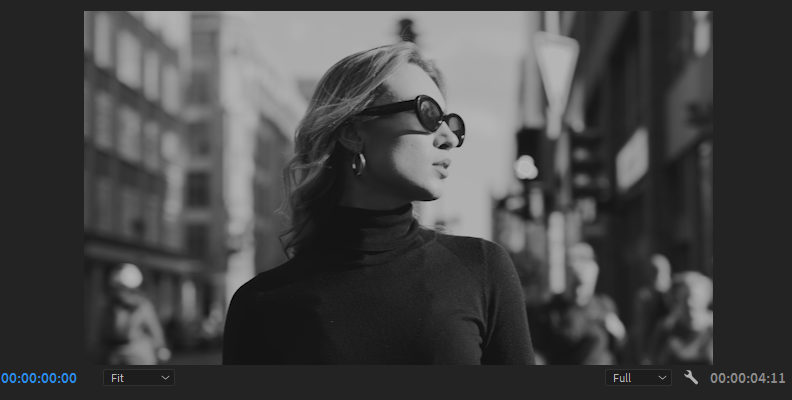
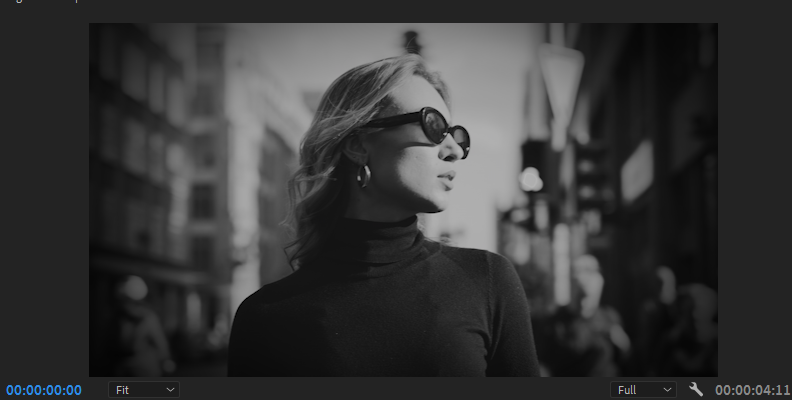
Step 4: Adjust Settings if Needed
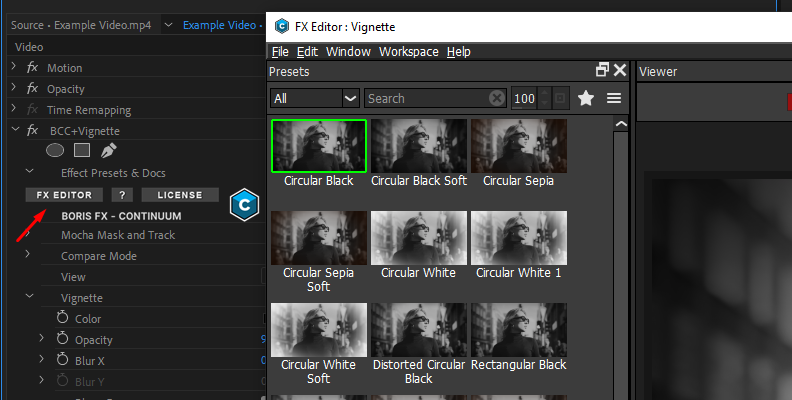
If you require a specific look for your vignette, you can access the Effect Controls panel to make any adjustments needed. All effects found in Continuum are very customizable.
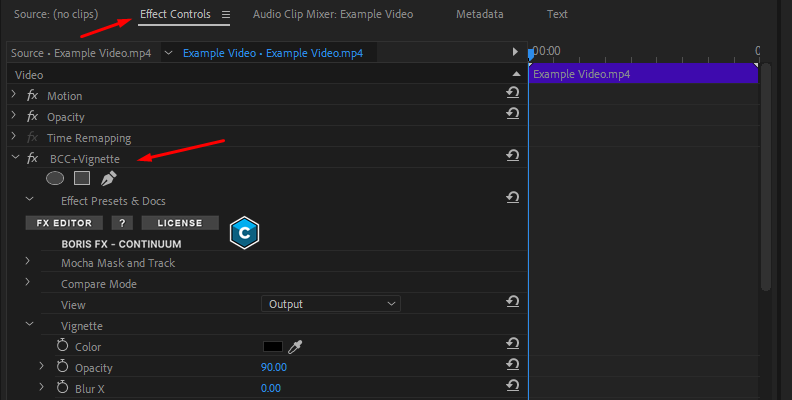
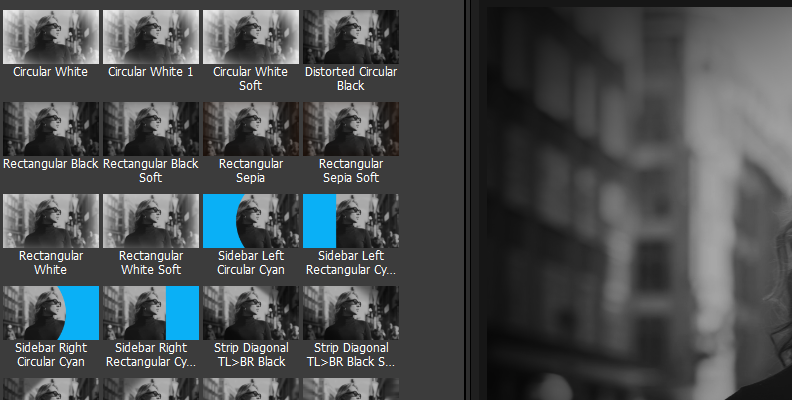
You can also open the FX Editor to access various presets, which are also fully customizable.
Why Would Video-Editors Use Vignettes in Videos?
In various video editing software, vignettes are customizable, allowing editors to adjust their shape, size, intensity, and feathering (how soft the vignette blends with the video). This flexibility ensures that the effect complements the composition without overpowering it. Additionally, modern editing tools offer precise controls to match the vignette to the video's tone and context, whether it’s a subtle enhancement or a bold stylistic choice.
Vignettes aren’t limited to mood enhancement—they can also mask imperfections, such as unwanted objects or uneven lighting near the frame's edges. By combining aesthetic appeal with practical benefits, vignettes remain a popular and versatile effect in video editing. Whether creating a cinematic film, a marketing video, or a personal project, adding a vignette can elevate your visuals and improve your storytelling.
Final Words
That covers everything you need to know about the video vignette effect.
Hopefully, what you found in this guide will help you with all your future work and make this tool something you regularly use to enhance your content in various ways.
We wish you the best of luck, and thank you for reading!


