Bump maps, normal maps, displacement maps? You may have heard these terms if you work in 3D modeling and animation, graphics design, or video editing. These mapping techniques can make a 3D object alive by adding texture, making it more realistic.
Today, we’ll explore bump mapping. What it is, its pros and cons, and the differences between a bump map with similar techniques like displacement maps and surface normal maps. Ready to learn more about bump mapping?
Let’s dive in!
What is Bump Mapping?
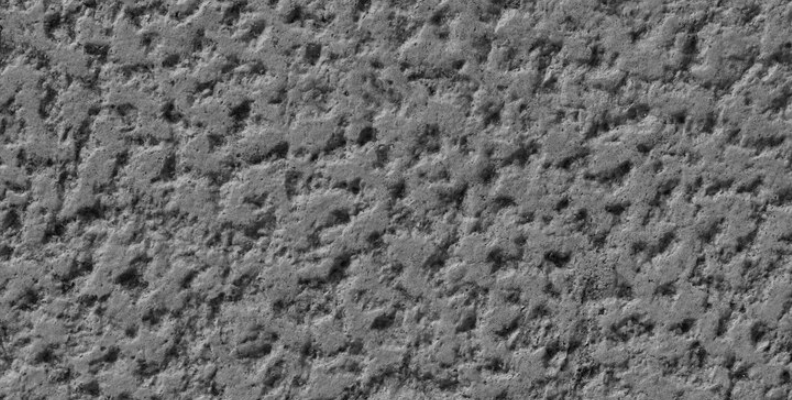
Bump mapping is a computer graphics technique used in 2D and 3D modeling, animation, and design to create realistic 3D textures, such as bumps, wrinkles, and dents, without changing the object’s surface geometry, only the surface appearance changes.
Today, the bump mapping technique is considered quite old. It was introduced in 1978 by computer scientist James Blinn. However, it is still one of the main techniques for creating realistic and detailed computer graphics quickly and efficiently.
So, how do we use bump maps? A bump map, or a height map, is a 2D grayscale texture image that can be created and edited in 2D software like Photoshop. Using grayscale and lighting techniques, the bump map creates the illusion of texture and depth instead of the original smooth surface of the 3D underlying object.
One thing to understand is that the texture created with bump maps is just an illusion. Changing the perspective or angle of the model can often break the illusion. Since the surface is not modified, the shadows cast by the 3D object won’t match the fake texture.
Bump maps are also limited to 8 bits and 256 black-and-white colors, unlike surface normals, which work with RGB values. A bump map only uses height data to simulate depth, with light (up) and dark (down) values. However, it’s easier to work with, create, and render than crafting the texture manually or using other techniques.
You should not confuse a bump map with similar techniques like normal mapping and surface displacement mapping. To ensure you fully understand what a bump map is, let's quickly review normal mapping and displacement mapping.
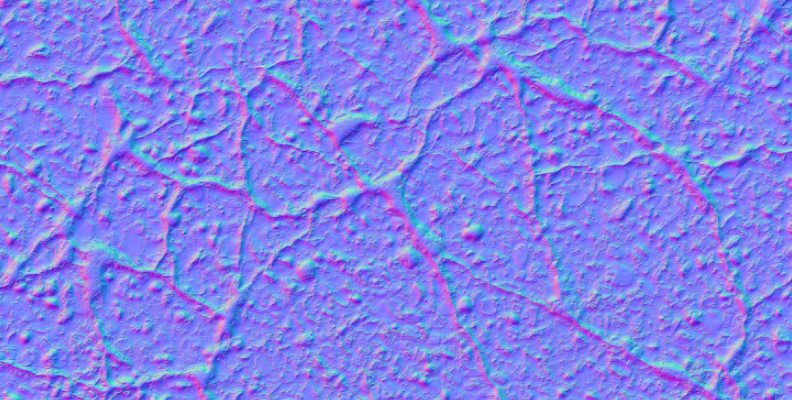
Normal maps are like updated bump maps. They work similarly to bump mapping, faking the texture and lighting and not modifying the object's geometry. However, a modified surface normal uses RGB values related to the X, Y, and Z axis of the 3D space to direct the software on how to place the map.
Displacement maps are a more advanced technique in which the map displaces a texture and modifies the geometry of the surface. The result is more realistic detail, real depth, shadows, light source, and silhouettes in the object.
Now that we’ve discussed what a bump map is let's find out how to use it to add texture to your 3D surfaces.
The easy and quick answer is with computer software. 3D software and editors can help you create and apply bump maps, normal maps, and displacement maps to a 3D surface. Here’s a list of the most popular choices in the industry:
Pros of Using Bump Mapping
Bump mapping, though an older technique, is still a common method today because it has a few advantages over other approaches for adding texture to 3D objects and surfaces.
Bump maps allow you to create little details on objects and surfaces, such as skin pores, clothes wrinkles, little dents on a damaged helmet, bumps on a rock, and terrain surfaces. Since these details are small, the limitations are less obvious to the eye.
Bump maps are also the easiest mapping technique to generate. You can quickly create and edit the maps in 2D applications such as Photoshop. They are an easy and quick way to add depth to a surface if you don’t need top-notch detail and graphics.
A bump map could provide a similar level of detail to other techniques, but it renders faster and consumes less of your CPU power. For this reason, a bump map works better when you don’t need high details and makes your work snappy. However, consider your particular CPU characteristics, too.
Bump maps are compatible with normal and displacement maps. It means you can apply a bump map to a surface and add other mapping techniques to create more complex designs.
Despite its limitations, bump maps can get the job done without excessive CPU usage and the trouble of generating other types of maps.
Cons of Bump Mapping
There are a few disadvantages to using bump maps. I touched on some of them earlier, but let’s explore how these aspects can make you want to avoid bump mapping and opt for something else.
Bump maps are known for being low resolution, with only 8 bits and 256 black-and-white colors. When applied to larger surfaces, the texture can look less detailed and unrealistic for the object. This can make the whole project look amateur, limiting you to using bump maps for small details or to stop using them. However, some 3D artists can do wonders with bump maps. It’s all about finding the right way and the best use cases.
Also, because it does not alter the geometry of the surface, even though the light effects try to replicate as the camera angle moves, the shadows the object casts and the shape remain as smooth as a raw 3D surface, breaking the illusion created by the bump map.
Even though the objects may look good at first, they can look weird once the angle and distance change and the objects with the bump map are in the same scene as other textures and objects. This includes reflections and objects that should have more mass, bulk, bumps, depth, etc.
Bump Mapping vs Displacement Mapping
If you’ve worked or read about a displacement map before, it may seem similar to a bump map, and you might be wondering when to use which one. I’ll go over the main differences between these two types of maps to help you understand better when to use which one and why both methods are so used in 3D.
Change in the Geometry
This is the main difference between a displacement map and other techniques. With a normal map and a bump map, geometry remains unchanged. When you add, let's say, a paper texture to a sphere to make it look like wrapped paper, with the bump map, it will look wrinkled, but the silhouette of the sphere will still look straight and smooth. With a displacement map, it will look wrinkled, but the change in the surface geometry will make the silhouette look with dents and bumps from the wrinkled texture.
Realistic and Detailed Textures vs Illusion
As a result of the previous aspect, changing the geometry of the surface and adding resolution will create a more realistic and detailed texture. Continuing with the paper ball example, the sphere model with a bump map would look like a perfect sphere, but if you use a displacement map, it will look like a more realistic paper ball.
A bump map creates the illusion of the sphere's wrinkled texture, but the displacement map will actually change it, which is why it can produce exceptional results.
Also, displacement maps can work with 8, 16, and 32-bit, unlike bump maps with only 8-bit.
Ease of Use and Render Time
Bump maps are easier to create and edit if needed, but displacement maps are more difficult to work with. However, today, many tools, such as Continuum, can generate displacement maps for video editing with easy-to-use settings.
Resources
Because displacement maps work by changing and adding additional geometry to the surface, they consume more resources from your computer and add more time to your renders. If the texture you create does not require the extra detail that a displacement map offers, you may prefer to lower the quality and leave the surface’s geometry intact to make the process faster using a bump map.
Final Words
Bump maps are a great tool for making your 3D models, videos, and motion graphics more vivid and achieving greater creative outcomes.
Normal maps, displacement maps, and bump maps each have their reasons to be used. You can accomplish some things using only one, but when the moment requires, you can use the other or combine them. That's the reason for understanding the main differences between a bump map and a displacement map.
Always consider the pros and cons of a bump map. Depending on your project's needs, a bump map, displacement map, or even a normal map may be better.
FAQ
Can you use bump mapping, displacement mapping, and normal together?
Yes. You can combine the bump map with a displacement and a normal type on the same surface. This combination works great for larger surfaces where the bump map texture won’t be enough for simulating bumps. The displacement map modifies the geometry to make the surface more realistic, and the bump map plus a normal map will add an extra layer of detail.


