


One of the most common visual effects you've seen in TV, films, commercials, music videos, and YouTube content is screen replacement. Imagine how amazing it would be to replace screens to correct shots, add footage from another video, or hide what was on the screen while recording!
Motion tracking for many new designers in screen tracking seems complicated, requiring a lot of time and tools that are hard to use. But today, you'll learn about one specific tool which, when combined with After Effect, makes the process intuitive and accessible to anyone.
In this article, you'll learn how to screen track from scratch using Mocha, a plug-in from BorisFX, and use that tracking data to make a screen replacement in After Effects. There is a free trial available as well, so anyone can try using Mocha for screen replacements.
Let’s dive in!
What Is a Screen Replacement?
Screen replacement or screen tracking is a technique used in motion tracking to capture data from a screen device in a video clip, like a phone, tablet, computer, or TV, and replace that screen with another video clip or image.
Video editors and motion graphic designers use screen replacement in post-production all the time to add entirely different footage on the screen that was not recorded in the original shot. The technique is used a lot in sci-fi movies and TV shows to add imaginary scenarios impossible to shoot in real life, but you'll be surprised to find out that screen replacements are used even in commercials and YouTube content.
Screen tracking also helps eliminate blurry screenshots and reflections and correct an overall lousy shot overall.
How to Replace a Screen in After Effects with Boris FX Mocha
Mocha by BorisFX is a planar tracker that makes screen tracking and masking tasks quicker and more intuitive. Video editors turn to Mocha when they need to replace a green screen, remove wires and other objects, and stabilize or lock motion from a video. Luckily, planar tracking with BorisFX couldn't be easier.
The basic workflow for screen replacement is tracking the screen from a source video, then using that tracking data to replace the screen with other footage. You can replace screens in a still image or footage in motion.
For this After Effects tutorial, you can use the Mocha AE effect installed in Adobe After Effects or the professional version of Mocha Pro from BorisFX. The basics for motion tracking in Mocha are the same for both products.
Step 1: Set Up Your Project In Adobe After Effects
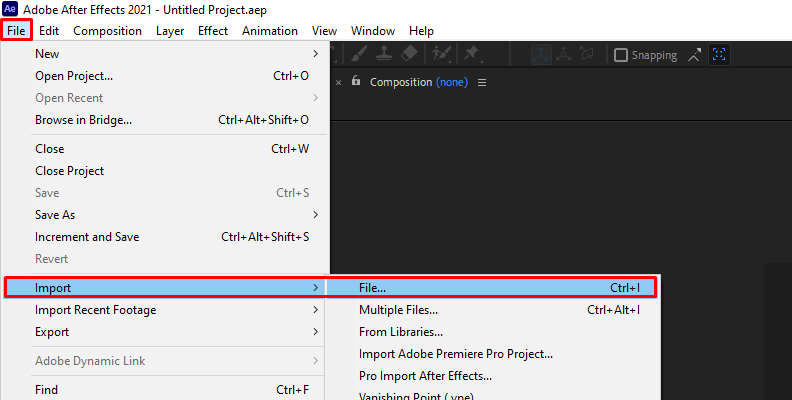
Import your media files in After Effects. That's the video with the screen you want to replace and the video clip that will replace it.
![screen replacement in after effects]()
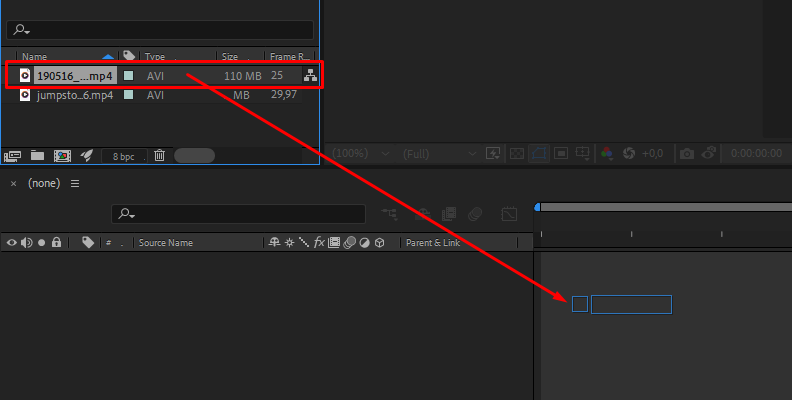
Drag the video you want to track to the timeline to create a new composition (the one with the screen you want to replace). You can rename the track as Main Clip or something that reminds you of the original clip that you want to track.
![]()
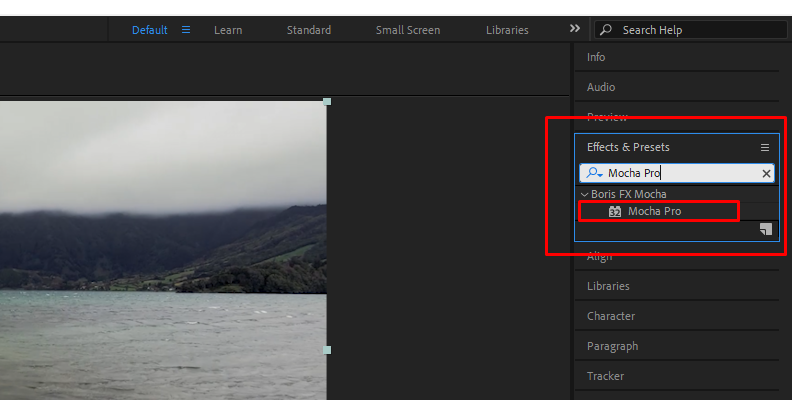
Step 2: Apply Boris FX Mocha
Select the video layer to track and go to the Effects & Presets panel and search for Mocha. Drag Mocha Pro or Mocha AE effect to the video clip to apply it.
![]()
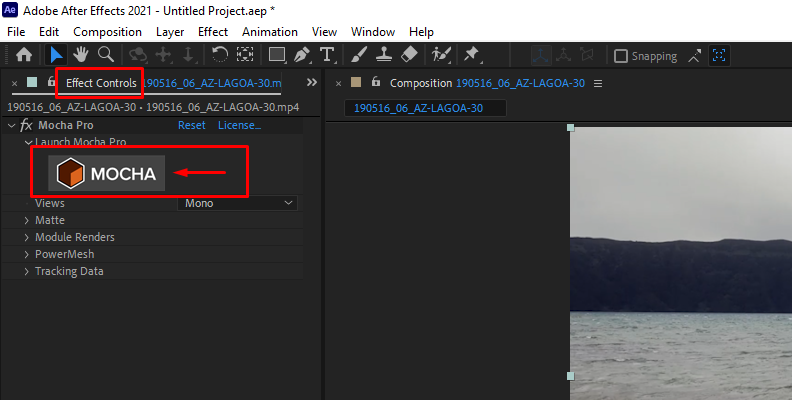
Now go to your Effects Controls panel and click on the Mocha logo to open the Mocha AE interface, where you'll track the screen.
![]()
Mocha will automatically read your compositions and import the video into its interface. Mocha's interface can look intimidating at first, but it becomes extremely accessible once you know which tools you'll use.
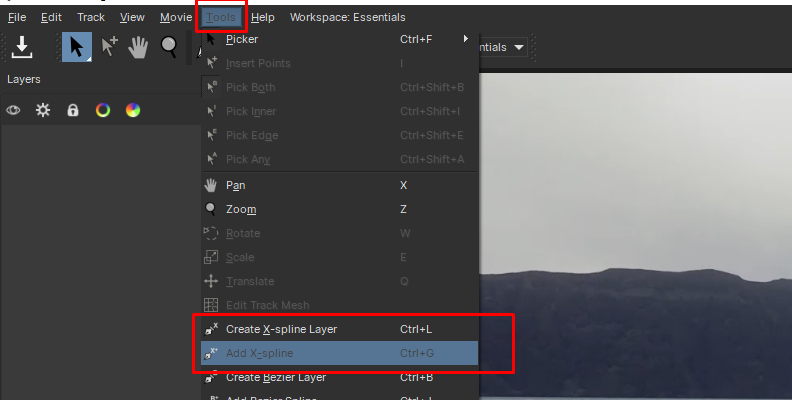
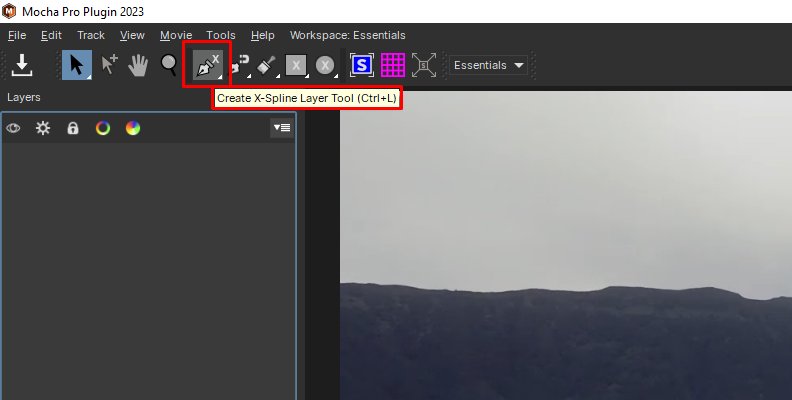
Step 3: Using the X-Spline Tool to Create a Layer of Your Screen
Use the essential workspace for this tutorial if it's your first time using Mocha. It's a straightforward interface and has all the tools you'll need right at hand.
Your first step is to locate a frame where you can fully see the computer screen you want to track, especially if it's a moving video. Don't worry if it's in the middle of your footage; you can track back and forward with Mocha.
Next, create a spline around the screen you want to track using the X-Spline tool (the icon with an ink pen and an x).
![]()
![]()
Draw a mask around the screen creating points by clicking. Close the spline with a right-click once you've finished masking. This will tell Mocha to look at this new layer to track.
You can rename the layer to the screen layer to stay organized on After Effects.
Step 4: Tracking Your Screen in Mocha
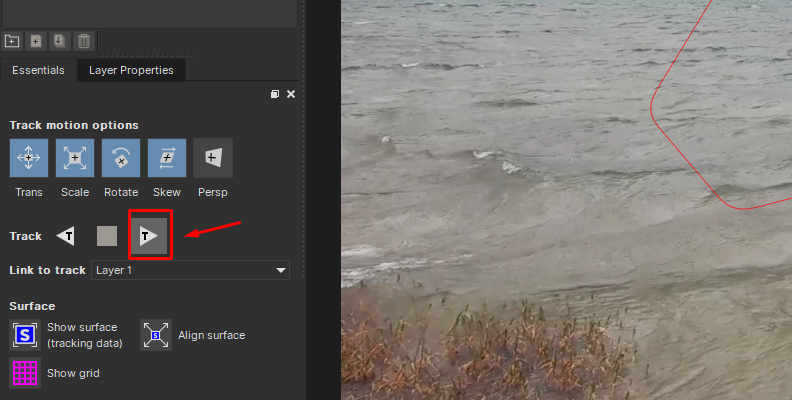
Select your layer and click on Show planar surface (the blue square button with an S) to enable a blue box on the screen. Adjust the corner of the box to match the corners of the screen you want to track. Using the planar surface, you can tell Mocha where the screen that needs to be tracked is within the frame.
With the spline, you're telling Mocha: "I want you to look at this area for tracking." Whereas, with the planar surface, you're telling the effect: "Track this screen."
Now you're ready to start tracking properly. Click on the track forward button to track forward, and then use the track backward if you started in the middle of the video clip to track the beginning of it.
![]()
Depending on the length of your video, it could take several minutes to complete the tracking.
Mocha usually does an excellent job tracking, but you can preview it and adjust the layer if something seems off.
You can create more layers to track each independently if you have multiple screens, repeating the process as many times as necessary. Remember to label them so you can identify them when you gather the data in After Effects.
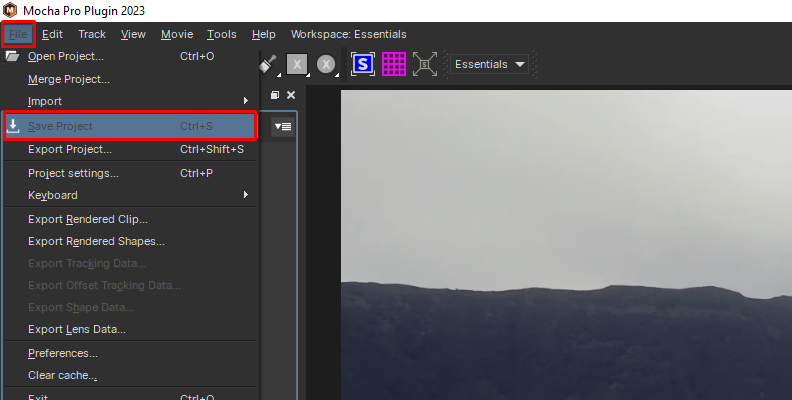
When the process is complete, save the Mocha project by clicking the Save button on the top left corner of your computer screen, with CMD+S or CTRL+S, or by going to File > Save Project. Then you can close the Mocha UI and return to After Effects.
![]()
Step 5: Prepare Your Replacement Video Clips
Drag the video clip that will replace the original video's screen to the timeline, placing that layer on top.
Right-click the layer and select Pre-compose. Name the new composition "screen comp" or any other name that'd identify it as the replacement screen. Select the second option, "Move all attributes into the new composition," and click OK.
![]()
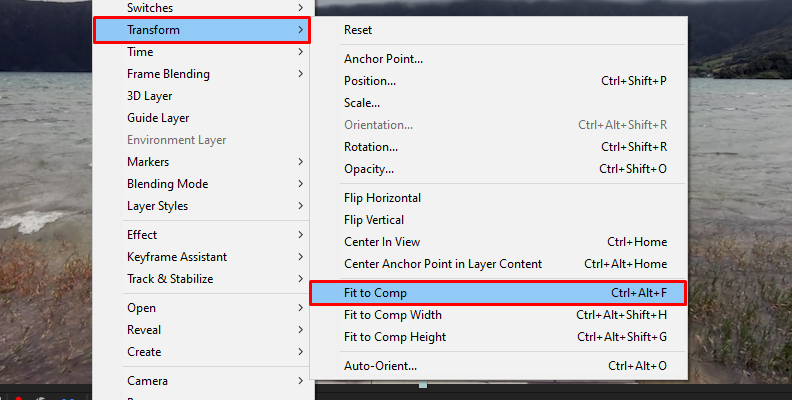
Enter the new composition, right-click it, and select Transform > Fit to Comp. Close it and go back to the main composition.
![]()
The aspect ratio of the screen you are replacing should match the one from the replacement clips. For example, if you're replacing a phone screen, you must edit the aspect ratio in the pre-comp so the replacement clip will look good in a phone's vertical resolution.
To change the aspect ratio from the pre-comp, go to the menu Composition > Composition Settings and type the aspect ratio of the device on the screen. The more accurate you are, the better the replacement clips will fit.
Step 6: Importing Tracking Data to After Effects
Select your main video with the Mocha tracking (the one with the screen you want to replace). Go to the Effect Controls panel and display the Tracking Data properties by clicking on the arrow on the left.
Click on Create Track Data to display all tracking information. You should see the layer you created in Mocha in steps 3 and 4. You will see them all listed here if you created several layers tracked individually with their respective label. Select the correct tracking data and press OK.
Choose the Export Option as Corner Pin (Support Motion Blur).
Choose the pre-comp you created in Step 5 with the replacement video clip as the target layer in the Layer Export To setting.
Click Apply Export, and now you should see the pre-comp with the replacement clips on the screen of your main video. Preview it to make sure everything has been tracked properly.
If you need to adjust the tracking, delete the corner pin effect in the Effect Controls panel from the pre-comp layer and relaunch Mocha from the main video to adjust the tracking data. Save the project in Mocha and reapply the tracking data to the pre-comp layer.
Step 7: Adding Final Details
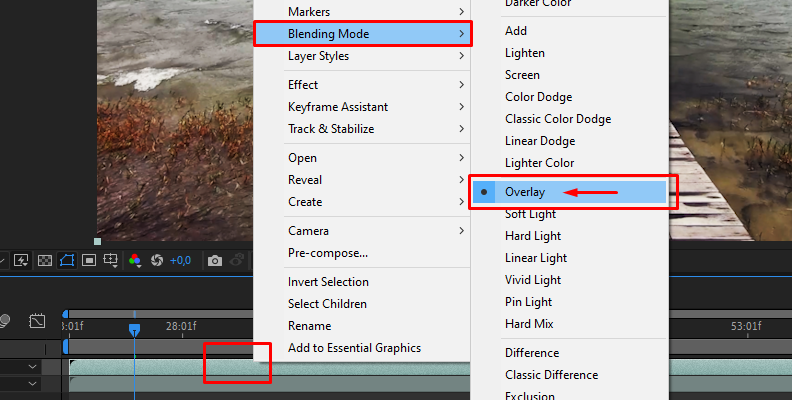
Sometimes the replacement clips may look unnatural on the final video, so you want to add some effects to make it look as realistic as possible. There are infinite possibilities, but basic blends and enhancement effects are the easiest way to do it.
For a basic blend, duplicate the original video and put it on top. Right-click the layer and select Blending Mode. Choose a blending mode and play with the opacity settings. This will help you bring back reflections and other details from the original screen.
![]()
The second method is using effects. Search for an effect in the Effects & Presets panel and add it to the clip on top. You can experiment with motion blur, grain, color correction, or a keylight effect to add a better look to the final product. Play with the settings until you’re satisfied with the result.

Final Words
Motion tracking may seem complicated, but it's all about exploring and experimenting with this powerful feature. The seamlessly integrated Mocha and After Effects workflow makes motion tracking duties something even inexperienced video editors can perform, so give it a try and learn a new way to upgrade your footage!
Don't worry if your screen replacement is not perfect the first time you try it. It'll take many tries to have accurate tracking, especially in scenes or animations in motion. You can think you've done excellent tracking and then find some corner data missing in After Effects. You might have to switch a lot between Mocha and After Effects in your first attempts with screen tracking.
With practice and patience, you’ll learn to perfectly track a screen in Mocha and replace it using Adobe After Effects compositions.
Good luck!


