


Modern video editing software and tools allow us to create the content of our dreams, whether it be for commercials, educational purposes, work, or social media promotions.
When it comes to creating such impressive content, most of us can agree that slow motion is one of the most popular effects to use. Even though it was first introduced a long time ago, it still induces the "wow" factor in most viewers and is used frequently even in the most top-tier production films.
In this guide, we'll help you learn more about Twixtor, what it is, and how you can use it to add a slow-motion effect to your video clip in Adobe Premiere Pro.
Without further ado, here's what you need to know.
Why Use Twixtor?
You may be wondering what Twixtor is, and why you should consider using it when editing Adobe Premiere Pro, or other popular video editing programs, as Twixtor works with After Effects, Final Cut Pro, and more.
Re: Vision Effects' Twixtor is a plug-in used for time remapping, meaning slowing down time in a video clip to create effects like a slow motion effect or speeding up time to create so-called "speed ramps" which are sometimes needed based on the type of content you're creating (timelapses and various other time-manipulation effects). It uses a frame interpolation method to generate new/extra frames needed for a smooth slow-motion cinematic effect with fewer artifacts.
Twixtor finds a lot of use amongst creators working in productions for YouTube, television, and advertising, where smooth slow-motion effects are desired but not originally planned and captured under such circumstances during filming.
As you probably already know, to achieve slow motion, you must record with a higher frame rate than the framerate at which you'll playback the video. This can be properly planned and executed under controlled circumstances, but that's not usually the case in productions such as the ones we mentioned above where content is often recorded on the fly and without much planning or fancy expensive equipment.
So, this is where Twixtor comes to save the day. Take a look at the next section where we cover how Twixtor can help you create a slow-motion video out of "regular" recorded material captured without the use of a high-speed, high-framerate camera.
How Does Twixtor Work?
Twixtor is a plug-in that you can add to a video within your video editor, like Premiere Pro, just like you would apply other video effects. However, before we get into the step-by-step tutorial on how to use it to alter your video speed, let's first explain how the software works.
The reason we mentioned Twixtor finds a lot of use in productions where the material isn't recorded with high-framerate cameras is because it uses a method called "Frame Interpolation" or "Motion Interpolation" which is essentially computer generation of new frames in between already-existing frames.
This allows creators to get the best results out of a slow-motion effect even when the material is not recorded at high framerate, as the software artificially "primes" the footage by generating/interpolating frames. So, when you apply Twixtor to your video, you get unparalleled image quality and slow motion smoothness compared to if you were to use the original framerate to create a slow motion without previously interpolating frames.
Now, this may sound a bit too good to be true, and there is something that we have to mention regarding any use of additional processing in editing. Although it's a very helpful method and can often save projects on its own, we still recommend recording the material accordingly with all this planned beforehand and using the right equipment.
The reason for this is that the results from such methods are not always perfect, and you can often find anomalies, warps, and artifacts if you closely look at the details in the new, extra frames generated by the software.
That said, the creators of the Twixtor plug-in boast a much lower rate of such imperfections when using their software to create filler/extra frames compared to some other methods, like the built-in Optical Flow in Premiere Pro. We'll leave it up to you to test and decide about the results, though.
So, to simplify, the Twixtor effect artificially makes up for the missing frames that are required to get a smooth slow-motion cinematic effect when altering the playback speeds of your video. It does this by analyzing on a frame-by-frame basis and interpolating/generating extra, using information gathered from the surrounding frames.
How to Do Slow Motion Video Using Twixtor in Premiere
By now, you already know what Twixtor is, how it works, and in which scenarios it can be helpful for your video editing projects.
Now, it's time to learn how to use it in Premiere Pro.
Step 1: Open Premiere (or Your Software of Choice) and Import Media
As we've already mentioned above, Twixtor is available as a plug-in for multiple video editing programs. Once you have it installed, you can use it within your software of choice.
For this specific example, we'll be using Premiere Pro as a host software. So, simply follow the steps to learn how to use Twixtor in Premiere Pro.
Open Premiere and create a new project. We recommend creating a new project instead of working on one you've already started. This is so that you can learn without making any unwanted changes. Once the software loads, import media by navigating to the "Project" section, then right-clicking an empty area and choosing "Import" as shown in the image below.

Step 2: Create a Sequence
You now need to create a new sequence. To do this, right-click on an empty area within the "Project" tab, then choose "New Item" -> "Sequence" as shown in the image below.
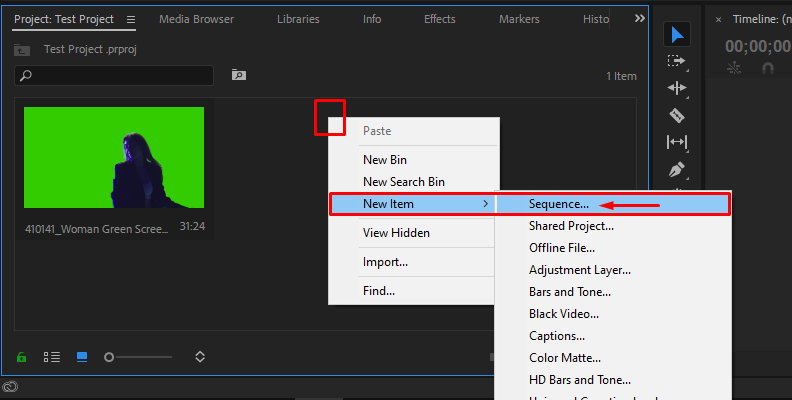
Choose the settings that work for you, then name your sequence and press the "OK" button. Naming your Twixtor sequence is important for later.

Step 3: Add the Video to the Sequence
Now, your next step is to add the video you previously imported to your newly created sequence.
To do this, simply drag and drop it over the timeline.

Now, this is a slightly tricky part, but you'll get it done right by carefully following the steps.
After you've added the video to your Twixtor sequence, duplicate it two or three times (or the same length as your desired slowed down clip) to extend the length of the slow-mo sequence. We do this because Twixtor, in its plug-in form, doesn't have permission to do this.
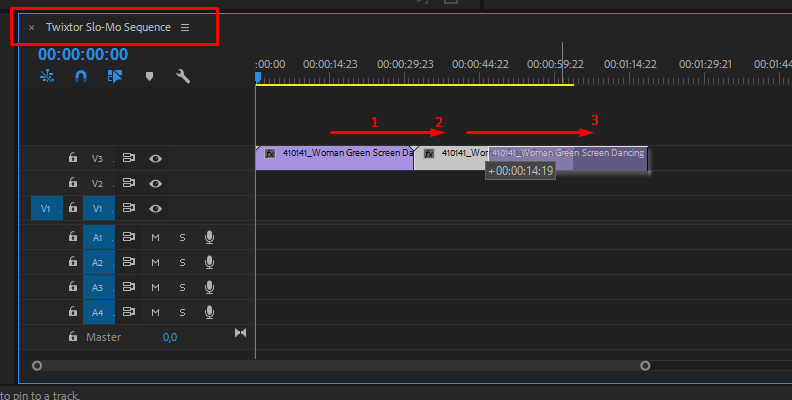
It's simple, just hold the ALT key on your keyboard and drag and drop the clip further along the timeline. Make sure they don't overlap while duplicating. If you drag the copy at the end of the previous one, Premiere will automatically "snap" it at the very end where it should be, without overlapping.
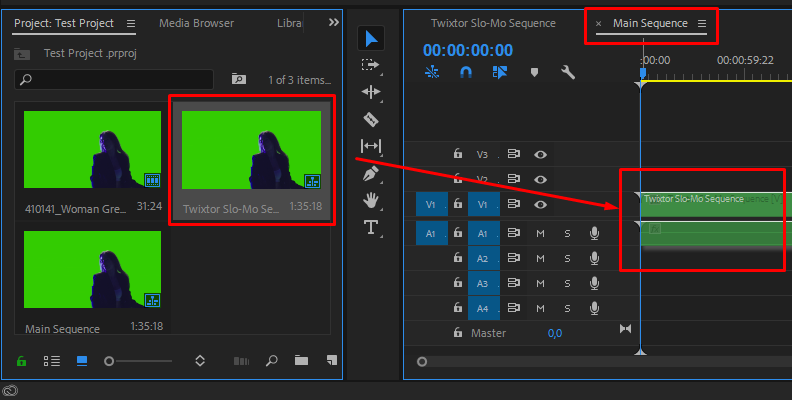
When done, create another sequence just like we showed you a few moments ago. You can name it "Main Sequence" or something similar.
Now, drag the Twixtor sequence for your Project Panel onto the main sequence.
Step 4: Apply Twixtor to the Nested Sequence
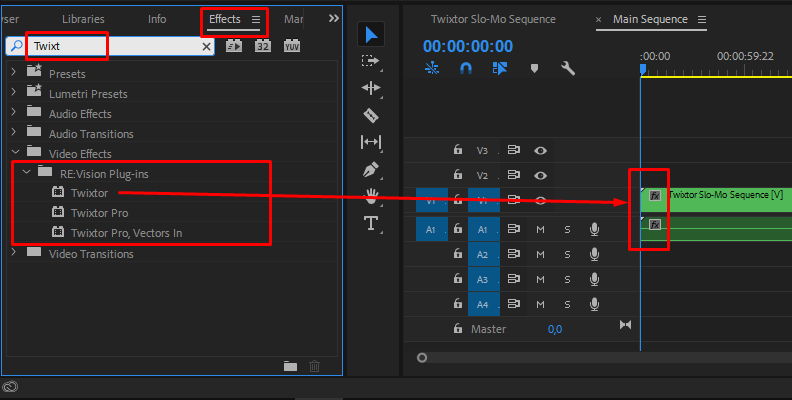
You apply Twixtor to the nested sequence as you do with any other effect in your editing software of choice, in this case, Premiere.
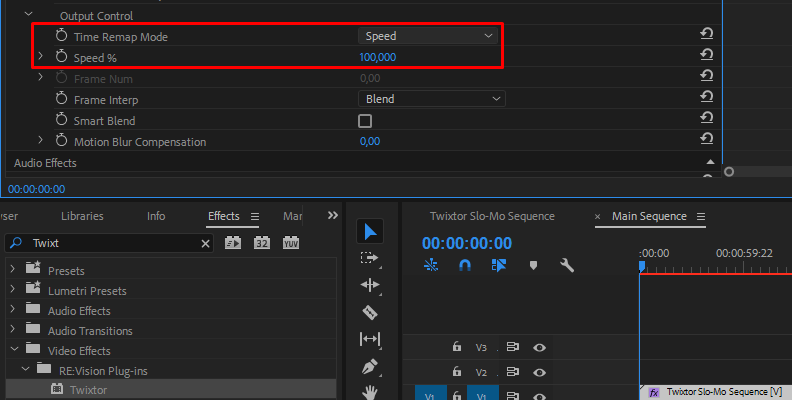
Simply search for it in the "Effects" panel, then drag and drop it over the video, or in this case, the nested sequence.
Step 5: Open the Effect Controls Panel
To use the effect's settings and parameters, open the "Effect Controls" panel in the top-left corner.
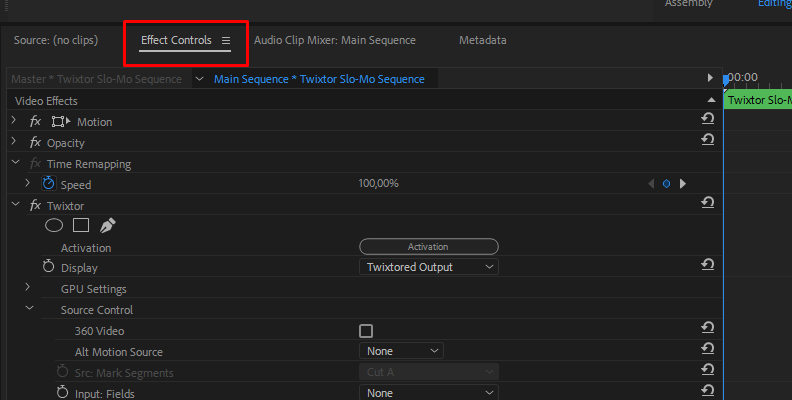
Here, you have many different settings that you can adjust depending on your project's needs. To make things much easier, we recommend finding the "Time Remap Mode" setting. Set the parameter of the Time Remap Mode to "Speed" instead of "Frame Number".
Now, all you need to do is set a speed percentage, meaning how much you want to slow down your video.
You can scroll down the list of settings and adjust them, but it's recommended you leave most at their default parameters except for some very specific scenarios.
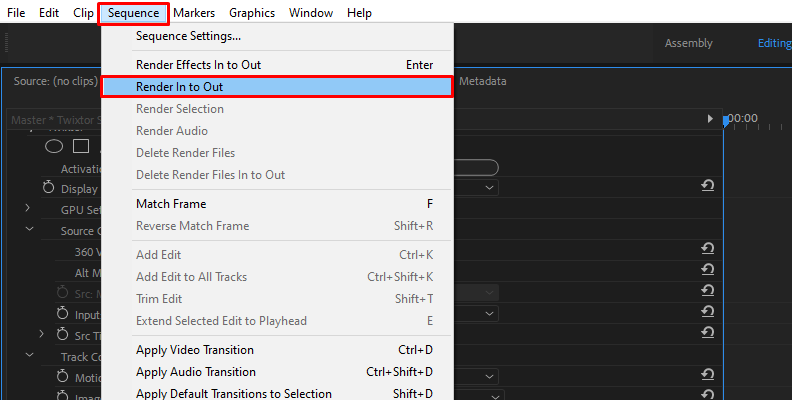
When done experimenting, go to "Sequence" -> "Render In to Out" to render your video.
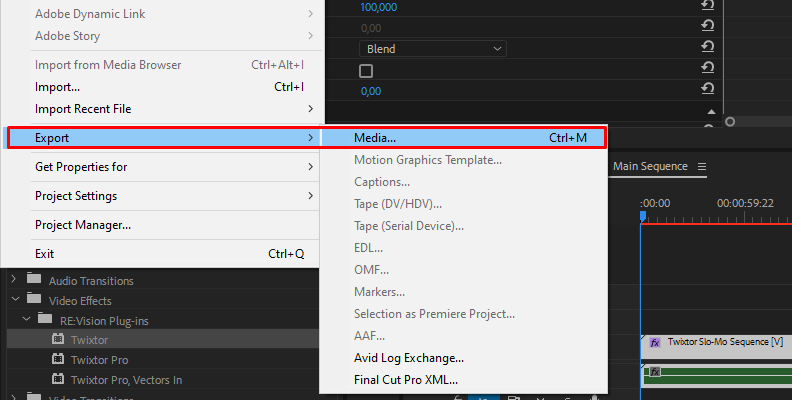
Step 6: Save, Preview, and Export Your Video
If you're satisfied with how the results look, save your project using the popular "CTRL + S" keyboard shortcut, then preview the video once more, and finally, export the video.
If you are not satisfied with how things look, feel free to use our recommended Twixtor alternatives
Final Words
That's all there is when it comes to slowing down your footage with Twixtor.
You now know what this plug-in is, how it works, and most importantly, how to use it to take your videography to the next level.
FAQ
How to Install Twixtor?
To install Twixtor, you need to visit the official website and choose whether you want the Mac or Windows version. From there, the file will download, and the rest of the process is just following the setup. Somewhere in the middle of the installation, you'll have an option to activate the product using a key, but you can also do this later on if you just want to try the trial version for now.


