


The ability to manipulate the speed of your footage is essential for successful video editing.
Whether you want to turn a slow-motion clip into a dynamic sequence or speed up a video to fit a desired duration, altering your clip speed with Final Cut Pro (FCP) can transform the pacing and impact of your projects.
In this guide, we'll walk you through how to change the speed of your clips from their original speed to a faster or slower rate using Final Cut Pro. We'll take you through the process of fine-tuning speed changes to achieve the desired speed for each segment of your project, highlighting both automatic and customized options to suit your editing needs.
How to Change Clip Speed in Final Cut Pro
To apply your desired clip speed change in Final Cut Pro, follow these straightforward steps:
Step 1: Import Your Video Clip
Launch Final Cut Pro on your Mac. You can find the FCP icon in your Applications folder or in your Mac's Launchpad.
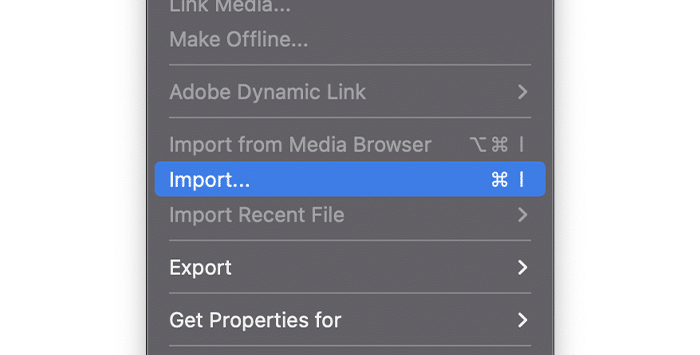
Import the clip you want to speed up (or slow down) into your project library. You can do this by selecting File > Import > Media from the top dropdown menu (or the <COMMAND + I> keyboard shortcut).
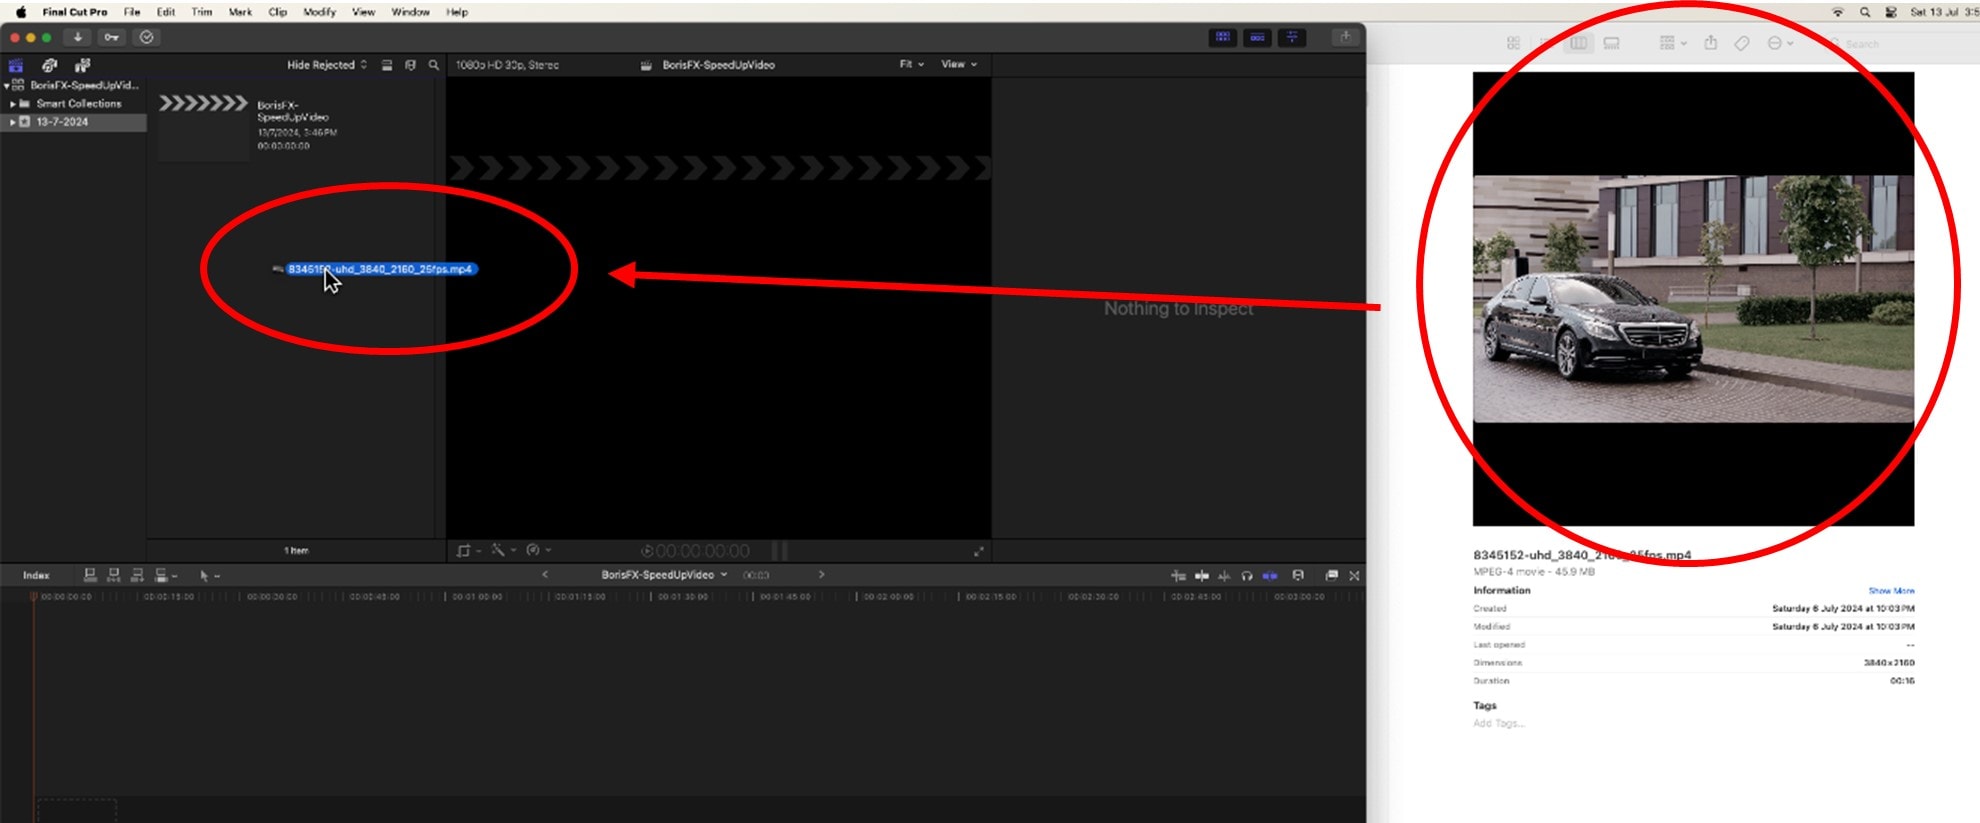
You can also drag your video file directly into the project library pane.
Step 2: Add the Video Clip to Your Timeline
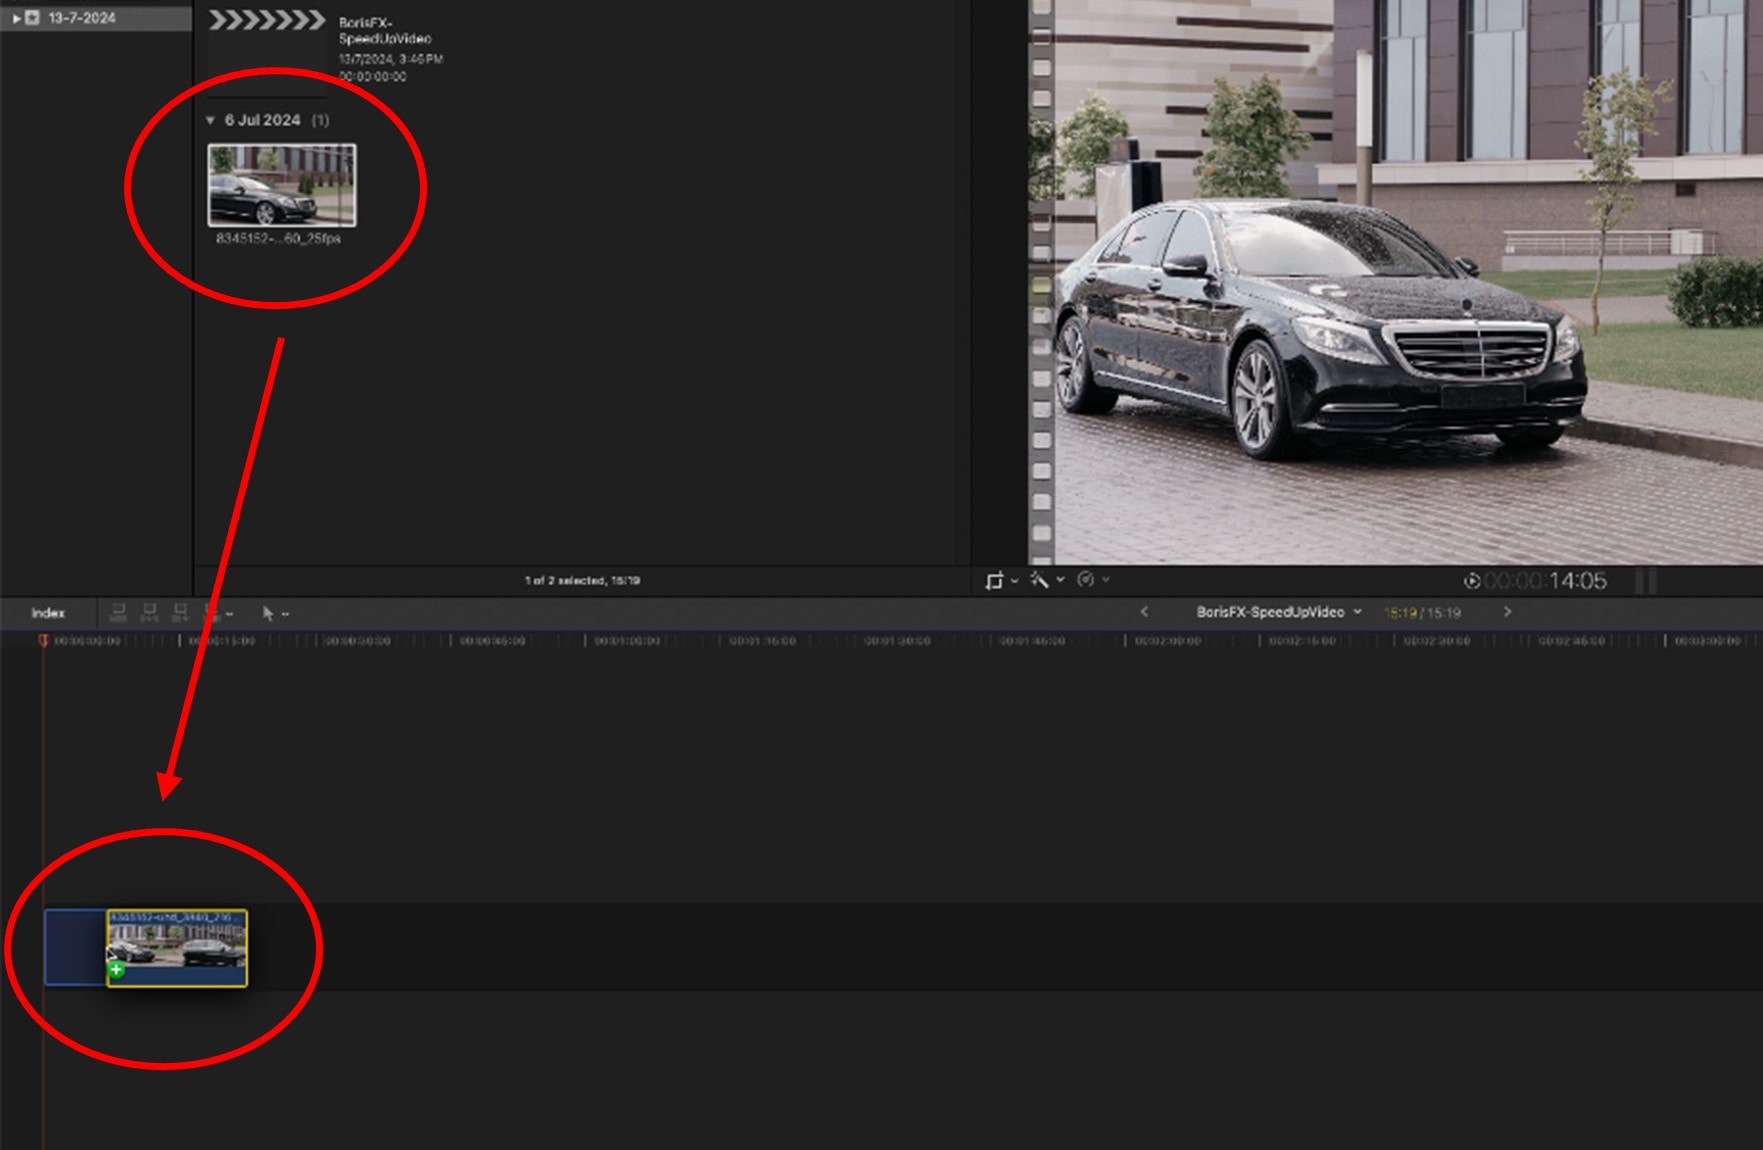
Select your video clip from the project library.
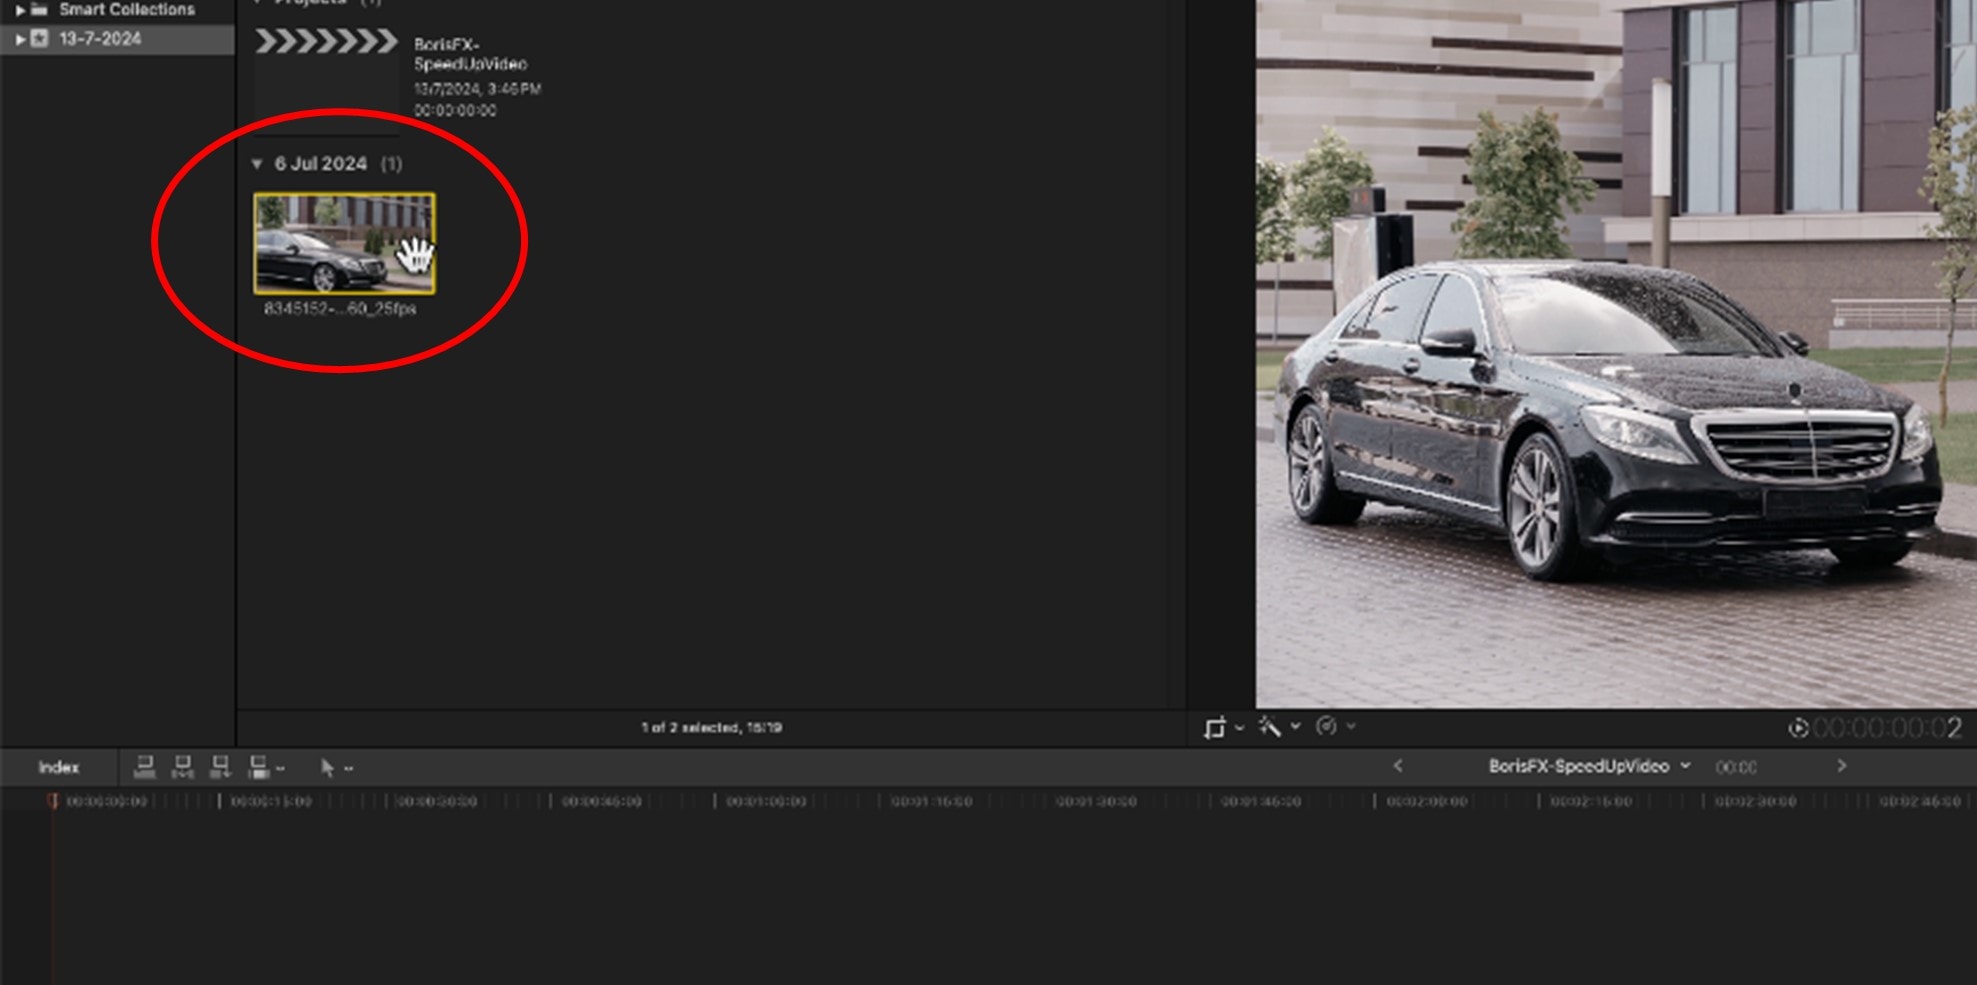
Drag and drop your clip in the timeline at the bottom of the FCP interface.
Step 3: Adjust Speed Settings
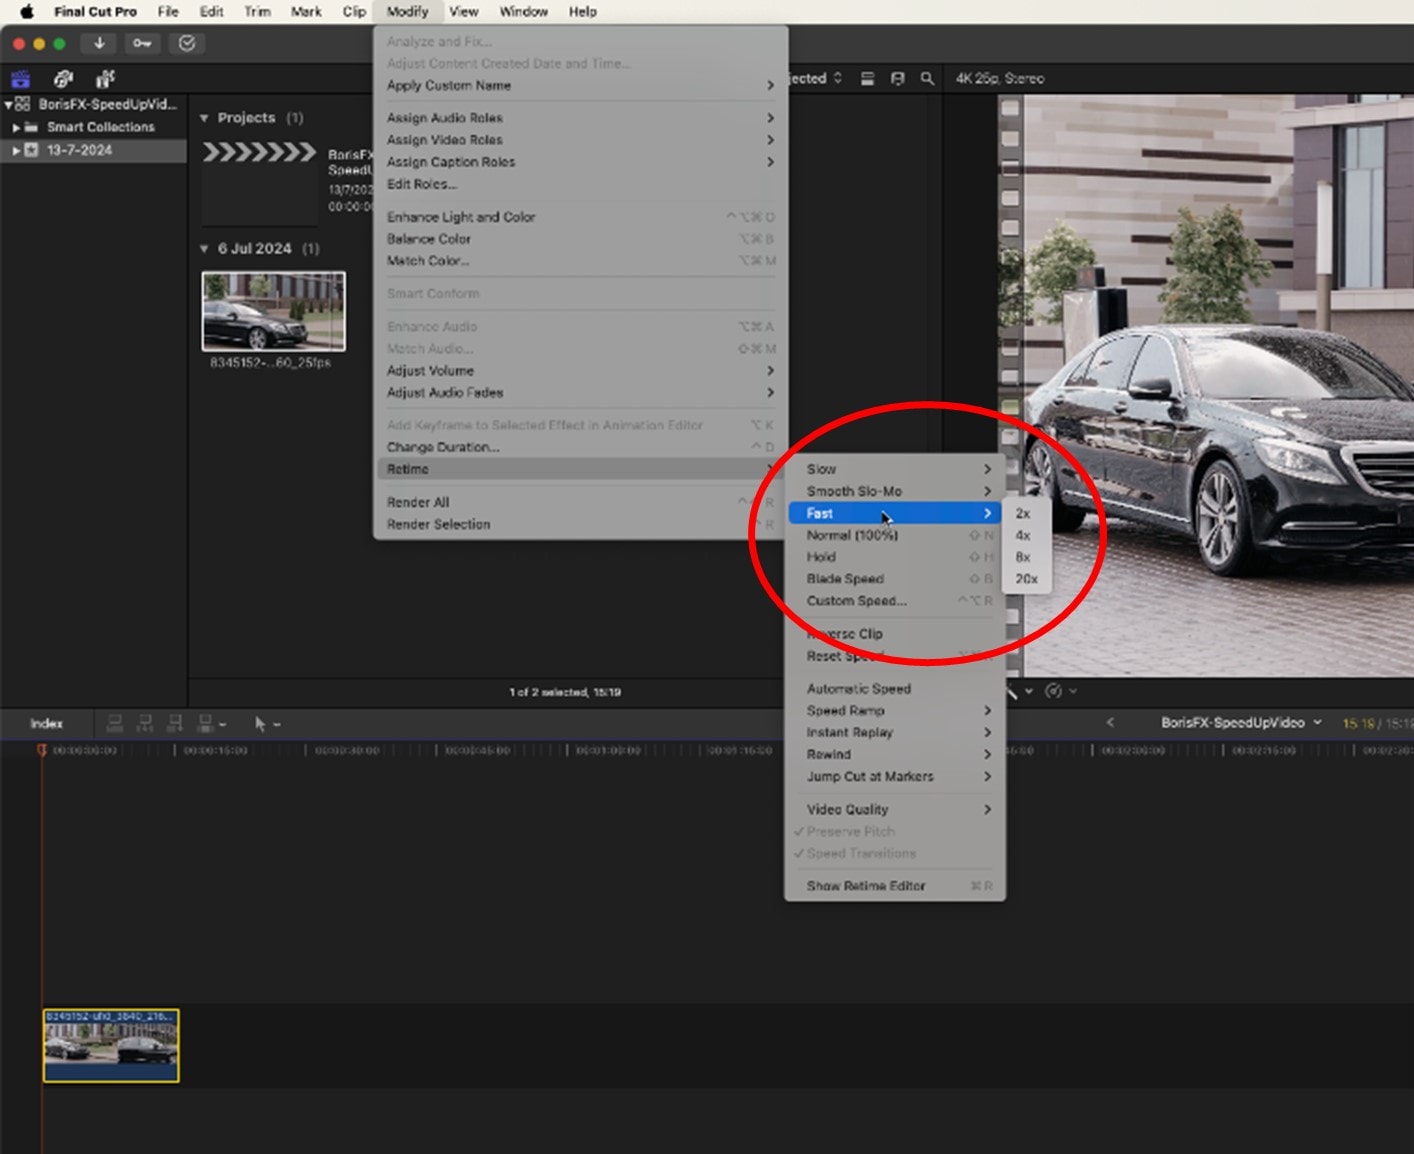
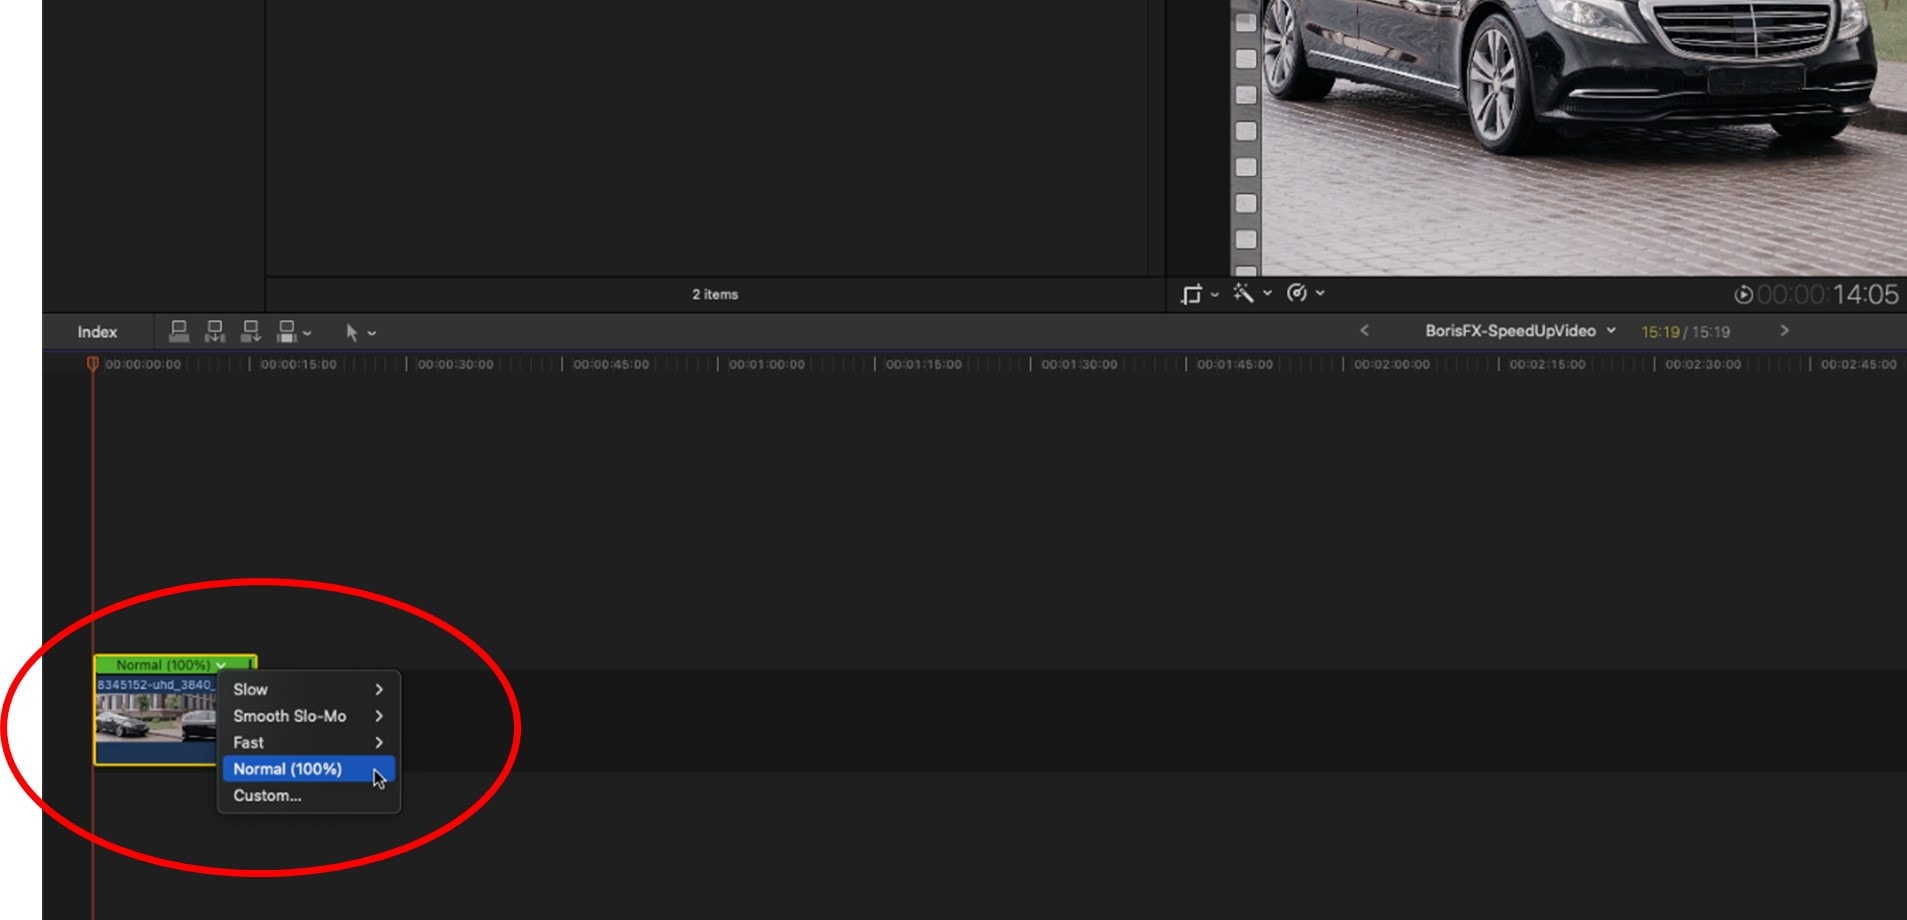
With your video clip selected in the timeline, navigate to the top menu and select the Modify option.
From the dropdown menu, select Retime (i.e., show Retime Editor) and then choose one of the automatic speed adjustment options (e.g., Fast, Slow, Smooth Slo-Mo, or Normal) or Custom Speed to change the speed depending on your preference.
You'll notice the automatic speed options have sub-menus for further refinement (e.g., 10%, 25%, or 50% for Slow or 2x, 4x, 8x, or 20x for Fast).
Alternatively, select the Retiming handle (i.e., icon) located at the bottom of the preview pane to show the Retime Editor.
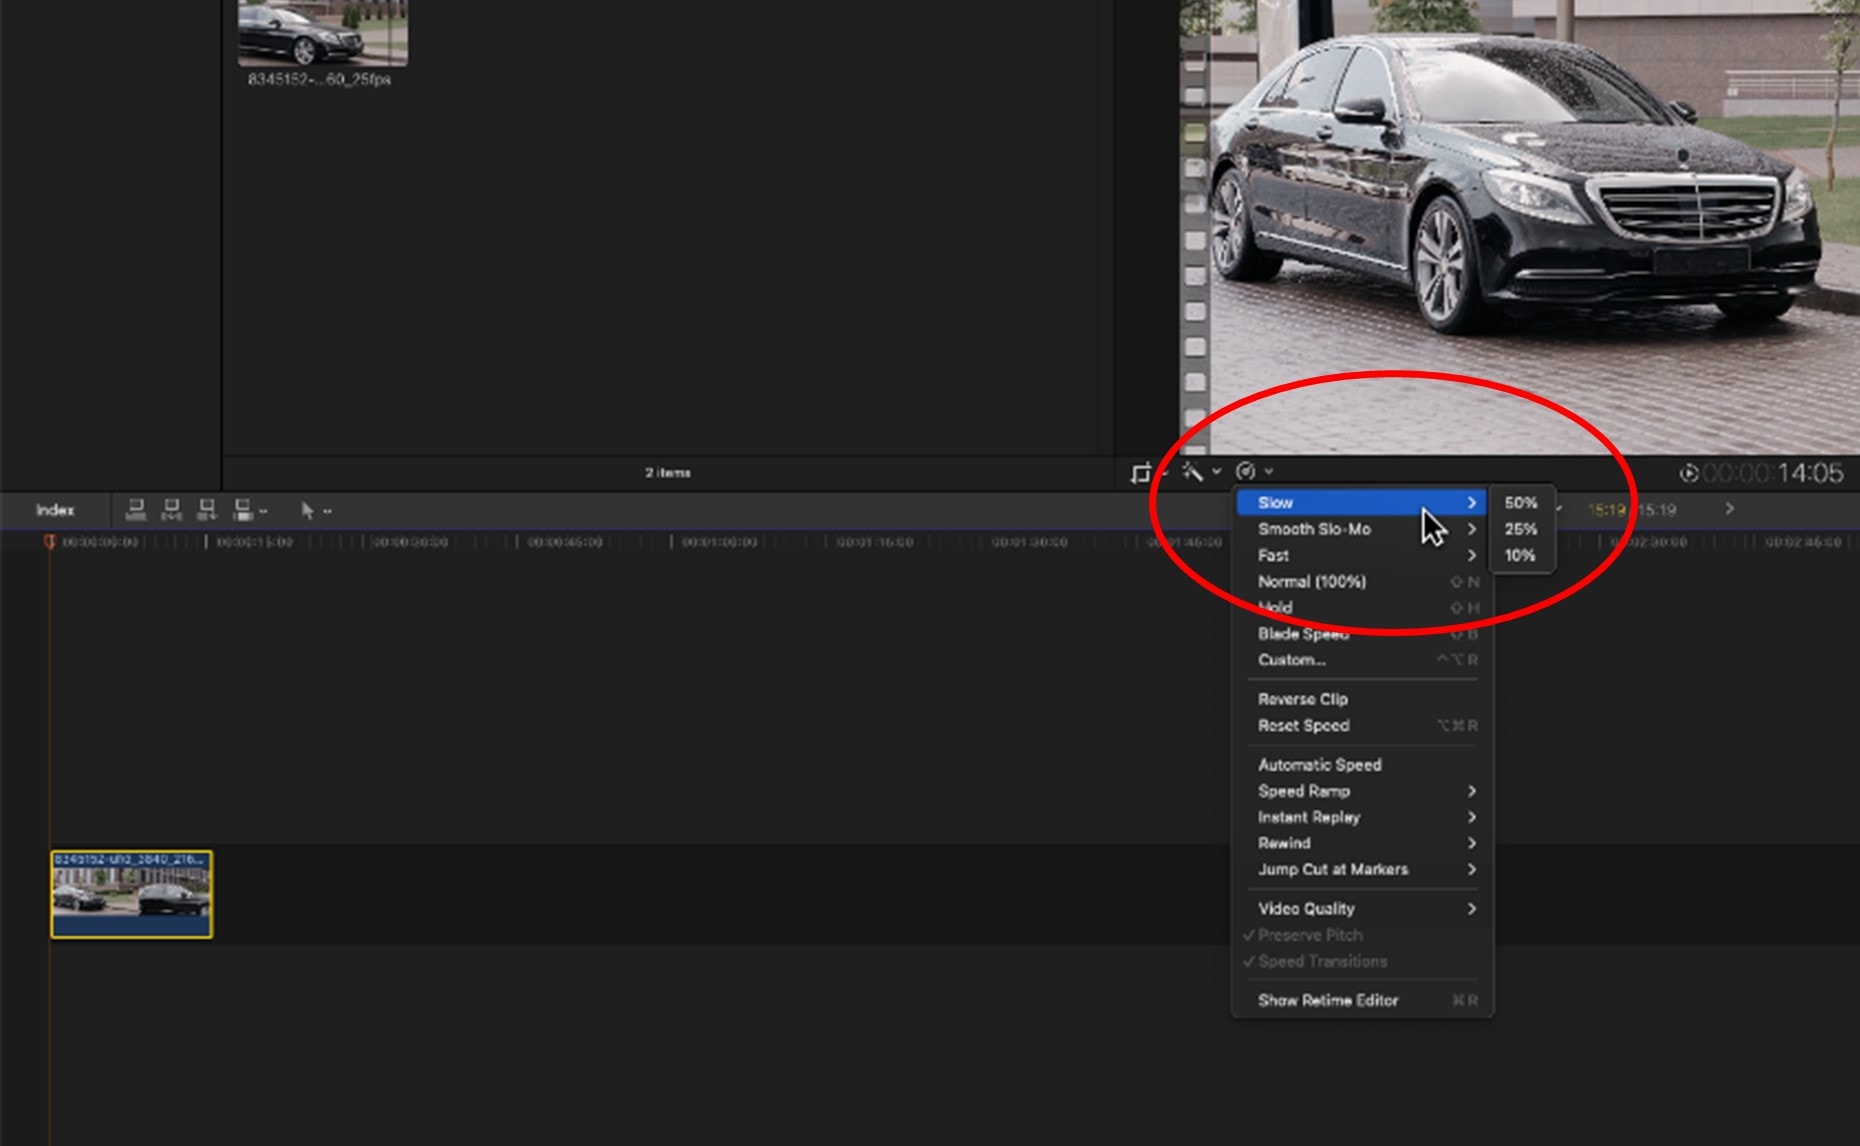
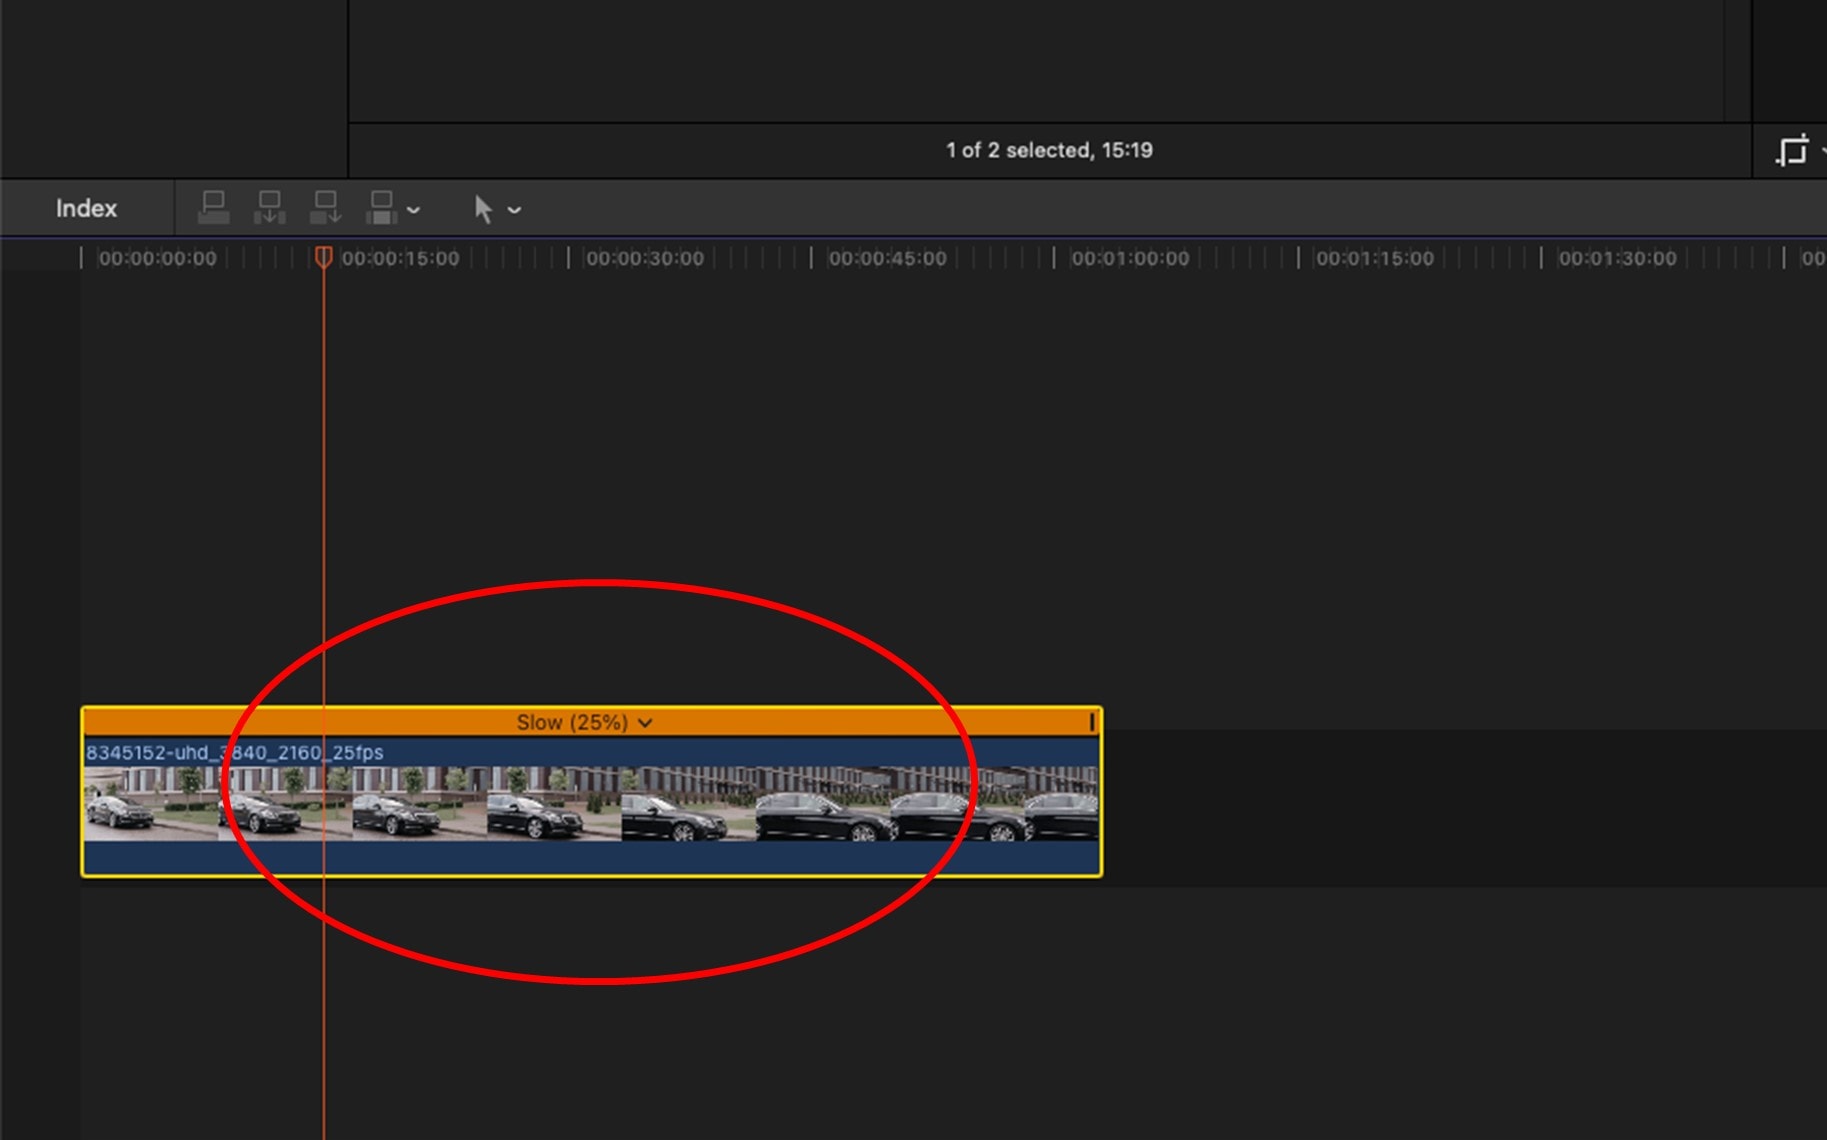
Here's an example of applying an automatic Slow speed adjustment of 25%:
You can also choose <COMMAND + R> as a shortcut that will automatically apply the Normal speed edit to your clip, which you can then change using the dropdown menu.
Step 4: Customize Speed (Optional)
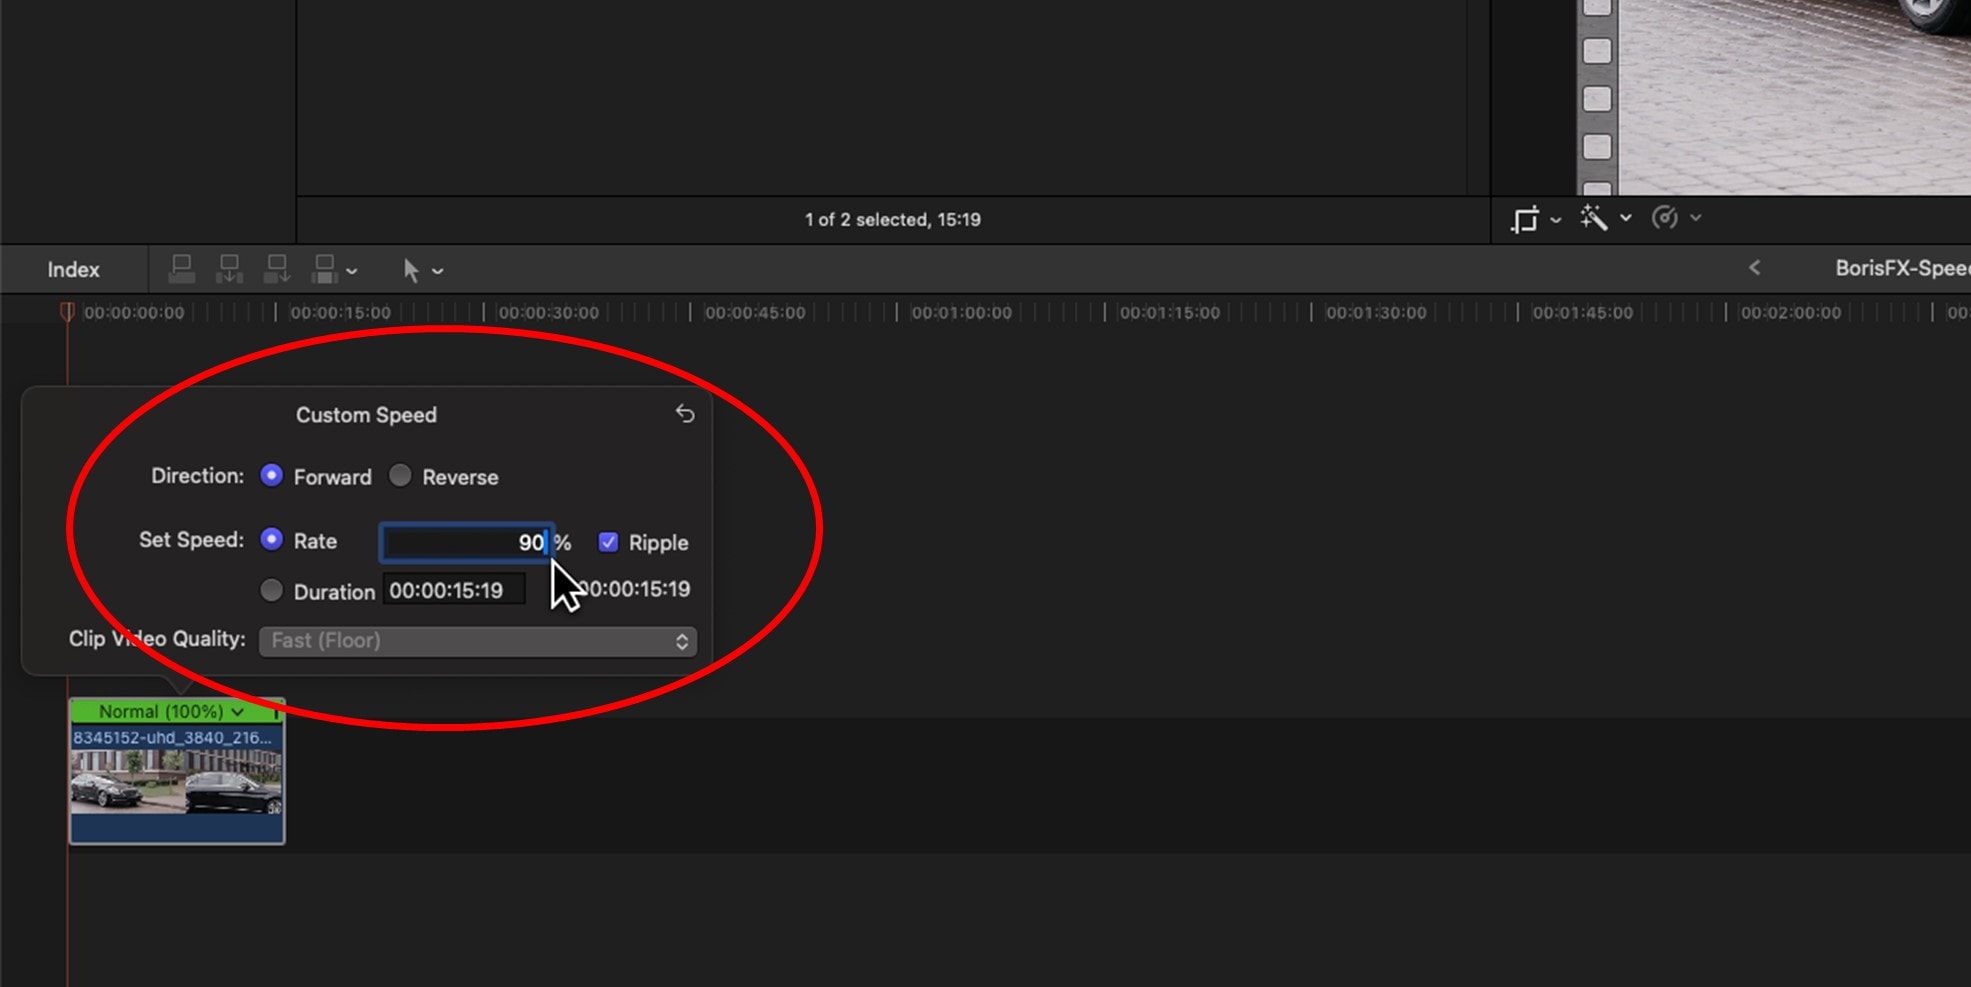
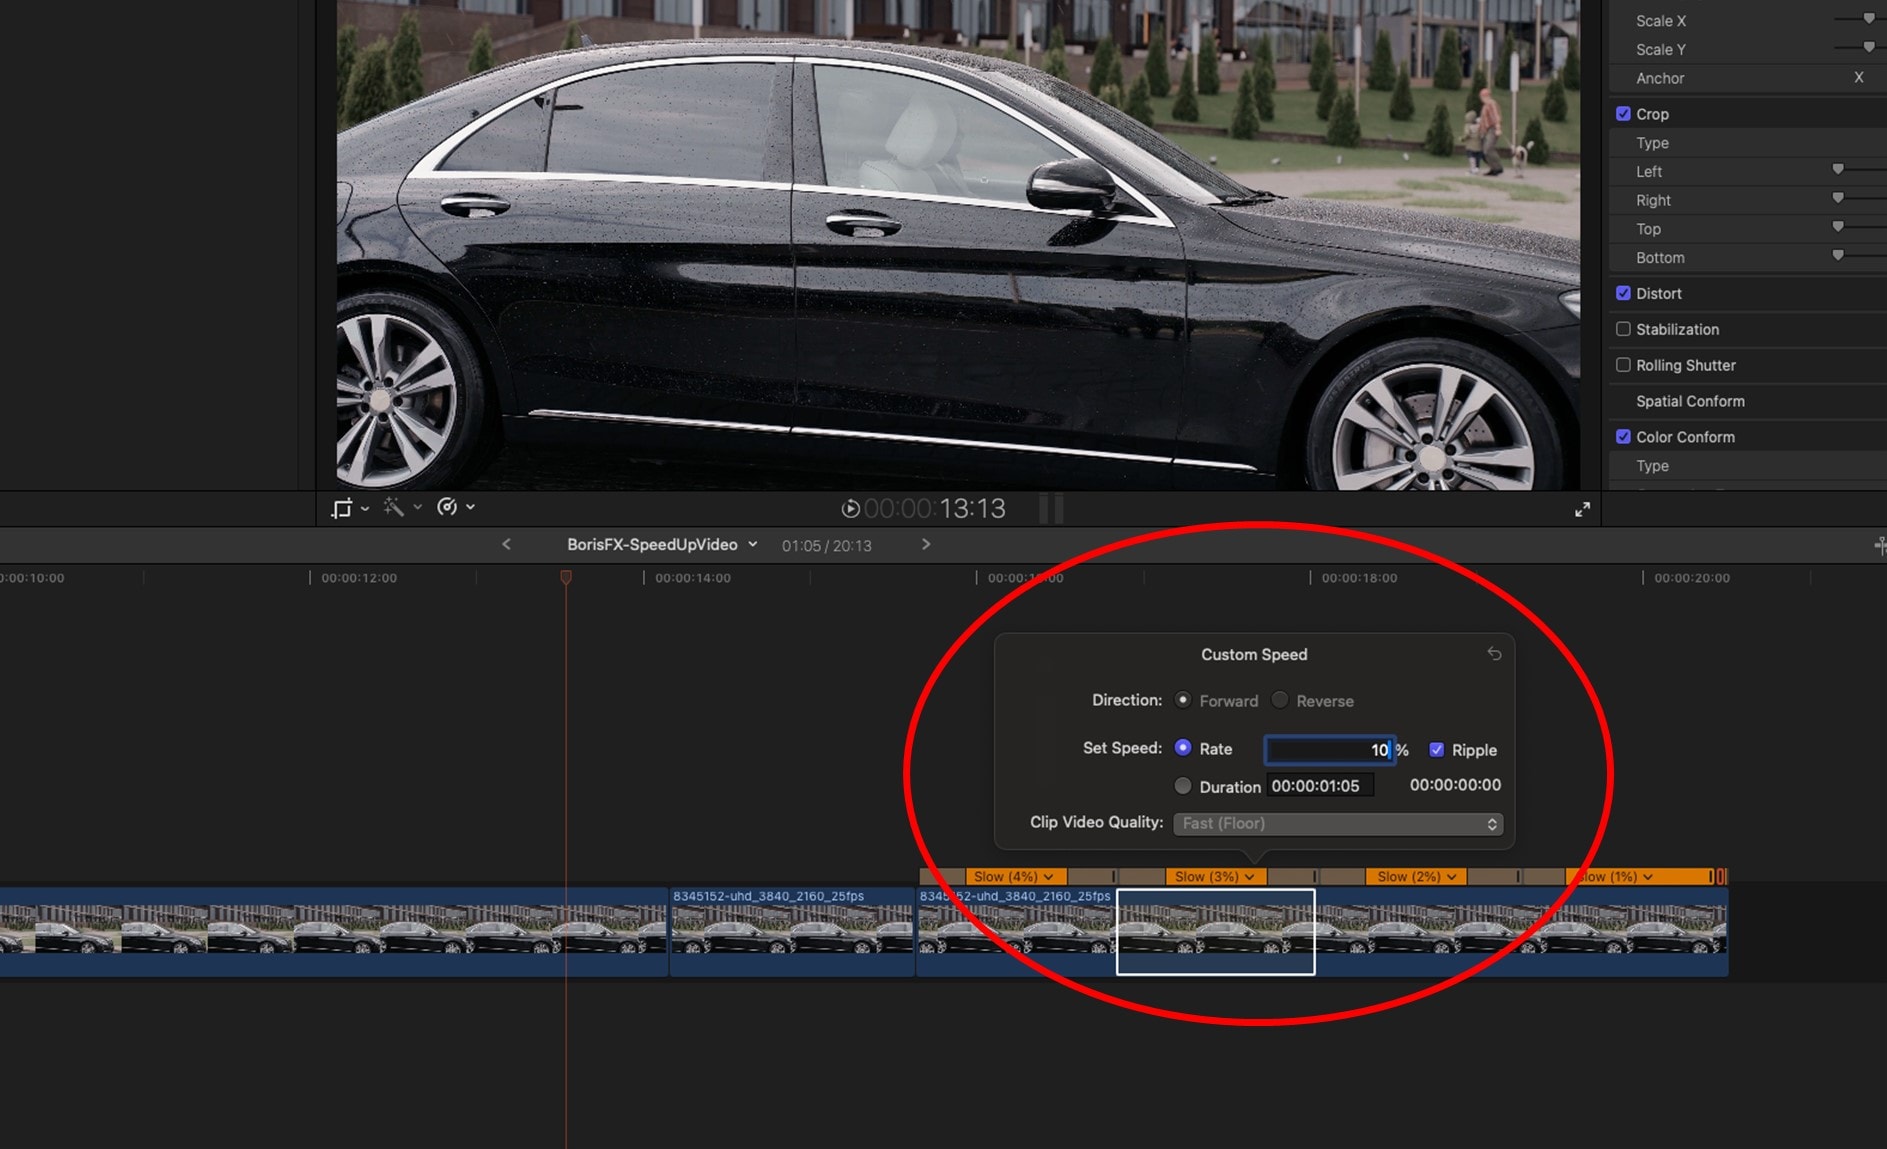
If you choose Custom Speed from the Retime menu, you can customize video speeds by adjusting the speed percentage in the speed editor window that pops up.
You can also adjust other settings to fine-tune how you change the speed, e.g., Direction (Forward or Reverse), Set Speed (to adjust your clip speed by Rate, using a frame rate percentage, or Duration, using time), and Ripple (to cause downstream clips to adjust, i.e., to move earlier or later in the timeline), by toggling the ripple checkbox.
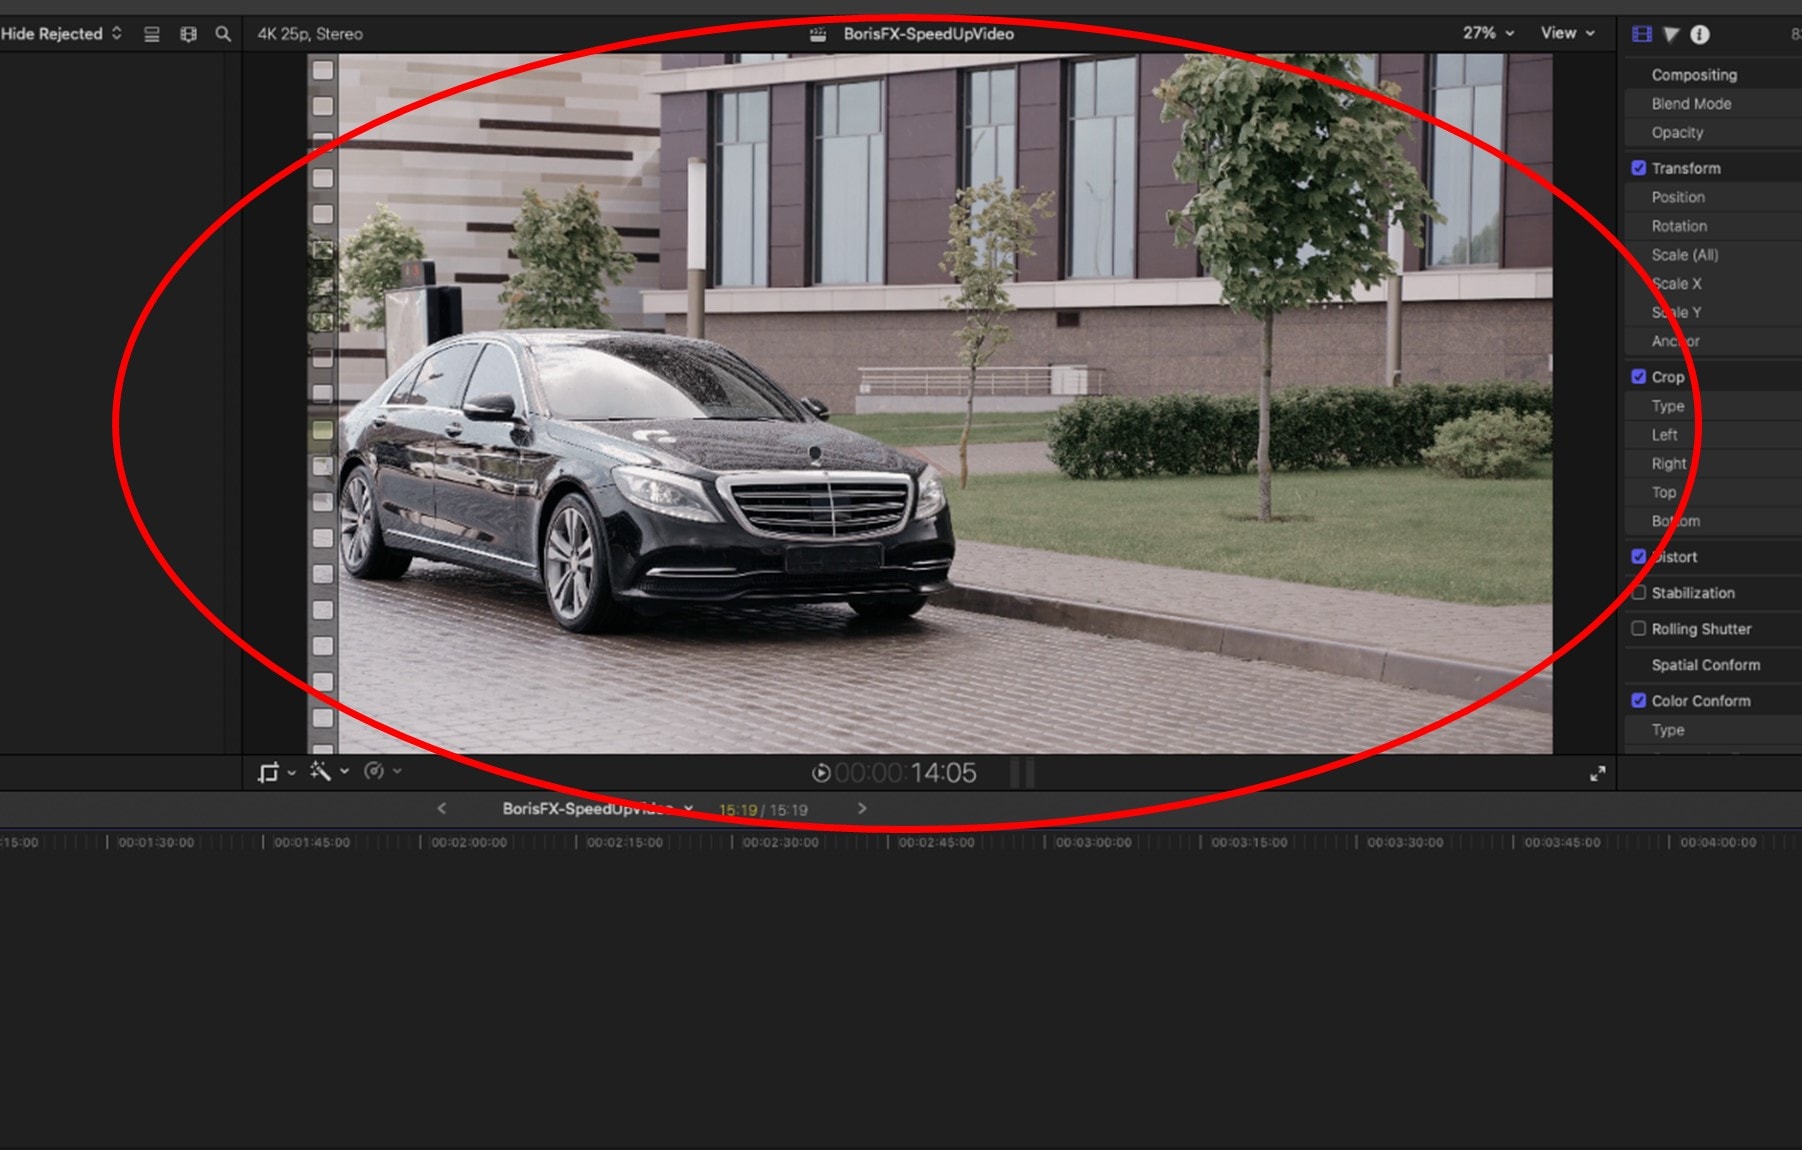
Remember to review your changes in the preview pane as you go (a.k.a., viewer window) to ensure they meet your desired effect.
Step 5: Export
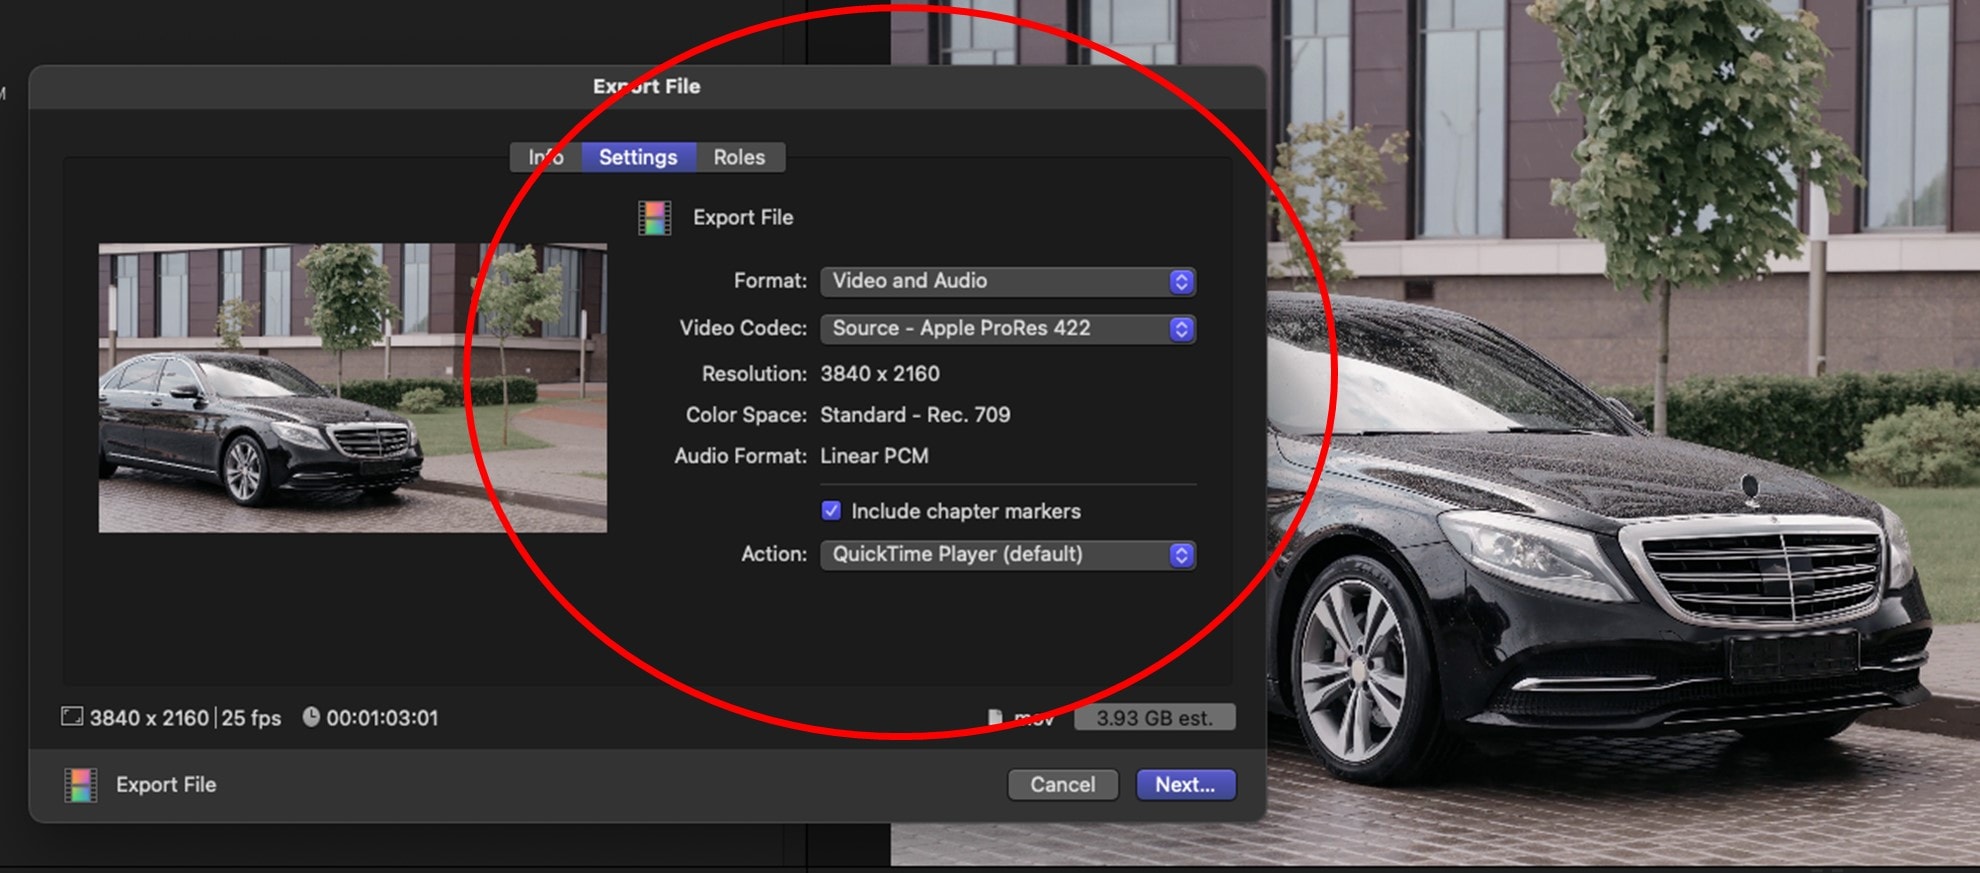
Once you're satisfied with the speed adjustment, render your project by clicking on the File menu and selecting Share to export your video (<COMMAND + E> shortcut).
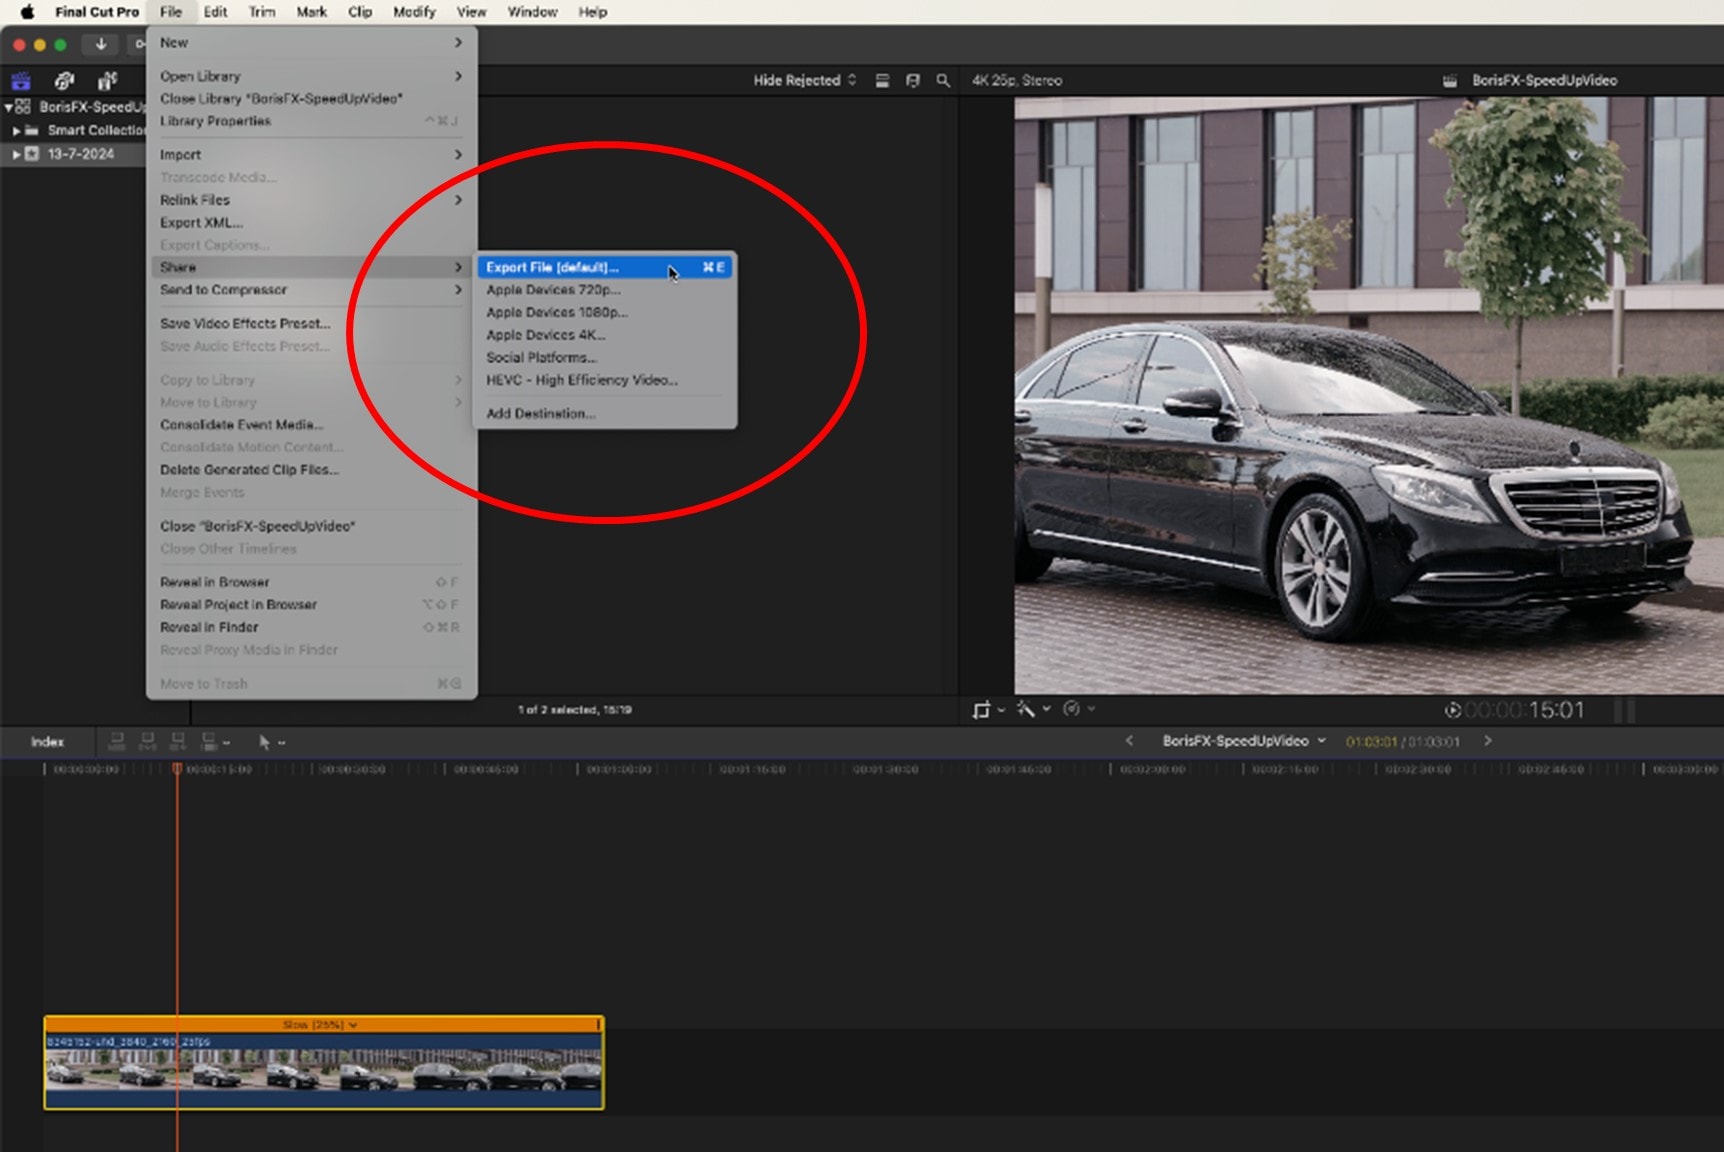
You can choose your format options, e.g., video format, codec, and resolution in the Export File menu, or use a preset Apple device or social media settings.
And there you have it!
It's fairly straightforward to make simple speed changes to your video clips in Final Cut Pro, but even these simple changes give you valuable creative scope in your projects.
Next, we'll consider some additional speed enhancements to give you even more flexibility in applying clip speed changes.
Additional Tips and Speed Enhancements
Optical Flow for Super Slow Motion
When you decrease the speed of a video clip significantly (a.k.a., "super slow motion"), consider using the Optical Flow retiming method in Final Cut Pro. This feature analyzes and creates new frames between existing frames to produce smoother motion and reduce the choppiness that can occur with super-slow speed adjustments.
Optical Flow usually works best for very short clips when you slow the motion considerably, e.g., 3-5% of the normal speed. If you slowed the speed of your clip to this degree without Optical Flow, the footage would look "staggered," moving image by image with an extremely slow frame rate.
To use Optical Flow, select your clip and go to the Retiming tool. Then select Video Quality > Optical Flow:
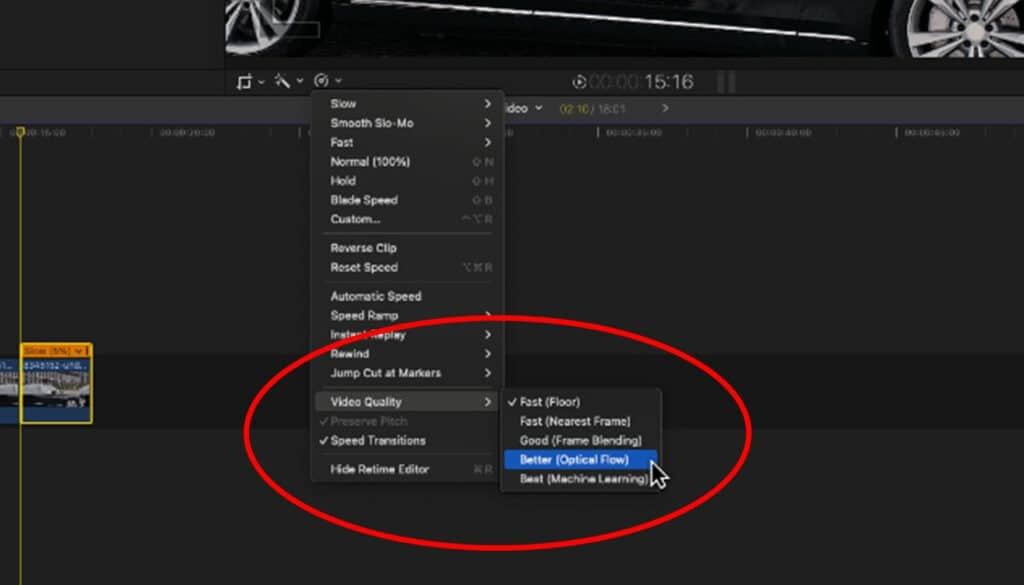
Final Cut Pro's software engine will analyze the clip and apply Optical Flow, resulting in a super smooth movement, as though you had shot the original footage in super slow motion. The effect can look quite dramatic and convey a lot of detail, enhancing the impact of your slow motion video footage.
Frame Blending for Moderate Slow Motion
Another way of achieving smoother playback for slow motion is with Frame Blending. You'll also find this under the Video Quality menu of Retime:
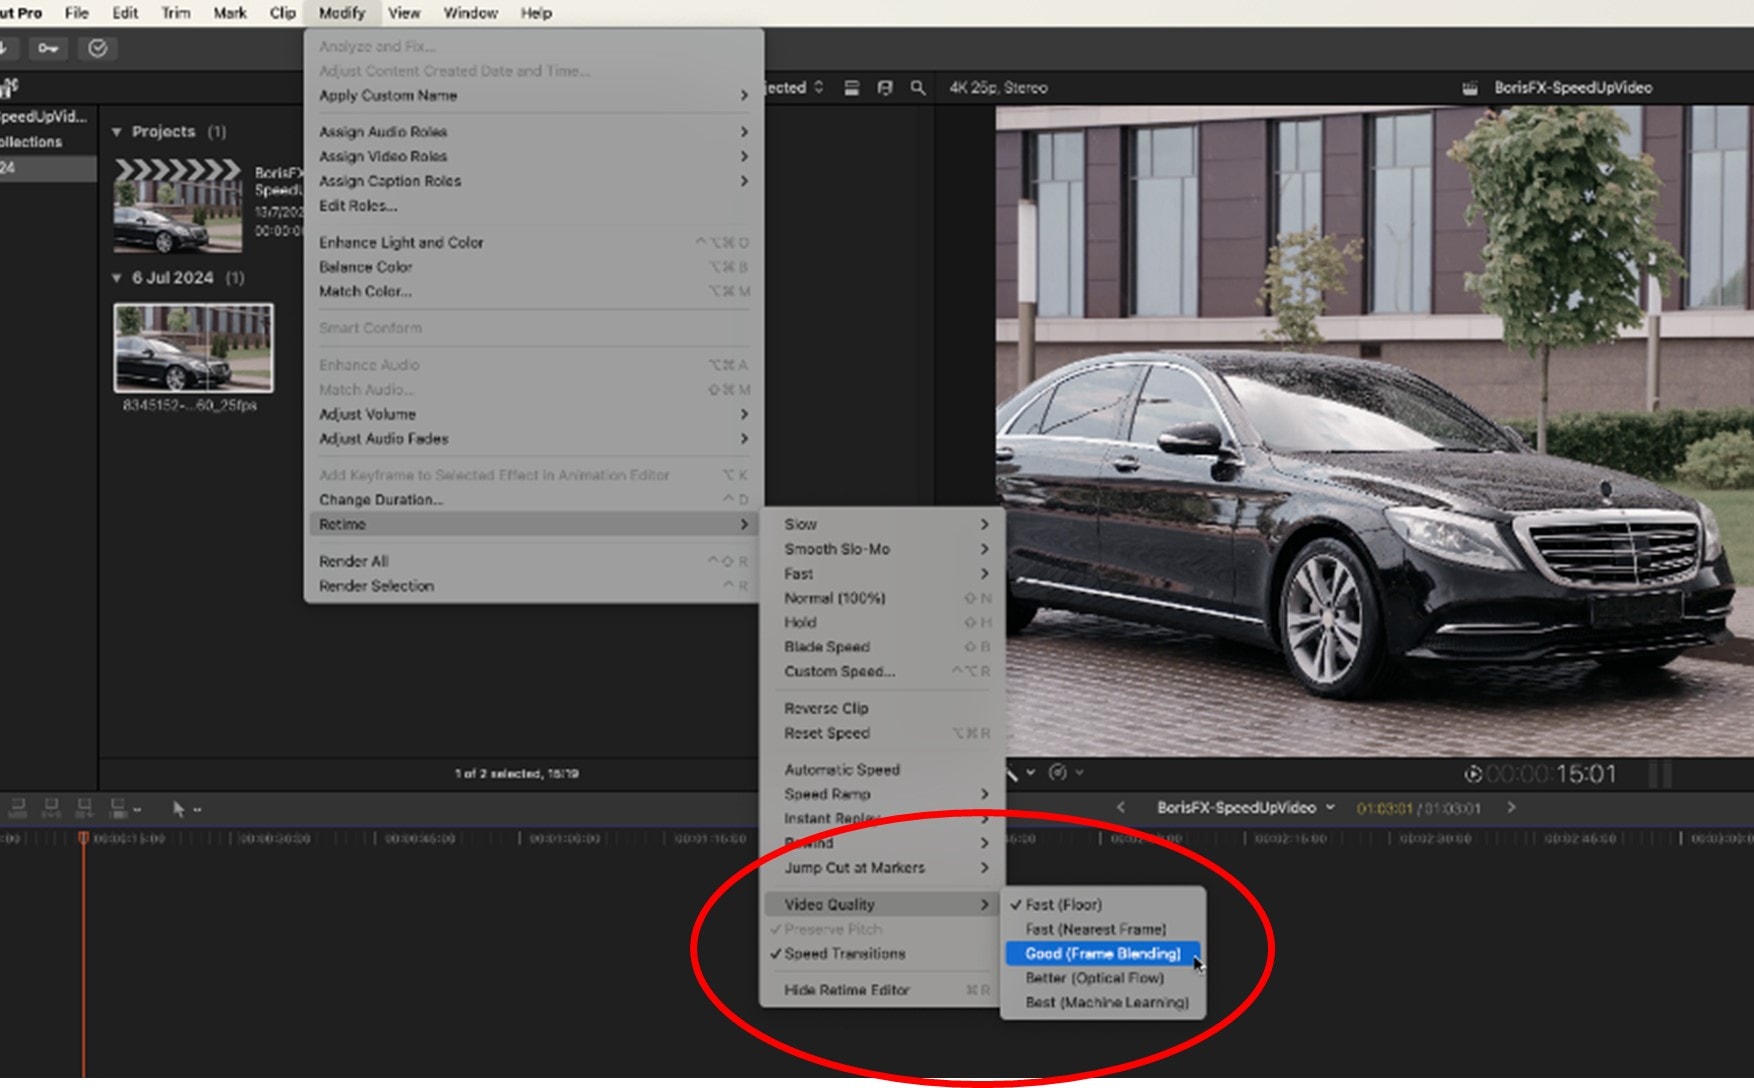
Frame Blending creates new frames in between adjacent frames to reduce the frame rate stutter associated with slow motion clips, just like Optical Flow. But Frame Blending uses less intensive processing. This is why it's usually better suited for "moderate" slow motion adjustments, e.g., 50–70% of the original speed, rather than "super" slow motion.
How effective Optical Flow vs. Frame Blending will be for your clip will depend on several factors, so it's worth trying both to see which works best for you.
Dynamic Speed Adjustments
To create variable speed changes within a single clip, use speed segments. These are ranges in a clip that you can set up with different (constant) speeds.
You can transition between fast and slow using speed segments, with forward or backward movement, and also transition between segments with gradual or abrupt shifts. This gives you plenty of scope for creativity with speed changes in your footage.
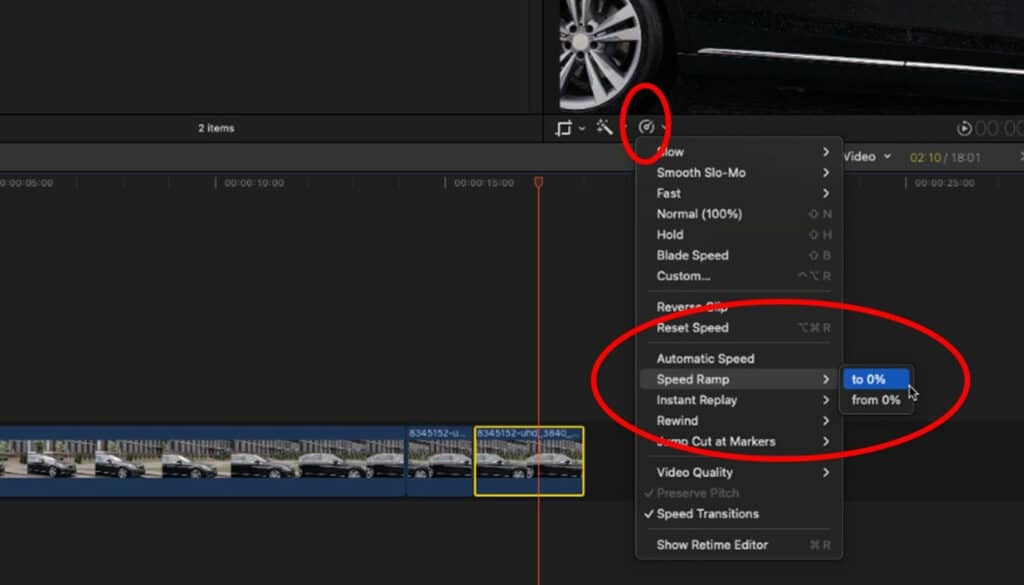
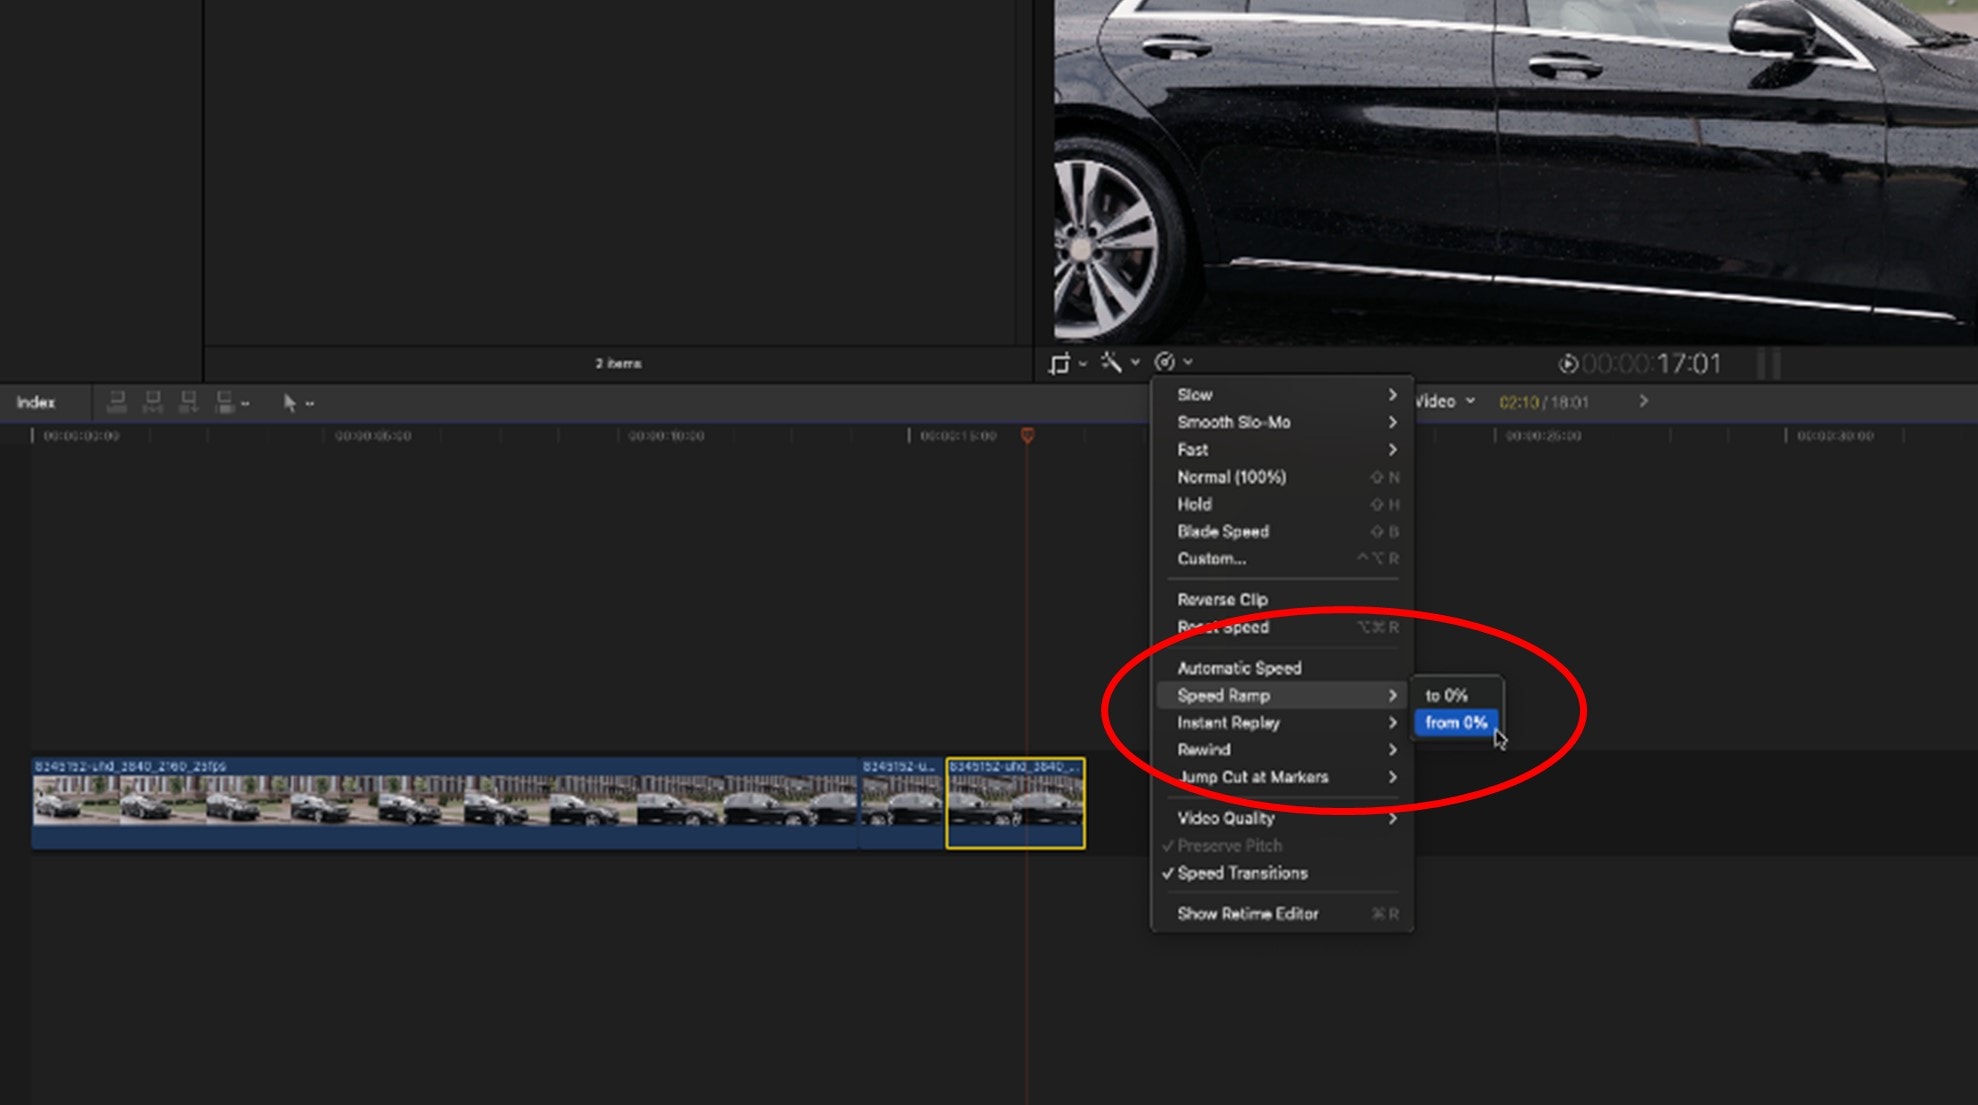
Gradual shifts between segments are called ramps, and you can achieve these using the Retime icon and the Speed Ramp option.
Here's an example of ramping to 0% of the original speed:
You can also do the opposite, i.e., ramp from zero speed percentage to the original speed:
When you use Speed Ramp, Final Cut Pro will create four segments, each with a different speed percentage:
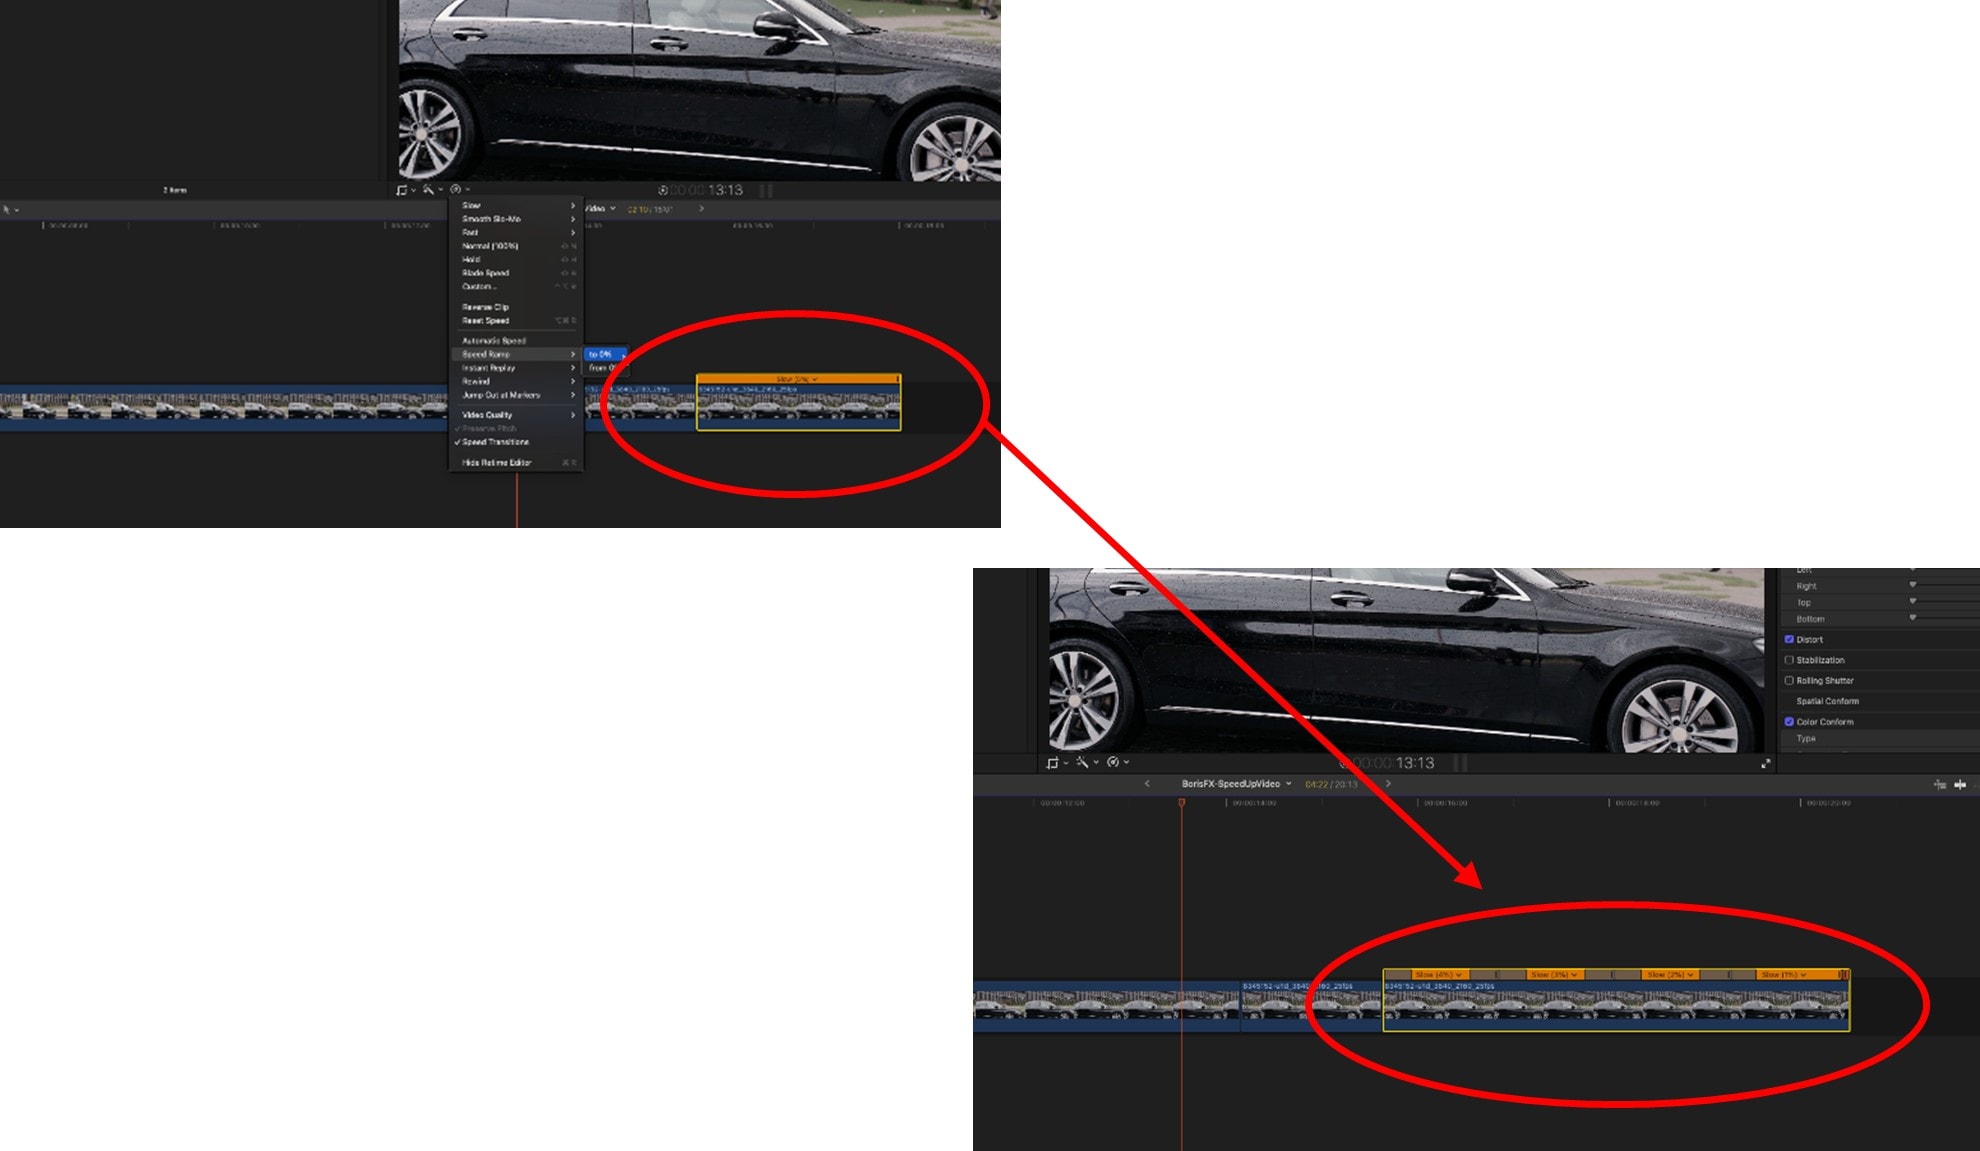
To adjust the speed of any of the created segments, use the Retime icon for that segment:
Preview Playback Quality
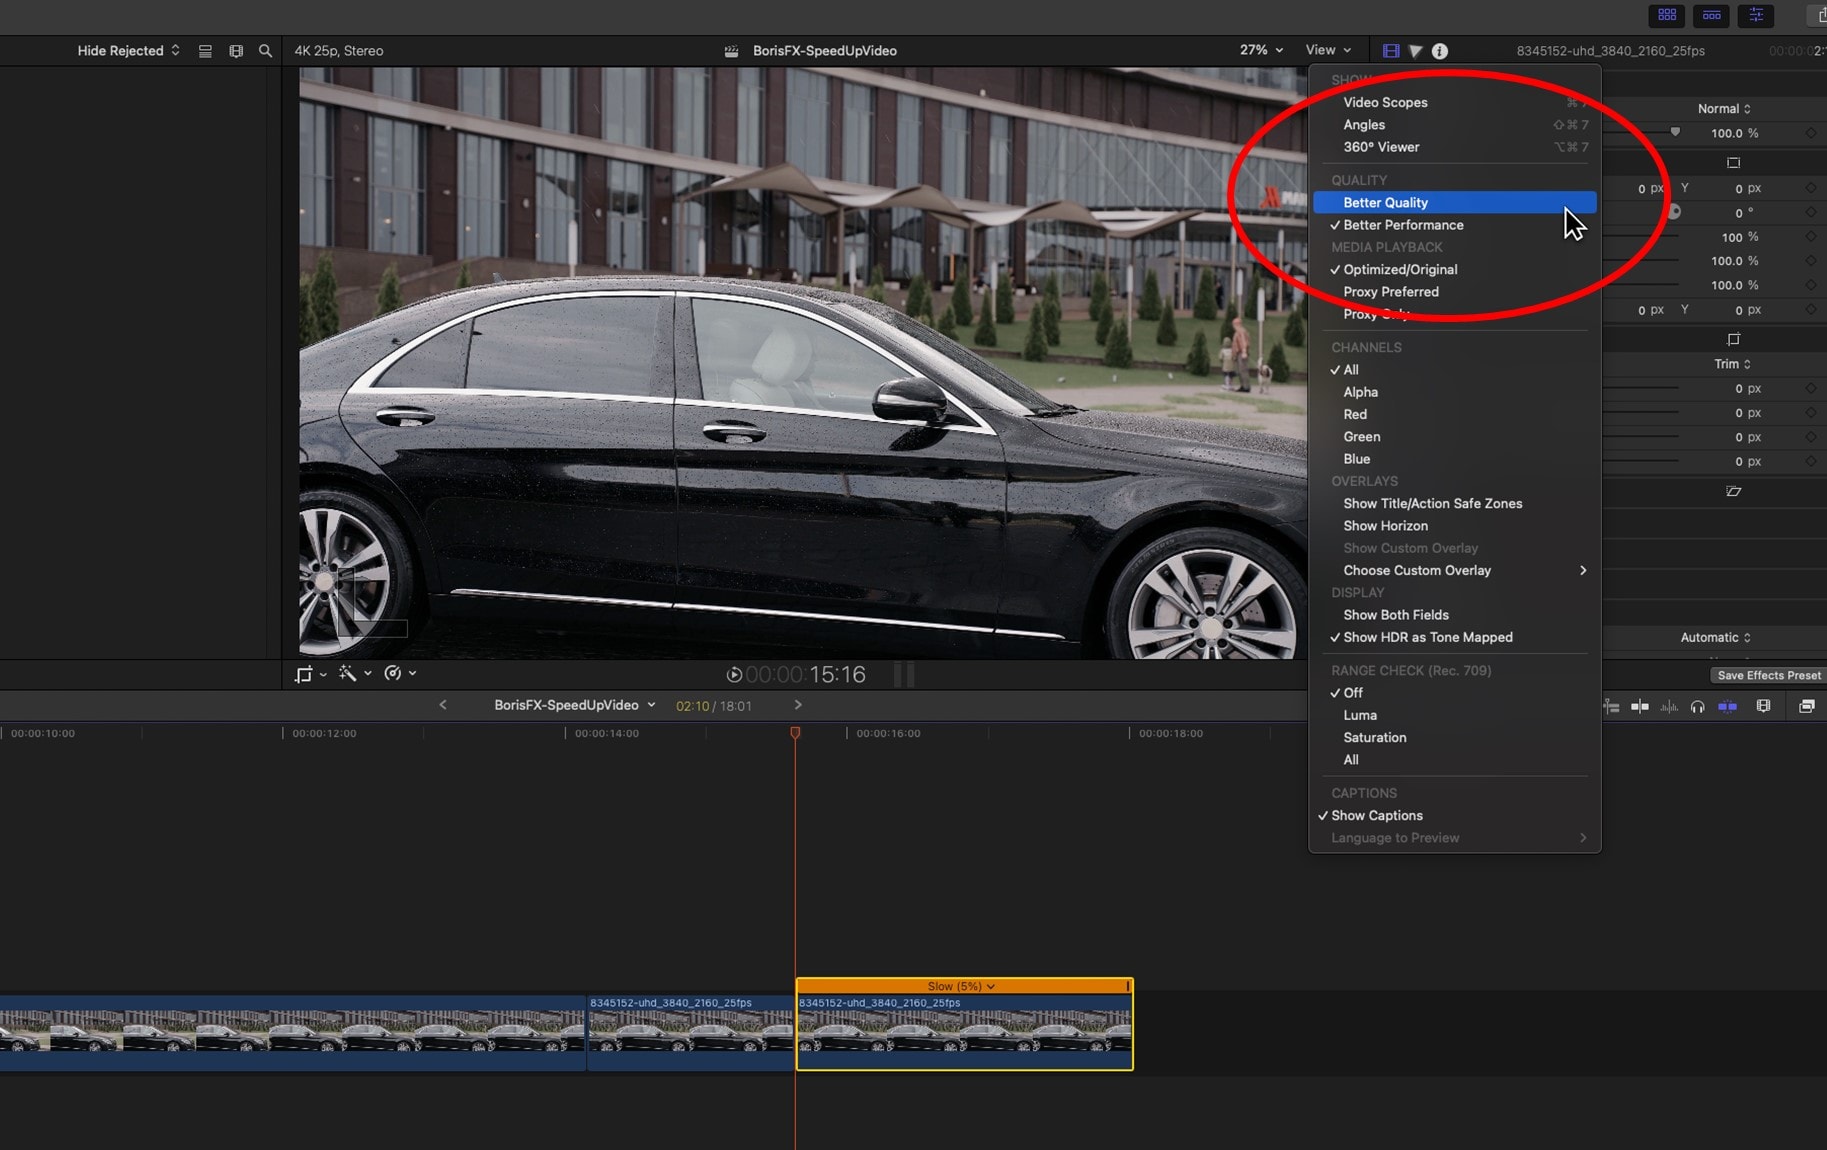
Remember to check the playback quality in the viewer window before finalizing your speed adjustments
Adjust the playback resolution to Better Quality or Best Quality under the playback settings menu to accurately preview how your speed changes affect video clarity and motion.
Sound Adjustments
Remember to also adjust audio settings accordingly if the pitch or timing of your audio needs to be synchronized with the new speed.
Final Words
In Final Cut Pro, mastering the ability to change and control clip speed is an essential part of video editing to produce professional-quality results.
Whether you aim to create dynamic motion changes or gradual adjustments to your footage duration, you can apply a range of speed-change effects depending on your project's needs.
Experiment with different speed adjustments to get the exact effect you're after, and uncover unique ways to enhance visual storytelling in your videos.
FAQ
Can I speed up certain parts of a video?
Yes, you can speed up certain parts of a video in Final Cut Pro by using speed segments. With these, you can create sudden or gradual speed transitions (ramps), or make some sections faster and others slower while leaving the remainder at their original speed.


