


Have you ever wondered why the whole process of creating a movie is so expensive and requires immaculate organizing? What's the reason producers demand everyone is on time and not a second is wasted while shooting?
Well, one major factor in creating any video or film material is nature and all its variables that rapidly change throughout the day. Light angle, temperature, wind, sounds, and even your actor's physical appearance.
Losing just half an hour on set can result in having the sun at a completely different angle in two continuous shots, which will definitely be considered a filming mistake.
However, sometimes things do complicate, and when you "miss your chance" to record at the right time, you need to rely on various techniques and the power of modern editing software and color grading to get things back on track. Otherwise, adding a whole new day for filming could easily disrupt the project's planned budget.
This guide explains the day for night shooting technique and everything about it, so without further ado, let's get right into it.
What Does "Day For Night" Shooting Mean?
If you've recently heard this term, you're likely wondering what it means to shoot "day for night" scenes and what this technique brings to the table.
What really is "day for night" and why not simply record a night scene during nighttime shooting sessions are some of the questions videographers have when first encountering this term.

To better explain things, let's first focus on what this term refers to, and then we'll go further in detail about why this filming technique exists and when you should use it in a film or video project.
Let's say you must record a night scene in a location that's freezing-cold at night or dangerous to be at past daylight. Instead of risking everyone's safety, paying a lot more for expensive equipment, and complicating every talent's schedule by booking them for nighttime work, there's a better option.
You can use the day for night shooting technique and "manipulate" natural factors using modern software to "bend" the daytime looks and transform it to night footage while avoiding unnecessary risks and potentially saving money.
To shoot day for night, or "day for night shooting," refers to recording a scene in daylight that's supposed to be shown as a night scene within the film or video.
There are numerous reasons to shoot day for night, but it's rarely the preferred method.
This technique is mostly used as a last-resort option, because even after the post-production process, the result may not look as authentic as it would if the scene was shot during the same time of day that you want to present to the viewer within the film or video.
Shooting a Day For Night Scene is Beneficial in the Following Scenarios:
- The location is unavailable/dangerous to shoot at during nighttime.
- You don't have high-end equipment (practical lights, expensive cameras) to shoot night scenes without getting "grainy" results, so a shooting day in broad daylight is a more viable option.
- The crew costs are significantly larger for a night shooting day, so shooting during daylight saves money. Talents are almost always more available for a daylight scene too.
- You have scheduled interior scenes that aren't light-sensitive so you can shoot those during the night to be more time-efficient.
Shooting Day for Night Scenes Has the Following Drawbacks:
- It opens up a whole new job in the post-production process which can also cost quite a bit. To get authentic night footage you'll need professional night color grading and sometimes even VFX (adding/removing clouds, adding stars, the moon, etc..).
- The scenes won't be as authentic as if you were recording them under natural light (moonlight) during actual night time.
- Requires excessive planning as you can't show something within the shot that's unrealistic for nighttime like children playing on the street or bypassers wearing sunglasses dressed like they're soon going to the beach.
- If the viewers detect a scene was shot day for night, it can easily ruin their immersion. Yet to make it undetectable by a trained eye requires tremendous effort. Some projects shot using day for night are considered "cheap" and called out by critics.
As you can see, there are both pros and cons of shooting day for night, so now that you know what this technique is and what it means to shoot night scenes throughout the day, it's time to decide whether your project can benefit from it or not.
The following section should be helpful in that regard.
Should I Shoot Day For Night?
If you're about to start a project with night scenes, whether it's a music video, a film, or any other type of recorded content, you need to weigh in the pros and cons of shooting day for night, then decide if this technique is beneficial or will set you back.
The main thing to consider when planning to shoot day for night is whether you have the required post-production skill to artificially create the night effect, the time to do it, and a plan B if the final result doesn't turn out authentic.
Some aspects are easily overlooked and can end up as mistakes in the final result, such as having harsh shadows due to filming when the sun is at its strongest and directly over the scene, which is unrealistic for nighttime footage.
Another one is the sun shining way brighter than the light emitted by the moon during night filming, so even when you create the whole night effect in post-production, actors or objects will still be affected by much stronger lighting that won't look authentic. The moon simply cannot shine as much as the sun.
As you can tell, as "attractive" as it sounds to record a night scene during the daytime, the whole process requires extensive planning, sometimes even more than a regular night shooting day. You need to carefully plan when to record scenes based on the sun angle, and that's not even all of it.
For the scene to look authentic, you need to artificially create a night sky within your editing or VFX software during the post-production phase. The clouds are different at night, so you'll have to pay attention to that too. You'll require soft light, which means avoiding harsh light and harsh shadows.
You'll need to show stars, which means you must shoot a clear sky, which is difficult. You'll need to avoid showing the sun directly in the footage too, which makes shooting angles and composing shots a lot more difficult.
If you want to show a shot of a city, none of the lights within the buildings would be on during the day, so you'll have to add hundreds of lights manually (think of details like street lights too) in post-production to make it look as if the shot was really taken during nighttime.

This requires immense skill and attention to detail, which if you cannot do it by yourself, will cost both time and money.
Now you should get a much clearer idea why shooting day for night is a last-resort option, and should only be used if the location you wish to record at is completely unavailable or dangerous to be at during nighttime.
As for interior scenes, things are easier but still require good planning and color grading in the post-production phase, so you should weigh in the pros and cons and decide whether the added post-production color grading process will cost more than simply arranging to shoot at actual nighttime.
How To Shoot Day For Night
Generally, even in night photography, and not just videography, there are some things that you should always pay attention to while editing day for night shots. Adding general soft light and softening hard shadows so that it's not obvious that the scene is lit by the sun is crucial.
Any night shot that's recorded during daylight hours will have some visible flaws that you'll need to fix during the post phase.
Here are some steps you should follow when attempting to shoot day for night to avoid complications later in the filming process:
Try Shooting On Cloudy Days (Or Golden Hour) To Avoid Harsh Shadows
If the sun glares directly over your talent's head, they'll have very harsh shadows over their faces. Moonlight simply cannot produce this type of shadow, so it's a dead giveaway that you've recorded the scene during daylight.
To avoid this, shoot during cloudy days, or during golden hour as that's when the light isn't too bright and casts soft shadows which are as close as possible to replicating moonlight. Plus, the sun is at an angle during this time, so you can position your actors for backlight, which once color-graded can look almost exactly like what the moon would create at night.
Shoot With Lower Exposure
This is pretty self-explanatory. Shooting with lower exposure is common for a night shooting day, and it will help avoid having anything stand out as "too-lit" within your shot, which can also be a dead giveaway.
Make sure not to lower the exposure levels too much though.
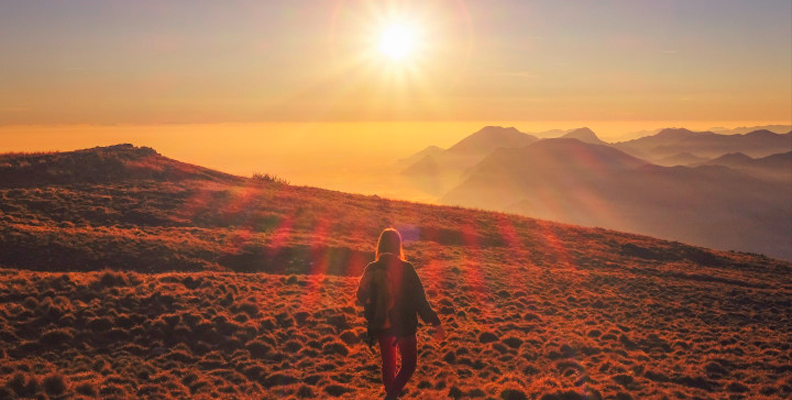
Know When To Show The Sky In Your Shot
You don't always have to avoid showing the whole sky in your shot, but it helps to know when is a good time to make it a part of your frame.
For example, during golden/blue hour, the lightning won't be a giveaway, but when the sun is high up and much brighter than everything else, you'll have to exclude it from your shot or spend way too much time and effort "tweaking" it down in post.
![]()
Use A Polarizer To Avoid Unwanted Giveaway Glare
There are no downsides to using a polarizing filter on your lens. In fact, it can only help you eliminate unwanted glare, such as water reflection or anything similar, which can ruin the immersion by letting the viewers know you're recording day for night.
You may also like: Remove Glare From Photo With Boris FX ContinuumIt helps get a more authentic look, so why not give it a shot.
Plan For An Extensive Color Grading Process
Last but not least, even if you've planned to the very last detail, be sure that the color grading process will take a lot of time and attention.
The risk when shooting day for night is that one small giveaway ruins the entire immersion, and even though you may be saving some time and money by shooting during the day, the color grading in post will still be demanding if you want a perfect result.
![]()
How To Shoot Day For Night With Mocha - Boris FX
Since the whole post, color-grading, and VFX process is such an important part of shooting day to night, it's best to have renowned plugins and tools at your disposal for premium results. The easier you can make this phase, the better for the whole crew working on the project.
One of Boris FX's leading products is Mocha Pro - an advanced, planar-tracking, and VFX plug-in available for all popular hosts, like Adobe Premiere Pro and After Effects, Avid, and more. It's integrated both in the Continuum and Sapphire packs by Boris FX, which you can find a free trial of on the official website.
The biggest challenge when shooting day for night is tracking things like the sky, which need to be masked in and color-graded separately, adding stars, a moon, and everything else that comes along with regular nighttime. Luckily, Mocha Pro can help you get this done easily due to the user-friendly UI and all built-in tools.
Additionally, this webinar by Boris FX shows how their specialists go about transforming day to night footage using Mocha, so it would be of great help to watch it should you decide to take this approach.
If you want to shoot day for night and require the right software to get the best result in post afterward, we recommend both Continuum and Sapphire by Boris FX. Top-tier productions have already used them in their projects, some of which you've likely watched already.
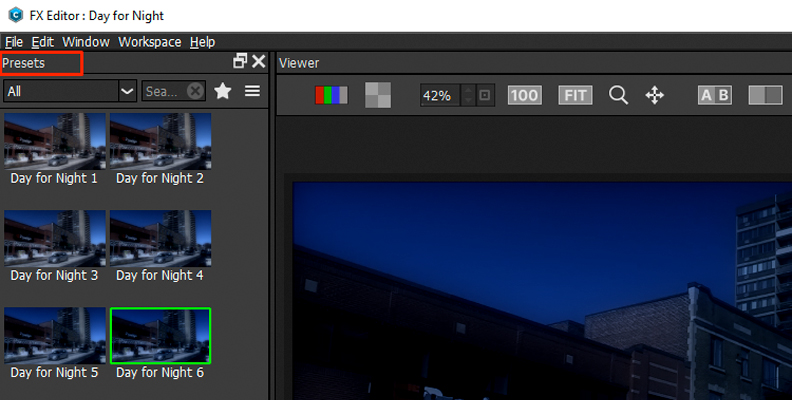
Specifically, the Continuum pack contains a Day For Night filter that you can apply to simulate night photography or give a video clip a night time look with night color grading in just a few steps.
Mocha is a part of the Continuum pack, as mentioned above, so in combination with the BCC+ Day For Night filter, you can really make wonders happen in your editing software.
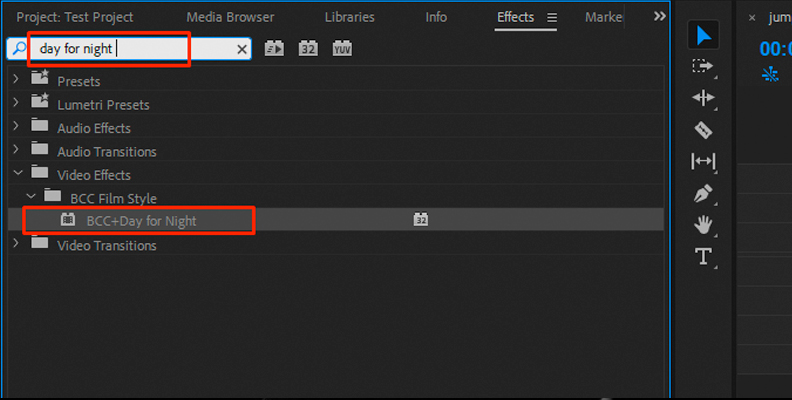
To apply the BCC+ Day For Night filter, open the Effects panel within your software of choice and locate the "BCC Film Styles" folder. Find the BCC+ Day For Night filter and apply it to your video. Now launch the editor by clicking on the "BCC FX Editor" icon.

Try out some of the presets for a start, as there are quite a few available that you can apply right away using just a click.
Feel free to adjust some other settings too, like Diffusion, Blur, and Opacity to modify the result and get the perfect lighting for your specific shot.
There's a separate "Moonlight Controls" parameter that adjusts the overall tint of the simulated moonlight, so make sure to adjust this too as it affects the lightning in the entire scene.
When done, press the "Apply" button and all changes will be transferred from the editor to your host application where you can continue working on your image/video.
The BCC+ Day For Night filter makes simulating day for night much easier and all in one place, and compared to manual color grading, it's much quicker and more efficient.
Final Words
That concludes everything you should know about shooting day for night, creating a night sky effect and all the extras in the editing room, planning for night shots, and more.
Hopefully, this will help you with any future projects that include night shots or adding night color correction in the post phase. Both as a videographer and an independent filmmaker, knowing when to implement or avoid the day for night technique is very important.


