


Background noise in videos is an issue that every filmmaker comes across sooner or later. Sometimes a grainy effect is caused by video clips recorded with insufficient light, and although, in most cases, cameras in automatic mode will increase their ISO values to capture more light, a higher ISO will also add more noise.
Adobe After Effects is the perfect video editing software to remove unwanted noise and grain from your video footage and improve the quality of your original clips. In this article, you’ll learn how to remove grain and background noise in Adobe After Effects using its native effects and powerful noise reduction plug-ins.
Let’s dive in!
How to Remove Grain or Noise in Adobe After Effects

In the first part of this guide, you’ll be removing noise and grain using only the After Effects built-in Remove Grain effect.
This effect aims to restore the image of your video footage using advanced signal processing to reduce noise while preserving the image detail.
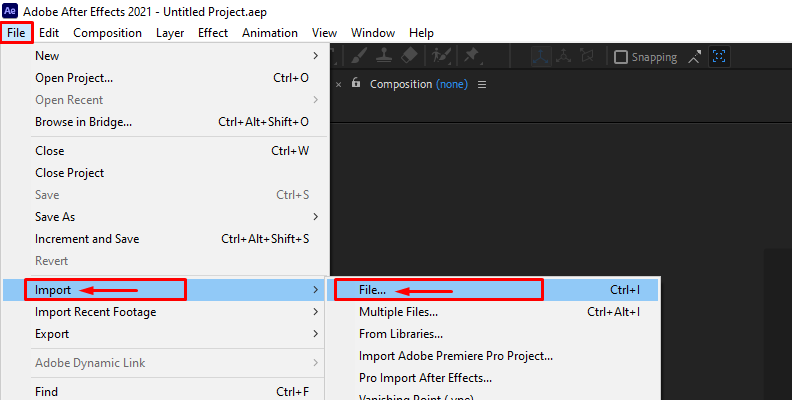
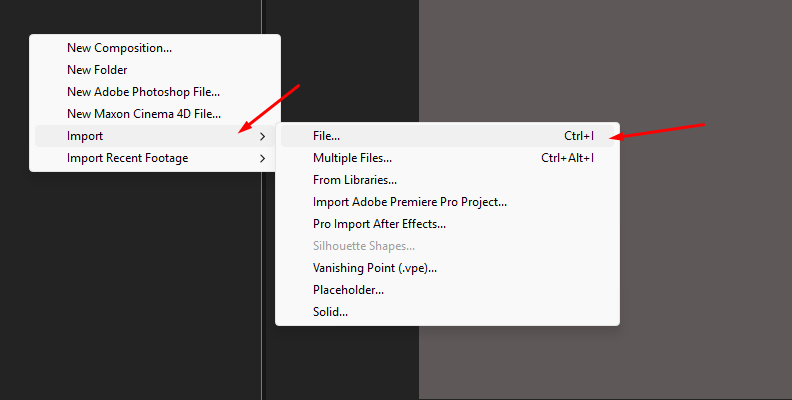
Step 1: Import Video Footage
Start by importing your grainy footage into Adobe After Effects. Go to File > Import and browse for the clips from your computer.
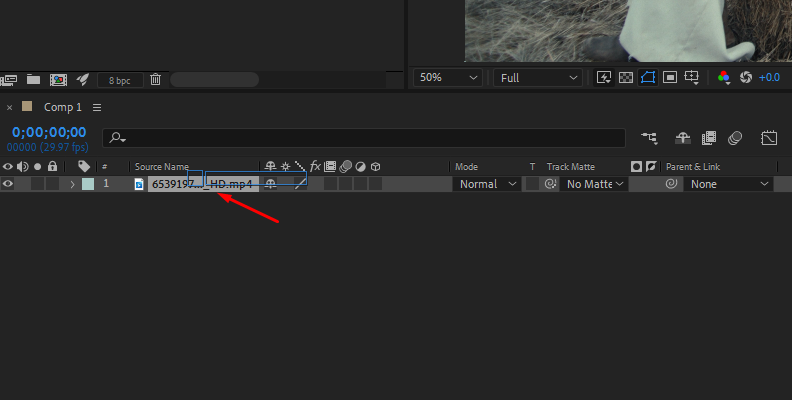
Then, drag the noisy clip to a new composition to start the process.
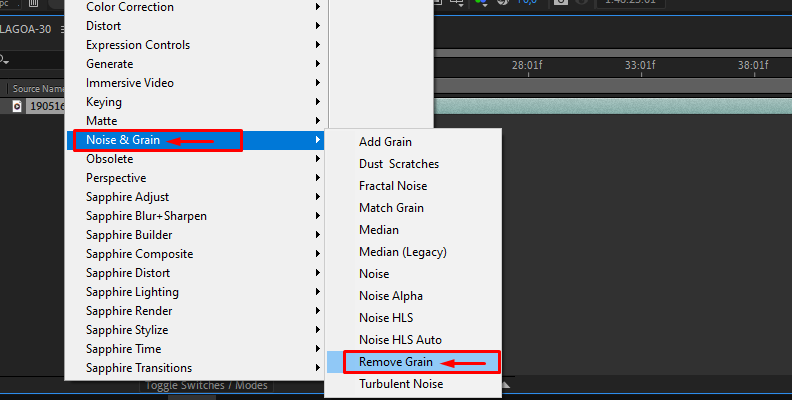
Step 2: Add Remove Grain Effect
Go to Effect in the main menu at the top of the screen. Scroll down until you see Noise & Grain, and choose Remove Grain from the following menu. The effect will be added to your Effect Controls panel, where you can adjust its settings, and that’s it!
You’ll find a visual preview box of how your video will look like in the square that appears on your footage. You can change the preview region size by dragging it.
Step 3: Noise Sample
The Remove Grain effect will automatically identify noise samples to correct your image, but you can also manually select the samples to target specific grains, adjust the number of samples, and change the size of the noise sample.
In your Remove Grain settings, change the Viewing Mode to Noise Sample. Then scroll down to the Sampling tab and change Sample Selection from Automatic to Manual.
Then, in the preview window, you can move the sample points to the locations with more grain. Increase or decrease the number of samples in "Number of Samples" and their size in "Sampling Size."
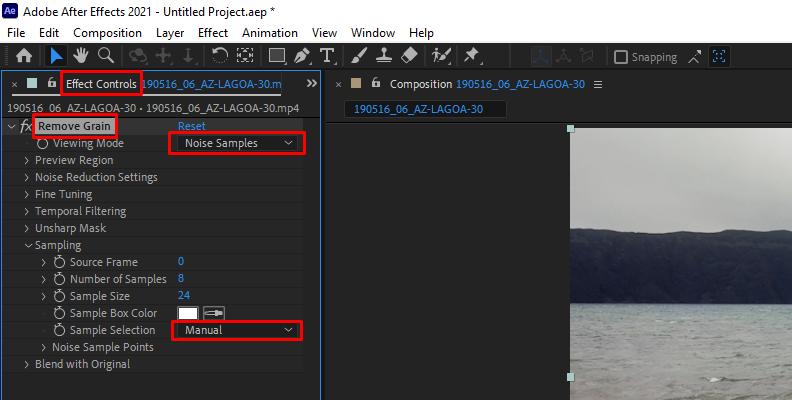
After selecting all your noise samples, go back to preview in the Viewing Mode. You can also choose Final Output to look at the entire image.
Step 4: Remove Grain Effect Settings
In your Effects Control panel, select the Noise Reduction Settings tab. Adjust how much reduction you want by changing the value in Noise Reduction. Observe the preview region to see how the new settings affect your image. Bear in mind that a high value will make your footage look blurry and lose details.
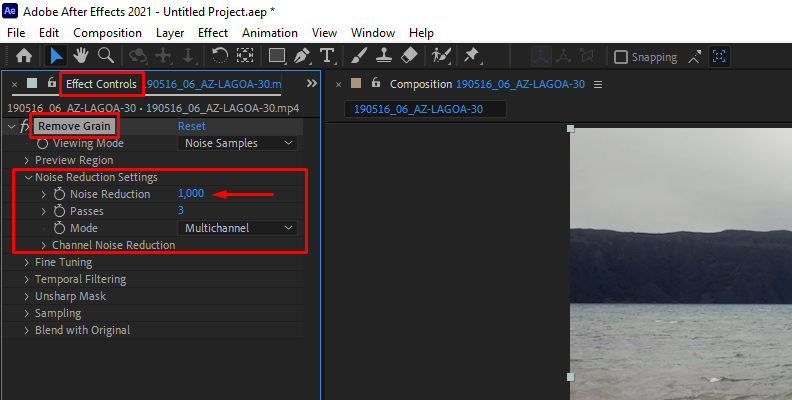
The Passes setting controls how much noise radius can be detected. A higher number can bring more quality, but rendering will take longer. If you have a large file, it would be better to leave the default setting so you don’t overload your computer.
Finally, you can choose to remove grain from all channels or adjust each channel independently. Under the Channel Noise Reduction tab, you’ll see three options for the red, green, and blue channels. Adjusting the red will change only the red channel, the green will change the green channel only, and so on.
You can preview each channel by changing it in the three-color icon at the bottom of the preview window. It will allow you to see which channel the noise is most prominent in. Different types of noise exist on each color channel, so you can fine-adjust how much to apply for each channel.
Step 5: Fine-Tune to Retain Sharpness
Your grainy footage should be much cleaner now, but After Effects gives you even more tools to fine-tune your videos. In the Fine Tuning tab, you'll find the following settings to bring back some detail to your image.
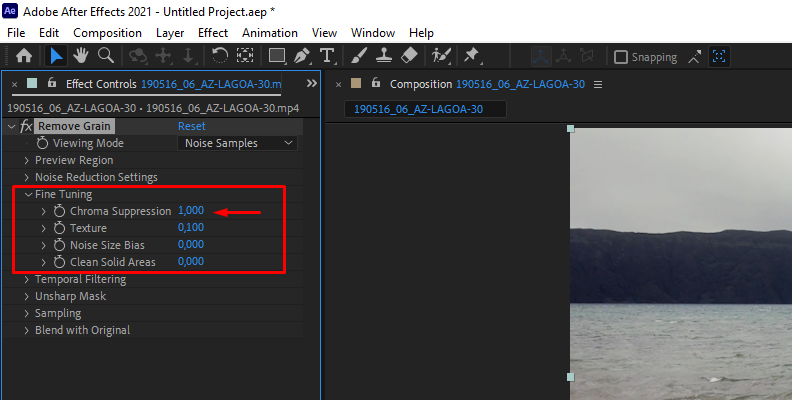
Increasing the Chroma Suppression values can help eliminate colorful noise, but it could also take some color away.
The Texture control allows you to preserve areas with delicate textures, such as wood grain. Keep a good balance between retaining the detail and reducing noise.
The Noise Size Bias targets the effect of small or larger noise. By default, all sizes will be affected equally.
The last setting is Clean Solid Areas, which controls how much the Remove Grain effect smooths solid color areas to make them look cleaner. You’ll notice that higher values will blur the edges, losing the sharp, natural look of the image.
If your image starts to get too blurry, the Unsharp Mask tab can help you maintain the sharpness lost during grain reduction.
Step 6: Temporal Filtering
You can enable Temporal Filtering to reduce noise between frames, which is caused by Remove Grain applying the effect to each frame independently. The interframe noise might not be evident in a still image, but it will be more visible when you play back your video.
Preview the footage and adjust Motion and Amount values to reduce the buzz between frames.
Step 7: Render and Export Your Video
To export your video, go to File > Export > Add to Media Encoder Queue. Select your format, output settings, and save location. Click Render and wait for After Effects to export the final output without grain.
Remove Grain: After Effects and Other Options
How to Remove Noise or Grain Using Boris FX Plug-ins
Removing noise with Adobe After Effects' built-in plug-ins can be time-consuming and tiresome. To streamline video editing and expedite the workflow, using third-party plug-ins is quite helpful to automate and optimize the noise reduction process.
For professional results, you can remove grain and noise from your videos with Boris FX plug-ins. In particular, the BCC + Denoise ML effect, which is part of the Continuum plug-in suite, will be exactly what you need.

As you would expect from Boris FX, there is compatibility with most video editing software, including Adobe After Effects, Adobe Premiere Pro, Avid Media Composer, and more.
Boris Continuum Complete (BCC): Continuum provides a comprehensive suite of plug-ins for various video editing applications, including noise reduction tools to fix noisy footage like BCC + DeNoise ML.
DeNoise ML is a comparatively simple tool to use, but it is also incredibly powerful, and the end results are spectacular. The tool uses AI and machine learning to eliminate grain from your videos. Even videos shot in low resolution or low light can benefit from DeNoise ML, and footage you once thought was unusable can be transformed.
Follow the next steps to remove noise from your video footage using the DeNoise ML plug-in.
Import the video clip you want to work with into your project and place it on the timeline.

Locate the DeNoise ML plug-in in your effects library. It should be listed under the Boris Continuum category. Alternatively, use the search box and type DeNoiseML and After Effects will find it.

Drag and drop the DeNoiseML plug-in onto the video clip on your timeline. It may take a moment or two to process the first time you use it, but that's normal.
Go to the Effects control and adjust the Model parameter. This will allow you to choose what type of noise it is that you want to remove from your footage. The options are:
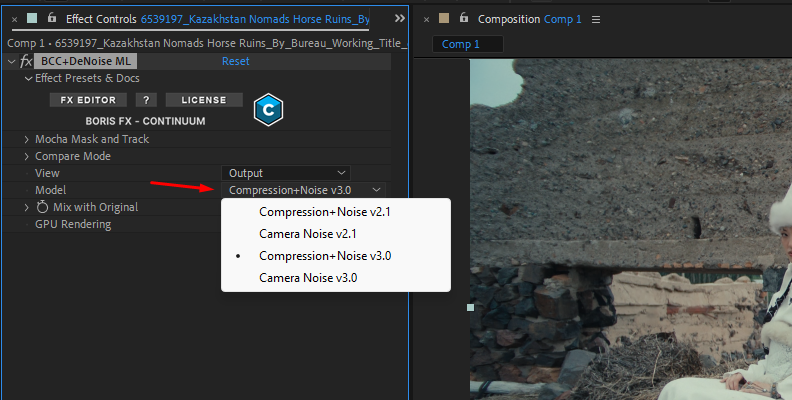
- Noise: Use this for getting rid of general noise or grain on your footage.
- Compression: This helps to eliminate artefacts that have been created from video compression.
Next, you want to adjust the blend. If you find that the effect is being applied too strongly, you can use the Mix With Original option. This allows you to blend the original footage with the footage that has been processed, so you can achieve a balance over the final way the footage looks (it's the equivalent of wet and dry mixing in audio production, just with images rather than sound).
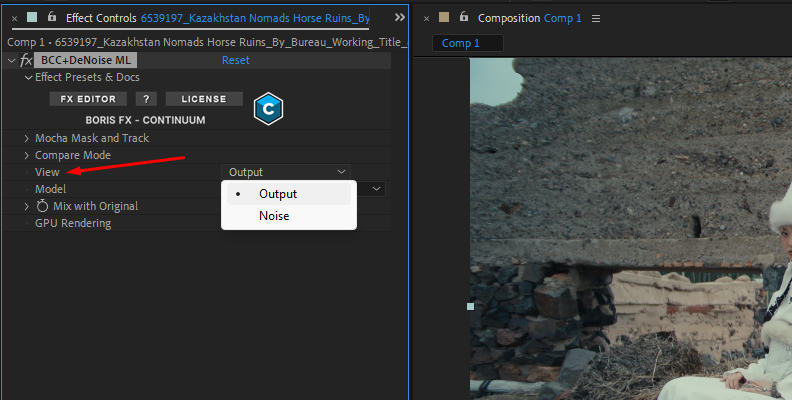
When you have done this, set the View menu to Final Output so that you can see the noise reduction effect and what it has done. There's also the option to choose Noise, which allows you to see exactly what the plug-in is removing.
When you are satisfied, render the video and save your file.
DenoiseML is a quick, incredibly effective, and powerful tool to have in your video editing arsenal. The results speak for themselves.

Final Thoughts
Unless used creatively, grain and noise can significantly impact the visual quality of videos, but with Adobe After Effects, you’ll have the tools to remove unwanted noise effectively.
Experiment with the different settings from the built-in plug-ins of After Effects, but if that’s not enough, Boris FX products can deliver exceptional results and help you take your content to the next level.
Good luck, and stay creative!
FAQ
Why can your footage get grainy?

The main reason why your video footage may become grainy during filming is due to a high ISO setting when shooting in low-light conditions. When the ISO settings are high, the image sensor becomes more sensitive to light, capturing brighter scenes but increasing noise and grain in your footage.
You can also get grainy footage in post-production. When brightening your video, you might also amplify the noise and grain in your image. Another cause is compression: when you have compressed your video footage multiple times, this can introduce artifacts that may appear as grain in the edited video.


