


Everyone has encountered this problem before – you’ve found the perfect place to record a video or a podcast. Everything looks right. Then you start rolling audio and notice – your audio recordings sound like an echo-y mess. Now, you need to know how to remove echo from audio. Luckily, there’s a solution to your problem, and it’s called CrumplePop EchoRemover.
EchoRemover is a plug-in for Final Cut Pro, Premiere Pro, Audacity, Audition, DaVinci Resolve, Logic Pro, GarageBand, Avid, Pro Tools and more. It helps remove room echo from videos and podcasts. It makes audio recordings that were once unusable sound professional and clear.
The Battle Against Echo
Echo is a constant threat in audio and video files. More so than background noise, the sound of echo immediately makes a video or podcast sound unprofessional.

If you're wondering how to remove echo from audio recordings, the best method is to avoid it before you hit record. Choosing a location can make a big difference in sound quality—if you’re near a bare wall, moving even a few feet away can help reduce echo.
As always, proximity to the microphone is key. If the mic is far from the speaker – for instance, if you’re using an on-camera mic – you might find yourself capturing more of a live room sound than you want as the sound waves move through space.
The problem is that often, you can’t fully control the environment you’re recording in. Installing soundproofing and rearranging furniture might not be something you want to tackle when you just want to record a nice-sounding screencast. For these situations, a simple low pass or high pass filter can be a lifesaver and help you keep the frequency range under control.
But for those of us who do professional audio and video work for clients, echo can't be solved by a noise gate plugin or a high pass filter. We also can’t exactly tell the client to go back for re-recording (as glorious as that would be). So, very often we need to take material that was recorded with room echo and make it sound good in our home studio. But how?
How to Improve my Audio Quality with EchoRemover
With a few steps, EchoRemoverwill help you quickly reduce the echo from your audio recordings.
If you need help finding EchoRemover inside your NLE, check out our “” section below.
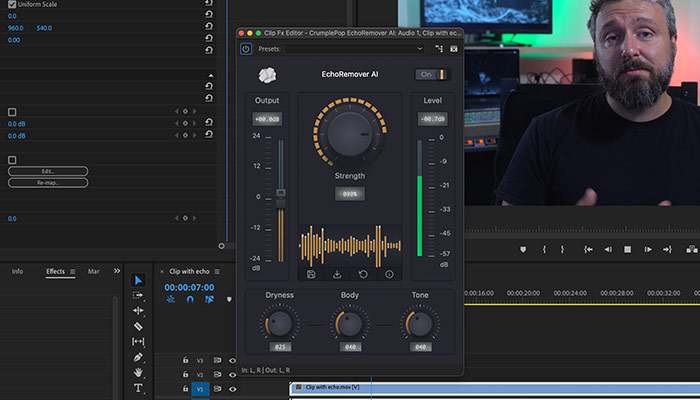
First, you’ll need to turn on the plug-in. Click the On/Off switch in the upper right corner, and you’ll see the entire plug-in light up. Now, you’re ready to get rid of the room echo in your audio recordings.
You’ll notice the big knob in the center of the plug-in - that’s the Strength Control. You’ll likely only need this control to reduce reverb. The Strength Control defaults to 80%, which is a great place to start. Listen to your processed audio. How do you like the sound? Does it reduce the echo enough? If not, keep increasing the Strength Control until you’re happy with the results.
Maybe you’d love to keep some of the qualities of the original recording. Or you want to bring a different color to the voice. Below the Strength Control, you'll find three Advanced Strength Control knobs that will help you fine-tune your sound settings. Dryness sets how aggressive the echo removal is, Body lets you dial in the thickness of the voice, and Tone helps bring brightness back to the voice.
Once you’re happy with your results, you can save them as presets to use at a later time or to send to collaborators. Just click the save button, choose a name and location for your preset and that’s it. To import a preset, all you need to do is click on the downward arrow button to the right of the save button. Select your preset from the window, and the plug-in will automatically adjust to your saved settings.
Hear It For Yourself
Advanced audio AI removes noise and boosts your vocal quality.
Toggle it on/off to hear the difference.
Remove Wind
Remove Noise
Remove Pops & Plosives
Level Audio
Remove Rustle
Remove Echo
Remove Wind
Not a Simple Noise Gate or Noise Reduction Plug-in, EchoRemover is Powered by AI
EchoRemover helps you clean up room echo and reverb problem areas in your audio by using AI to identify and remove them. This lets EchoRemover remove more reverb while keeping the voice sounding clear and natural. Leaving you with a professional-sounding production that’s bound to impress.
EchoRemover keeps your sound quality professional, beyond the thinness of a low pass filter or gate threshold.
Why else might an editor want to check out EchoRemover?
- Quick and Easy Professional Audio – Not an audio professional? No problem. Your audio sounds professional with a few quick and easy steps.
- Works inside your favorite NLEs and DAWs – EchoRemover works with Final Cut Pro, Premiere Pro, Audition, Audacity, Logic Pro, GarageBand, Avid, Pro Tools and more.
- Save Precious Editing Time – Editing is often a race against time. Everyone has had to deal with a tight timeline. EchoRemover helps save time and lets you get back to what really matters.
- Not Just Noise Reduction - Much better than using just a graphic EQ, ambient noise reduction, or noise gate plug-in. EchoRemover does more than select noise reduction, EchoRemover's analyzes your audio file and removes echo while keeping the voice clean and clear.
- Used by Professionals – CrumplePop has been around for more than a decade and is a trusted name in the world of post-production and backround noise reduction plug-ins. Companies like the BBC, Dreamworks, Fox, CNN, CBS, and MTV have used CrumplePop plug-ins.
- Sharable Presets – Whether you’re working in Final Cut Pro or Adobe Audition, you can share EchoRemover presets between the two. Are you working on a project in Premiere Pro but doing finishing touches in Resolve? You can share EchoRemover presets between them.
Where Do I Find EchoRemover
You’ve downloaded EchoRemover, so now what? Well, the first thing you’ll want to do is find EchoRemover inside the NLE of your choice. Here is where you'll find EchoRemover in the most popular applications.
Adobe Premiere Pro
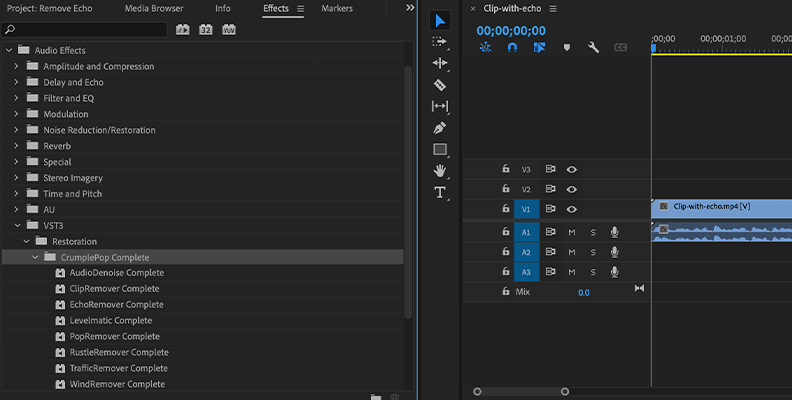
In Premiere Pro, you'll find EchoRemover in the Effect Menu > Audio Effects > VST3 > CrumplePop.
After selecting the video or audio file you’d like to add the effect to, double-click on EchoRemover or grab the plug-in and drop it onto your audio clip.

Then go to the Effects tab in the top left corner. You’ll see FX CrumplePop EchoRemover - click on the big Edit button, and the EchoRemover UI will appear. Now you’re ready to remove echo in Premiere Pro.
Note: If you notice that EchoRemover doesn’t appear immediately upon installation. Don’t worry. The plug-in is installed but if you’re using Adobe Premiere Pro or Audition, there is one small extra step before you can use it.
Video: Scanning for Audio Plug-ins in Premiere Pro and Audition
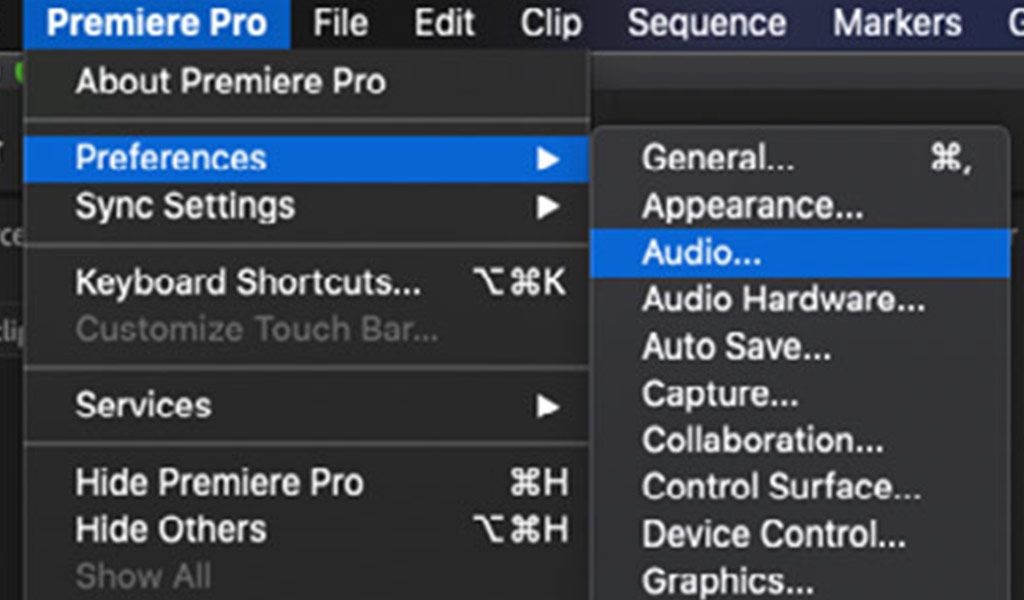
Go to Premiere Pro > Preferences > Audio. Then, you’ll need to use Premiere’s Audio Plug-in Manager.
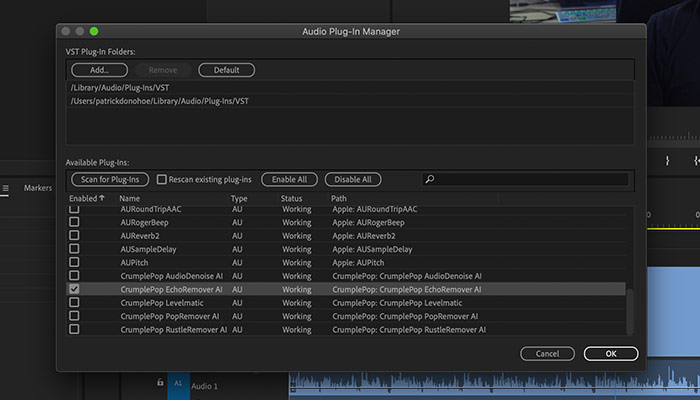
Once the window opens, you’ll see a list of all of the audio plug-ins installed on your computer. You’ll need to click Scan for Plug-ins. After that, scroll down to CrumplePop EchoRemover Make sure it’s enabled. Click OK and you’re ready to go.
You can also find the Audio Plug-in Manager in the Project Panel. Click on the three bars next to the Effects Panel. You can select the Audio Plug-in Manager from the drop-down menu
Final Cut Pro
In Final Cut Pro, you'll find EchoRemover in the Effects Browser under Audio > CrumplePop.
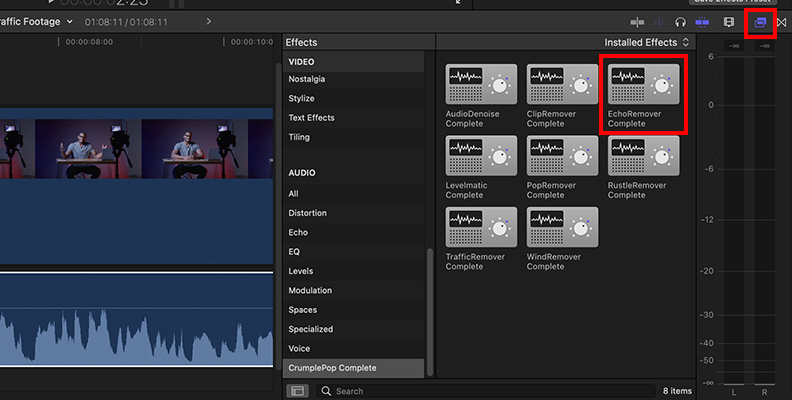
Grab EchoRemover and drag it onto the video or audio file. You can also select your audio clip and double-click on EchoRemover.
Then go to the Inspector Window in the upper right corner. Click on the sound icon to bring up the Audio Inspector window. There you’ll see EchoRemover with a box to the right of it. Click on the box to show the Advanced Effects Editor UI and you’re ready to start reducing echo in FCP.
Adobe Audition
In Audition, you'll find EchoRemover in the Effect Menu bar > VST3 > CrumplePop. You can apply EchoRemover to your audio file from both the Effects menu and the Effects Rack.
Note: If you're not seeing EchoRemover in your Effects Menu bar, much like with Premiere, Adobe Audition also requires a few extra steps to install EchoRemover.

You’ll have to use Audition’s Audio Plug-in Manager. You’ll find the plug-in manager by going to the Effects menu and selecting the Audio Plug-in Manager. A window will open with a list of the audio plugins you have installed on your computer. Click on the Scan for Plug-ins button. Look for Crumplepop EchoRemover. See that it’s enabled and click OK.
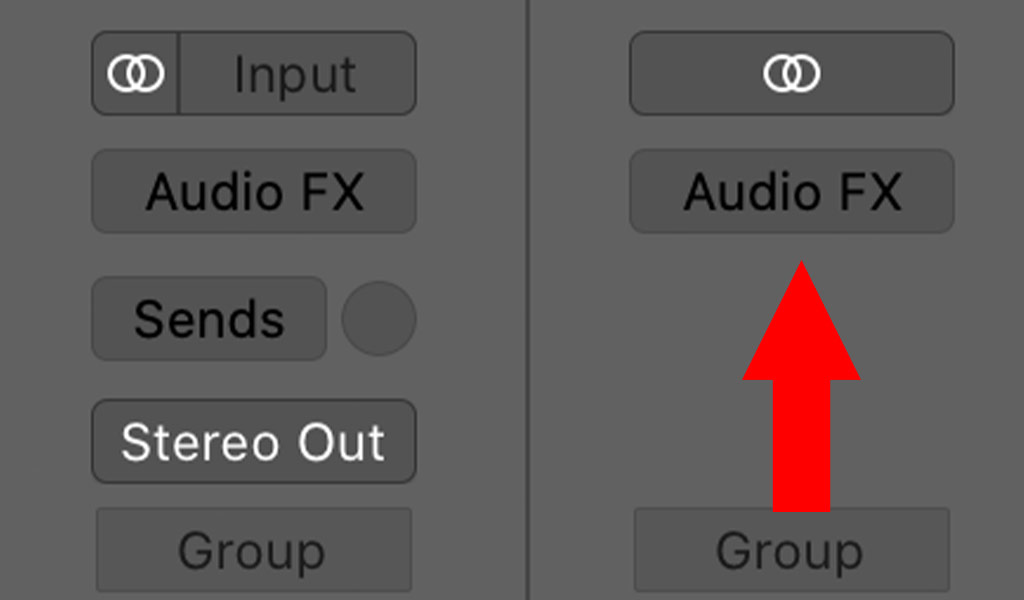
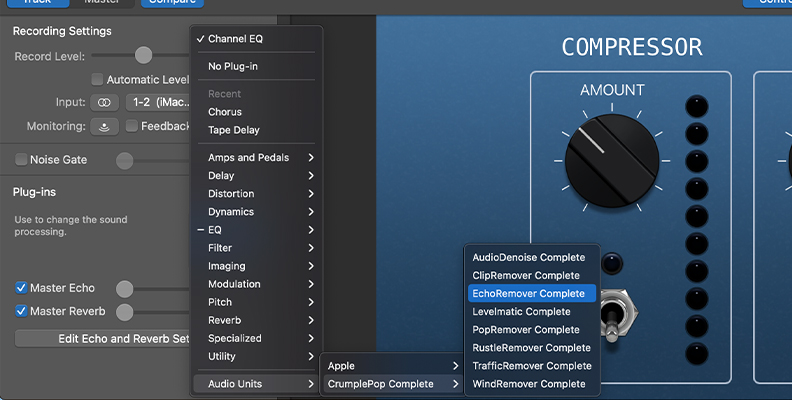
Logic Pro
In Logic, you'll apply EchoRemover to your audio file by going to the Audio FX menu > Audio Units > CrumplePop.
GarageBand
In GarageBand, you'll apply EchoRemover to your audio file by going to the Plug-ins Menu > Audio Units > CrumplePop.
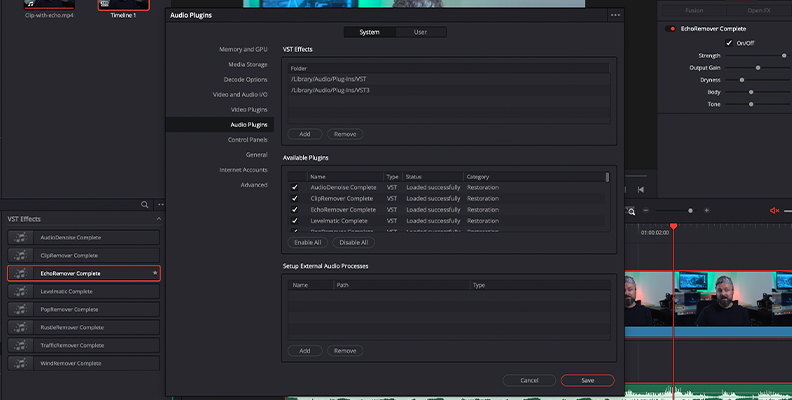
DaVinci Resolve
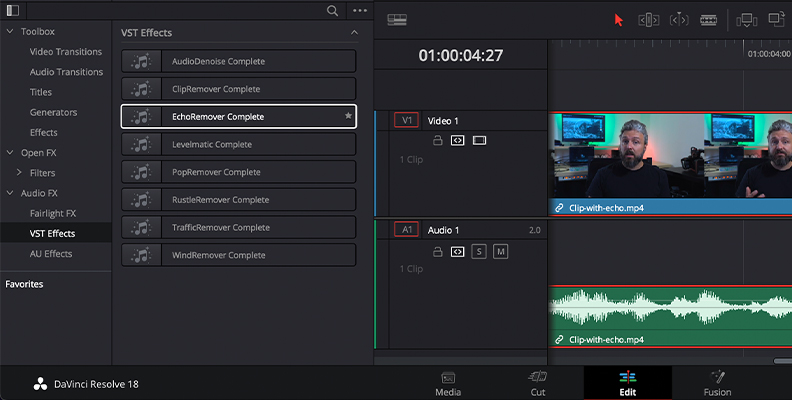
In Resolve, you'll find EchoRemover in the Effects Library > Audio FX > AU. Then click on the fader button to reveal the EchoRemover UI.
Note: If you can’t find EchoRemover after those steps, you’ll need to do a few quick additional steps. Go to the DaVinci Resolve menu and choose Preferences. Open Audio Plugins. Scroll through Available Plugins, find EchoRemover, and make sure it’s enabled. Then hit save.
EchoRemover Gives You an Audio File You Can Be Proud of
EchoRemover can help save audio files that once would have been considered unusable. All it takes is a few easy steps to remove echo and background noise, and now your audio sounds clean, professional, and ready for the big time.


