Reviewing the footage after a long recording day is both a pleasant and stressful experience. You admire all the effort you put into it but are also stressed to find out something's wrong, as re-recording is often very expensive, complicated, and, in most cases, not even an option.
Unfortunately, many things can go wrong during recording, one of them being a dead pixel on your clip(s) caused by equipment malfunction.
If you've recently encountered this problem and are now looking for a way to remove a dead pixel from your video recordings, this guide should help you learn how to do it correctly.
We've got quite a bit to cover, so without further ado, let's get into it.
What Is Dead Pixel Removal in Premiere Pro
For this specific task, we'll be focusing on Adobe Premiere Pro. Of course, completing this task is possible in many other video editing programs, but since Adobe Premiere Pro is the top choice for many editors, both beginners and advanced, we'll opt for it to help us solve the dead pixel removal task.

The removal of a dead pixel in Premiere Pro means finding a way to somehow digitally mask out the hot pixel spot so that it doesn't appear in your shot. Also, a dead pixel may not sound like a big deal at first, but when you play your video project on a larger screen, it will be more than noticeable to the audience.
Also, sometimes dead pixels/hot pixels happen to be in an area of the screen where something really important comes up as a detail or part of the story. In such a case, it's an even bigger problem.
Thankfully, modern video editing programs offer several tools for the task, allowing you to remove specks or any other unwanted spots from your shot. This task is no longer impossible or even as difficult to complete as it once was.
Premiere Pro may not have a "dedicated pixel removal" tool, though we cover one of those in our last section below, but it does offer several options to fix this problem, including masking, applying effects such as blur or mosaic, and more.
How to Remove Dead Pixels in Adobe Premiere Pro?
Let's take a look at the following section, where we explain how to remove dead pixels in Premiere Pro, step-by-step, using multiple methods that you should choose depending on your project's type.
Step 1: Zoom in and Identify Dead Pixels
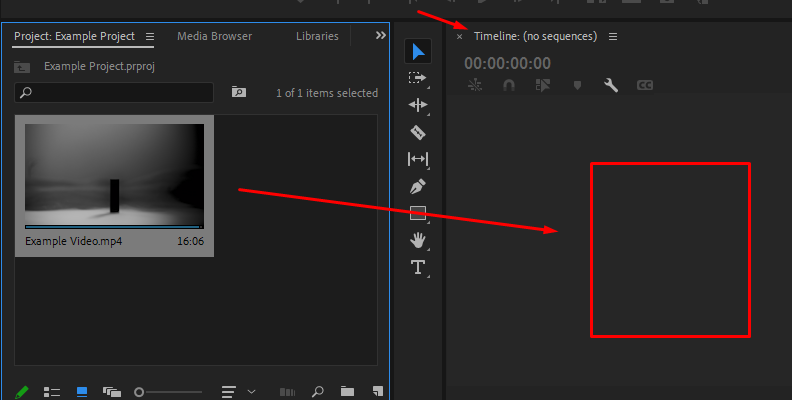
The first step is to import your footage into the software and then into the timeline area to create an editable sequence.
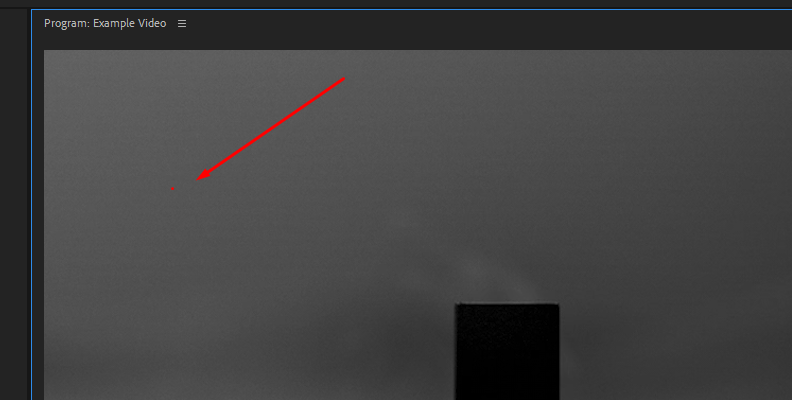
Then, you need to zoom in and find the dead pixel in your video to understand its location. You can do this using "ALT" + "Mouse Wheel Up" or just the "+" key within the Program Monitor window.
Step 2: Apply the Opacity Masking Technique
This method allows you to cover the dead pixel with nearby pixels. This is very helpful when the dead pixel is surrounded by other pixels that look very similar to each other.
To do this, duplicate the video layer. Select your video clip and press ALT + Drag to create a duplicate of the clip on a new track.
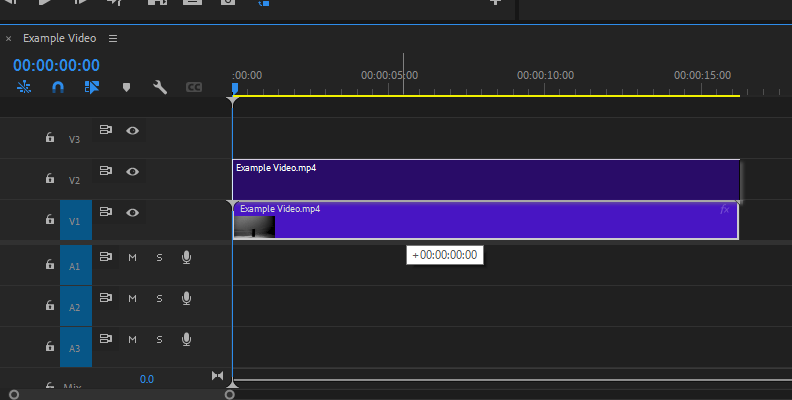
Now, select the duplicated video layer, the one that is on the top video track above your original clip, and go to Effects Control > Opacity.
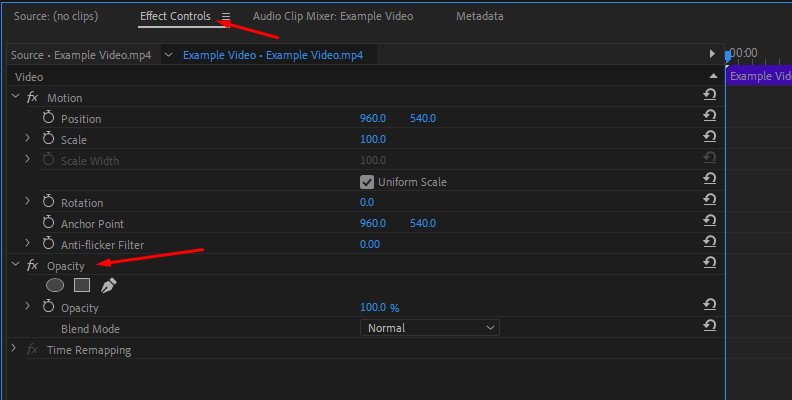
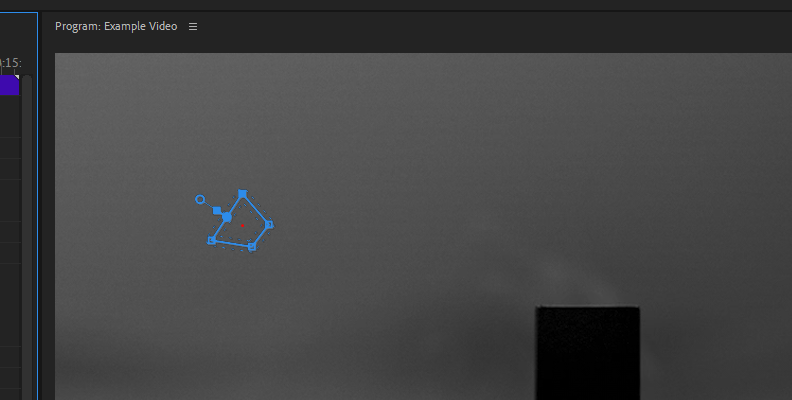
Now, use the Pen Tool to draw a small mask around the dead pixel area.
Keep in mind that in the image you see below, the mask is much larger than it needs to be. If it's just a pixel, you really need to isolate that pixel and nothing more. The mask in the example image is larger so that you can see what's happening better.
Click the "Inverted" option for the mask, but also make sure it's set to "100%" under "Mask Opacity".
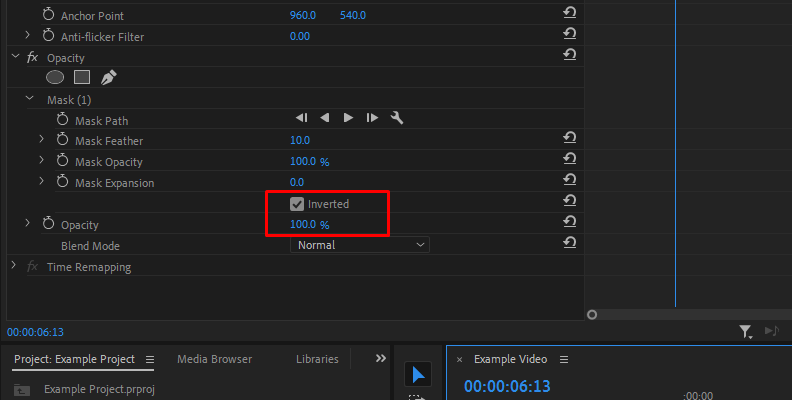
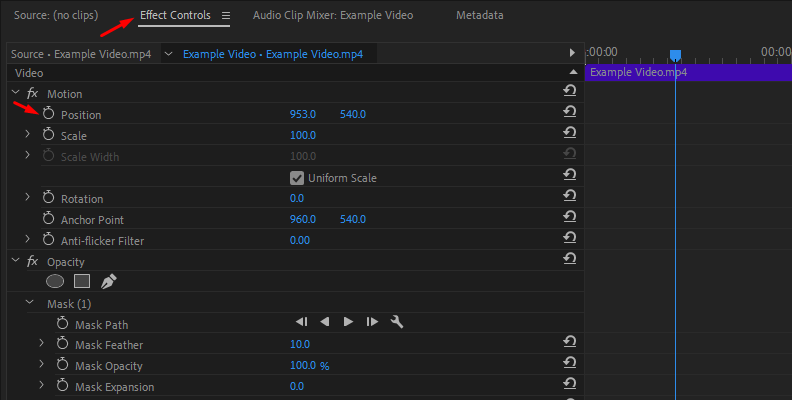
Doing this will create a "hole" in the top layer. Now, all you need to do is use the "Position" parameters to move this top layer in a direction where the "hole" we created will cover a "clean" part of the video below. You usually do not need to move more than just a few pixels to the left or right.
Step 3: Using the Gaussian Blur or Mosaic Approach/Method
If the dead pixel is small and the background is not too detailed, you can use the Gaussian Blur or Mosaic effect method.
Apply the Gaussian Blur or Mosaic Effect on the duplicated video layer.
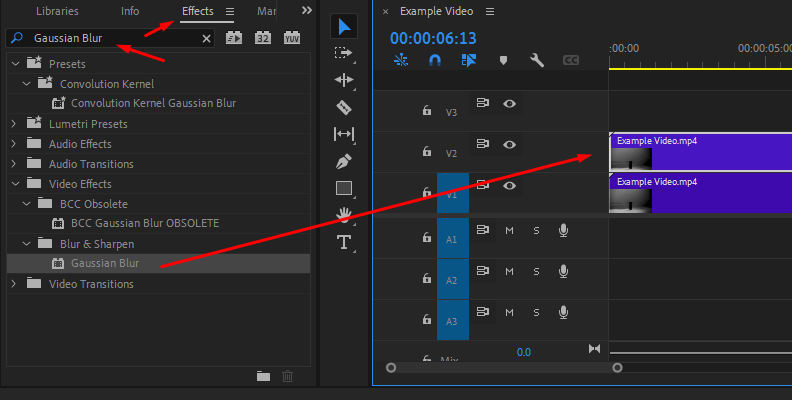
Mask the effect to just the small area containing the dead pixel using the Pen Tool, just like we did in the previous section with the Opacity masking.
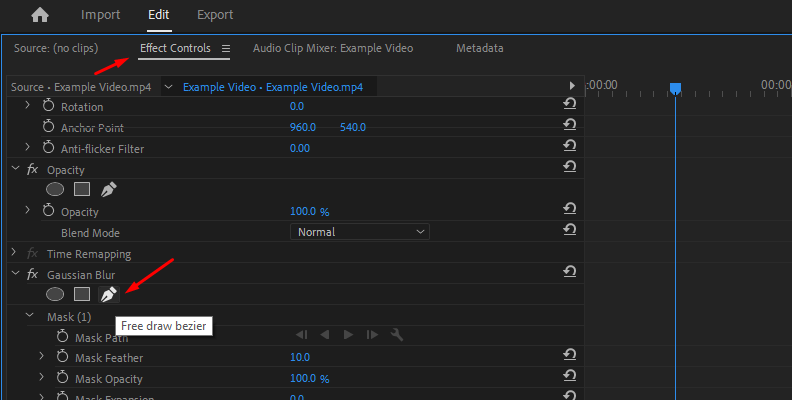
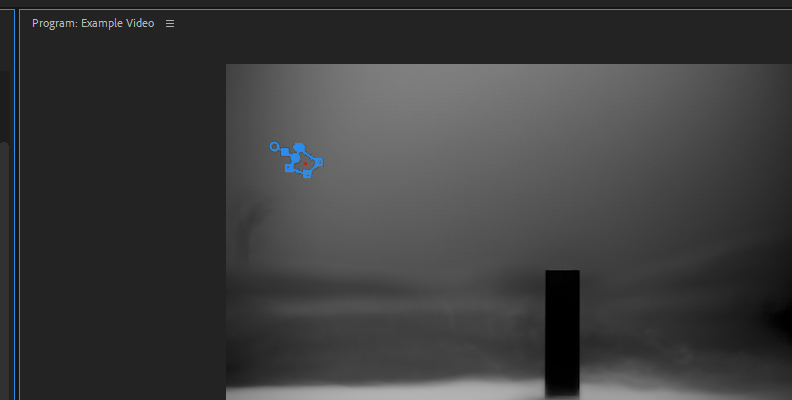
Adjust the effect intensity to blend the dead pixel with the surrounding pixels.
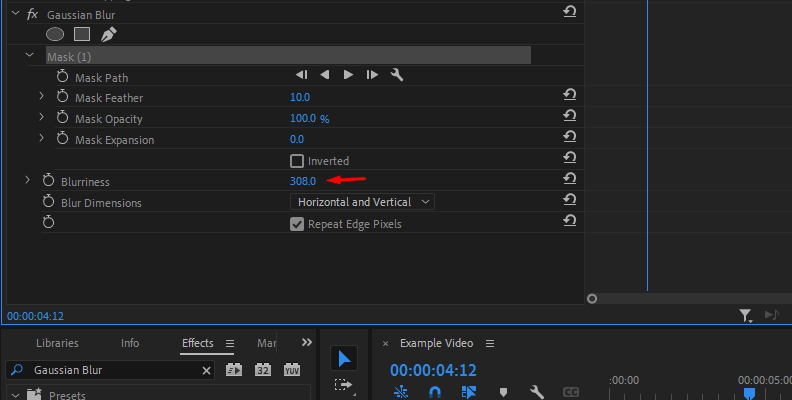
This is a very easy and helpful method if the background is not too detailed. You can seamlessly blend any dead pixel in just a matter of seconds with this approach.
Remove Dead Pixels in Adobe Premiere Pro with BCC Pixel Fixer
Despite Premiere Pro offering multiple ways of solving an issue with dead pixels, there are plug-ins that help even further by simplifying the whole process and offering more room for customization.
For example, the BCC Pixel Fixer effect found in the Continuum creator pack is the go-to choice for many editors facing a dead pixel/hot pixel issue.

Once you download and install Continuum for Premiere Pro, here's how to use BCC Pixel Fixer to accomplish this task:
Step 1: Add Pixel Fixer to Your Video in Premiere Pro
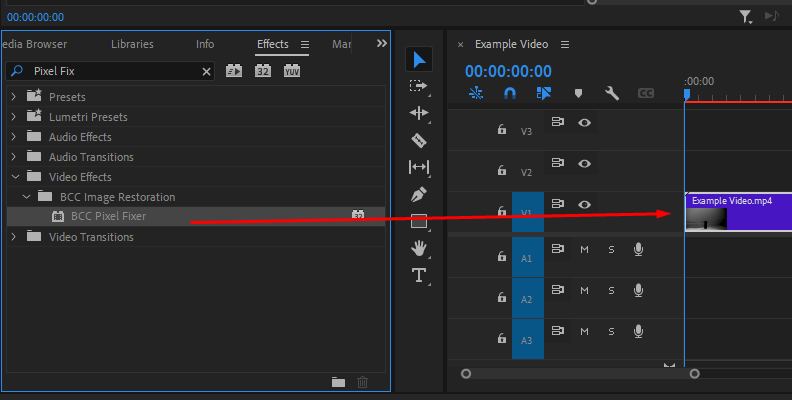
Once you import media in Premiere Pro, drag the video(s) with a dead pixel to the timeline area to create a sequence. Then, open the "Effects" tab and locate BCC Pixel Fixer, then drag and drop it over your video.
Step 2: Set Different Points on Dead Pixels
Now that the effect is added to your video, open the effect controls panel and set different points on different dead pixels. If you have only one dead pixel, here's what you need to do.
Use the coordinates for Position 1 to position it right over the dead pixel. You can see how a small "target" icon moves in the program monitor window.
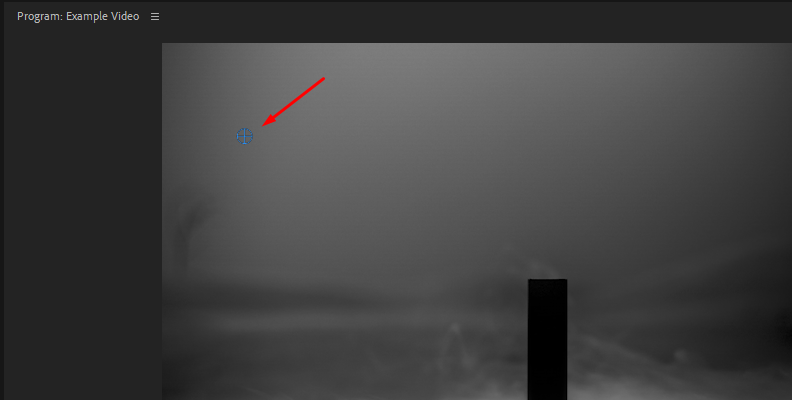
You can also click and drag the target within the program monitor for easier placement rather than changing the numbers for the X and Y axes.
If all dead pixels are a similar shape, you can "tick" the "Use Shape 1 for all" setting. If you need to cover more than one pixel, you can scroll down the settings list and enable more points.
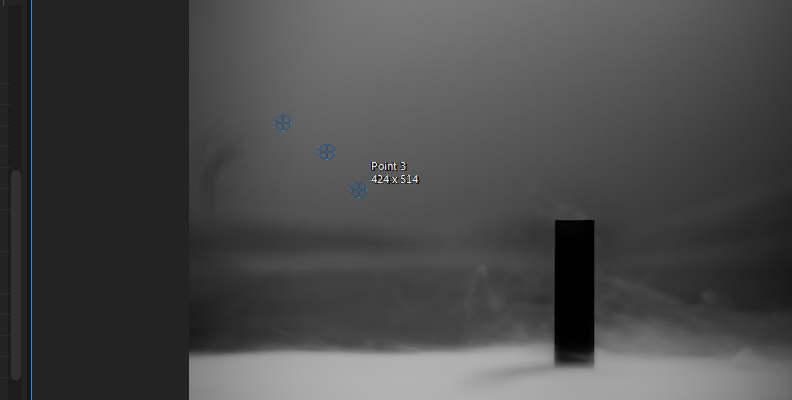
Adjust the blur tuning to your liking, and that's all there's to it! It's much easier compared to using the regular tools offered in Premiere Pro.
Final Words
That concludes our guide on removing dead pixels in Adobe Premiere Pro using various methods. Hopefully, this will help you with all your future work as encountering image imperfections is a common occurrence in the videography and content creation world.
We wish you the best of luck, and thank you for reading!


