


Film photography has made a comeback in recent years, with many professional photographers, enthusiasts, and hobbyists exploring ways to replicate the distinct film colors of old film stocks and vintage cameras.
In this article, I'll explain how to recreate the film aesthetic using different methods with photo editing apps and Boris FX Optics, a powerful and reliable plug-in for Lightroom and Photoshop.
Let’s dive in!
How to Make Photos Look Like Film
The first thing to mention is that it is best to shoot photos in RAW format. Images in RAW will have more data, allowing you to work better with color correction tools, color grading, and other effects. With RAW, you ensure that you won't have any undesired noise or banding and make your photos look like film when you export them.
Another recommendation is to have physical or digital photos as a reference to take inspiration for the tone and look you want to replicate.
Method 1: Basic Color Adjustments
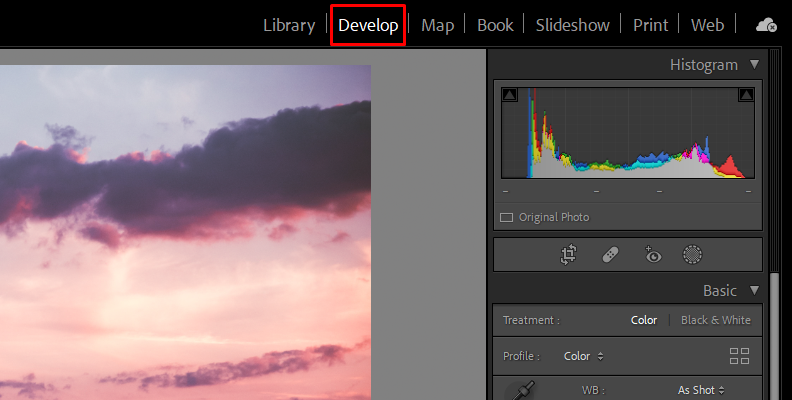
A simple way to make a photo look like film is by making color adjustments. Back in the old days, stock films had unique colors that digital photographers try to replicate today. You can find different tonalities depending on the stock film. Playing with the basic color settings, you can make your photos look like film. In Lightroom, you can find these settings in the Develop module.
One of the main characteristics of classic film cameras is the warmer colors. Increasing the temperature gives your photo the warmer yellow-orange color of some film stocks.
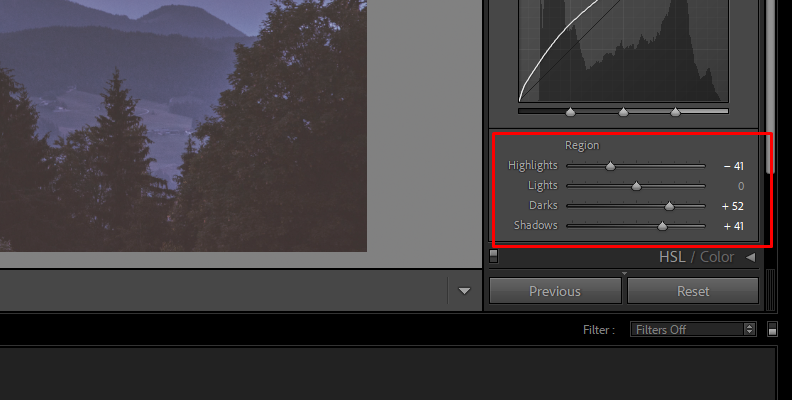
In Lightroom's Basic Color tab, you will find the settings for temperature, exposure, contrast, highlights, shadows, texture, and saturation, among others.
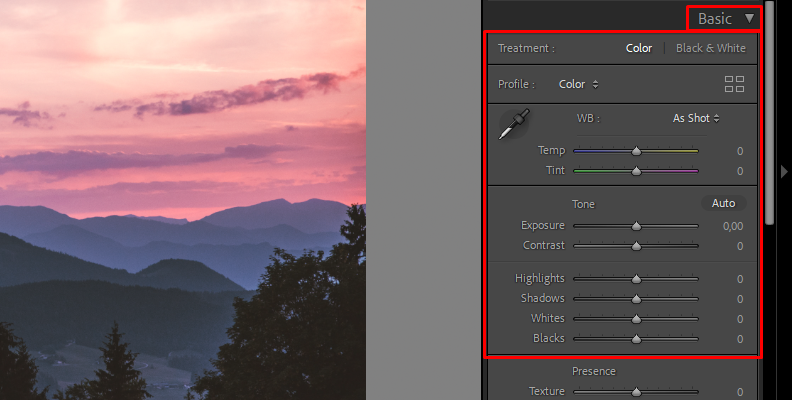
Adjust Image Saturation, temperature, and contrast in general for quick adjustments to add film color to your photo. Then, adjust the balance between the highlights and shadows with the sliders.
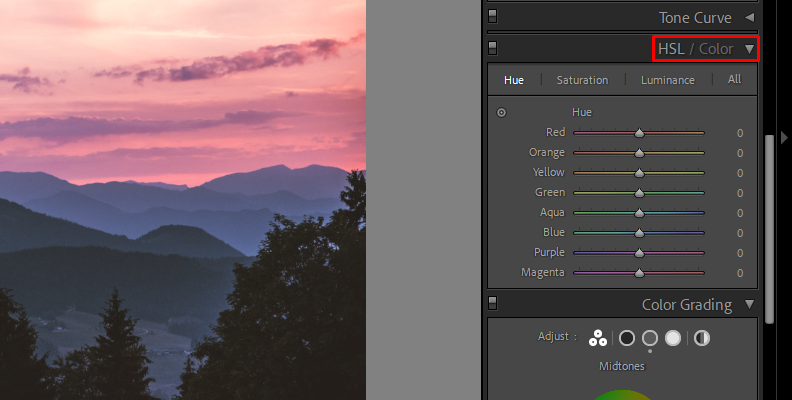
In the HSL/Color tab, you can further adjust each color's hue, saturation, and luminance to have more control over what colors to enhance. In general, you need to increase the temperature and saturation of orange and yellow hues and reduce luminance.
Method 2: Highlights and Shadows in the Tone Curve
Old film photos have less balance between highlights and shadows due to the low dynamic range of vintage cameras. Go to the Tone Curve in your photo editor to mimic this film look. In Lightroom and Photoshop, you'll find it under the Tone Curve tab.
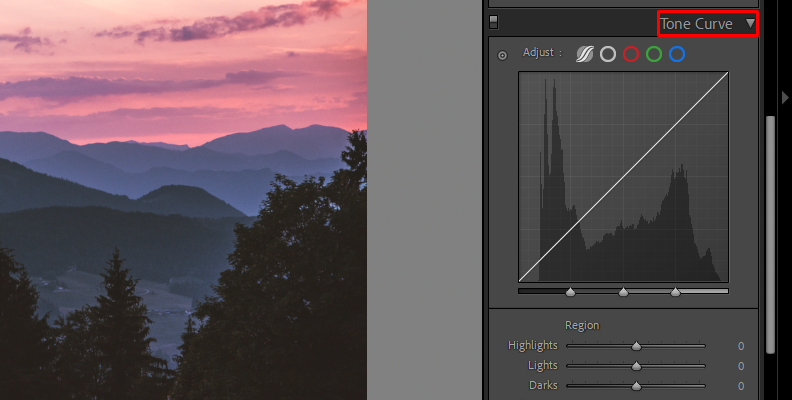
Start by increasing your shadows and dark tones and adjusting the highlight lower. You can use sliders or click on the curve to add a point and drag it up and down to increase or reduce its values. Using the tone curves instead of sliders allows you to add the faded effect of film photos.
The purpose is to simulate poor exposure so that the specific settings might vary depending on the colors in the image.
Method 3: Add Film Grain to Your Photo
One way to tell between a film photo and a digital photo is its definition. With digital cameras, photos look sharper and cleaner, whereas retro images look more blurred and undefined, with a lot of noise and grain. After you’ve done the previous methods, you can apply noise and grain to finish the photo, or you can apply film grain right away to a photo if it already has the film look in color.
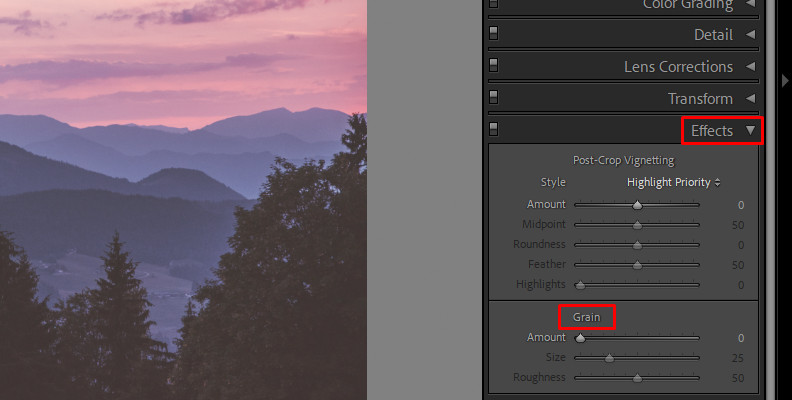
In Lightroom, you can add film grain in the Effects tab. Adjust the amount, size, and roughness using the sliders to create a film look with a thick texture.
In Photoshop, add noise and film grain from Filter > Noise > Add Noise, adjust the amount and distribution (Gaussian is more randomized), and check Monochromatic to add colorless grain.
If your photo editor does not have filters or effects, you can download texture images and blend them with your photo to add noise. Also, shooting with a higher ISO can add natural grain if you cannot apply grain with the other methods described. However, in this way, the noise will be in the original photo, and you won't have much control over it.
Method 4: Apply Effects
Besides grain and noise, you can add other effects and stack them to make photos look like film. Some of the effects you can apply are:
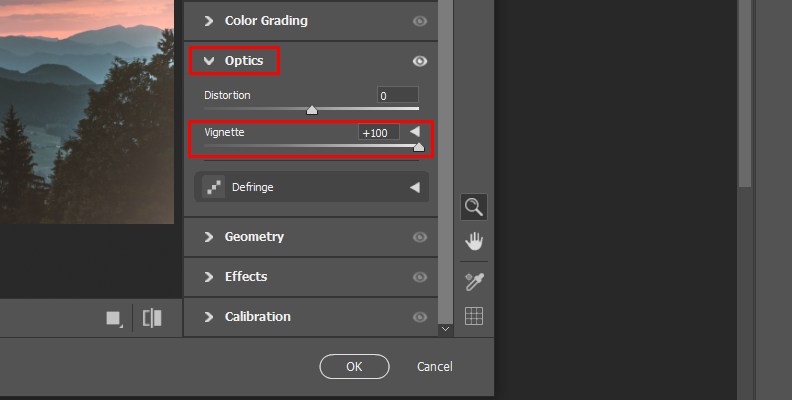
Vignettes. Vignettes help draw focus to the image's subject, creating a darker corner that reminds one of a classic film.
Scan lines. This effect will give your image a grainy, black-and-white, low-quality look from newspaper photos back in the day.
Film presets. Some video editors will have film stock presets. You can quickly apply one to your photos without adjusting everything yourself. Apps like Instagram and other mobile apps feature these filters to make photos look like film with a simple touch.
Alternative Method: Make Photos Look like Film with Optics
Optics is a Boris FX plug-in for Photoshop and Lightroom and a standalone application for Windows and Mac. Optics features many presets and tools to produce stunning images, add effects, and edit photos to look like film. It's simple to use and lets you get creative layering effects and photo filters.
Follow these simple steps to make your photos look like film using Optics in Lightroom, Photoshop or the standalone app.
Step 1. Import Your Photos
Open your photo editor of choice and import your photos. If you're using the Optics' standalone app, go to File > Open and browse for the image you want it to look like film. Remember that importing RAW files is best to get the best of the filters on the film look.
Step 2: Apply Optics Filter
In Lightroom, select the photo and right-click it to display the dropdown menu. Then, choose Edit In > Boris FX Optics. A pop-up window will ask you to edit the image in Lightroom in three different ways. If you have done some color correction and edits in Lightroom, use the first one to see those changes in Optics. Click Edit and wait for Optics to open.
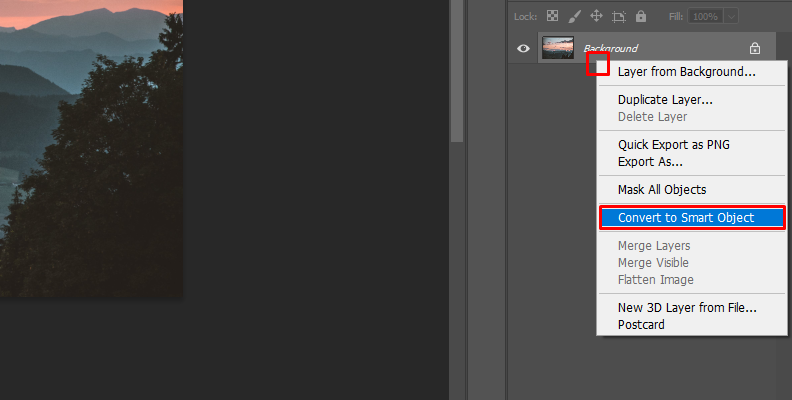
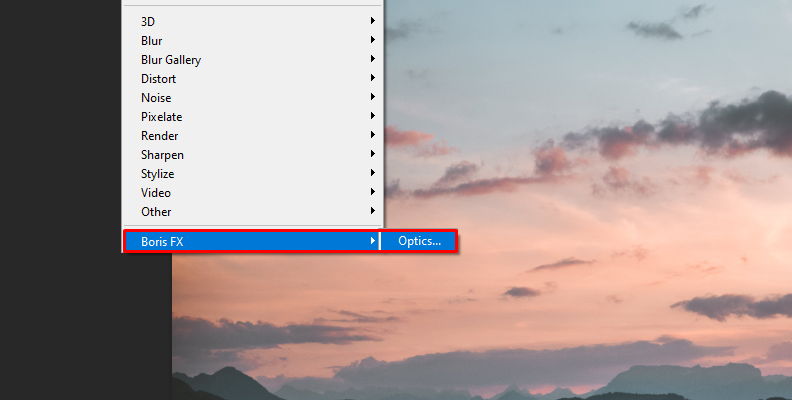
To apply Optics in Photoshop, right-click your photo and convert it to a smart object so you can adjust the filters later in the editing process.
To apply Optics, go to the menu Filter > Boris FX > Optics.
Step 3: Create Film Photos with Optics
Optics has ten categories for filters. You can find the effect to make photos look like film in the Film Lab tab. Here, you have the Film Stock effect, which includes thousands of presets for different types of film stocks and looks.
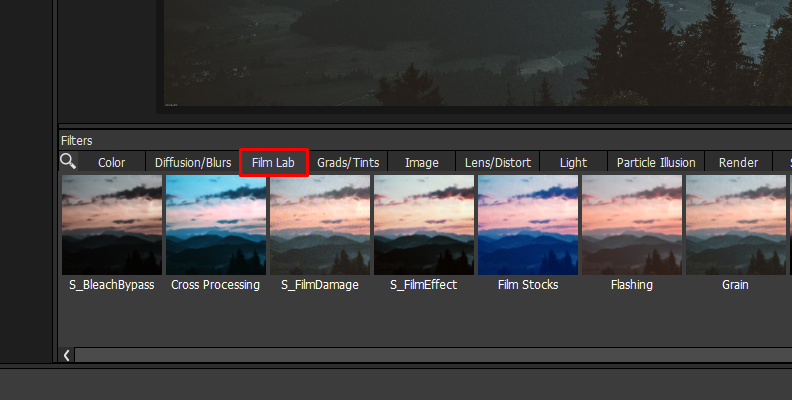
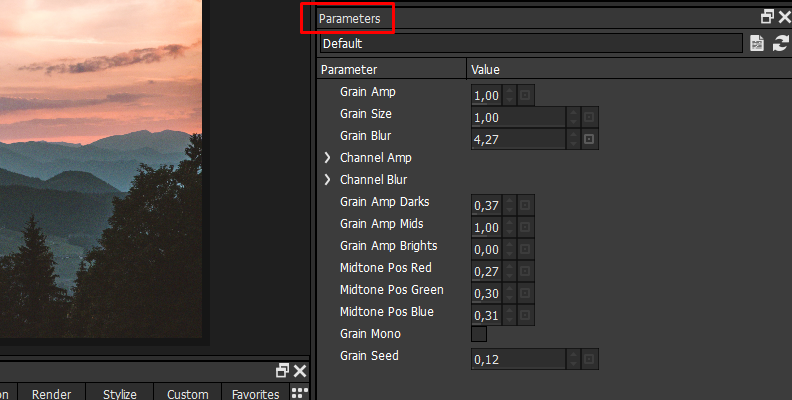
Presets will appear on your left; click on a film effect to apply it to your photo.
On your right, you will see the parameter for each preset that you can adjust like hues, temperature, contrast, saturation, highlight, and shadows, modify the curve, add grain, and adjust sharpness.
Step 4: Stack Film Effects
Optics includes some Sapphire effects like S_FilmDamage, S_FilmEffect, Grain, and S_VintageColor2Strip, which you can stack with a texture or film effect. To stack filters, create a new layer with CLTR/CMD + L and add the filter on a separate layer.
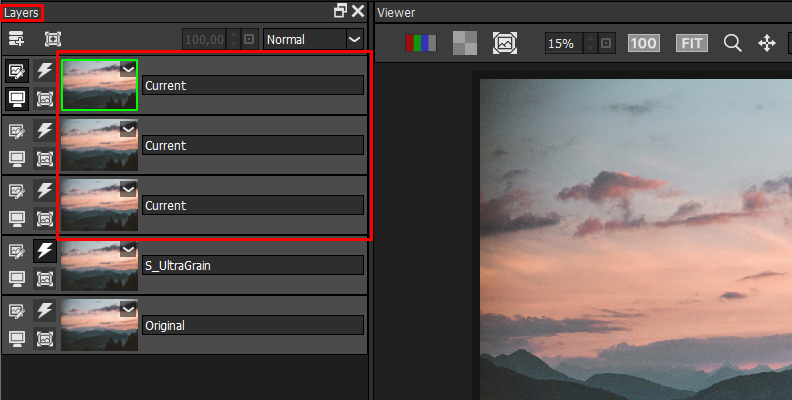
In Photoshop, you can change the order of the layers, the opacity, and the blending mode in the layer's panel on the top right.
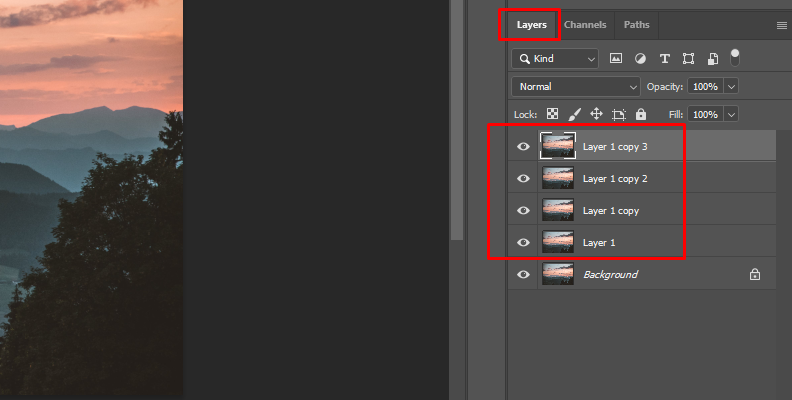
You can create masks if you need more control over which sections of the image to apply the effects. Click the 'Add Mask' icon next to 'Add Layer' on the Layer panel.
Step 5: Export your Film Photos
The last step is to save and export your photo. In the plug-in version, click Apply to save the settings and return to your host program to export the image.

Go to File > Save to save your photo in the standalone application. You can save the file with the settings to edit later in Optics.
Apps That Make Photos Look Like Film
These mobile apps can help you make photos look like film without transferring them to your computer for editing.
Lightroom Mobile App
Lightroom Mobile features all you need to create film photos with the quality of the desktop version of Lightroom in the palm of your hand. The mobile app version of Lightroom allows you to edit with basic color settings and add effects and presets to make your Android and iPhone photos look like film with simple touch controls.

Huji Cam
Huji Cam, developed by Manhole, is an app that helps you take photos with your mobile phone and replicate the film look of the 90s vintage film cameras. Huji Cam is simple to use and allows you to select the photo quality and random light effects to add film colors. Huji Cam is available for Android and iOS in their respective stores.
RNI Films
RNI Films is a film camera app with state-of-the-art film effects and claims to have the most authentic film camera emulation of all mobile apps. Its friendly user interface helps you make your photos look like film with a few taps. RNI Films is available for Android and iPhone mobile phones.

VSCO
VSCO is a mobile app for Android and iOS that edits your photos with professional results in an easy-to-use interface. You can use VSCO for free with limited editing tools and presets or upgrade to a higher plan to obtain over 200 premium presets and more editing features such as HSL, film grain, and Lightroom compatibility.
Dazz Cam
Dazz Cam mimics film photos from the 90s and 80s film cameras. It features AI-generated effects, film effects, film grain and dust, light leaks, and more filters to make photos look like film. You can shoot from your mobile phone and use photo adjustments to create the film color from vintage images. Dazz Cam is available in the iOS and Android app stores.
Final Words
By following these methods and using the apps featured in this article, you can achieve the look of film photography without having to buy disposable cameras.
Use some of the apps mentioned to take pictures with your mobile phone or edit any digital photo in your camera roll. Experiment with the tone curves, HSL, and other color settings to achieve film photos worthy of film cameras, and be careful with adding film grain as too much can affect the stylish film look.
Good luck!
FAQ
How to Make Videos Look Like Film?
Follow the same workflow in your video editing software to mimic the effect of film photos in videos. Apply noise and grain effects, and play with the color correction tools and color grading wheels. Effects like Sapphire from Boris FX can help you add a film effect simply with presets like the ones included in Optics.


