


If you’re looking for a new creative way to share on social media, upload content to your website, or bring back to life your favorite pictures by adding some magic to them, look no further than cinemagraphs!
In this step by step guide, you’ll learn to create cinemagraphs, a mesmerizing media for visual storytelling that can attract and intrigue your audience like a video without the struggle of filming and video post-production.
Let’s dive in!
What is a Cinemagraph?
Cinemagraphs originated in 2011 when photographers Jamie Beck and Kevin Burg sought a new way to tell stories with images that could enhance a picture's storytelling power and be more versatile than a video. That’s when they combined their skills to make the first cinemagraphs, adding moving elements to their photos.
A cinemagraph is like a bridge between a photo and a video that plays in a continuous loop. You can call it an almost static video or a slightly moving picture. And you can create cinemagraphs from both video clips and photos.
The main characteristic is that the movement is small and repetitive, such as hair moving, a book flipping, flickering lights, smoke, rain, pouring water, etc., and lasts only a few seconds.
How to Make Cinemagraphs
Creating cinemagraphs can be simple and quick once you’re familiar with the programs you use. The hard part comes in the planning and filming of the cinemagraph. First, you need to plan what you want to do and if you will create a cinemagraph from a video or a still photo.
If you start from a still image, you need to plan how to turn it into a cinemagraph by animating the background or adding motion to an object. If you start from a video, it could take some more work. You must prepare the film, what you will shoot and where, get good lighting, and film as steady as possible using a tripod.
In both cases, there’s a lot of planning to do ahead. Think of the story you want to tell your audience with the cinemagraph. If you record video, keep in mind that the cinemagraph will loop when you're filming your subject and capture less movement from sources other than the one you want to emphasize.
Once you complete this first part, now it’s time to upload your footage on your video editor and start editing. These are simple ways to create cinemagraphs on your computer and mobile devices.
1. Adobe Photoshop
With this method, you can create a cinemagraph in Photoshop from a short video footage and export it as a GIF file.
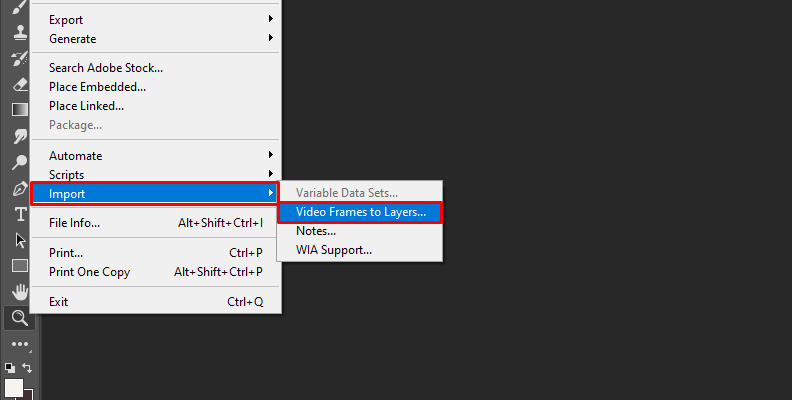
Step 1: Import Your Video to Photoshop
Import your video file in File > Import > Video Frames to Layers.
In the following dialogue box, you can trim your video to choose a few seconds to make a cinemagraph if your original video file is too long. Choose the section that will work best for cinemagraphs.
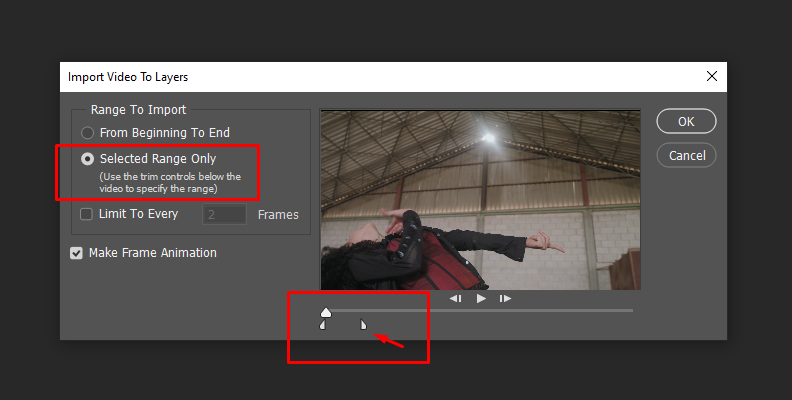
Click OK to import your video file as frames.
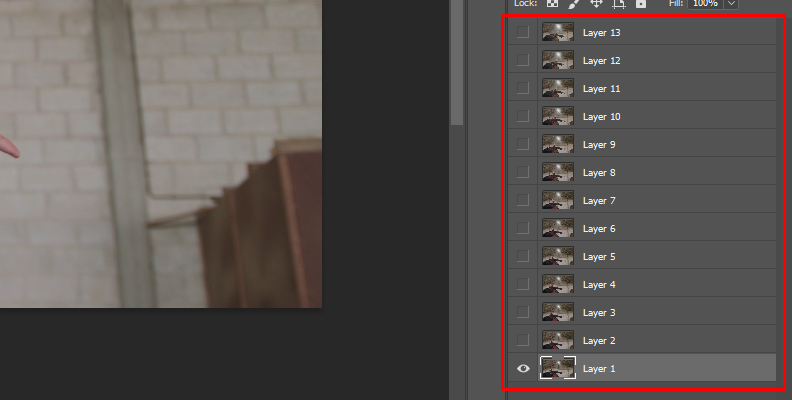
Step 2: Remove Unnecessary Frames
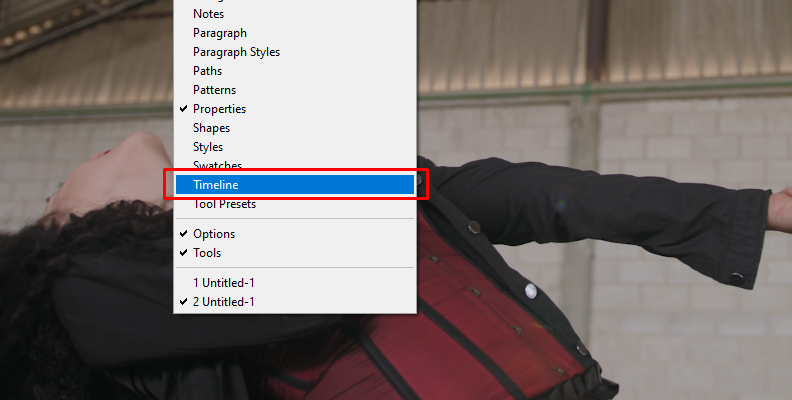
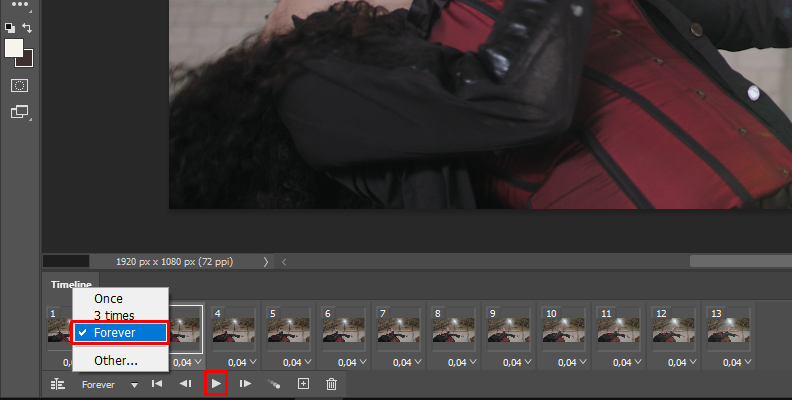
Each frame of your video will appear as layers on the layers panel and on the video timeline. Play the timeline to watch the video and decide if you will remove layers until you have a short second video. Next to your play controls, select Forever to loop the video clip.
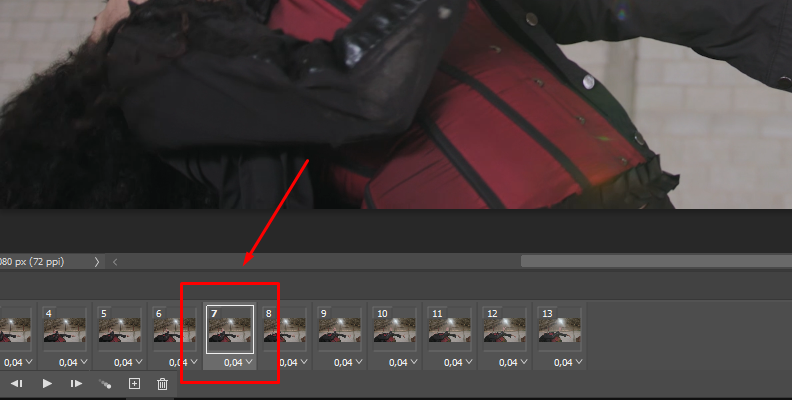
Step 3: Select a Still Frame
Select one frame to make it the still image of the cinemagraph. It will make your video freeze so you can see the movement of one object in the video.
Step 4: Create a New Layer Mask
Now that your still frame is ready, let’s bring the still image to life. To do that, create a layer on the frame you put on the top as a still frame.
Make a mask around the moving object and invert it in Select > Inverse. Create a new layer mask from the mask in Layer > New > Layer via Copy and put it as the top layer. Play the animation to see movement only through the mask and the rest of the image static.
Step 5: Create a Seamless Loop
Select all your frames and click the plus symbol under the timeline to duplicate them. Click the timeline menu at the far end right of the timeline panel and choose Reverse Frames to make the cinemagraph repeat in a loop.
Step 6: Export
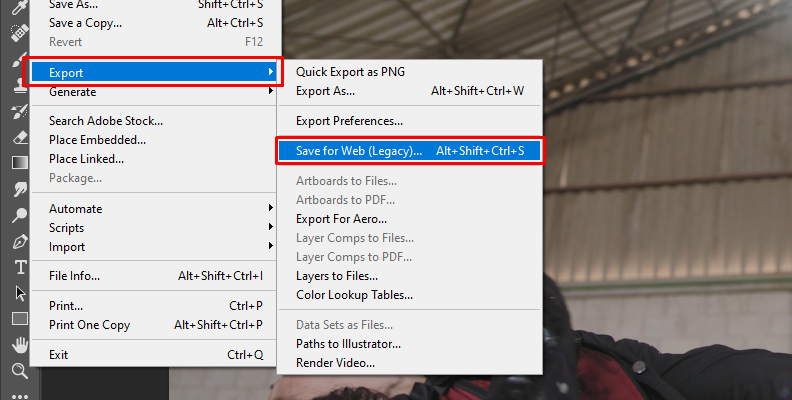
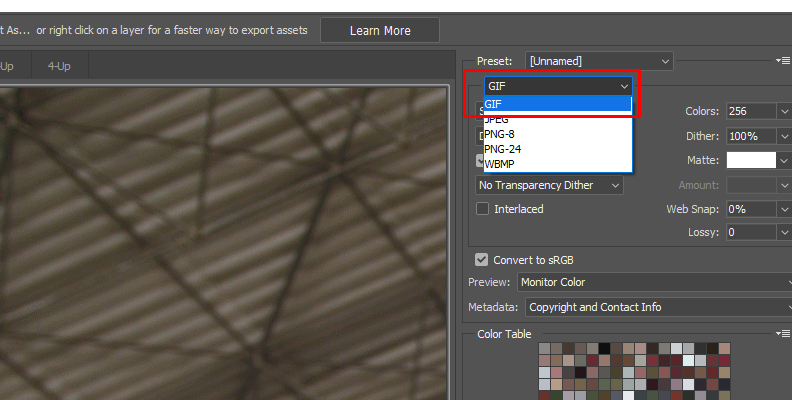
To export the cinemagraph, go to File > Export > Save for Web. Select GIF as a file export and click Save.
2. Adobe After Effects
Creating cinemagraphs with After Effects is a great option, as you can use the effects library to make them more attractive.
Step 1: Create a New Composition
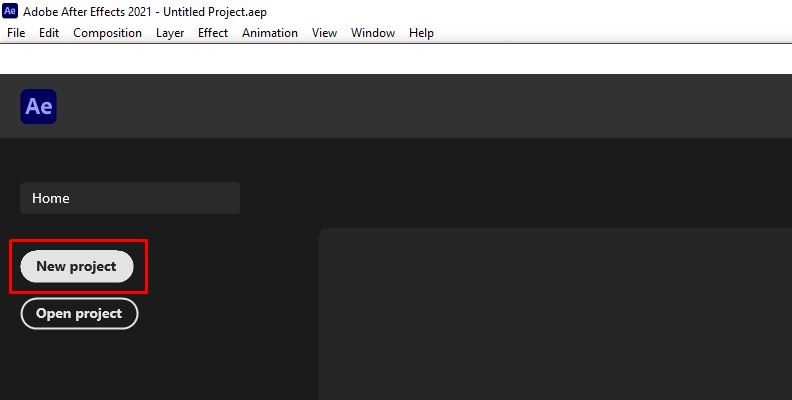
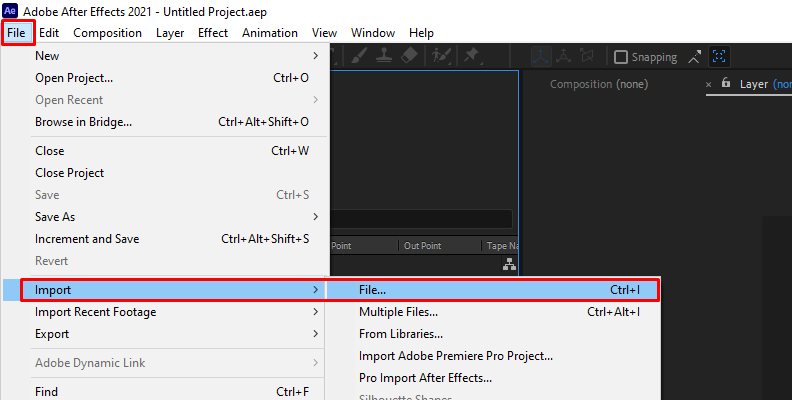
Import your video footage to create a new composition. If you need to trim your video, select the segment you want and create a composition from the selection.
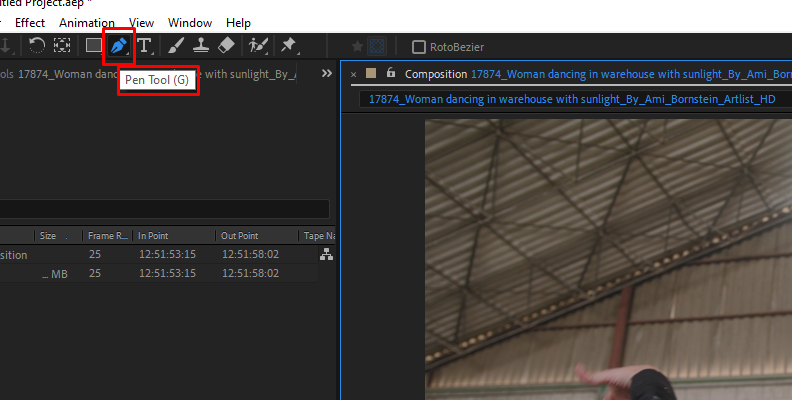
Step 2: Masking

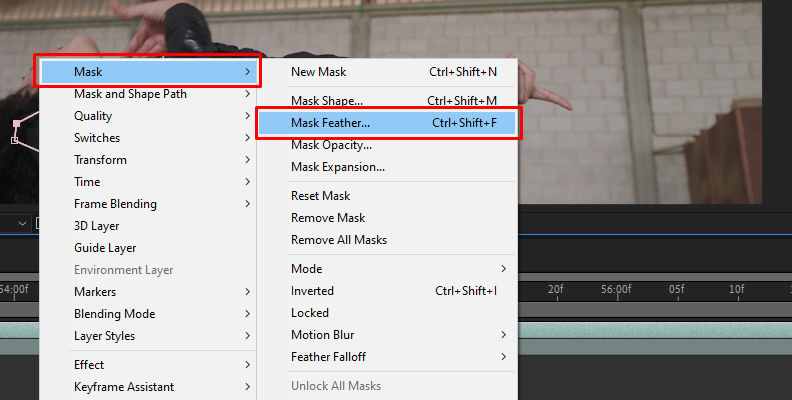
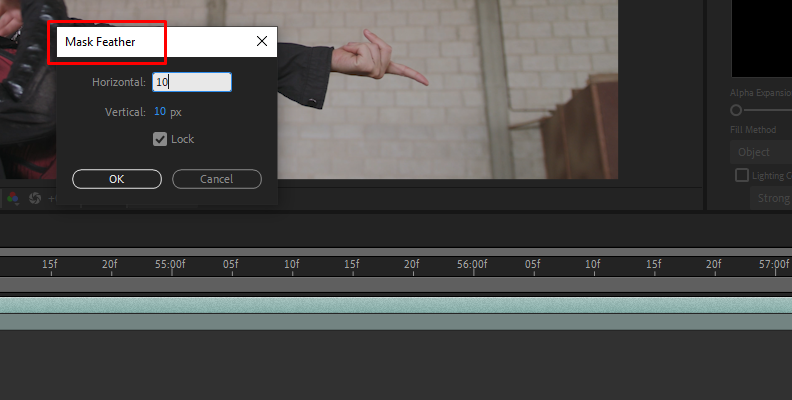
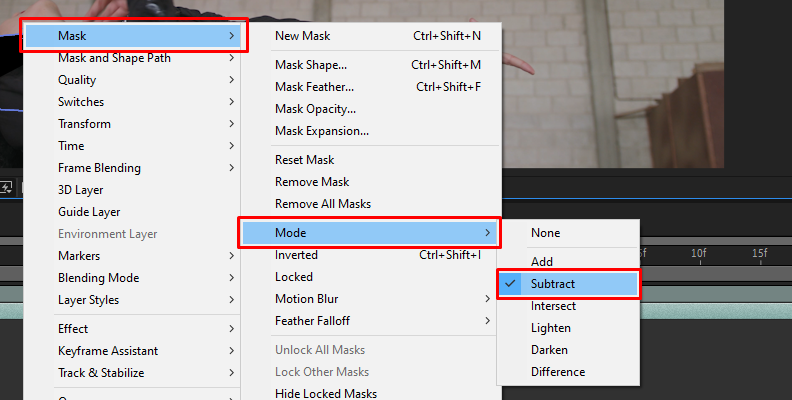
Duplicate your video layer and select the one on top to draw the mask where a minor and repeated movement occurs. You can use the pen tool or one of the pre-established shapes. Add a feather to the mask to make it smoother, and change the type from Add to Subtract.
Step 3: Freeze Time
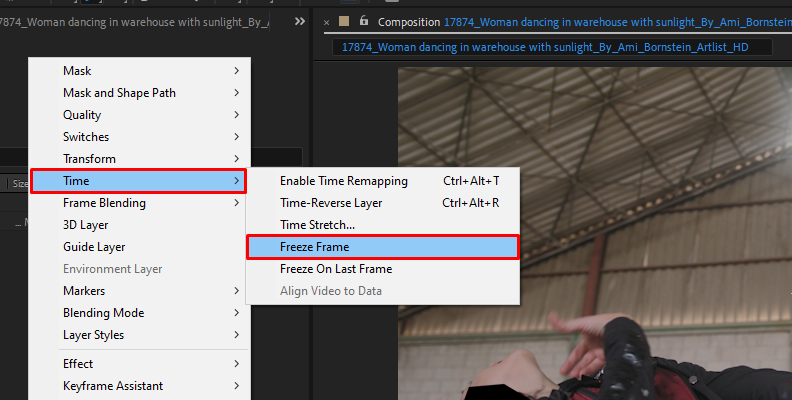
The next step is to freeze the video layer on top. To achieve this, right-click the upper layer and select Time > Freeze Frame to make everything in the video, except the mask, freeze in time. Now, you should see only the mask with movement.
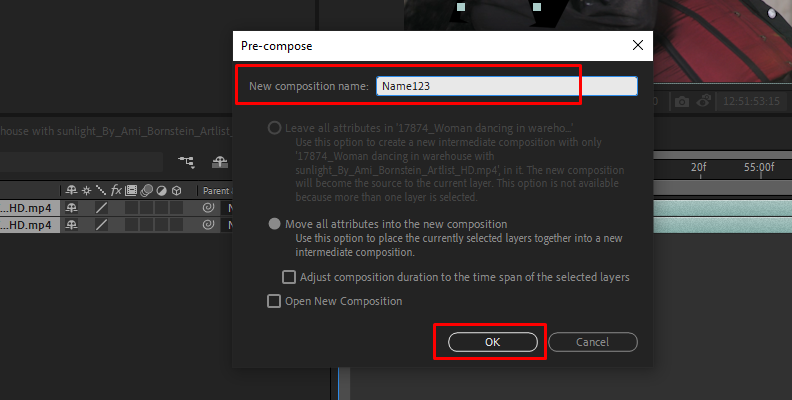
Step 4: Pre-compose
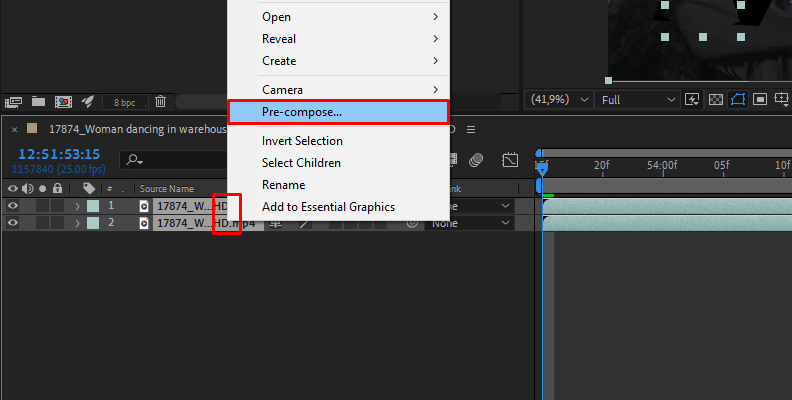
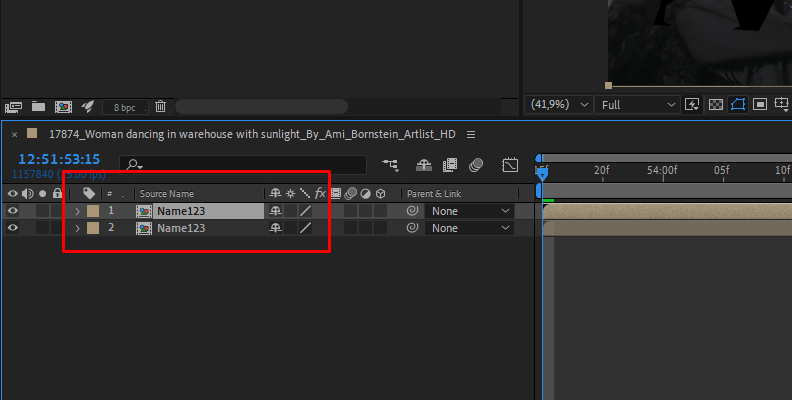
Select the two layers and pre-compose them. Name your new composition and click OK. Open the new composition and duplicate the layer. A cinemagraph constantly loops, so you need to make it look smooth.
Step 5: Create a Looping Video
Trim the first layer length to last a few seconds and the bottom layer from the beginning to the end of the upper layer. You should have the first layer starting, and after a few seconds, the second layer continues but with no changes for now. Move the top layer towards the end, then select both layers and move them towards the beginning. To achieve the smooth loop, animate the top layer's opacity to go from 0 at the start to 100 at the end.
Step 6: Export and Render
Preview the video and make the adjustments needed until you like the result. Export and render the video and start sharing your cinemagraph anywhere.
3. Cinemagraph Pro
Cinemagraph Pro is an application for creating cinemagraphs on iOS devices and macOS. Sadly, it is not available for Android or Windows, but Apple users can easily make cinemagraphs from their iPhones.
Step 1: Create a New Document
Open Cinemagraph Pro and import your video footage. Trim the video to select a few seconds for the cinemagraph.
Step 2: Mask the Scene
Select the brush tool and adjust the size brush, hardness, and opacity, and start drawing over the part of the video that you want to maintain movement.
Step 3: Edit Loop
Select if you want to use a bounce or repeat loop and adjust speed, delay, and crossfade settings.
Step 4: Final Adjustments
You can adjust your cinemagraph color, brightness, and more. Also, you can choose filters to give your cinemagraph a more cinematic look.
Step 5: Export and Share
Click export to save the cinemagraph to your device. Select the file type and the number of repetitions. You can also share the cinemagraph directly from the app to your social media platforms.
How to Make Cinemagraphs with Optics
Optics is a cinematic effect plugin for Photoshop, Lightroom, and a standalone application to create stunning cinemagraphs and edit photos with over 180 filters and thousands of presets. One of the latest features is its inclusion of Particle Illusion, allowing you to create a cinemagraph from a still photo with unique effects to bring life to your still images.
Step 1: Import Your Photo to Optics
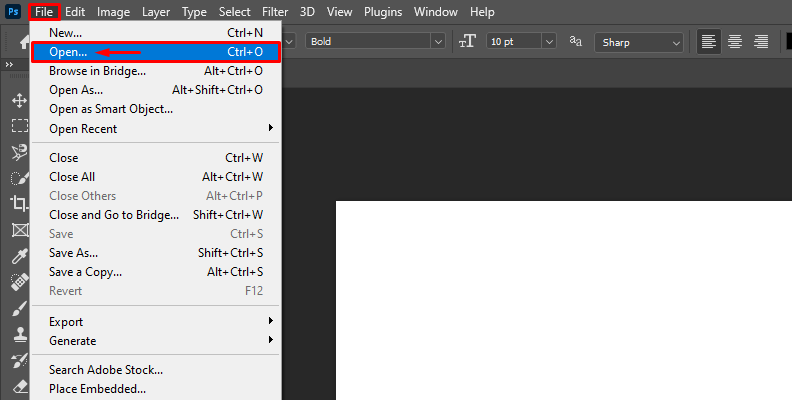
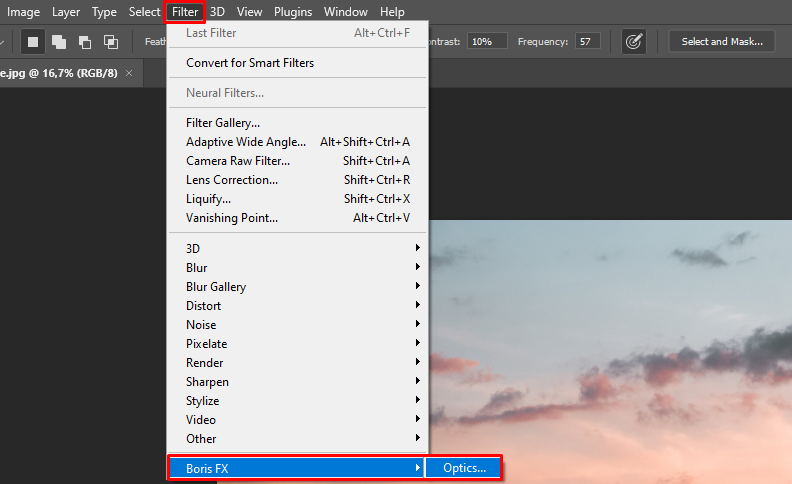
For the standalone version, click File > Import and select your image. In Photoshop and Lightroom, import your still images and apply Optics. In Photoshop, it's under Filter > Boris FX > Optics. In Lightroom, right-click your image and select Edit In > Boris FX Optics. When you use the plug-in version, it will launch the Optics interface.
Step 2: Using Optics
Optics' user interface is straightforward. You can rearrange the windows that you need or create new customized workspaces. By default, you have the viewer in the middle, the layers on the left, filters under the viewer, and presets under the layers. On your right side, you have the parameters for your presets.
Step 3: Particle Illusion Presets
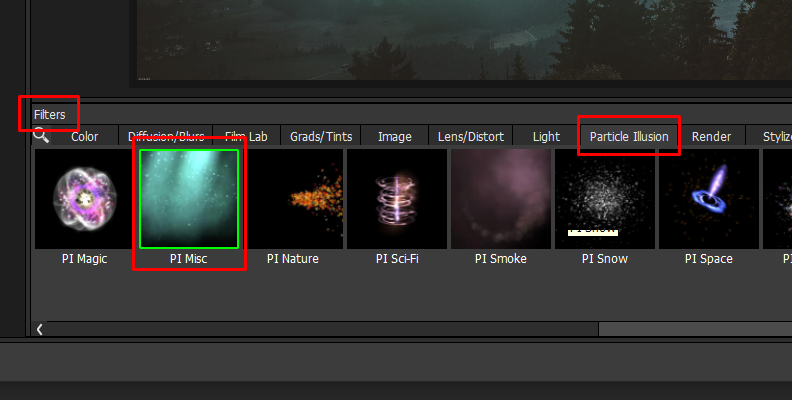
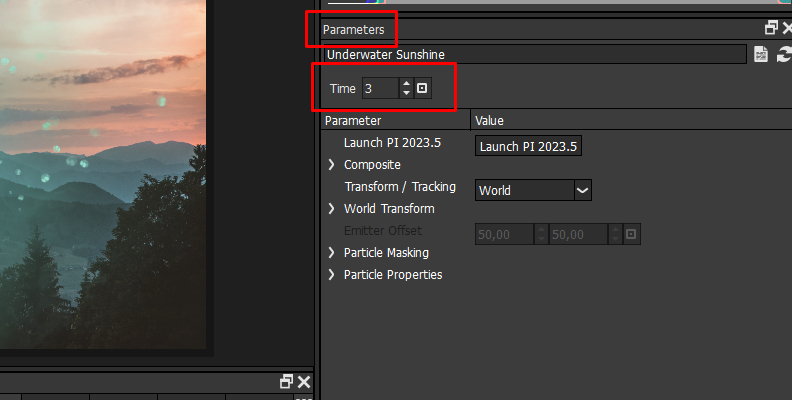
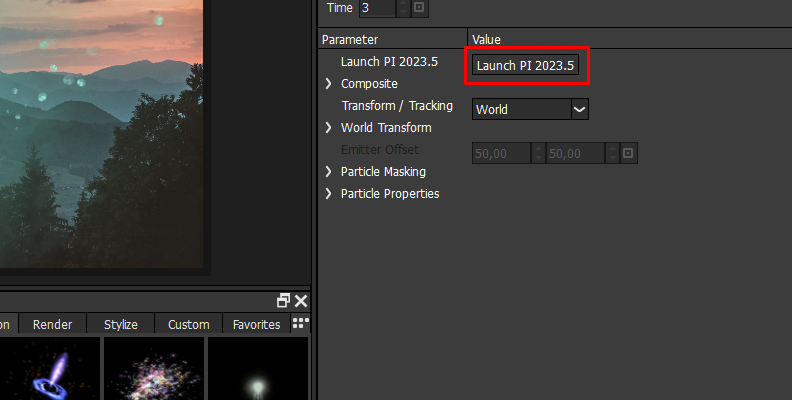
Select Particle Illusion from the filters category and choose one. If you want to see how the effect will look with movement, go to the Parameters and move the Time values to see it moving. Under Time in the parameters, you will see a button to Launch Particle Illusion; click on it to go to its interface (you don’t need to have Particle Illusion installed.)
If you need to create masks, add them to your image editing software or Optics before launching the Particle Illusion editor.
Step 4: Editing Particles
The particle illusion editor gives you more control over the behavior of the emitter. You can delete the preset from Optics and start from scratch by selecting a new emitter from the Presets library and editing its parameter.
Step 5: Render the Cinemagraph
Since you’re working with an image, the final cinemagraph must be rendered and exported as a video. Once you have the cinemagraph ready, click on Render. Select the Output folder and name, and click Start Render. When it finishes, you can close Particle Illusion and Optics. Your cinemagraph will be waiting in the folder where you save it.
Final Words
Cinemagraphs have become extremely popular on social media, websites, and online marketing. They’re engaging because you can tell a story with them in a few seconds, and in a time when you need to grab the viewer’s attention in seconds, cinemagraphs will be a secret weapon for your marketing strategy.
With these four methods, you have enough tools to create cinemagraphs from a video or photo from your iOS device and your computer. Experiment with different images and particles in Optics and make your own cinemagraphs.
Good luck!
FAQ
What is the Format of a Cinemagraph?
The most common format is a GIF file, but for a better-quality cinemagraph, it’s recommended to export it in a video file using codec H.264. However, the end file type depends on where you share the cinemagraph. A GIF will be enough for social media, blog spots, and email marketing.


