


Photography offers a wide range of styles to choose from in order to create a unique look in each shot. One such style is the cinematic shot, which gives the impression of a still taken straight from a movie. Cinematic shots can transport us to the scene and evoke powerful emotions. Complex composition, color grading, and other filters are what distinguish narratively driven cinematic portraits.
While modern cameras and mobile phones include cinematic filters to add detail and compose a cinematic photo before shooting, true cinematic photography involves more than simply applying filters. This article will explore what creates the cinematic look, the process behind creating it, and how to achieve it using photo editing software. Included in this article is a step-by-step tutorial on creating cinematic photos with Optics by Boris FX.
Let’s dive in!
What is Cinematic Photography?
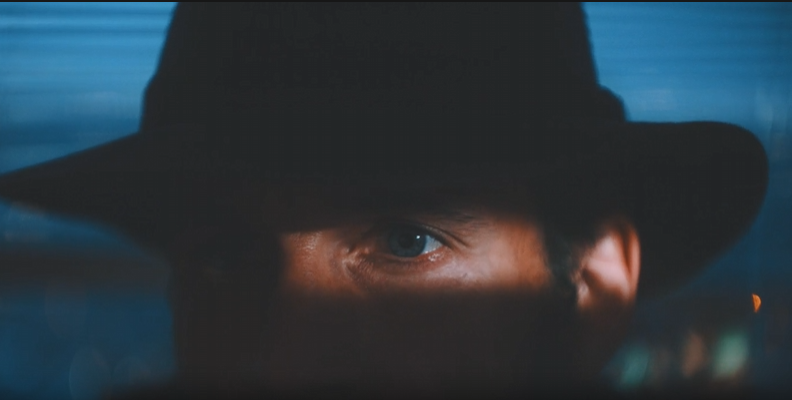
Cinematic photography is a style that mimics stills from movie scenes to create images with plenty of emotion and depth. It's a powerful way to tell a story through pictures.
Cinematic is a word that we usually associate with movies, and has become almost a synonym for horizontal shots in a 16:9 or 2.35:1 aspect ratio with smart color grading that can influence the viewers' emotions to immerse them in the storyline.
To create cinematic portraits, you must have a vision of how you want the photo to look, watch movie stills and other pictures for reference, search for the right location, control lightning, direct models when needed, and more. Cinematic photography does not rely on post-production only: you work towards your goal from the moment you raise your camera.
Cinematic photography has certain features that you must consider if you want to achieve this cinematic look. That includes aspect ratio and other camera settings, lighting techniques and composition knowledge, and knowing your way around a photo editor like Adobe Photoshop, Optics, or any other option. You don’t need to be a software expert, but knowing the basics of color and lighting will give you a head start.
Crafting cinematic photos is about composing an image with all its elements telling a story.
How to Create Cinematic Photography
A cinematic photo is created before you even lift your camera.
Yes, there’s a lot you can achieve in post-production and by knowing how to set your camera, but the result will depend on much more than that. You need to pay attention to the most minor details during your shooting. From the camera angle, you need to shoot to the location, lighting, and surroundings, including the subject.
I’ll guide you through creating cinematic portraits, including some tips to help you get the desired look. Remember that with art, you never have strict rules that you need to follow. Use this as a guideline, but know there’s no golden rule in cinematic photography.
Step 1: The Idea
Your cinematic photography needs to start somewhere, and that’s with your idea. Start with a vision of how you want your photo to look. For this, you might need some inspiration from other references: watch your favorite movies, search for still pictures from that film, and try to analyze its composition.
Look at the subject, color palette, and background. What is it that you find most attractive in the picture? Analyze the feelings it evokes in you, and think of what you want your audience to feel. You could start thinking about locations, backgrounds, and subjects at this stage. If you are enthusiastic about street photography, you can hunt for those real-life moments and turn them into a cinematic portrait.
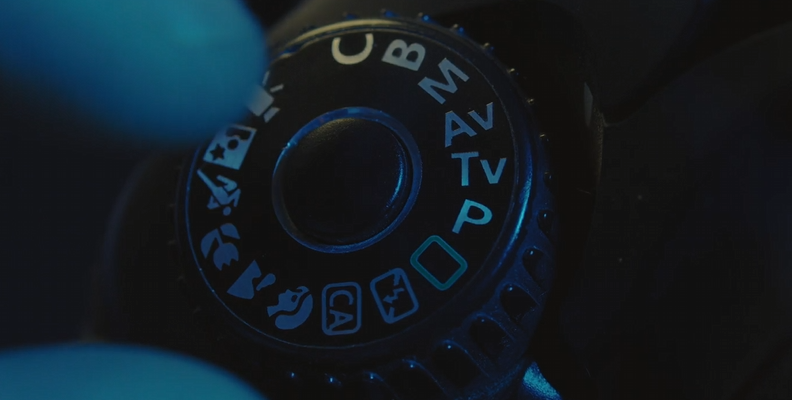
Step 2: Camera Settings
Digital cameras now have many filters and options to achieve cinematic images. Adjust HDR, grain, vintage mode, and black and white filters before shooting so can create cinematic images instantly. However, there are other things to consider when deciding which camera to use and how to use it.
Aspect Ratio in Cinematic Photography
You know a cinematic look when you see it in movies. A wider aspect ratio will make your pictures achieve this look. You can change the aspect ratio on your camera to 16:9, and if you want a wider aspect ratio, such as 1.85:1 or 2.35:1, you’ll probably need to crop the image in post-production and, therefore, shoot the photo with extra space on the top and bottom.
A tip to ensure that your picture will look cinematic after cropping it is to use the grid view on your camera. It will allow you to adjust the shot so that all the elements you need in your photo stay after cropping the top and bottom of the picture.
A tip I've seen other photographers do is to tape the camera's LCD screen on the top and bottom. It will help you only see the content in the uncovered space. However, make sure not to damage your camera.
Aperture, Depth of Field, and Exposure
The aperture in photography regulates how much light passes through your camera. You can adjust the lens opening by f-stops, referred to as focal ratio, f-ratio, or f-number. The aperture in your camera's lens will determine your photo's depth of field and exposure. Understanding how the aperture works is critical to capturing a cinematic portrait.
You can find f-stops expressed in f/1.4, f/2, f/2.8, f/4, f/5.6, f/8, f/11 and f/16. These numbers represent the aperture diameter divided by the focal length, making it the inverse of the relative aperture. Because of that, a smaller aperture means a higher f-stop and a wider aperture means a smaller f-stop.
Knowing this, you can tell that an aperture of f/1.4 will give you more exposure, affecting the depth of field. A wider aperture will provide a shallow depth to draw attention to the photo's subject by adding a blurry background.
For amateur photographers, there are ways to achieve the blurry effect in post-production.
Shooting in RAW vs. JPEG
JPEG (Joint Photographic Expert Group) is photography's most popular file format. It compresses the digital image with little noticeable image quality loss, allowing for more storage space in your camera. However, it reduces the amount of processing you can do before noticing the loss of quality.
Most DSLRs, digital cameras, and modern mobile phones can shoot in RAW. Check your device settings to see if they allow RAW. Shooting in RAW delivers more information in the image to edit in post-production without sacrificing quality at the expense of a bigger file.
Step 3: Taking a Cinematic Photograph
Here are some tips to make your cinematic photography better.
Composition, Background, and Layers
Make all the pieces of your photo fit together. The subject, the background, midground, and foreground all tell the backstory of your scene. Feel free to use layers, even in small spaces. However, keep a balance so as not to distract with elements that do not contribute to the theme.
Tell a Story with Your Cinematic Photo
Cinematic photos should look like movie scenes and tell a story, whether you shot a series of images or a single picture. You can use props and small directions to your subject to achieve it. It does not have to be obvious; try to make it as organic as possible to create images that resemble real life.
Control the Lighting
Research on lighting techniques to achieve the best shot. Different types of light will bring to life different moods in your picture. Experiment with natural lighting, lamps, and the direction of the light source. You can evoke other emotions using soft lighting, daylight, or night shooting. A softbox is a form of artificial lighting that can create a soft, diffuse look, which you can easily control. Directed light, from a single source (anything from a flashlight to street lights to a professional lighting rig) can create dramatic, striking effects. The more you control, the better the result.
Shoot From Different Angles
Shooting from multiple angles will give you more perspective and accentuate elements that will portray the scene differently.
Step 4: Post Processing Cinematic Photography
The last step in cinematic photography is post-production. Enhance and adjust your photos in your editing software. If you’re using RAW, ensure your software supports RAW image files. Photoshop, Lightroom, and Optics are great options because you can edit RAW images without a problem.
Crop Your Photo to a Wide Aspect Ratio
Import your photo into the editing software and crop it to a cinematic aspect ratio. Another thing you could do if you don’t want to lose elements in the picture is to add black bars on the top and bottom to give a cinematic look.
Use Filters and Presets
Photo editing software and plug-ins usually come with default settings and presets. The presets usually aim at popular cinematic styles, so you might find the one you need there. You can tweak it later if you need to adjust colors and effects.
Filters like film grain and lens flare will also add another layer to your image to make it look like a movie.
Color Grading
You can tint the scene with color-grade tools to change the general feel. You can use cool colors or grayscale for a nostalgic mood. If you want to show happiness, colorful tints can achieve that. Use curves and color wheels to adjust the image's brightness, shadows, highlights, contrast, and overall color.
There is no "one size fits all" solution in post-production. The best you can do is experiment to create portraits with a cinematic style.
How to Create Cinematic Photography with Optics
Using filters and presets in post-production is a simple technique to give your photos a cinematic look. I’ll show you how to do it with Optics. Optics by Boris FX is a powerful and creative photo manipulation tool available as a plug-in for Adobe Photoshop and Lightroom and as a standalone application.
The recent version, Optics 2025, comes with easy to use AI powered masking tools, particle brushes, Particle Illusion masking, filters from Sapphire and Continuum, and over a hundred presets to start editing right away.
Step 1: Download and Install Optics
Go to the Optics main page and register to download the installer. You can use the free trial to try all the new features. Install Optics: you can install only the standalone application, the plug-ins for Photoshop and Lightroom, or both.
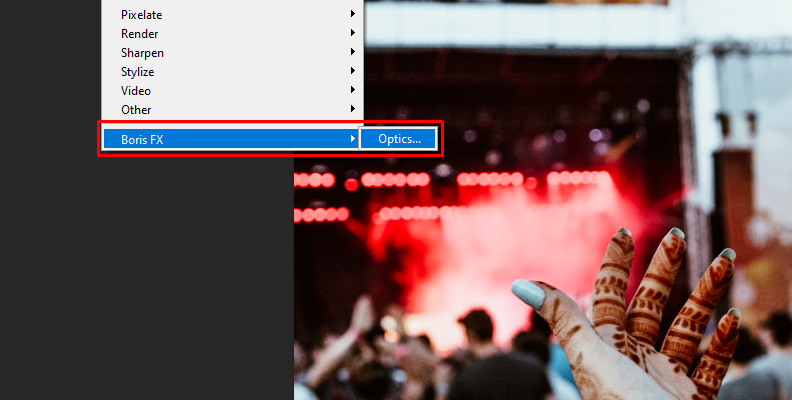
Step 2: Import Your Images and Open Optics
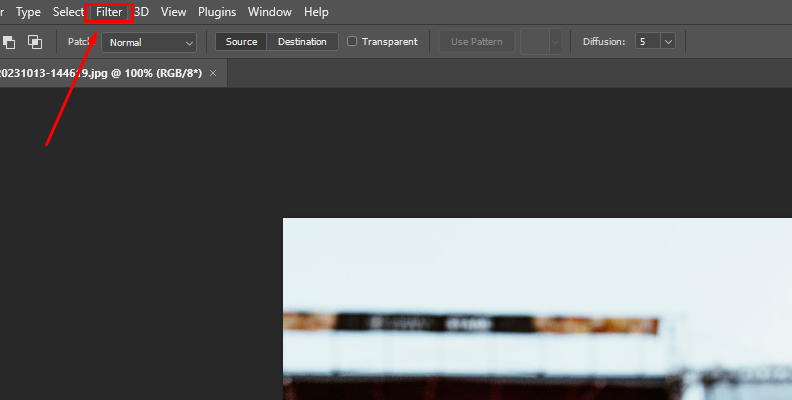
Import your RAW or JPEG images to Photoshop and Lightroom and apply the Optics filter from Filter > Boris FX > Optics to open the Optics interface. Your photo will appear in the center viewer; the layers will be to your left, parameters to your right, and filters below the viewer.
Step 3: Apply Filters and Presets
Choose from one of the presets below the viewer. You can browse by category and click on the filter to apply it. You should see the filter as a new layer in the top left corner, and the presets will appear right under layers.
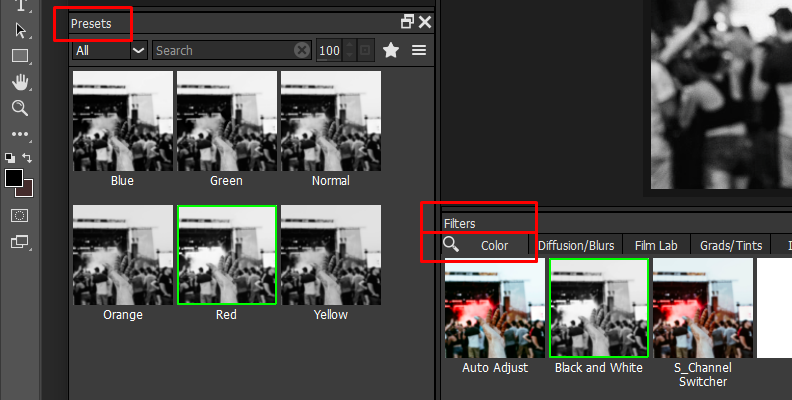
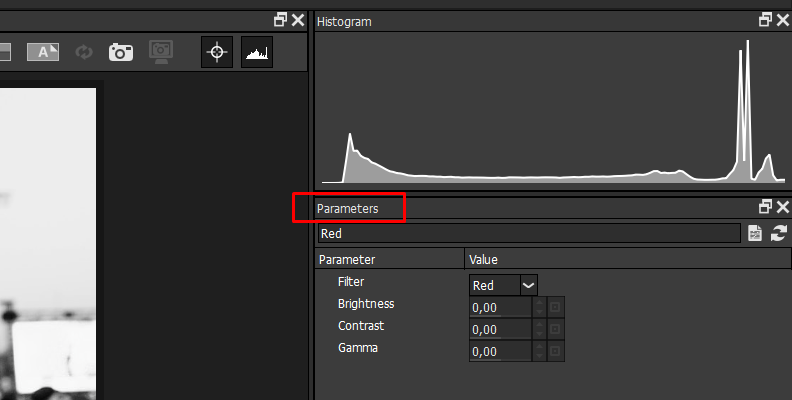
When you select a preset, the parameters window will enable the settings for each filter. You can fine-tune your image there. I suggest exploring the presets and filters to familiarize yourself with them.
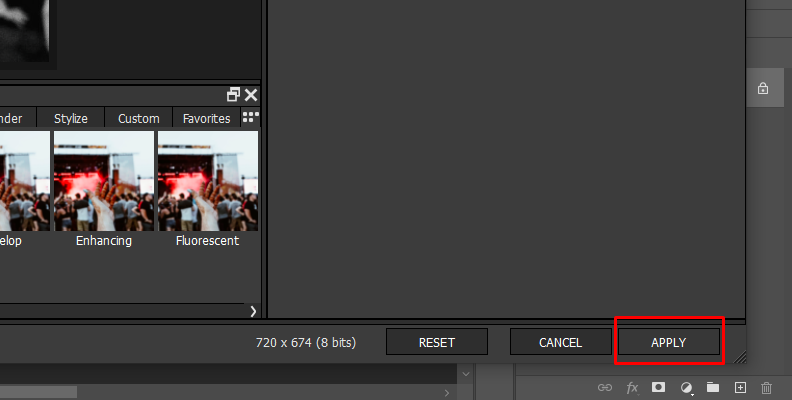
Step 4: Save Your Image
You can save your cinematic photo by selecting File > Save if you're in the standalone version. If you’re working from Photoshop or Lightroom, click Apply in the bottom left corner. It will save the changes and go back to your composition software.
Step 5: Learn More with Optics Tutorial
On the Boris FX website, you can access a catalog of free video tutorials to learn how to edit images in Optics to continue learning new techniques and processing to create cinematic photography, like the one you see below.
Final Words
Creating cinematic photos involves working with your camera's settings, aspect ratio, light source, camera angle, composition techniques, and post-production skills.
Your editing skills will definitely improve with practice, but plug-ins like Optics can provide easy-to-use tools for anyone who wants to craft a cinematic style from day one.
Good luck, stay creative, and wherever you're taking inspiration from, you can now capture your ingenuity perfectly!


