


Music and audio content always need new and attractive ways to reach and engage with the audience. A great way to share your content is with an Audio Visualizer. They can bring life to your audio by adding motion as if the frequencies were speaking to you.
Today, you'll learn how to create an audio visualizer for your music. But even if you're not a musician, you can use audio visualizers for podcasts, video content, school projects, advertisements, and more.
Let's dive in!
What is an After Effects Audio Visualizer?
Audio visualizers or music visualizers are graphics that react to the beats of music tracks or audio clips. They analyze data from the sound source to generate its visual representation and provide an engaging visual look, highlighting the audio source over the rest of the video or background.
Using an audio visualizer effect allows people to listen and see your music. They can be subtle frequencies or waveforms over a quiet background or a big dancing circle jumping to the rhythm of a dance track.
Different Types of Audio Visualizers
There are different types of audio visualizers that you can create depending on the type of content and the mood you want to evoke.
Audio Waveforms imitate the look of a digital audio waveform, displaying the amplitude of the sound signal.
Bars display frequencies in bars.
Analog Lines display a single line that creates spikes reacting to the sound. It can simulate the classic look of radios.
Dots display the audio spectrum in dots.
Circle wraps the audio spectrum in a circle to create a ring.
How to Make an Audio Visualizer in After Effects
Creating a music visualizer in Adobe After Effects will only take a few seconds with an easy-to-use effect called Audio Spectrum. With Audio Spectrum, you can customize the audio visualizer to make fresh-looking graphics.
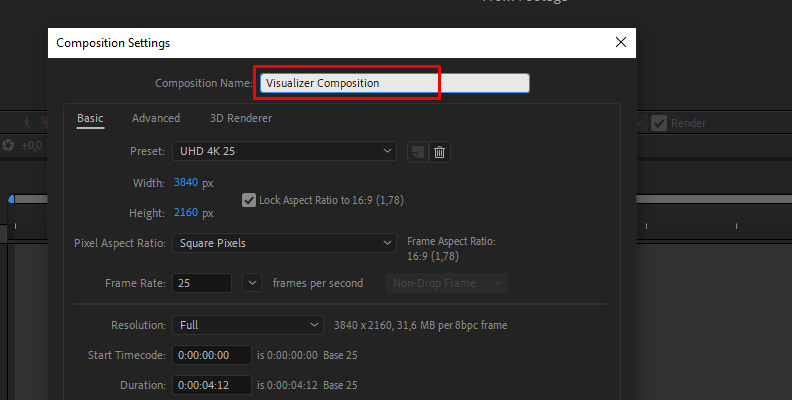
Step 1: Create a New Composition
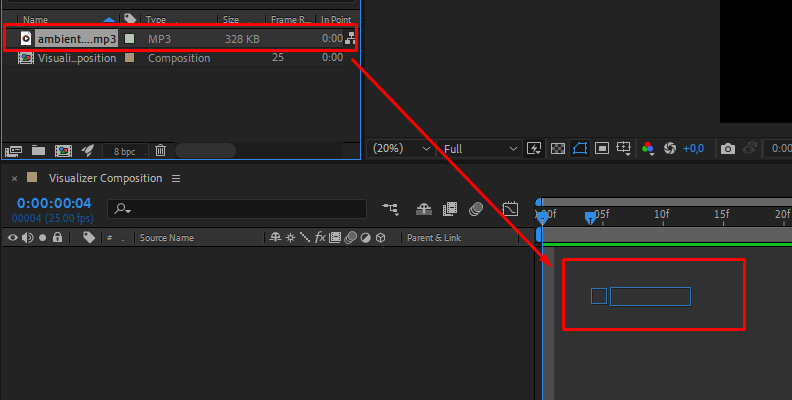
Create a new composition with the aspect ratio you need depending on the destination (YouTube, Instagram, TikTok, etc.). Import your audio file with the music or sound you want to generate the audio visualizer and drag the audio to the timeline.

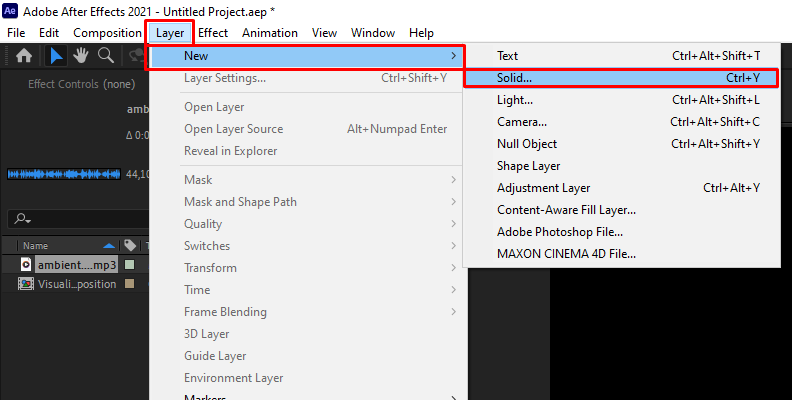
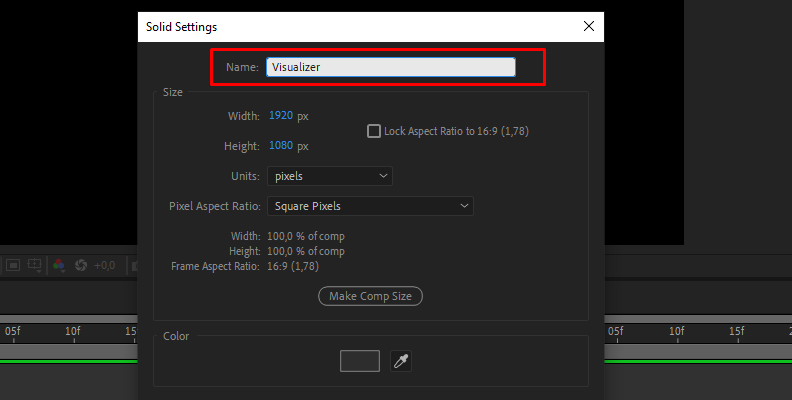
Step 2: Create a New Solid Layer
Go to Layer > New > Solid to add a solid layer to your composition, where you’ll create the audio visualizer. Make it the same size as your main composition. To stay organized, name the solid layer an audio visualizer or spectrum effect to identify it when you need to change its settings.
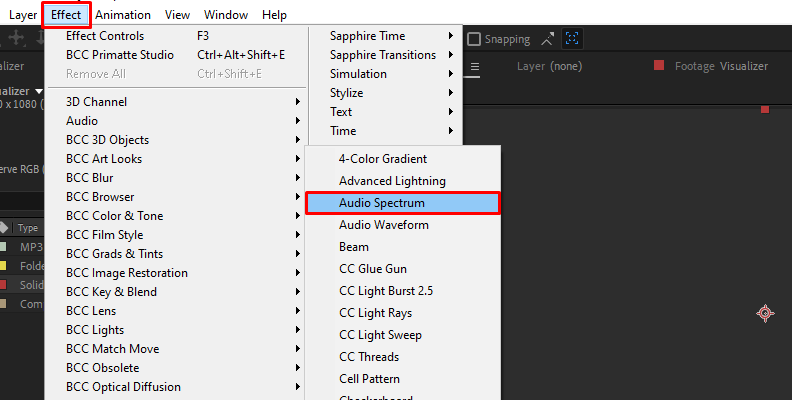
Step 3: Audio Spectrum Settings
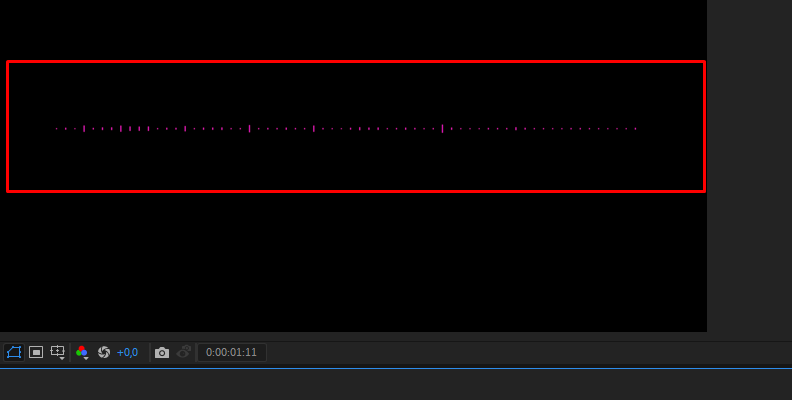
Select the solid layer and go to Effect > Generate > Audio Spectrum to add the effect to the solid layer. You’ll see a static line in the preview window, but don’t worry. You must first tell After Effects from which audio to generate the audio visualizer.
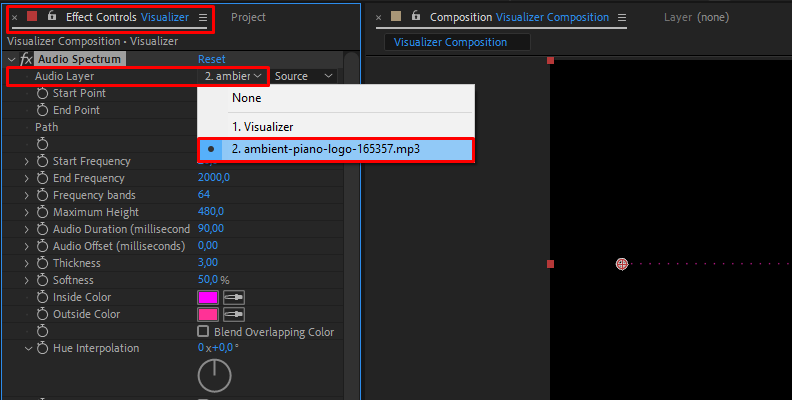
Step 4: Create an Audio Visualizer
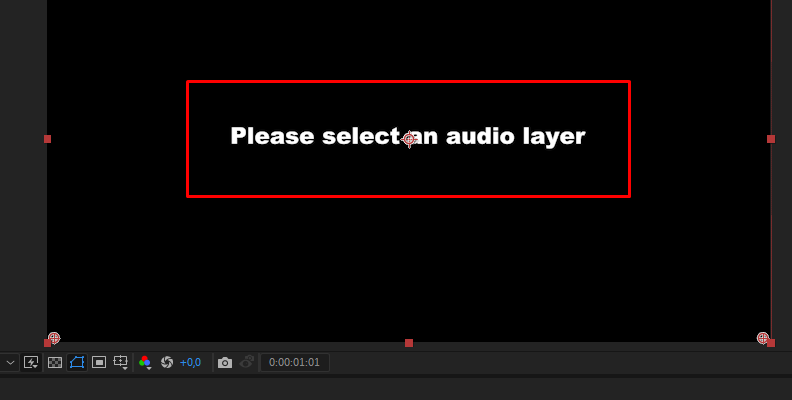
Go to the Effects Control and display the Audio Spectrum. Click the dropdown menu for 'Audio Layer' and select the layer with the audio file you imported initially. It should have the name of your audio track. If you scrub through the video, you will see some movement on the audio visualizer.
Step 5: Customize Your Audio Visualizer
The audio visualizer's complexity will depend on what you visualize and how far you’re willing to play with the settings to achieve your desired effect. Sometimes, you need a small waveform at the bottom of an album cover; others, you want a colorful audio visualizer running through a pair of wired headphones.
Specify Position
The Start and End Point parameter allows you to set the position of the audio visualizer. You can adjust its X and Y positions. But you can also define a path using the shapes or the pen tool to draw the position and shape you want for the audio visualizer. Then, select the mask in the Path dropdown menu.
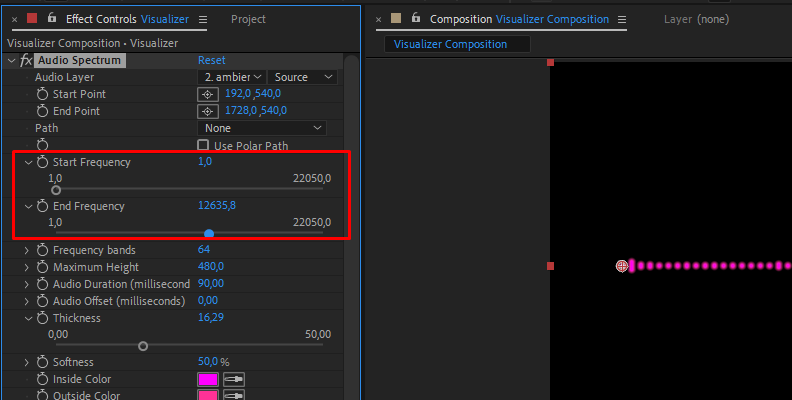
Frequencies
You can set the range of frequencies you want to display in the audio visualizer. Set the lowest frequency you want to display in Start Frequency and the highest in End Frequency to highlight your song, and set the frequency bands to display in the audio visualizer.
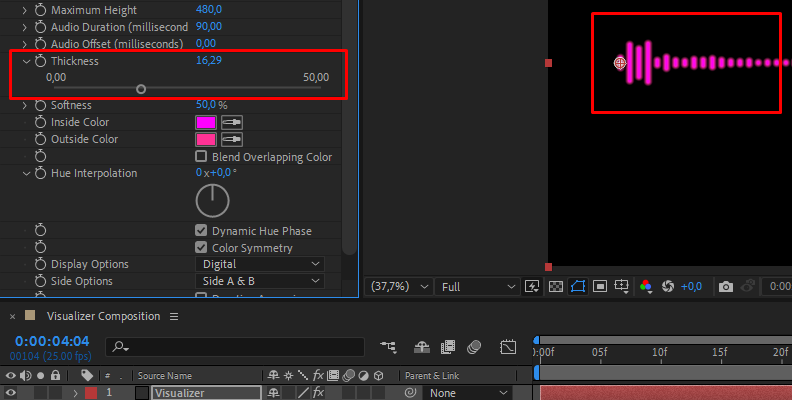
Looks
Adjust the maximum height to make the visualizer jump higher, and experiment with the Thickness and Softness. In Display Options, you can choose the type of audio visualizer between Digital, Analog Lines, or Analog Dots. Then, change how to display it on Side Options where Side A & B will show the audio spectrum above and below, Side A only above, and Side B only Below.
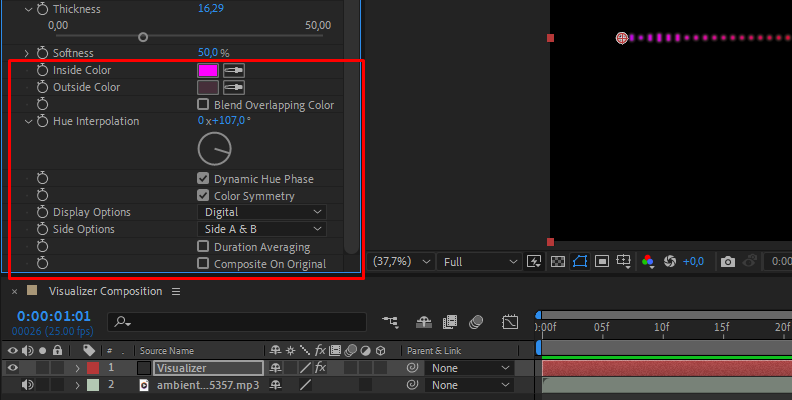
Color
Choose the color of the audio visualizer, combining an inside and outside color for the bars. The Hue Interpolation settings rotate through the hue color space. It will first use colors similar to the selected ones, and then, as you increase the values, it will start adding other colors. If you want a rainbow look, you can add a few turns until you achieve the ideal result.
Step 6: Stack Effects
You can add multiple instances of the Audio Spectrum effect and make slight changes to give the audio visualizer more depth. Add the Polar Coordinates effect to make a circle audio visualizer and adjust the Start and End Points of the Audio Spectrum effect. Other effects you can experiment with are Venetian Blinds, Glow, and Gaussian Blur to create more complex looks.
Step 7: Add a Background
Now, you can drag your background to the bottom of your composition. You can add some more effects to the background to blend it all.
How to Make an Audio Visualizer in After Effects with Boris FX Continuum Plug-ins
Do you want an even easier way to create audio visualizers? Boris FX has you covered with the BCC+ Audio Visualizer plug-in included in Continuum.
Step 1: Download and Install Continuum
Go to the Continuum page to download the installer. You can follow this tutorial with Continuum's trial version.
Step 2: Set Up Your Composition
Import your audio track into After Effects and create a new composition with the aspect ratio of your choice. Drag your audio and drop it into the timeline. Go to Layer > New > Solid to create the solid, where you'll add the audio visualizer effect.
(We've covered these same steps in the section above so feel free to refer to those images for help)
Step 3: BCC+ Audio Visualizer
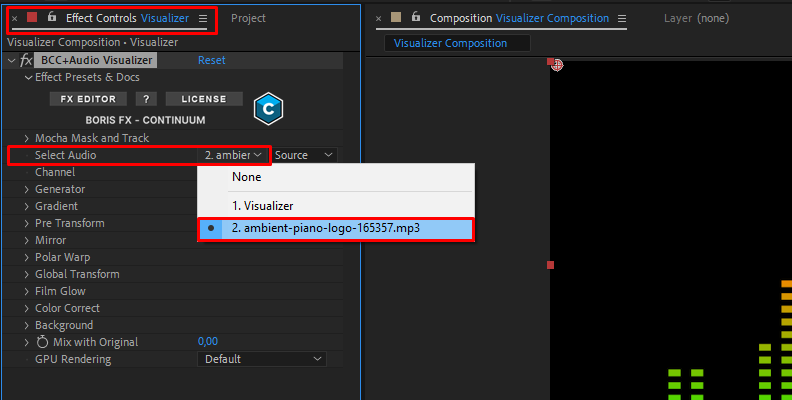
Select the solid layer and apply the effect from Effect > BCC Time > BCC+ Audio Visualizer. A pop-up window will appear, asking you to select the audio layer. Go to the Effect Controls panel, display the dropdown menu for 'Select Audio,' and change it from ‘None’ to your audio layer. It will show with the same name as the layer in the timeline.
Step 4: Customize the Audio Visualizer
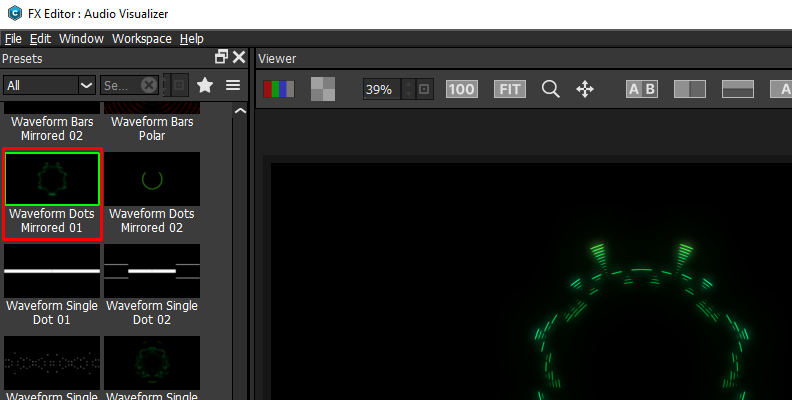
There are two ways to customize the audio visualizer with the BCC+ effect: manually or using presets. You can, however, use a preset and change its color and form to adjust it to your liking. To open the preset library, click on FX Editor. Choose one close to what you’re looking for and press Apply to return to After Effects.
Type of Audio Visualizer and Appearance
Under Generator, you can change the style, choose between waveform and frequency, and choose whether to display bars or dots. Each style will enable additional settings to be tweaked, so experiment with them.
To create original looks, you can transform the original visualizer using the Pre Transform, Mirror, Polar Warp, and Global Transform.
Color
Enabling Gradient will allow you to set the color of your audio visualizer, play with the settings to select the colors, and change the gradient type. You have other parameters like Color Correct to adjust hue, saturation, brightness, contrast, and Film Glow.
Step 5: Add a Background
If you want to use a background video or image, you can drop it in the composition to see the audio visualizer over it. But if you don’t, BCC+ Audio Visualizer allows you to create a solid or a gradient background.
Go to the Effects Controls and scroll down until you reach the Background parameter. Change the Background Mode to solid and choose a color for a solid color background, or choose gradient and display the gradient controls to select your color, type of gradient, and other settings.
At the bottom, you can change the Blend Mode for your background.
Final Words
Experimenting with different forms of audio visualizers is important if you want to refine your style and make your music identifiable through visual representation. With the Boris FX Continuum Audio Visualizer effect, you can create custom visualizers and save them for later use. Whether you need audio visualizer templates for music, effects templates for speech, or specific clients, experimenting with different settings and options is key to mastering these effects. Don't be afraid to go back and forth and try new things, as it may lead to discovering new possibilities that you may not have considered before.
Good luck!


