


In video editing, motion tracking is one of the core elements you must master to work on more complex, action-packed projects.
Fortunately, almost every modern video editing software offers motion-tracking tools, including Adobe Premiere Pro, one of the industry's leading editing workspaces.
Whether it's creating a simple focus mask or "attaching" a graphics effect to a moving object within your shot, motion tracking is the way to go about it.
This tutorial will explain what motion tracking is, how to do motion tracking in Premiere Pro, and when to use it in your video clips.
Without further ado, let's get straight into it.
What is Motion Tracking?
Motion tracking, to put it simply, is the act of following the movement of a specific person or object within your shot.
The most common example of this is a person with a blurred face or a car with a blurred license plate. No matter where to person moves within the shot, the blur mask follows them, and this is achievable through motion tracking.
Motion tracking software is used for many other purposes too, like adding supernatural special effects to characters in sci-fi movies, or chat bubbles, as seen in comics and infographics.
All in all, it's a very useful skill to possess as a video editor.
Why Do You Need Motion Tracking?
You need motion tracking for various reasons, as it's a very versatile tool and can be applied in video clips of almost any type.
For example, if your content often includes recording in public, you'll have to blur the faces of those who want their identities kept private. But, those people don't always remain static within your shot. They move, and so your face-blur bubble has to follow. The same applies to blurring license plates of cars.
If you want to help the viewer focus on one person amongst the whole crowd, combining motion tracking with zoom and outline effects can help keep the attention on what matters the most within the shot.
Lastly, if you want to add a special effect to a person, like a fiery trail, for example, you'll have to use motion tracking to "make the effect" follow them throughout the entire shot while they're moving.
All this and more can be achieved by utilizing this helpful tool, and in the section below you'll learn how to make it happen.
How to Do Motion Tracking in Premiere Pro
Although it's a tedious process requiring a lot of patience and attention to detail, you can do motion tracking in Premiere Pro for free.
In this section, we'll show you how to do motion tracking for both visual effects and face or object-centering on screen.
How to Do Visual Effects Motion Tracking (Mask Tracking)
The best way to add any type of effect over a moving object or a person within your video clip is by using a mask.
Here's what you should do:
![]()
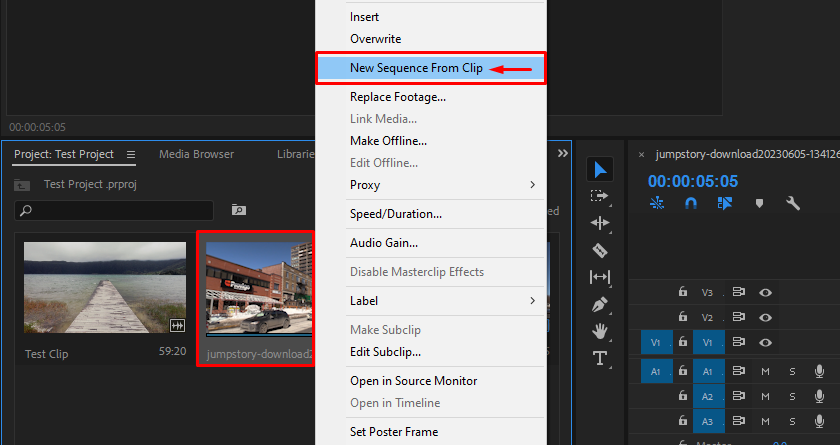
Step 1: To begin, import a video within Adobe Premiere Pro. Then, right-click it within the Project View panel and choose the "New Sequence From Clip" option.
![]()
Step 2: Create a duplicate of your video so that you don't modify the original file. To do this, hold down your ALT button, then click and drag the video on your timeline one layer upwards.
![]()
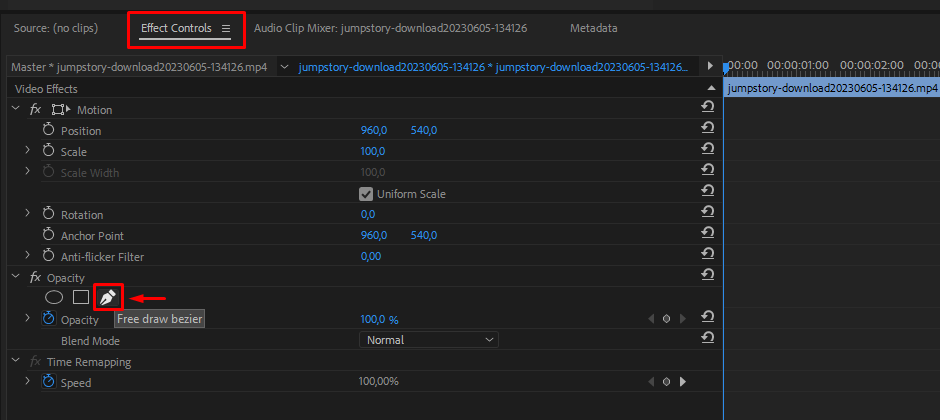
Step 3: Select the top video layer you just created, then open the Effect Controls Panel and click on the Free Draw icon, as shown in the image below.
![]()
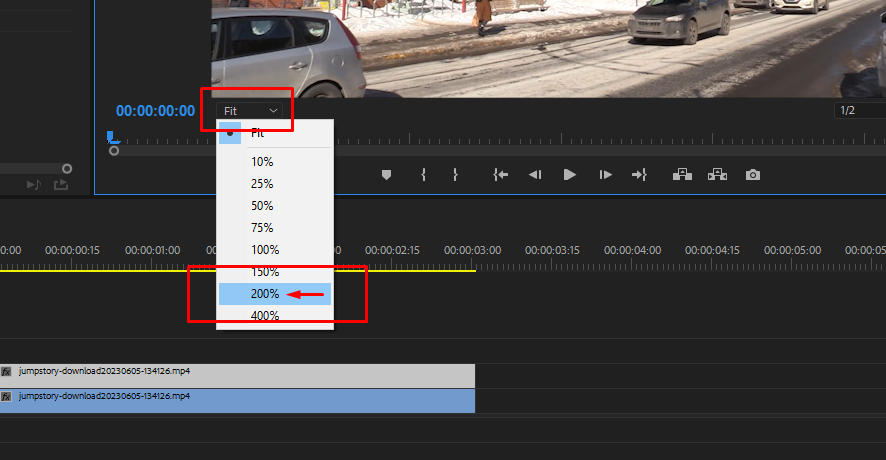
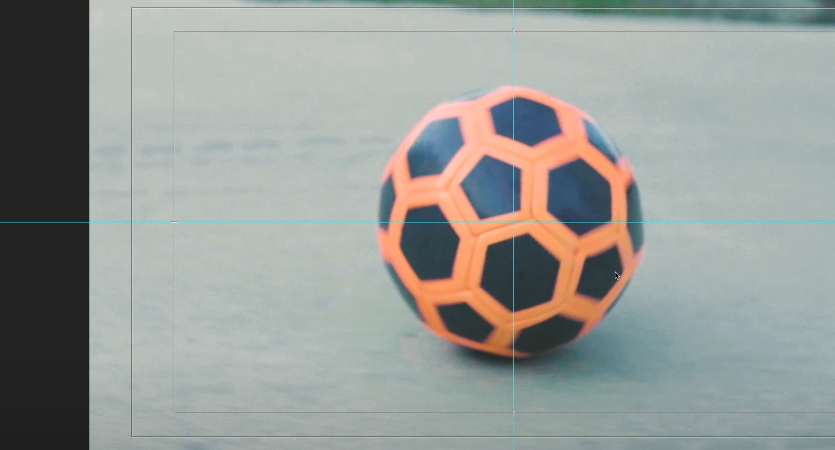
Step 4: Draw the mask around the object. You can use the Zoom tool to make the image larger and draw with better attention to detail, as well as hold the ALT key and move the mouse to curve it around the edges.
![]()
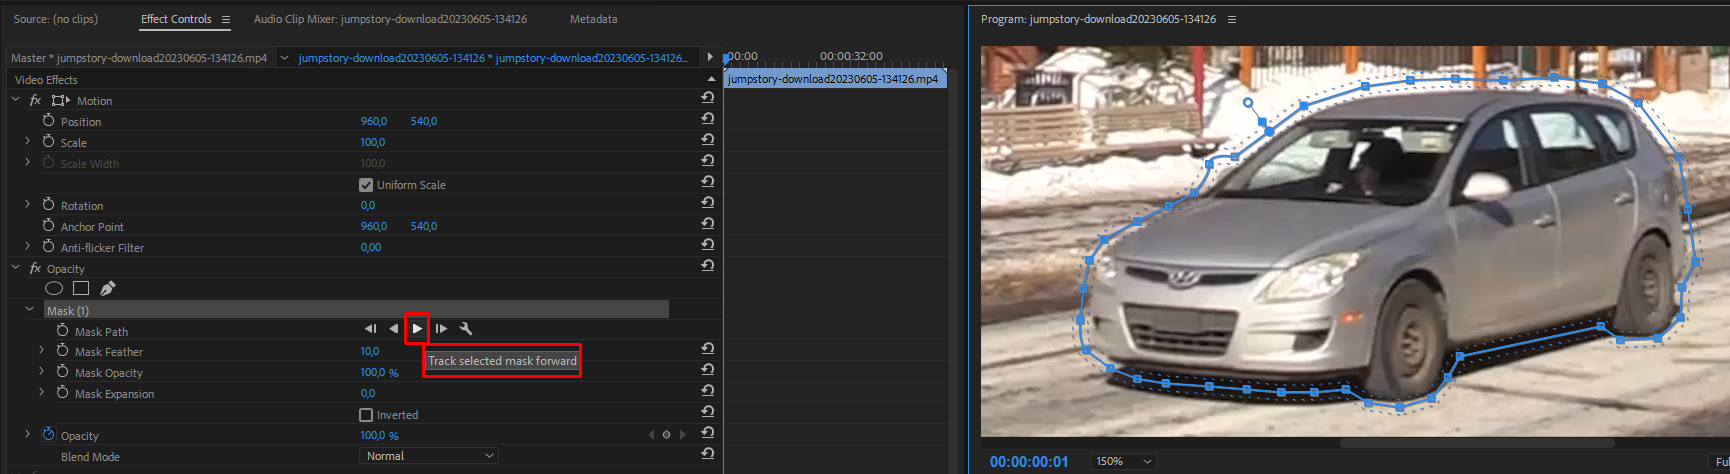
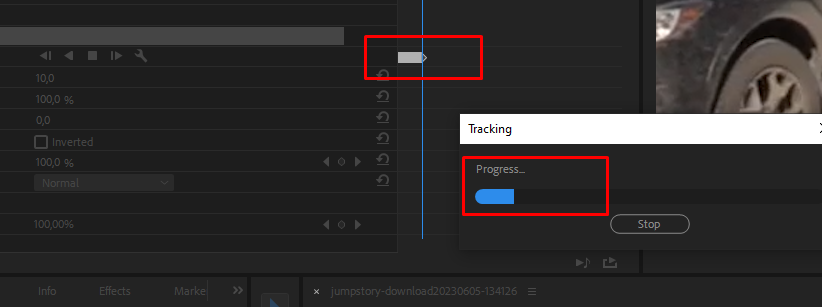
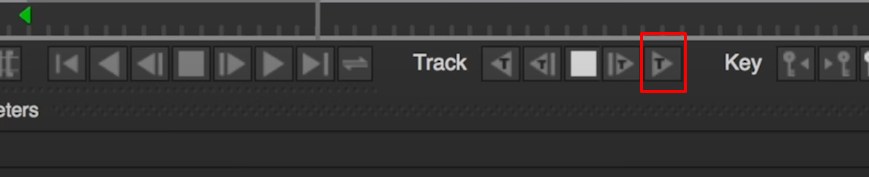
Step 5: Now that the mask is drawn, click the "play" button to activate Premiere's auto motion tracking tool. This will generate all the keyframes for you, but it will take some time. To do manual tracking, move the playhead one frame at a time and create the mask path yourself through minor adjustments at each new frame.
![]()
Step 6: If you believe the Premiere Pro auto motion tracking tool didn't do the best job, feel free to click on each of the keyframes and adjust the mask position so that it fits your object or person better.
![]()
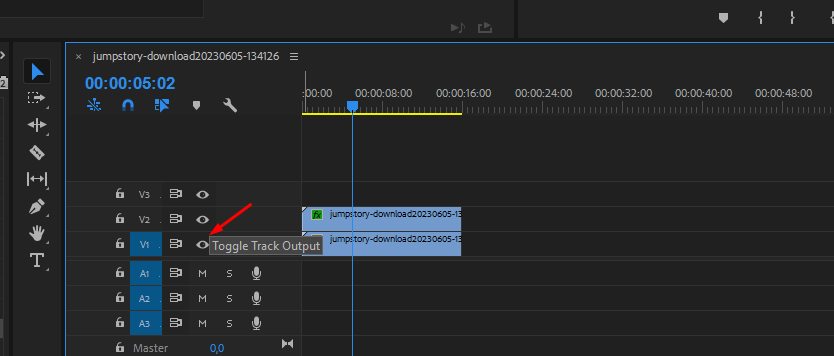
Step 7: Making any modifications to the top layer video, like adding the Gaussian blur effect or doing color correction, will also apply to the mask. If you ever wish to disable the mask and see what the original video looks like without it, simply click on the "eye" icon that stands for the "Toggle Track Output" feature.
That's all there's to it!
You've now learned how to do both masking and motion tracking in Premiere Pro using the objects auto motion tracker feature and some manual mask drawing effort.
How to Motion Track to Center a Face in Your Video Clips
A different type of motion tracking would be repositioning your shot so that the center is always a person's face, which is useful in dance videos and other similar content.
This is also relatively easy to do, and we'll show you how.
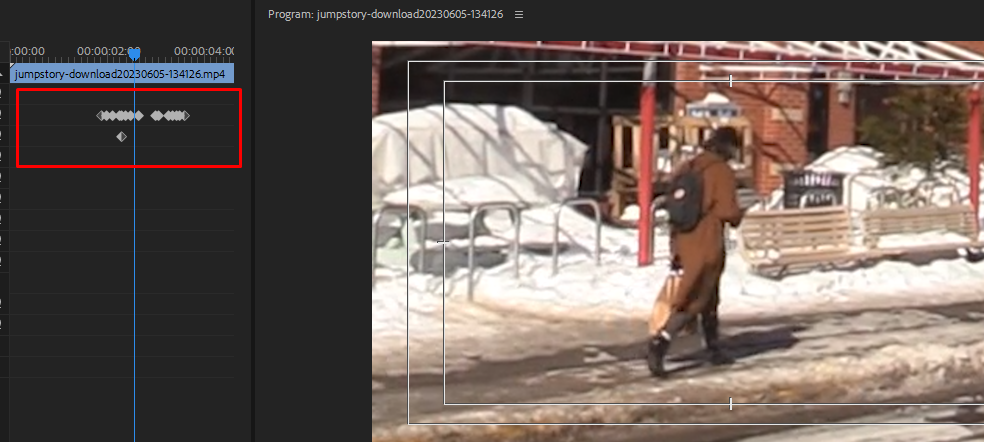
Step 1: Import the video clip within Adobe Premiere Pro.
![]()
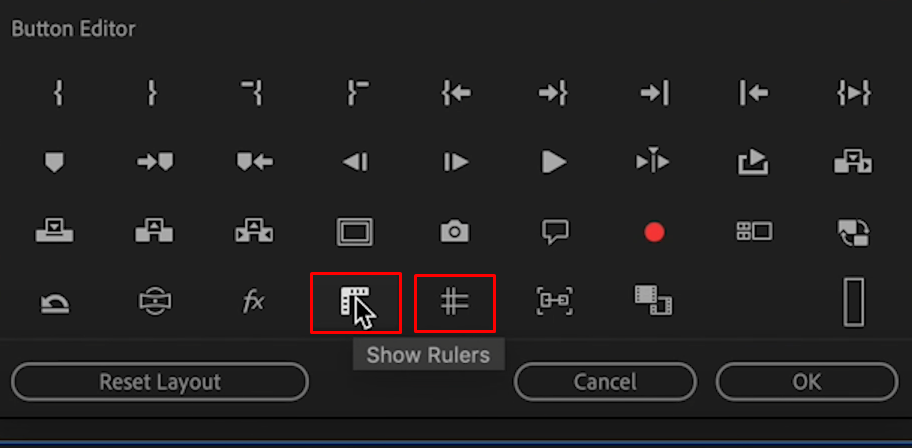
Step 2: Click on the "Button Editor" icon, then drag the "Show Rulers" and "Show Guides" functions to your bar.
![]()
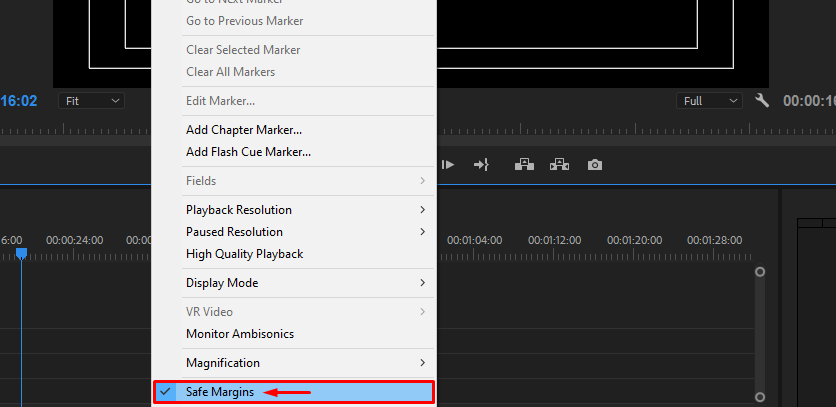
Step 3: Right-click your video within the "Program" section and click on "Safe Margins" to activate the feature.
Step 4:Enable both the rulers and the guides so you get a better representation of where the center of the screen is. Drag both a horizontal and a vertical ruler to form a cross at the center.
![]()
Step 5: Zoom in on your footage and place the object or person at the center of the screen with the help of the rulers you activated in the previous step.
Step 6: Open the effects control panel and click on the stopwatch icon next to both the "Position" and "Scale" parameters. This will create the first keyframes.
Step 7: Move the playhead three frames forward using the right arrow on your keyboard and re-center the footage, placing the object or person's face you want to track in the exact middle. As soon as you move the shot, new keyframes will be created.
Step 8: Repeat this process until you get to the end of this video. When done, press the play button and you'll see that the object or person is constantly in the center of the shot.
![]()
If you want to be even more accurate, reposition the shot at every frame instead of every third or every fifth, but keep in mind this can take a long time.
That's how you motion track within Premiere Pro using the built-in features and the effects control panel.
Motion Tracking in Adobe Premiere Pro Using Mocha - Boris FX
Although Premiere Pro is an industry-level video editor with many helpful built-in tools, it can always be better through the use of a plugin with tons of advanced features.
Here's how to do motion tracking in Premiere Pro in an even more advanced and precise way using a renowned plug-in.
Step 1: Download and install the free trial of Mocha Pro from the official Boris FX website.
![]()
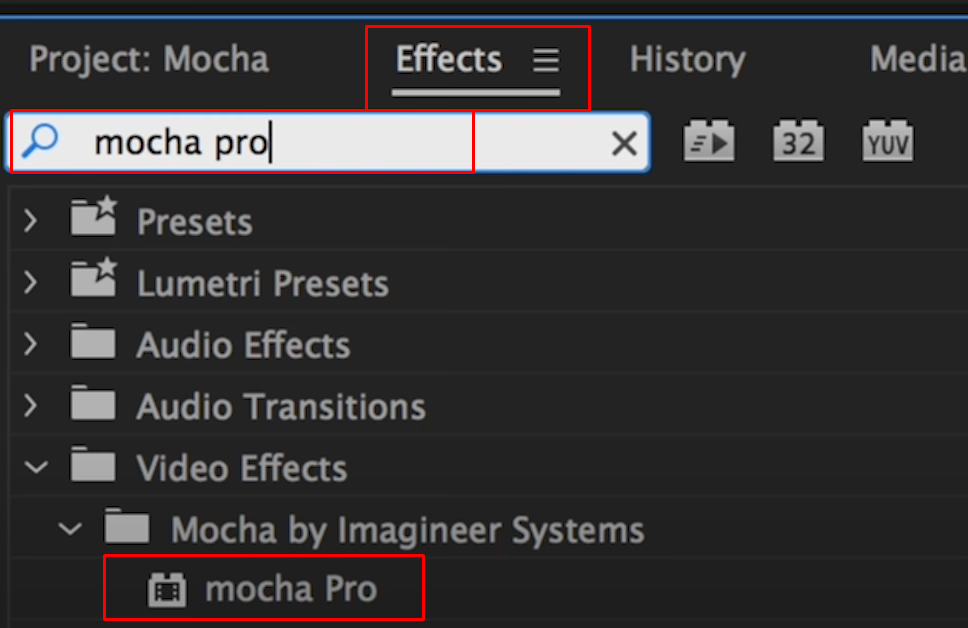
Step 2: Click on the "Effects" category in Premiere and use the search bar to look up Mocha Pro. Click on it and drag it over a video that's on your timeline.
![]()
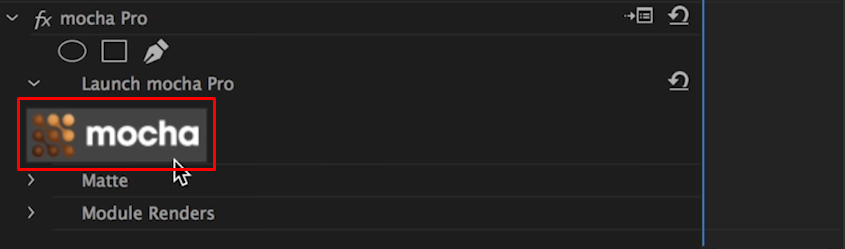
Step 3: Open the "Effects Control" panel, scroll down a bit, and click on the Mocha logo to open the plug-in's panel.
![]()
Step 4: Use any of the tools offered in Mocha to draw a mask over the subject's face or any other object or element within your shot that you wish to track. When done, simply click on "Track Forward" button, and watch the magic happen.
Mocha Pro has advanced, award-winning tracking technology that works much better than the regular, built-in one available in Premiere. Capturing any moving objects within your shot using this method will be easier than ever.
From here, the possibilities are endless. You can add motion blur effects, adjust different parameters, create and edit new masks and layers, and much more. When done, simply render the video.

Final Words
That's all there's to it!
You now know how to do motion tracking in Premiere Pro for free and using the renowned Mocha Pro plug-in, which is a lot more versatile and effective method but requires a purchase.
Hopefully, this will make editing more complex projects easier for you in the future.


