


Are you looking for a vintage photo look or comic-like style for your pop art? This type of ink-looking art has become very popular in recent years, especially among those trying to recreate that 1890s feel to their designs, art, and photography projects.
In this tutorial, you’ll learn how to create a halftone effect using Continuum from Boris FX for your videos and images and an alternative process using Adobe Photoshop.
Let’s dive in!
What are Halftone Effects?
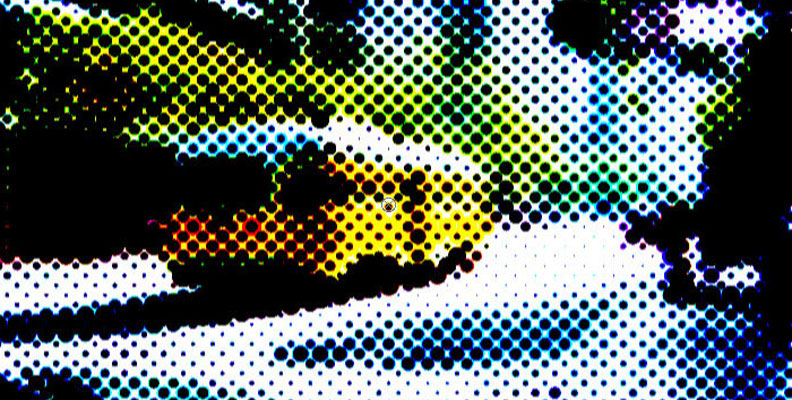
Halftone was a printing technique in which images were reproduced with a pattern of dots of varying sizes and intervals to mimic a gradient of color tones and shades with only a few tones due to ink limitations. The human eye interprets the small halftone dots from the pattern as even and continuous tones and shades when looked at from a distance, but as low-quality images when looked closer.
There are two types of halftones: binary halftone printing uses only black ink for black-and-white images, and color halftone, which utilizes the CMYK printing style with only cyan, magenta, yellow, and key (black) colors to replicate the continuous tone with a pattern of dots.
Today, halftone effects are used creatively in art, digital photography, and graphic design to replicate the vintage, dotted look of analog color printing in digital images. The "old-school" color printing halftone effect can be achieved with filters in many photos and video editing software.
How to Make Halftone Effect with Continuum's BCC Halftone
In this first part of the tutorial, you'll learn how to apply a halftone effect with BCC Halftone from Continuum. The halftone filter converts your original photo, replicating the halftone dots from printed material.
With BCC Halftone, you can create black-and-white halftone patterns and colorize them. I'll show you how to tweak the effect and use presets for a quick, more thorough halftone pattern.
To use Continuum plug-ins, you'll need one of the many supported hosts, such as Premiere Pro, After Effects, Final Cut Pro, DaVinci Resolve, VEGAS Pro, or Avid Media Composer.
Step 1: Download Boris FX Continuum
Go to the Boris FX Continuum page and download the free trial. Install the Boris FX HUB application and select Continuum for your host. Follow the instructions until the installation is complete.
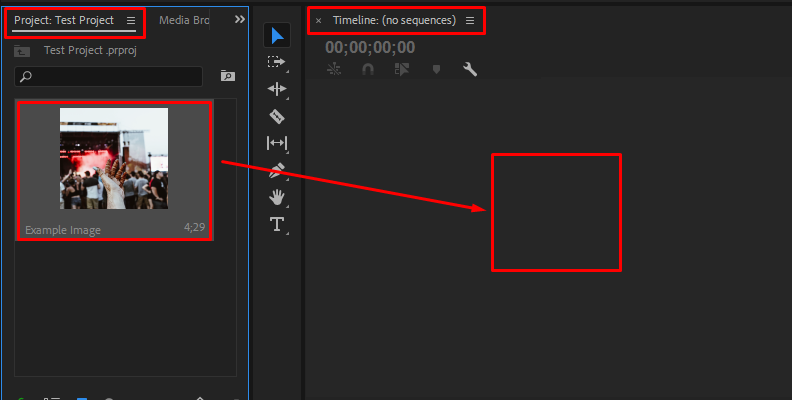
Step 2: Import Your Photo
Import the image or video you want to add the halftone texture into your editor software and add the photo to the timeline or composition.
 NOTE: For this example, we'll be using Premiere Pro. The steps may vary slightly depending on what host software you choose to do this in
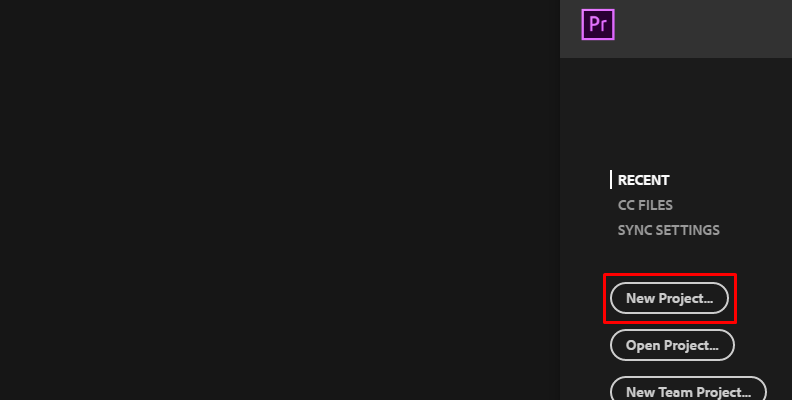
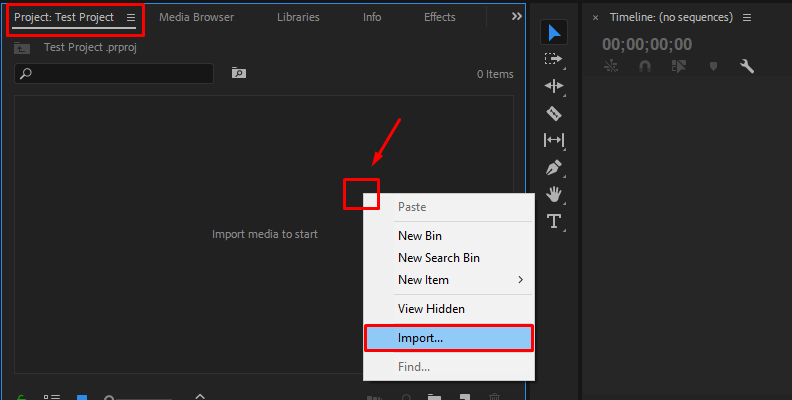
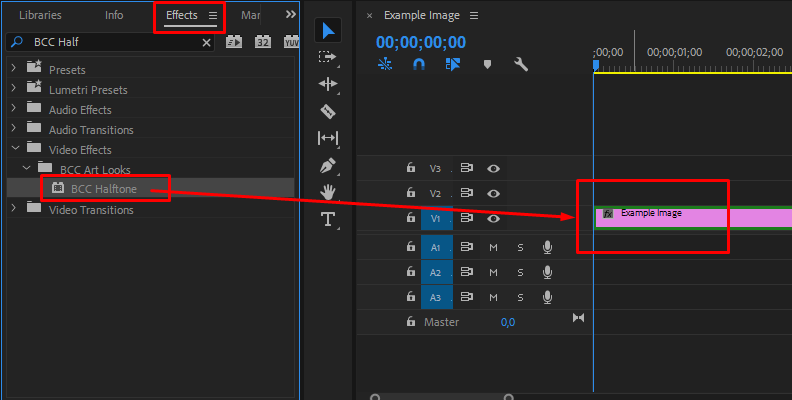
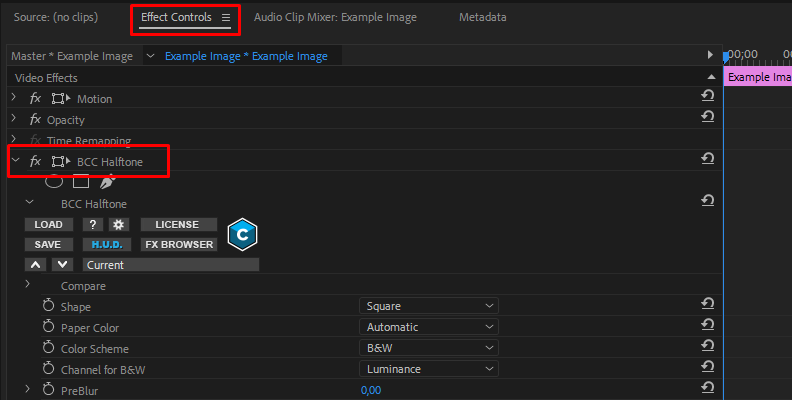
Step 3: Apply BCC Halftone to your Image
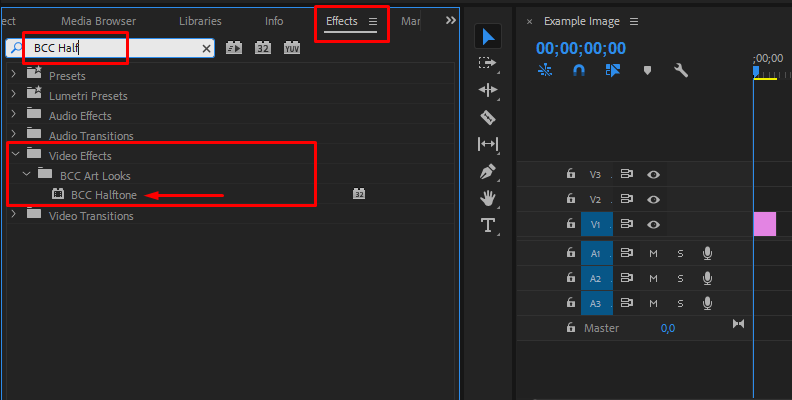
Go to your effects library in your host and search for BCC Halftone. The filter is under the category BCC Art Looks > BCC Halftone. Click and drag it to the image you want and drop it there.
Step 4: BCC Halftone Presets
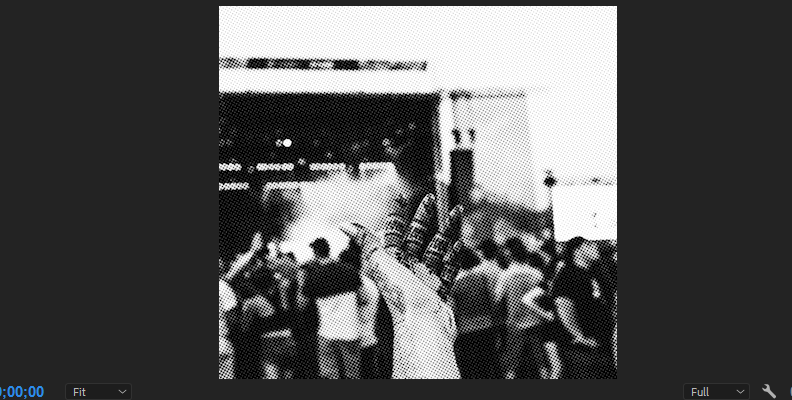
The Default BCC Halftone settings will show a grayscale halftone pattern, but if you go to the effect controls, you'll find many things to tweak.
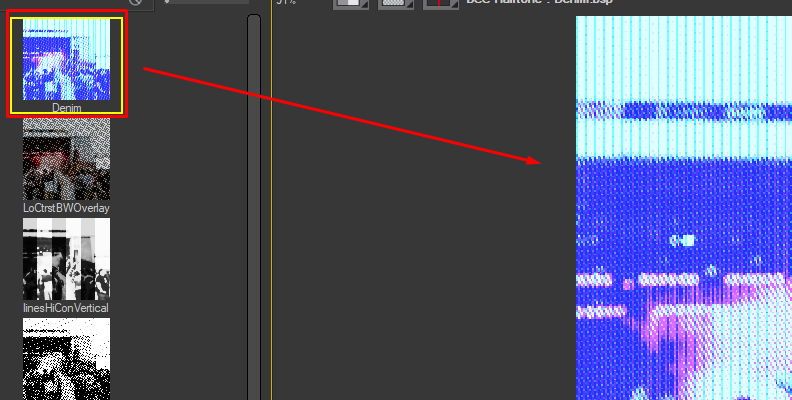
The fastest way to get a halftone texture for your image with BCC Halftone is with presets from the FX Browser. All BCC filters come with factory-installed presets and allow you to make your own, which will be available from the FX Browser for future uses.
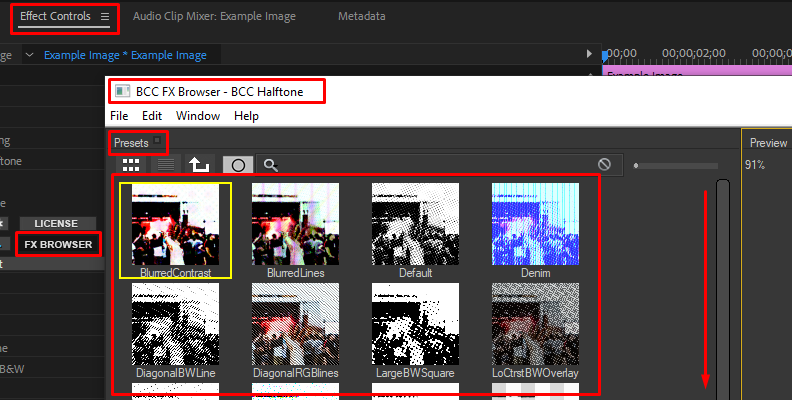
Click the FX Browser button to launch the presets library, choose one of the halftone effects, and click apply to return to the host. You can edit the preset in the effect controls or create the halftone pattern from scratch.
Step 5: BCC Halftone Settings
I'll now review the BCC Halftone settings that will allow you to customize the filter. However, the best effect will depend on the image and the look you're trying to achieve. Since it all comes down to personal taste, I suggest you experiment with different settings until you find the one that satisfies your needs.
The Compare Mode allows you to see the original photo and the image with the halftones next to each other in different preview modes.
Choose the halftone dot shape between square, round, and lines.
The Paper Color sets the paper color over where the image is generated as if it were printed. You can adjust each color angle from the Color & Angles depending on the Color Scheme selected.
Color Scheme defines the color space used to create the effect. B&W, CMY, and CMYK will deliver different ink styles to the halftone effect.
PreBlur adds a blur effect to the original image before the halftone pattern. It helps soften the edges of the image without affecting the halftone effect output colors.
PostBlur does the opposite of PreBlur. It applies a blur effect to soften the edges and colors after generating the halftone pattern, which affects the output colors.
HT Scale adjusts the size of the halftone dots. Higher values reduce the number of dots, and lower values increase them.
HT Aspect adjusts the dots' aspect ratio. It can be adjusted to a positive or negative value for vertical and horizontal lengths.
HT Smoothing adjusts anti-aliasing to apply blur and reduce detail and noise.
The Low and High Limits adjust the minimum and maximum size of the pattern dots and affect their size variation.
Additionally, you can adjust brightness and contrast and set the origin of the filter on the X and Y axes.
If you want to animate the halftone effect, you can do it by keyframing the Mix with the original setting. Another interesting feature available for all BCC filters is the integration with Mocha for masking and tracking.
Halftone in Photoshop

Using a filter, you can create a halftone image from your photos with Adobe Photoshop. There are a few methods to achieve color halftones and grayscale halftone patterns.
I'll show the three most common and easy techniques for adding a halftone effect to your images in Adobe Photoshop.
Method 1: Color Halftone
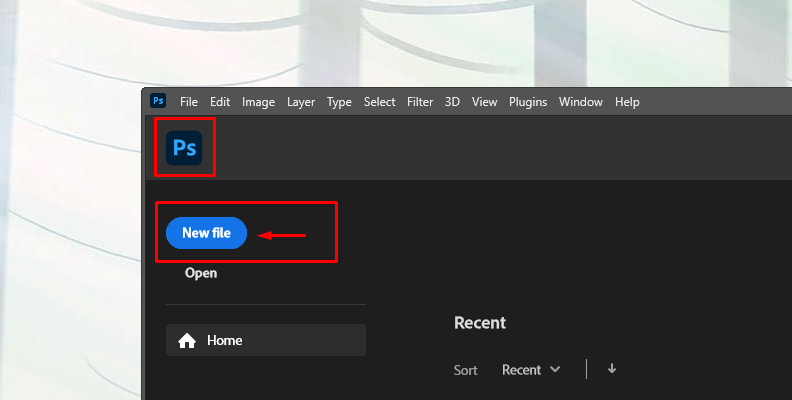
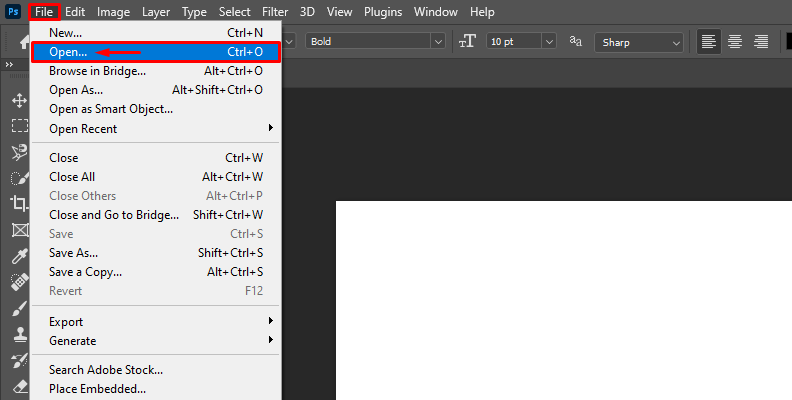
Step 1: Import the Image into Adobe Photoshop
Create a new Photoshop project and import the images for which you want to add halftones.
Step 2: Add Color Halftone Filter
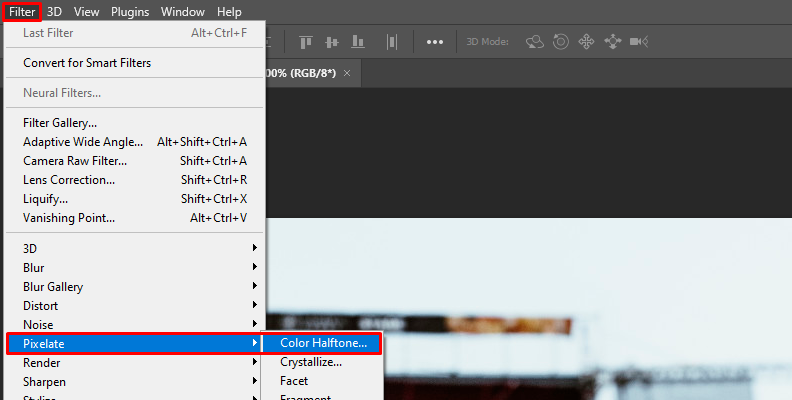
Go to the Filter menu, then Pixelate > Color Halftone. Adjust the settings in the following Color Halftone window to produce the halftone texture.
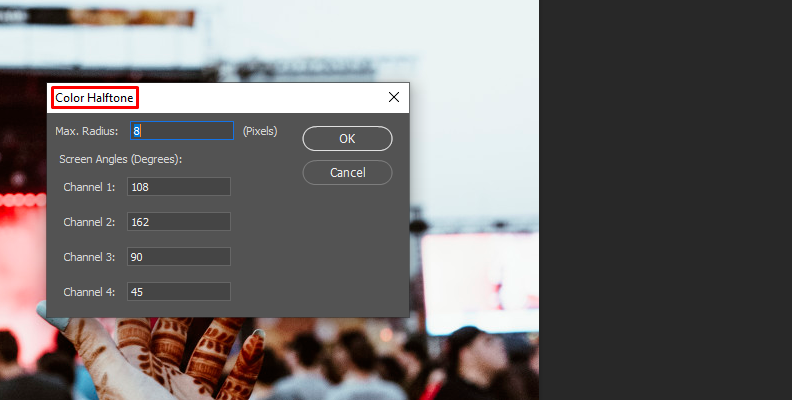
The Max Radius adjusts the size and spacing of the halftone dots in terms of pixels.
The Screen Angle is controlled by channels, which arrange the position and how the halftone dots overlap. The channels refer to the cyan, magenta, yellow, and black dots in the pattern.
You cannot preview in real-time when you change the values in the Color Halftone screen. So, you must undo the Color Halftone filter to modify the radius and screen angle settings and repeat the process until you find a good combination.
Method 2: Grayscale Halftone Screen
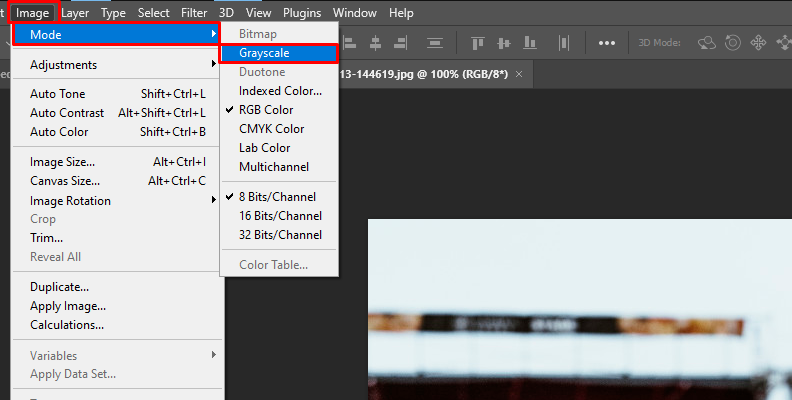
Step 1: Image Modes
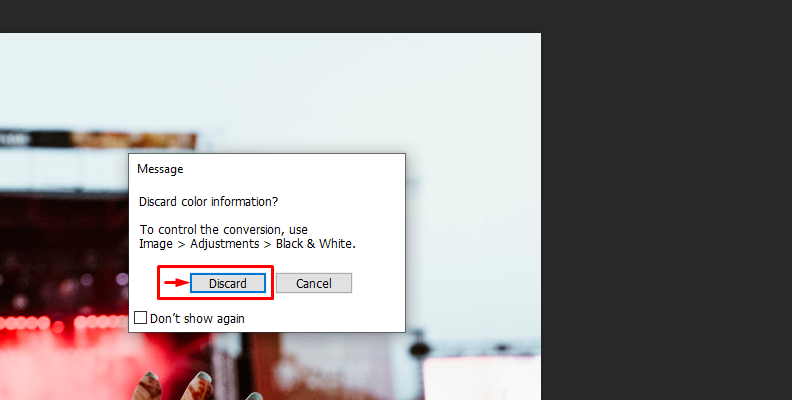
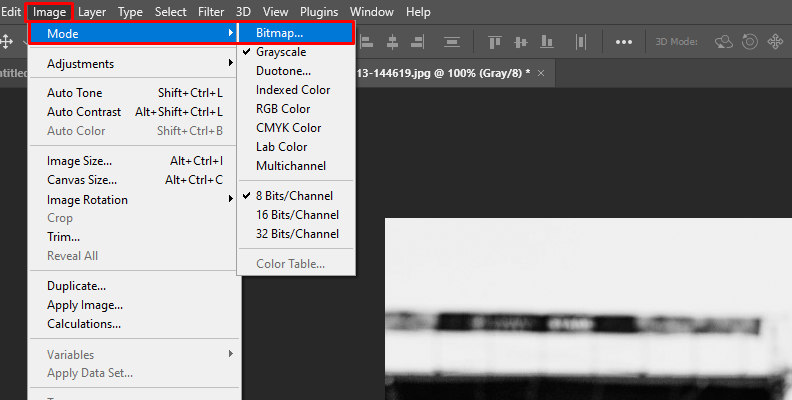
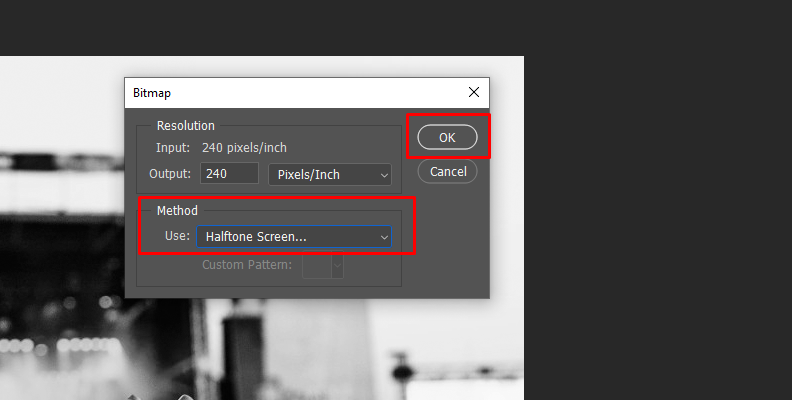
Import the image for generating the halftone effect into Photoshop. Go to the menu Image and select Mode > Grayscale. Choose "Discard" in the message window. Then go again to Image > Mode, but this time choose Bitmap. Choose the method Halftone Screen and click OK.
Step 2: Halftone Screen
The Halftone Screen will pop up right away. Here, you can adjust the size of the dots using the frequency value.
The Angle determines the direction in which the dots are placed. Finally, choose the shape of the halftone dots between the six options: round, diamond, ellipse, line, square, and cross.
You can only preview the result once you press OK. If you're unsatisfied with the result, undo it and repeat the process, altering the values. Try with other shapes until you get the desired halftone texture.
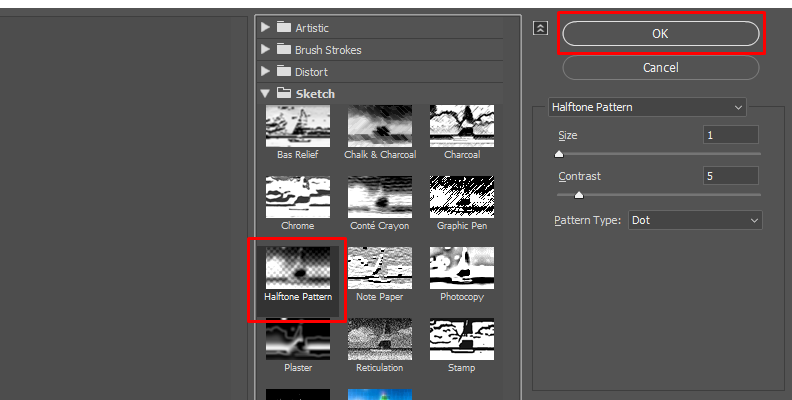
Method 3: Halftone Pattern from the Filter Gallery
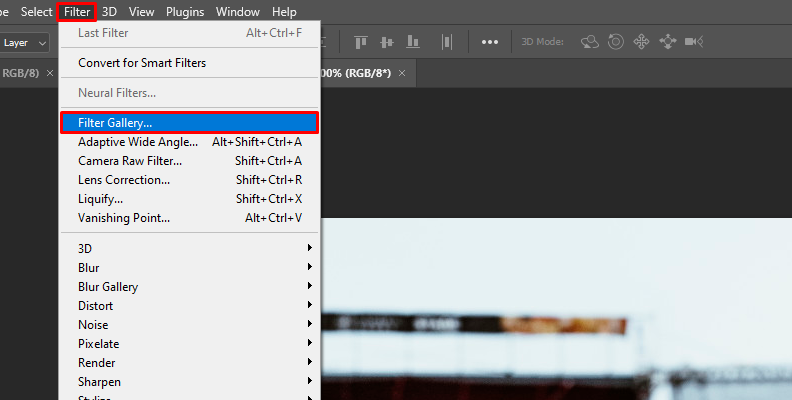
Step 1: Access the Filter Gallery
Add the images to Adobe Photoshop and go to the Filter menu. Scroll down to Filter Gallery and browse the Sketch category to choose Halftone Pattern. Unlike the other methods, this allows you to preview the halftone effect.
Step 2: Adjust Halftone Pattern Settings
The settings on the left allow you to change the pattern shape and adjust the size and contrast of the dots. Click OK to apply the halftone pattern to the image.
What is the Difference between Grayscale and Halftone?
A grayscale effect creates a printing image using gradient tones and shades using black and white colors.
Halftone uses patterns of dots to generate the image's tonality. A single-color dot (black) can be used for binary halftones, or the CMYK (cyan, magenta, yellow, and black) colors for a color halftone.
Final Words
Halftone images are still extremely popular among digital photographers, content creators, comic artists, and designers.
Experimenting with all the possibilities that BCC Halftone offers and the filters in Photoshop can create unique and retro graphics for your photos. How about giving it a try today?
Have fun!


