


The ability to replace backgrounds in video content made a revolutionary change both in the professional film industry and on a more casual level that we see in social media posts and advertising campaigns.
Whether you want to create unique content for your social media profiles, appear more formal on your online meetings and calls, or impress the audience with your upcoming film school project, chroma keying is one of the most popular ways, and it's worth knowing how to do it properly.
In this tutorial, we will help you learn about chroma keying, what it is, and how you can do it flawlessly to achieve picture-perfect results.
Without further ado, let's get straight into it.
What "Chroma Key" Means
We have a separate guide dedicated to explaining what a Chroma Key is, so feel free to check it out as this section will only briefly explain the concept before moving onto the steps showing you how to do chroma keying.
With that said, let's define chroma keying in a simple and novice-friendly way.
Chroma key, also known as green screen or blue screen, is a visual effects (VFX) technique used in film, television, and photography to combine two or more images or video streams. The process involves filming or photographing a subject against a solid-colored background, typically green or blue, and then replacing that background with another image or video during post-production.
The keying process works by isolating the colored background (chroma) and making it transparent, allowing the desired background to show through. The choice of green or blue colors for the background is because these colors are less likely to match the natural color of human skin or clothing, reducing the risk of unwanted transparency in the subject or other "glitches" in the video.
The chroma key technique is widely used in various applications, such as creating virtual sets, adding special video effects, and enabling presenters to appear in different locations without realistically being there. It is a powerful tool for creating both visually engaging and immersive content.
How to Chroma Key in Adobe Premiere Pro
To chroma key in Adobe Premiere Pro, you'd need green screen footage, or more specifically, a subject recorded on a green screen background, something to replace the background with, as well as a basic understanding of the software.
Don't worry about the last part, though, as this step-by-step guide will show you how to do everything from start to finish, even if this is your first time using Adobe Premiere Pro.
Here's what you need to do:
Open Premiere Pro and Import Your Green Screen Video
The first step is to import your media into the software. You can do this by navigating to the "Project" tab and right-clicking an empty area, as shown in the image below, then choosing the "Import" option from the menu.
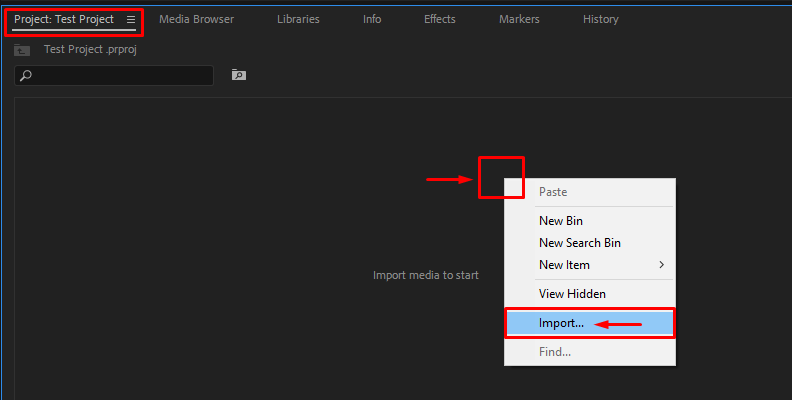
During this step, you need to import the video with the green screen background, and the video you wish to replace the green screen video background with.
Create a Sequence and Add the Ultra Key Effect
Now that your media is imported, you need to create a sequence. You can do this by dragging and dropping the videos onto the timeline area.
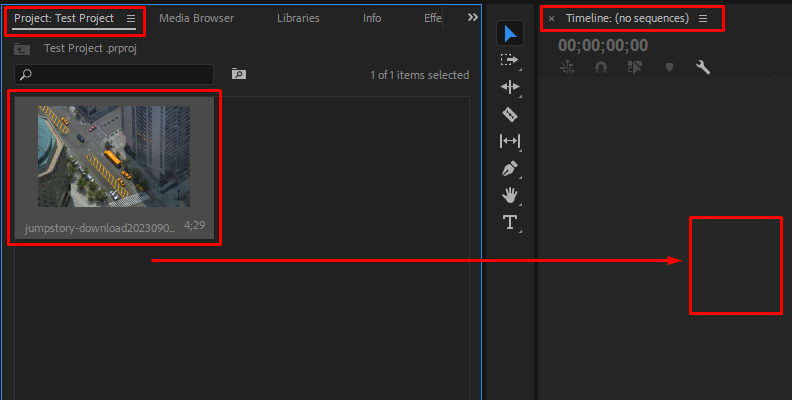
Doing this will create a sequence. Then, you can apply an effect to the clips in that sequence, which in this case is the "ultra key" effect.
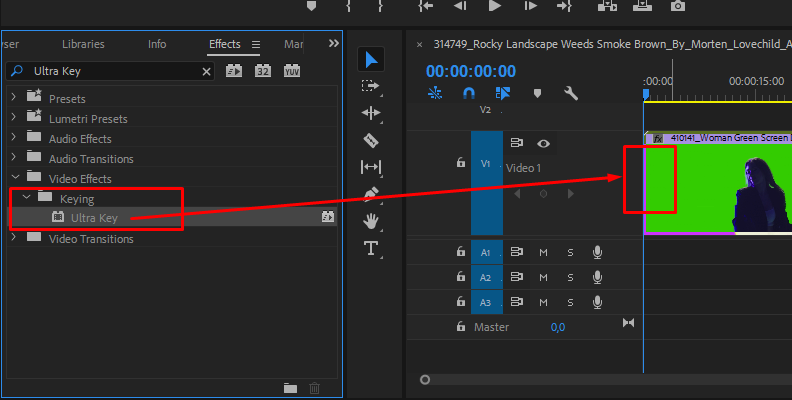
Navigate to the "Effects" tab and use the search bar to type in "ultra key" which will make finding the effect much easier.
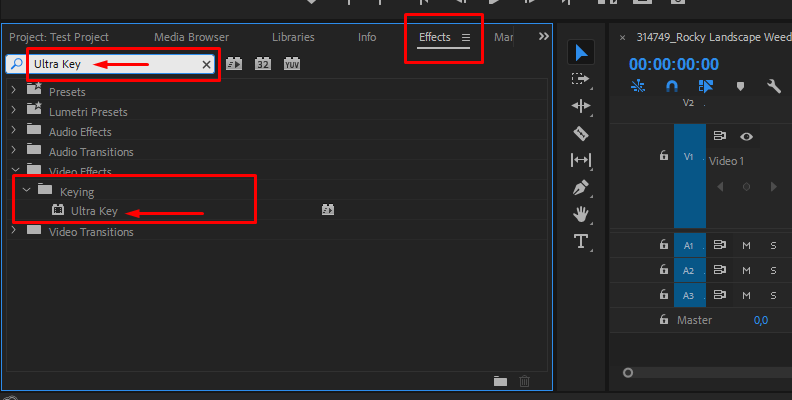
The "ultra key" effect will be under the "Keying" folder, as shown in the image above.
Drag and drop the effect over your green screen footage.
Access the Effect Controls Panel to Use the Key Color Setting
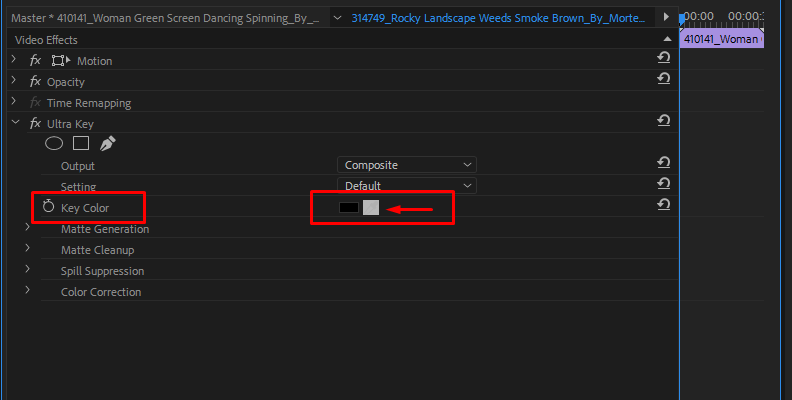
Once you apply the ultra key effect to your green screen video, click on the video on your timeline, then click on the "Effect Controls" tab in the upper-left corner of Premiere's interface.

Your next step is to find the "Key Color" parameter, then click on the "eyedropper tool" next to the color icon.
You will see that the eyedropper tool is now active on your screen and you can move it around when moving your mouse.
Move it over to the right side where your video preview window is, then click anywhere on the video where the green screen footage shows to let the software know which pixel color it needs to select to remove green screen from your footage.
In simplified terms, select the green area with the eyedropper tool by clicking on it.
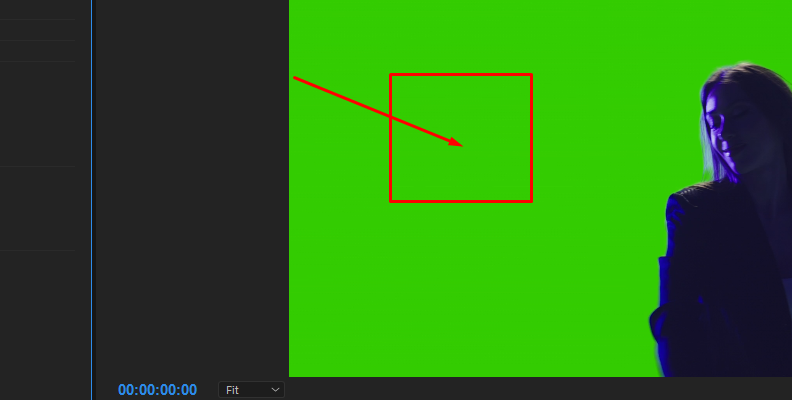
Right after clicking, if you lit the green screen evenly during recording, you'll notice that all of it is removed and your actor/subject/object is still in the video, except there's no background behind them.
If this is the case, then you've successfully removed the green screen from your video clip. You can repeat this if you have multiple green screens to remove.
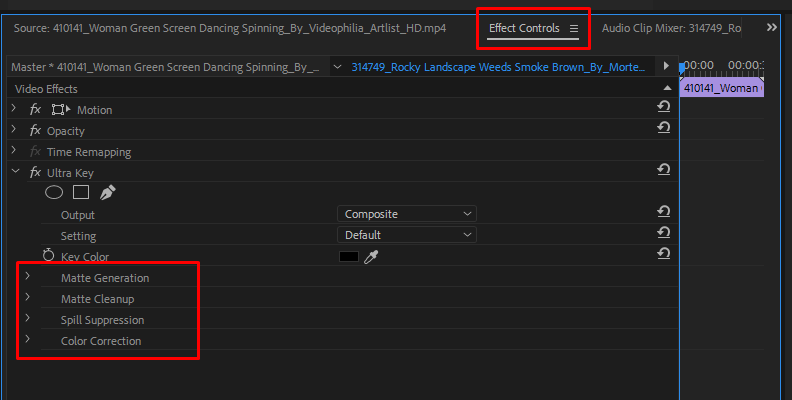
In case you see any abnormalities, you'll need to modify the parameters within the effect panel to fine-tune your modification.
There are four subcategories of available parameters that you can expand to modify various settings. "Matte Generation," "Matte Cleanup," "Spill Suppression" and "Color Correction".
All green screen footage is different, and depending on the video effects you wish to achieve in yours, you'll need to do different modifications. This is why we cannot guide you with specificity when it comes to the exact steps you need to take to modify your results.
For most stock green screen video clips available, you won't need to do any corrections after selecting the background using the eyedropper tool.
Add the Background Clip
Your last step is to add the background clip to the green screen footage from which you removed the background.
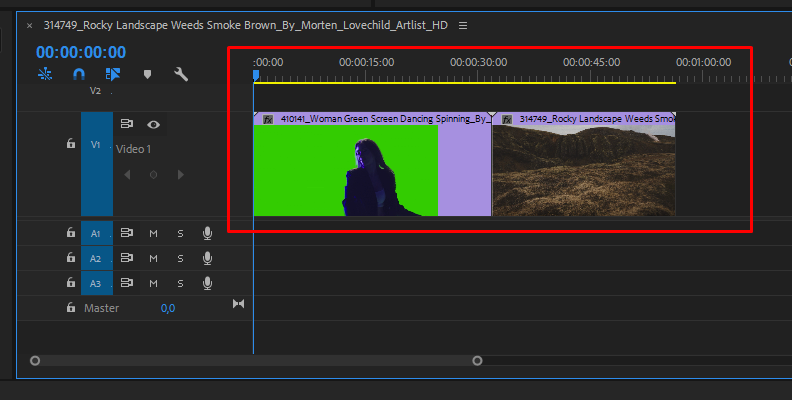
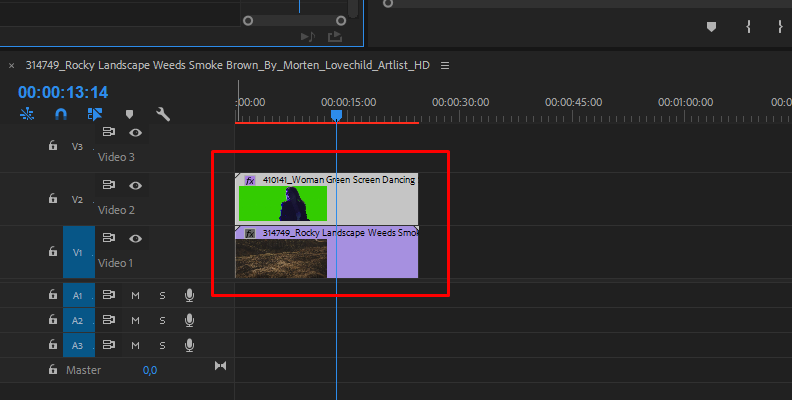
This is very easy to do, and all required on your end is to move the green screen video that you used the ultra key on one video track above the background clip on your timeline.
Then, move the background clip right below the main green screen video.
That would look something like this:

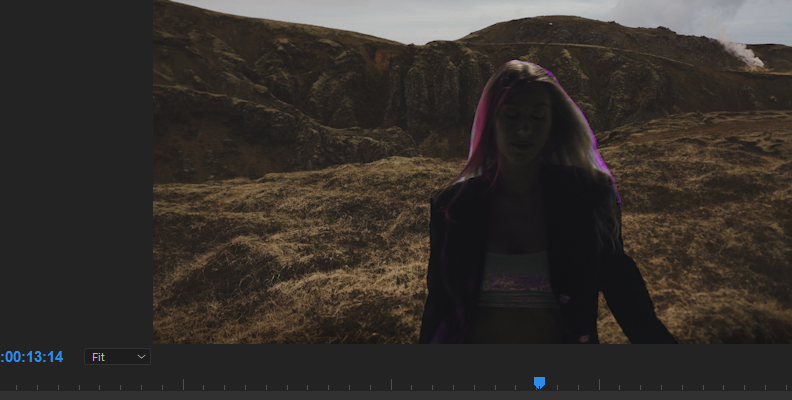
And now, if you did everything as shown in the steps, you should immediately have your subject from the green screen video onto a new background from your background clip.
And that's all there's to it!
That is how you chroma key in Premiere Pro for free.
How to Chroma Key with Continuum by Boris FX
When it comes to image and video editing, you can accomplish most of the things that you have as ideas manually if you have the required skills and knowledge.
However, with plug-ins, you get to save a lot more time, and if you are a beginner, you can do things that you otherwise wouldn't know how to do.
The Continuum pack by Boris FX is one of the most widely known additions to any editor willing to take their work to the next level, and in this section, we'll use one of its many tools to show you how to chroma key in Adobe Premiere.
If you have Continuum installed for Premiere Pro, here's how to chroma key using the BCC Chroma Key tool.
Load Adobe Premiere Pro, Import Footage, and Create a Sequence
This step would be the same regardless of which software you use to chroma key using this effect from Continuum. As you probably already know, almost all Boris FX plug-ins are widely available for various software, so you can do this on Adobe Premiere Pro, After Effects, VEGAS Pro, and more.
If you don't know how to import footage in Premiere Pro and create a sequence, take a look at the previous section in this guide where we cover that step-by-step.
Apply "BCC Chroma Key" to Your Video
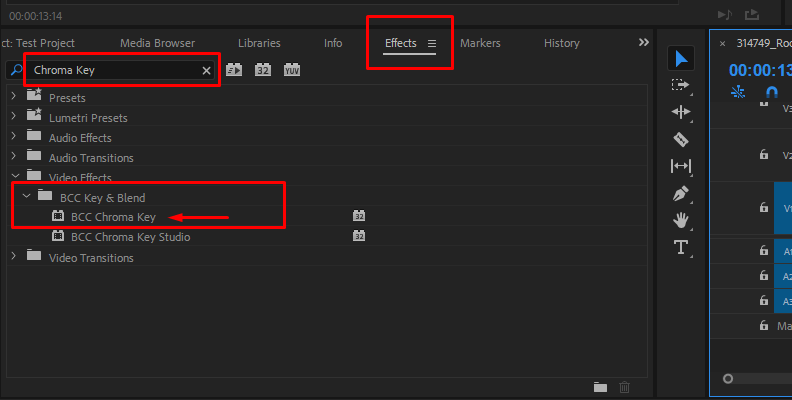
Once you have a sequence consisting of the video with a green screen and the one you'll use for a background, you need to find and apply the "BCC Chroma Key" effect to your green screen clip.
To do this, navigate to the "Effects" panel in Premiere Pro, then use the search bar to type in BCC Chroma Key. You will find the effect under the "BCC Key & Blend" folder.
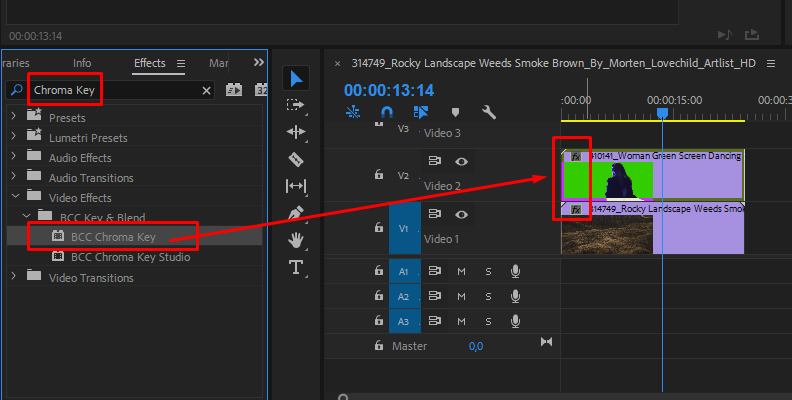
Once you find it, apply the effect by dragging it on top of the video with the green screen that's on your timeline.
Now, click on the clip that you just applied the effect to, then open the Effect Controls panel by clicking on it in the top-left corner.
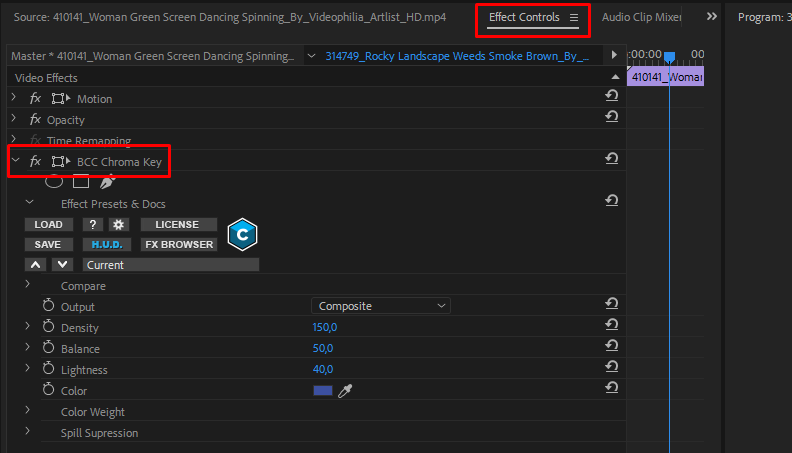
This will show you all the parameters you can modify, but for now, the most important one we need to look at is the "Color" one.
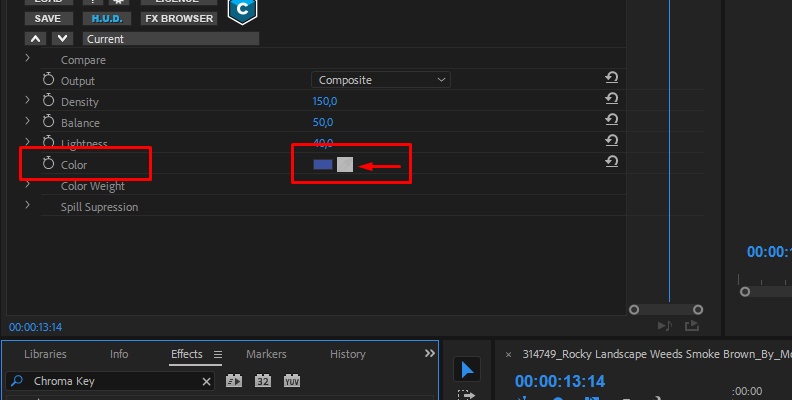
Click on the eyedropper tool next to it, then click on an area in your clip that matches the color of the background you want to remove. In our case, it's a green screen, but it could be a different one in yours.
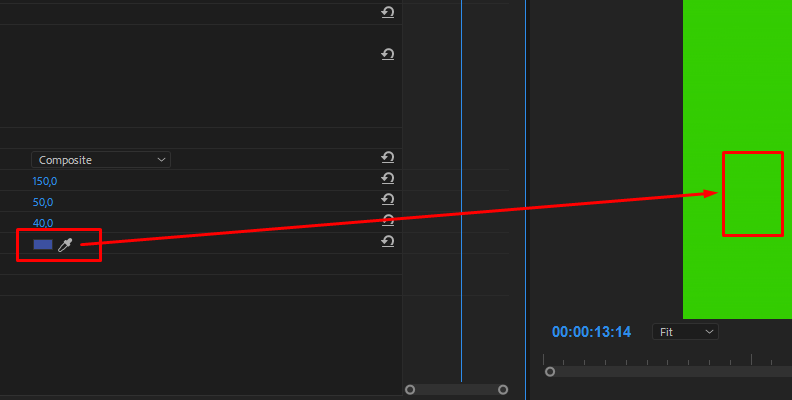
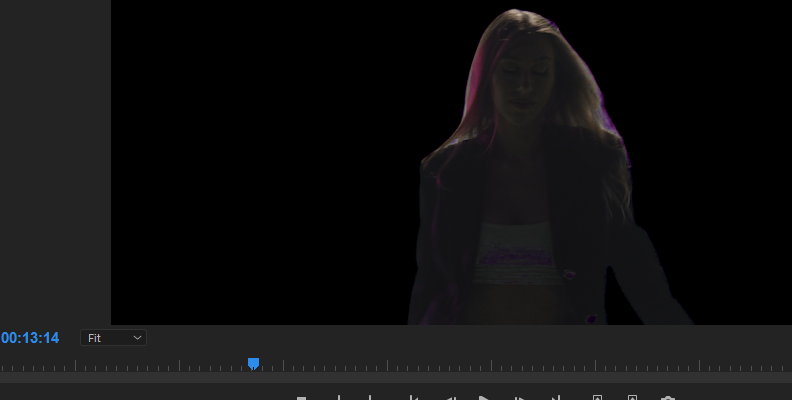
Once you do that, you'll notice that the background is immediately removed.
The next step is to add the video you want to use as a background right underneath the original green screen clip.
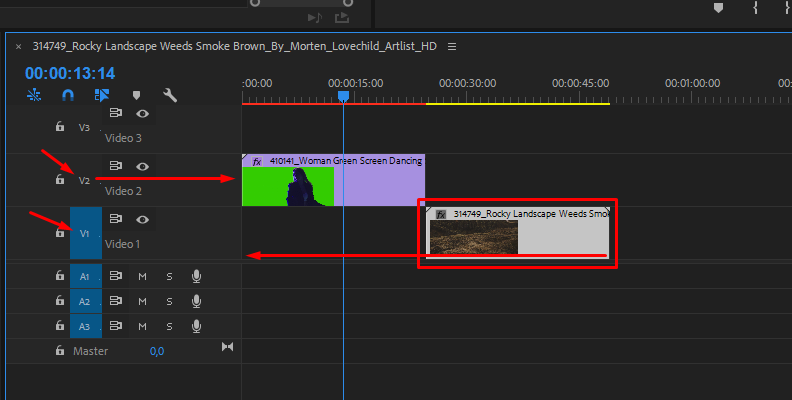
This is because Adobe Premiere Pro prioritizes whatever is on a higher video track, so you want your subject from the green screen clip to show on top of the background video clip, which is why it should be placed on top.
And that's everything you need to have a successful green screen removal using the "BCC Chroma Key" effect by Continuum in Adobe Premiere Pro.
If you want to further fine-tune the image, you can open the Effect Controls panel and use the various options to do any modifications needed.
Final Words
That's everything you should know about the chroma key method. You now know more about what it is, and most importantly, how to do it yourself both manually and by using the BCC Chroma Key effect from Boris FX Continuum.
Hopefully, this should help improve your editing work. Good Luck!


