


Simply put, video transitions are fades, wipes, dissolvers, and more advanced 3D animations used in post-production that tie two media clips together, creating more professional-looking footage. Transitions make video cuts look smoother, create dynamic variations between two scenes, or drive the story forward with creative and unique transition effects.
In today's article, I'll cover how to add transitions in Magix VEGAS Pro (formerly Sony Vegas) to give your final cut a professional and outstanding look. You'll learn how to do it using VEGAS Pro and Boris FX transitions effects to increase your post-production toolkit and improve your video editing skills.
Let’s dive in!
How to Add Video Transitions in Sony Vegas Pro (Now Magix VEGAS Pro)
VEGAS Pro allows you to add transitions in different ways with different outcomes depending on the level of customization you want to achieve. Sometimes, all you need is a simple effect so your video clips blend nicely; other times, you might want to create a more elaborate effect to build momentum as you introduce the next scenes.
You'll first need to set up your project in VEGAS Pro to add transitions between two or more media clips or cuts.
Step 1: Import Media
![how to add transitions in sony vegas]()
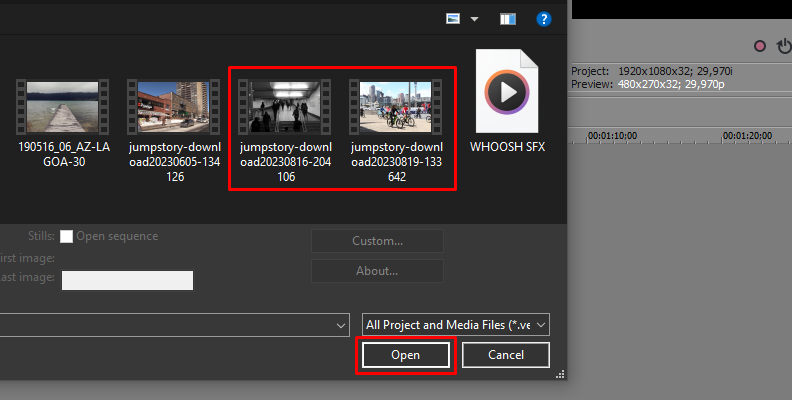
You must import at least two media clips to create and add a video transition in VEGAS. It can be any combination of footage, photos, or videos and photos. Or you can split a long video clip and add a transition between the split.
![]()
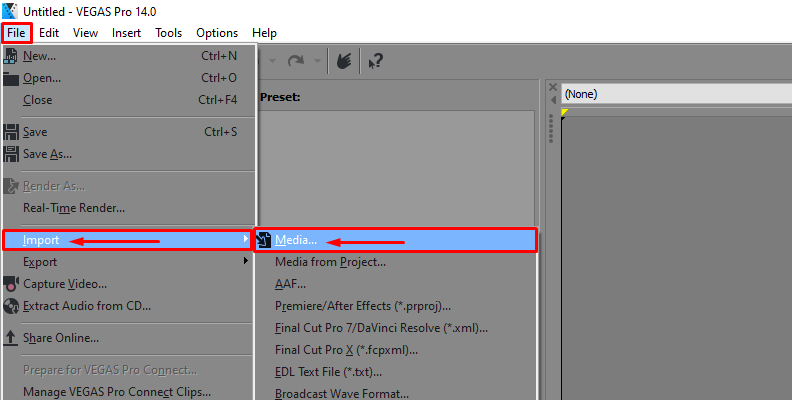
Go to File > Import > Media and browse for your media clips. Drag and drop the media clips to the timeline and arrange them to put them in order. You can also import media from the Explorer Window into Sony Vegas Pro.
![]()
Step 2: Add Simple Fade Transitions
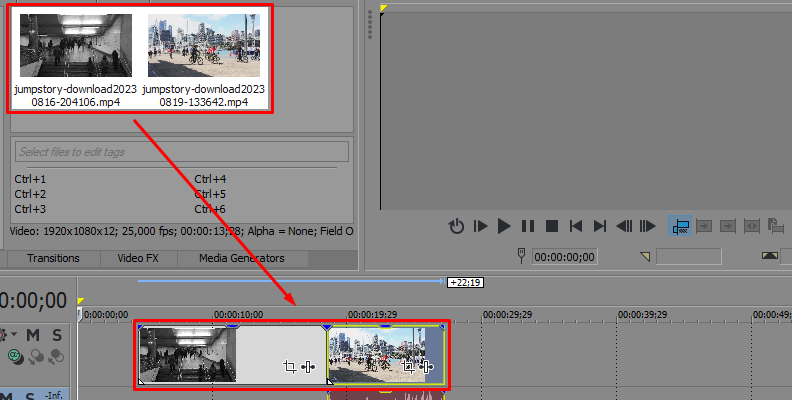
VEGAS allows beginners editors to quickly create a single transition between two events by dragging the video clips into each other.
Pick two events that you want to add a fade transition between.
Click an adjacent clip in the timeline and drag it into the following clip.
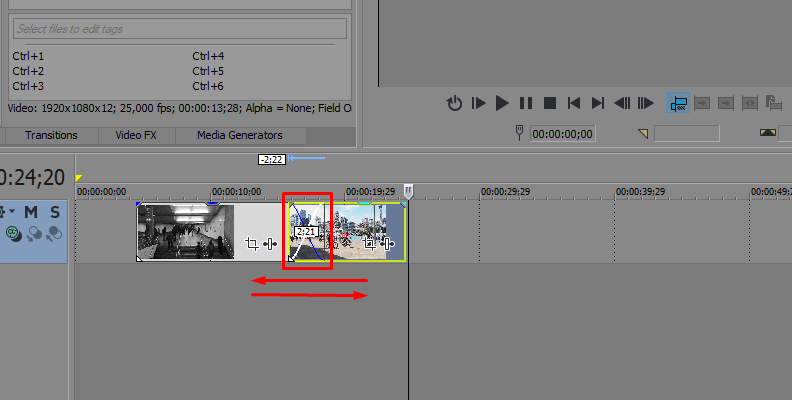
As you join them, you will see an overlap area to indicate the fade. You can change the transition period by dragging one clip closer or farther from the second clip.
![]()
Repeat the process with every media clip to create the same fade transition.
The merged clips will create a basic dissolve transition, but you won’t be able to customize or control the effect in any way. Follow the next step for more customization options, adding other transition effects for each video clip.
Step 3: Add Transition Effects
The second method to add transitions, which will give you more personalization options, is using transition effects.
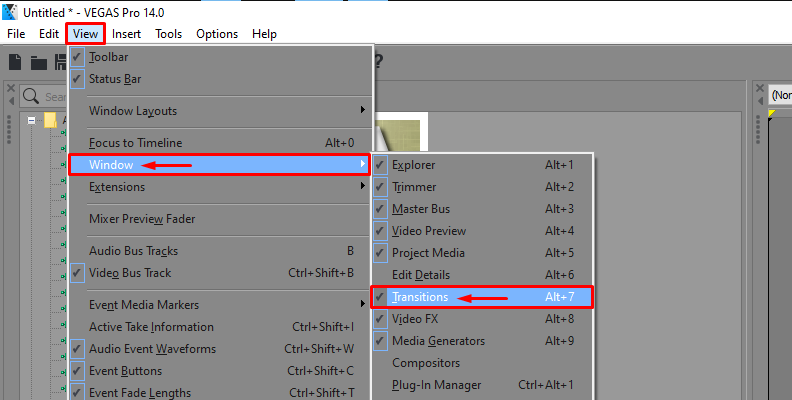
Go to the Transition tab. If you don't see the Transition tab above the timeline, go to the View main, then Window, and click on Transitions to make the Transitions window visible. Now it should be on the tabs among Video FX and Media Generator.
![]()
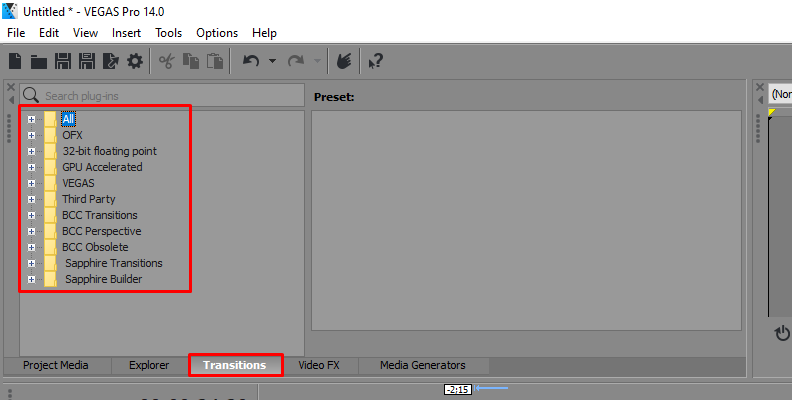
From the Transitions window, you'll see several categories. You can browse by transition type or use the search box above the Transitions windows to search for one.
![]()
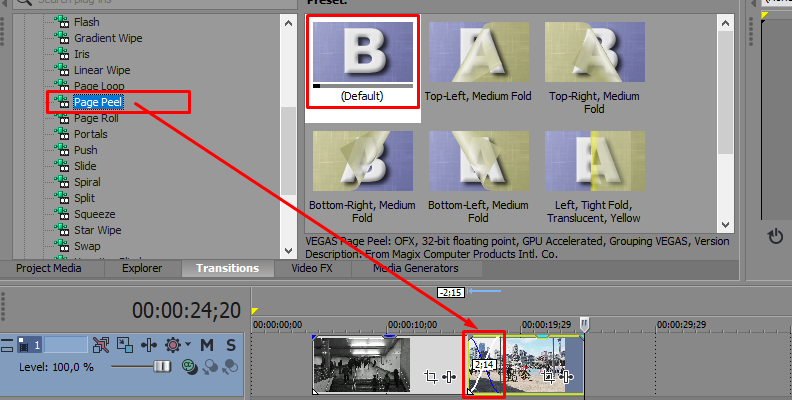
When you select a category, you will see a thumbnail that previews the transitions if you hover the mouse over it. Take your time to explore all the transitions VEGAS Pro include until you find one to add to your media clips.
![]()
Select a transition and drag it between two clips. When you drop the transitions in position, the Video Event FX window will appear. Here you can change settings to personalize the transition.
![]()
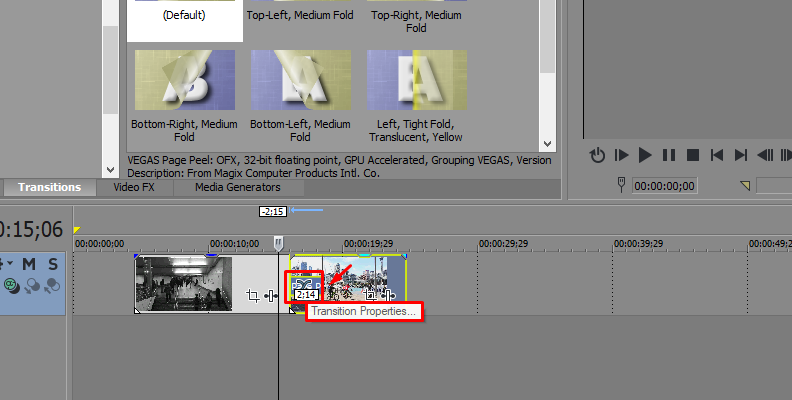
Once back in the timeline, you will see a small rectangle appearing over the clip with the name of the transition effect, called the Transition progress envelope. You can edit the transition duration by dragging it from the edges of both sides of the effect.
If you need to go back to the Video Event FX window to change settings, you can click the Transition Properties button to the right of the transition, and it will open the Video FX window.
Step 4. Adding Multiple Transitions
You may want to add more than one transition to your video clips. You can save time if you add multiple transitions simultaneously, which is helpful if you work with longer videos with several cuts.
Select all the media clips where you want to add a transition.
Go to the Transitions tab and search for the transition effect you want to use.
Drag it to one of the selected video clips and drop it.
The transitions will be added between all the selected video clips, and the Video Event FX window will pop up.
In the timeline, you can drag the edges of each transition to adjust the length independently.
To edit each transition setting, you can open the Video Event FX Window by hitting the transition properties button. The changes will be applied individually for each transition event.
Step 5. Replace an Existing Transition
Let's say you have the same transition in all media clips, but there’s one specific scene where you want to use a different one. You can replace only that transition with a new one simply by adding the new transition to that clip.
Find the new transitions you want to add.
Click and drag it to the existing transition.
The new transition will overwrite the old one, and the Video Event FX will pop up for the new transition effect.
Preview the effects and edit settings if needed, then close the window.

How to Add Video Transitions in VEGAS using Boris FX Tools
Boris FX Continuum and Sapphire plug-ins come with cutting-edge auto-animating transitions, from classic to modern effects, to drive your stories forward. You can create custom dissolves, wipes, film rolls, hyper pulls, feedback effects, time averaging, and more with Boris FX transitions.
Step 1: Download and Install Boris FX Plug-ins
Make sure to download the Boris FX installer of Sapphire or Continuum for your host and install them on your computer.
Step 2: Import Clips to the VEGAS Project
Import two clips or more to VEGAS Pro and drag them into the timeline. Arrange the video clips in the right order.
Step 3: Search Boris FX Transitions Effects
When you install Boris FX Continuum and Sapphire plug-ins, all the effects will automatically load in the VEGAS library. Transition effects will be under the Transitions tab with all the other VEGAS native transitions effects.
For a quicker browse of Boris FX transitions, you can switch to the Third Party tab in the Transitions window. But if you have other external plug-ins installed, they will also be under Third Party. Use the search box and type "BCC" or "S_" to locate all Continuum and Sapphire transitions faster.
Step 4: Add Boris FX Transitions
You can add Boris FX transitions in the same way you’d add any other transition: by clicking and dragging the effect to the beginning of a clip, between two clips, or at the end of the clip.
Select a transition and drag it to the clip.
![]()
Edit settings in the Video Event FX window.
Adjust the duration of the transitions in the timeline.
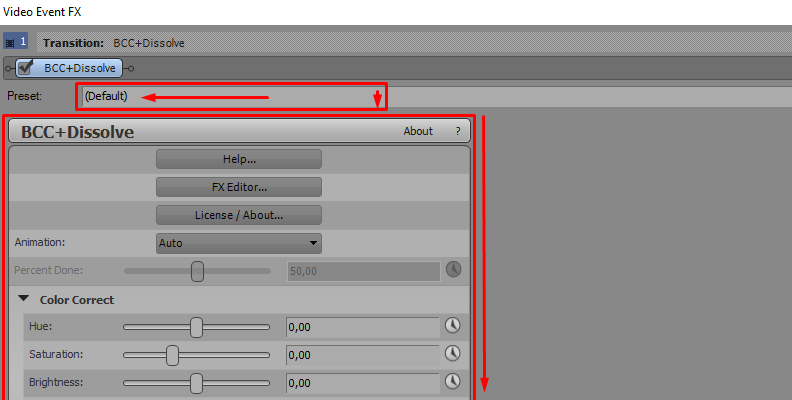
Boris FX transitions have something different in the Video Event FX: a Preset button. By clicking the FX Editor or Load Preset button in the Video FX window, you will launch Continuum or Sapphire preset browser, where you’ll find many options to customize your transitions behavior and speed.
![]()

How to Remove Transitions
If you decide a specific transition is unnecessary, VEGAS Pro makes removing transitions easy.
Locate the transitions you want to delete and click the Transitions Properties button.
![]()
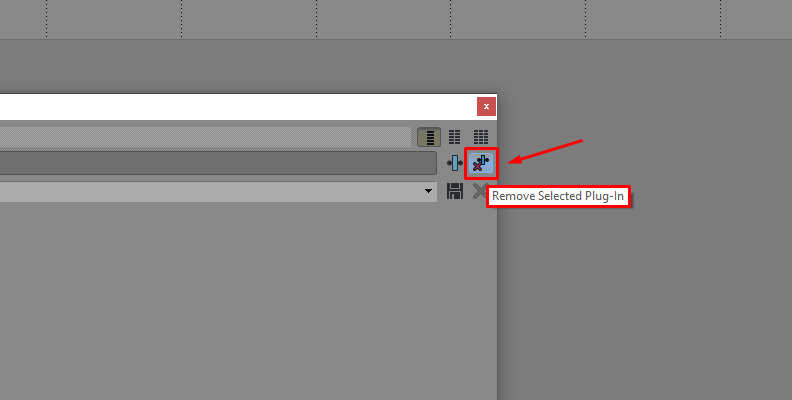
You will see a blue and red FX icon on the top right corner of the Video Event FX. If you hover the mouse over the red FX icon, it will display "Remove Selected Plugin."
![]()
Click the red FX icon to remove the transition effect from the clip.
The Video Event FX window will close, and the transition will be removed from the video clip.
If you want to remove a fade transition added by dragging together two clips, you can remove it by separating the clips.
Final Words
You can create more exciting videos by applying Boris FX Continuum or Sapphire transitions to Magix VEGAS Pro (formerly Sony Vegas Pro) tools. Now that you know how easily you can add transitions, you’ll never want to let your media clips go without these effects.
You can download a free trial of Boris FX Continuum and Sapphire and start experimenting with transitions, new settings, and professional presets to create a transition that will make your films, videos, and image presentations unforgettable.
Good luck, and keep developing your video editing skills with Boris FX plug-ins!


