


Sometimes, recording video material, whether for professional purposes or as a hobby, requires the perfect circumstances, according to the project's goal.
Unfortunately, even world-class productions often fail to be there on the spot when nature allows for a successful recording set in the imagined circumstances, and that's when we rely on modern technology to keep us on track with our original ideas.
One example is recording on a snowy set. You may arrive on time when there's snow on the ground, but it may not be snowing actively at that moment, though that's exactly what you may want to showcase in your work for that extra video production magic.
Fortunately, there's a solution, and we'll tell you all about it in this guide.
Below, we'll help you learn how to add falling snow effects to your video using BCC Snow, a tool featured in Continuum by Boris FX, so if you're willing to learn more, let's get straight into it.
What is the Snow Effect?
The snow effect is a digital, post-production solution for making a scene look like it was recorded while it was snowing outside. Such effects can be added using most modern, popular video editor programs like Adobe Premiere Pro and After Effects.
Snow-simulating effects can add snow overlays to your video, and when done properly, they can be very convincing and realistic. The snow effect is a popular choice for any type of video content where you need to add a snow layer to enhance the atmosphere and make the story/setting more suitable for a winter-themed narrative.
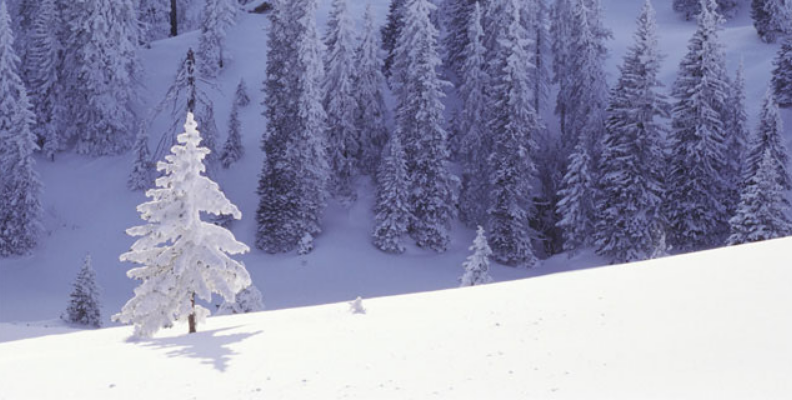
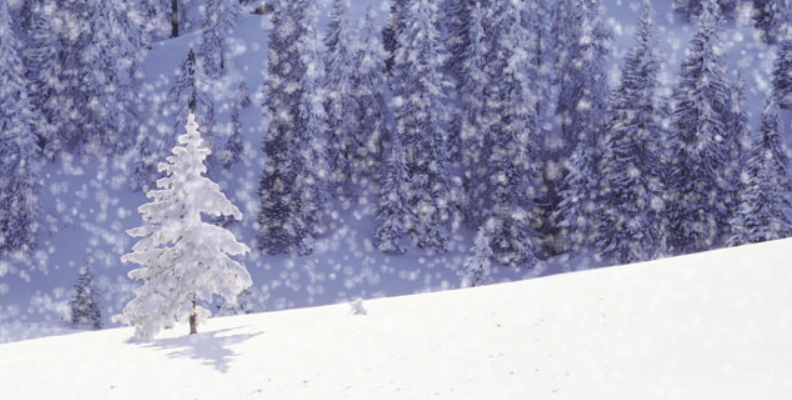
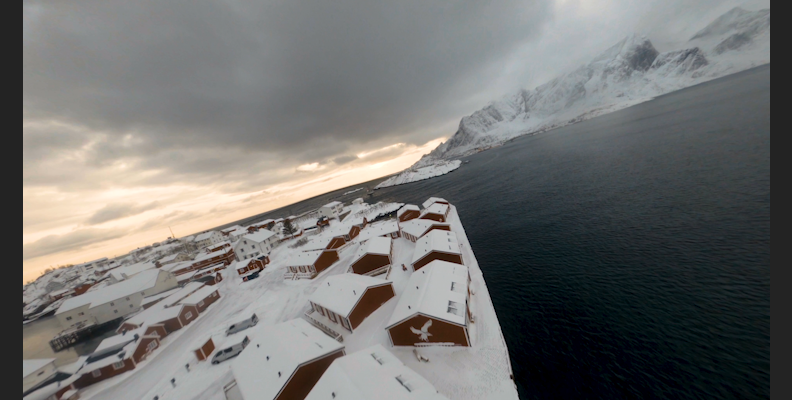
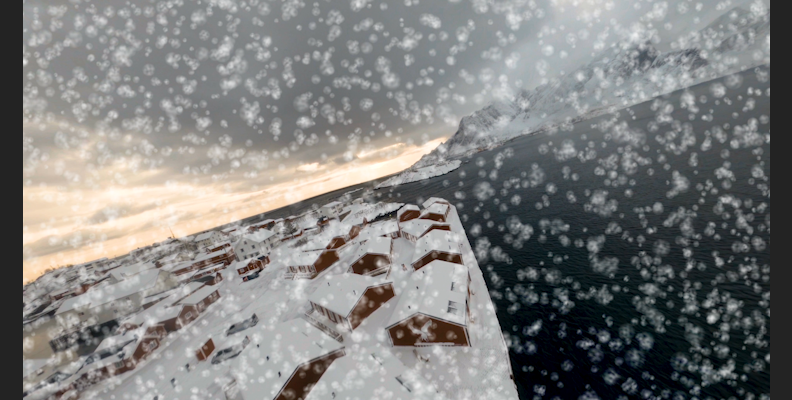
In the two images below, you can see the BCC Snow effect in action.
The first image doesn't have the snowfall effect added to it, while the second one has the effect, and it benefits a lot from it. The difference is quite drastic.
Before BCC Snow:
After BCC Snow:
The great thing about using such post-production video effects is that they can save you a lot of time and money.
If you need to wait for the snow to start in cold winter conditions, along with your entire crew, that can be tiring, costly, and overall problematic. On the other hand, dragging and dropping a snow video effect on to your shot can quickly and easily turn it into a winter wonderland without any trouble.
Of course, most of the time it's better to capture the real snowfall on video, but as mentioned earlier, the conditions are not always perfect when recording on a set. In such cases, post-production tricks and a bit of fine-tune will help you out a ton, and sometimes even save an entire project.
With that said, here's what you need to know about adding snow effect looks to your video in Adobe Premiere Pro.
How to Add Snow Effect to Video With BCC Snow
BCC Snow is an effect that is a part of the Continuum creator pack by Boris FX.
Continuum has a free version available for download from the official Boris FX website. The content you'll create with it will be watermarked, but you can choose to buy the full version later on and that will remove watermark.

One of the best things about Continuum is that you can use it with most popular video editing programs, such as Adobe After Effects, Avid, Adobe Premiere Pro, DaVinci Resolve, VEGAS Pro, and more. This means you won't have to move to a different workspace that's unfamiliar to you, while still taking advantage of all the easy-to-use filters and effects available in Continuum.
With that said, we'll be using Adobe Premiere Pro for this specific guide, but keep in mind that you can use other video editing programs too, and the workflow will only be slightly different due to the interface.
Here's what you need to do to apply a snow effect to your video using Adobe Premiere Pro and Continuum's BCC Snow effect.
Step 1: Create a New Project and Import Media (Image or Video)
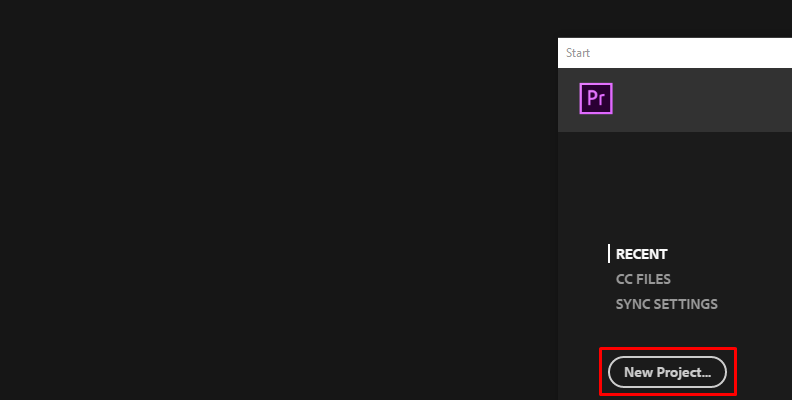
Your first step would be to create a new project and import media within Premiere Pro.
When launching the program, you'll see a "New Project" option on the home screen. We recommend creating a new project instead of working on an already existing one.
Once you're into the new project, navigate to the "Project" tab and import media by right-clicking anywhere on the empty area where it says "Import media to start" and then choosing "Import" from the list of options, as shown in the image below.

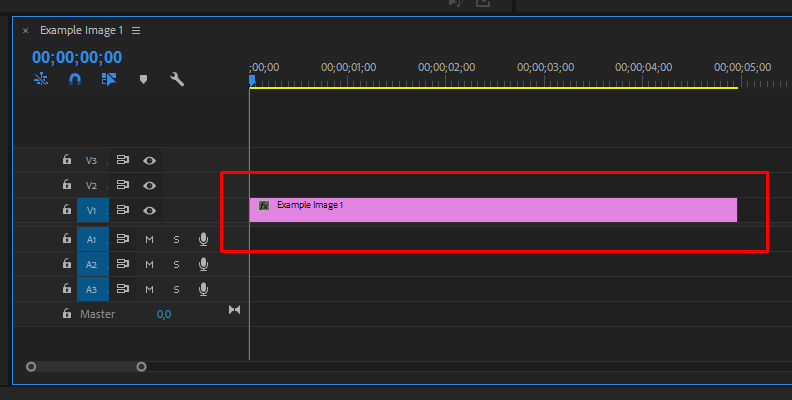
Step 2: Create a Timeline/Sequence From the Imported Media
Now that you've imported media, it's time to create a sequence/timeline using a clip/image. To do this, simply select a clip or an image from the "Project" tab and drag it over to the empty timeline space.
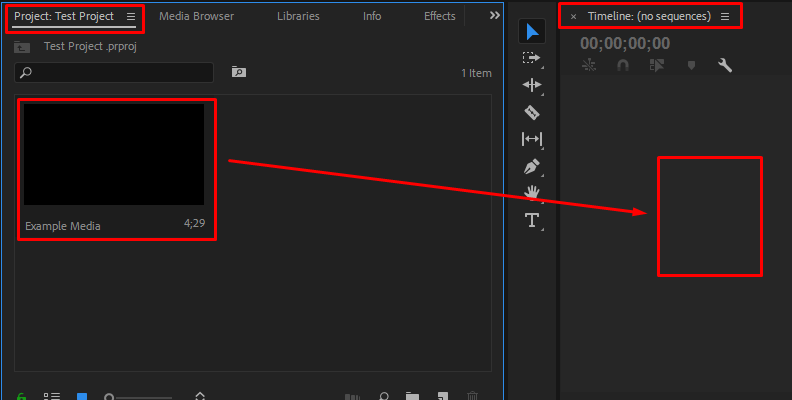
Now, your sequence/timeline is created.
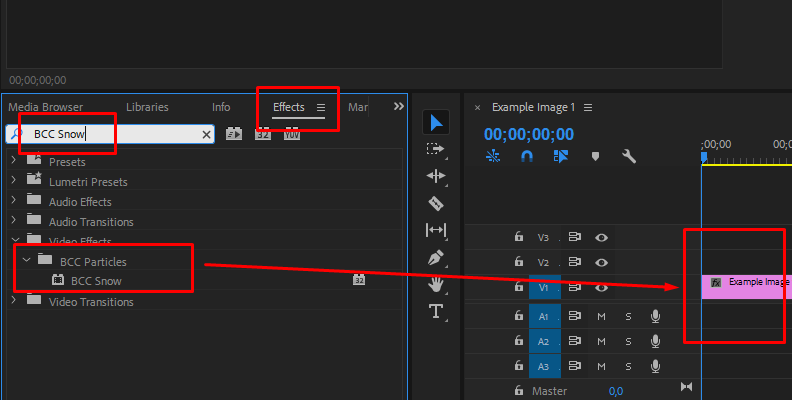
Step 3: Search for the Effect and Apply It
Your next step is to add the BCC Snow effect to your video/image on the timeline.
But first, you need to locate it.
Click on the "Effects" tab and use the search bar to type in BCC Snow.
Once you find the effect, which should be in the Video Effects -> BCC Particles folder, drag and drop it over the video/image on your timeline.
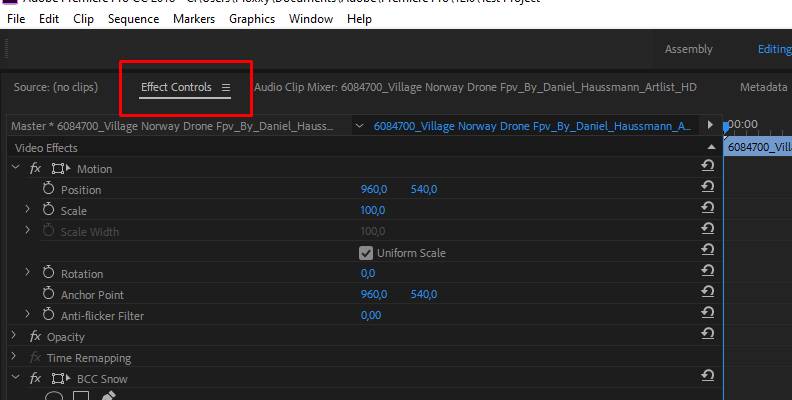
Step 4: Adjust Settings and Parameters in the Effect Controls Panel
Once you apply the effect to your image or video, you'll immediately notice a difference. There will be snow particles within the shot.
However, you may want more snow or perhaps less, or maybe you would like to increase or decrease the density, depending on your scene and project needs.
To do this, you would have to access the Effect Controls panel located in the top left corner of your screen.
Once you're in the panel, you need to scroll down a bit to see the BCC Snow effect.
Here, you can adjust all the settings listed until you get the desired result.
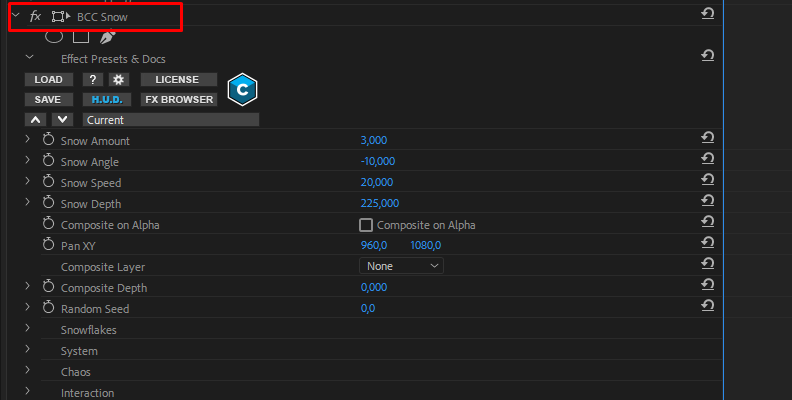
When satisfied with the changes, simply save and export. That's all there's to it!
Before using BCC Snow
After using BCC Snow
Final Words
Now you know more about using the snow effect that's part of the Continuum, and with one of the most popular video editing programs in the world, Adobe's Premiere Pro.
Hopefully, this will help you enhance the look and feel of your winter scenes in your future work.
Best of luck, and thank you for reading!
FAQ
This section contains some of the most frequently asked questions on this topic, along with the answers that you may find helpful.
Can you add a snow effect to a photo?
Yes, you can use the same method listed in the guide above to add a snow effect to a photo. Even though Adobe Premiere Pro is originally a video editor, you can still use it to apply this effect to a photo. Everything will be essentially the same, except instead of importing a video, you'll import an image.
How to add a snow effect in After Effects?
You can add a snow effect in After Effects the same way you did in Premiere Pro. Simply create a new layer, find the BCC Snow effect from your list of effects, add it to the video or image in question, adjust the blend mode and other settings if needed, and that's all there's to it. Easy as that!


