


Have you ever noticed the blurry effect that happens in movies when there's a fast-moving scene, like a car chase, and everything else in the frame is blurred? That’s the motion blur, a common effect that can add vibrancy and energy to your scenes!
Motion blur can be created while recording but is usually added to your footage during post-production, so in today’s tutorial, I'll show you how to create this effect in your videos using the powerful video editing software Magix VEGAS Pro.
To achieve this, we'll start with using VEGAS Pro built-in tools, and then I'll show you how to create this effect professionally with our FX products. But first, let's explain motion blur and why you need to add it to your videos.
Let’s dive in!
What is Motion Blur?
Motion blur is the effect that makes images, moving and still, simulate movement. You can achieve this effect by recording video clips with a high shutter speed. Shutter speed refers to the time your camera needs to take the picture: when it takes a long time, the sensor is exposed to light for a longer, creating exciting effects like the motion blur.
You may wonder why you want to add blur to your footage. The reason is that motion blur is present naturally in our daily life: when we see an object moving fast, like a car passing by our side at full speed, we perceive it as a blurry image.
Adding motion blur in post-production with video editing software aims to imitate this real-life perception of fast-moving objects to give a more realistic effect to videos.
Why Do You Need to Add Motion Blur?
Adding motion blur in post-production gives a sense of speed and movement to your recordings. Besides creating a speed effect, you can use motion blur for transitions, time-lapse and slow-motion sequences, texts, and other graphic animations. In still images, it can be used as a creative effect in endless ways.
Let's find out how to add a motion blur effect in VEGAS.
How to Add Motion Blur in VEGAS Pro
Step 1. Set Up Your Project
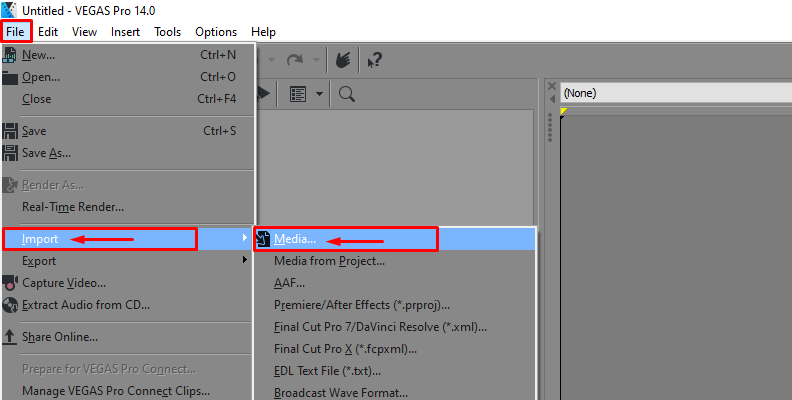
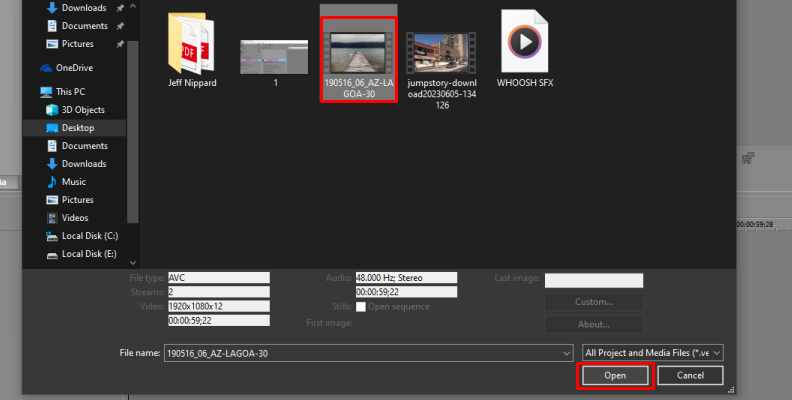
Create your project by importing the media files. Go to File > Import > Media. Browse for video files and click Open. You can also drag the files from the File Explorer window into VEGAS Pro. It's better to use video footage with movement to take advantage of the motion blur effect.
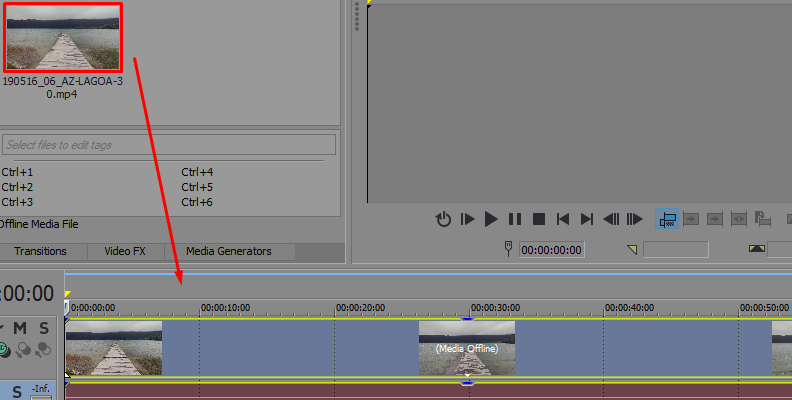
To start your project, drag the video footage to the timeline. You can drag and drop a single video clip or multiple clips and apply motion blur as a transition effect. Edit the video clips by cutting and trimming the unnecessary parts.
You can apply motion blur to text and graphics too. But first, you'll need to create your moving text and graphics with tools such as Track Motion.
Step 2. Choose Your Motion Blur Type
The default motion blur type is Gaussian, but you can change it from the Project Properties tab to experiment with other types.
To change the motion blur type, go to the main toolbar and click the Project Properties button to open the Project Properties window.
Move to the video tab and find the Motion blur type in the second section. Click on the dropdown menu to select different types, such as Gaussian, Pyramid, and Box. Once you choose the desired effect, click Apply and OK to close the window.
You can change other parameters to fully customize the effect, such as the project's frame rate, weight, and height, and loading and saving presets as a template for future similar projects.
Step 3. Enable the Video Bus Track
To apply motion blur effect to your video, you'll need to be able to see the video bus track. To enable it, go to the menu bar, click the View tab, scroll down and select Video Bus Track. You can also choose Video Bus Track using the keyboard shortcut CTRL + Shift + B.
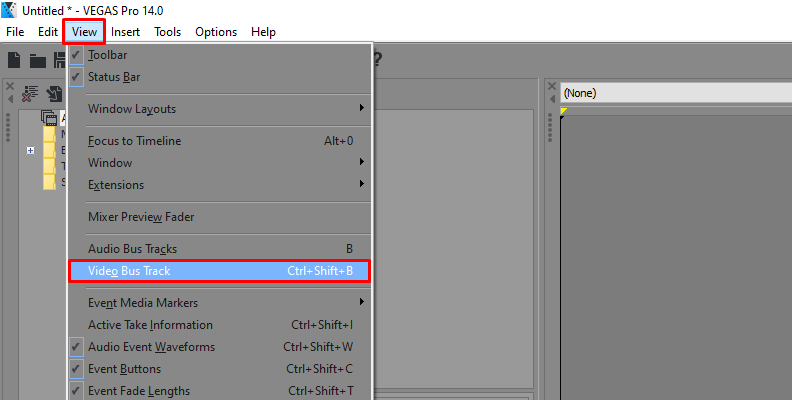
The Video Bus Track will now be visible under your original video track.
One thing to consider is that the video bus track will affect all the video tracks on the timeline. If you want to apply motion blur to one clip or section of the video only, you'll need to bypass the effect. Select Video Bus Track settings and click on Bypass Motion Blur.
Step 4. Insert Motion Blur Amount Envelope
Insert the motion blur envelope in the video bus track to add the motion blur effect. Right-click the video bus track to insert the envelope and select Insert/Remove Envelope > Motion Blur Amount.
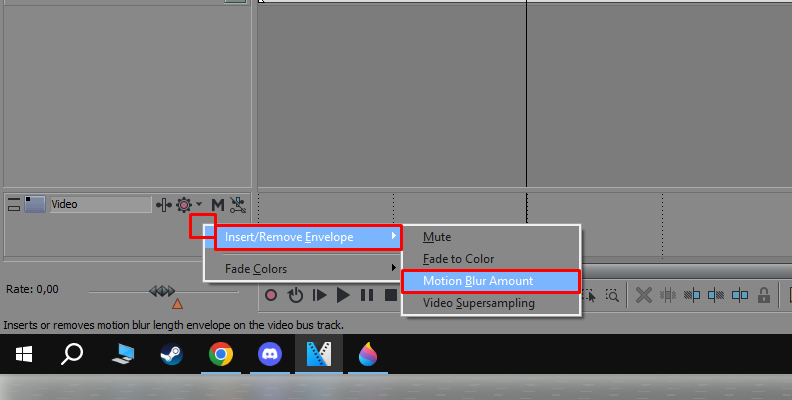
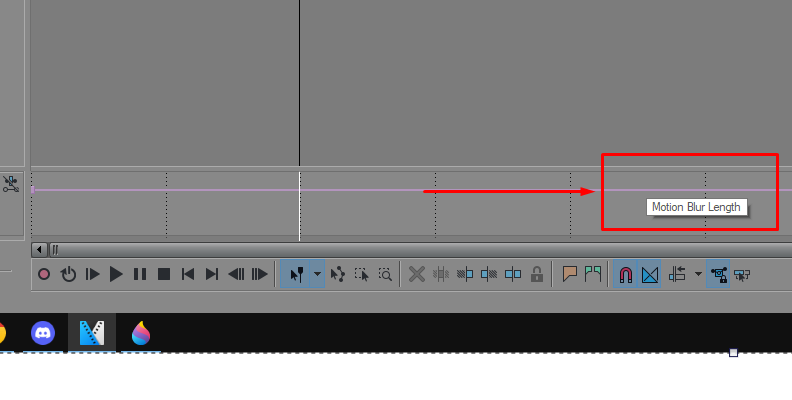
Now you can also set the motion blur length. After choosing the Motion Blur Amount envelope, you’ll notice a pink line in the video bus track; the line shows the motion blur length, and here you can control the motion blur amount to apply to your video clip.
Step 5. Adding Motion Blur
To add the motion blur effect to the video clip in your timeline, drag the pink line up and down to increase or decrease the motion blur amount in your video clip. The more you raise it, the blurrier your video will get, so make adjustments until you reach an ideal blur level.
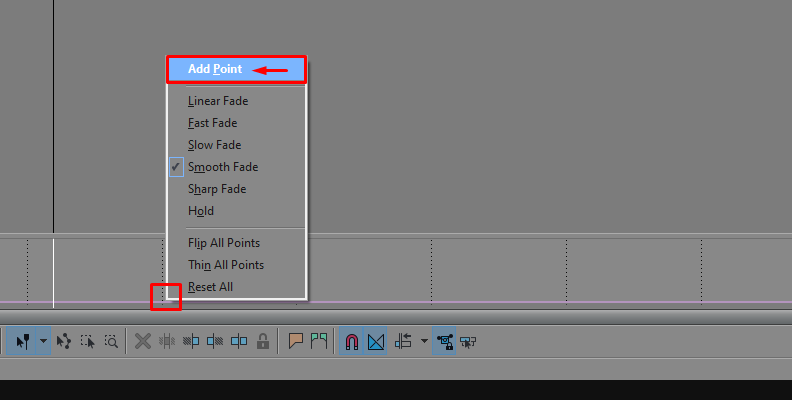
To add the motion blur effect to a single clip or as a transition in a particular part of the video clip, you can do it by adding keyframes in the pink line in the video bus track. Create keyframes by double-clicking in the timeline or right-clicking on the video bus track, then selecting Add Point from the dropdown menu.
Create more keyframes at the beginning and end of the video clip or part of the video you want to add the motion blur effect.
There are two ways to adjust the motion blur effect from your keyframes. The first and more straightforward way is simply by clicking and dragging the keyframe up and down.
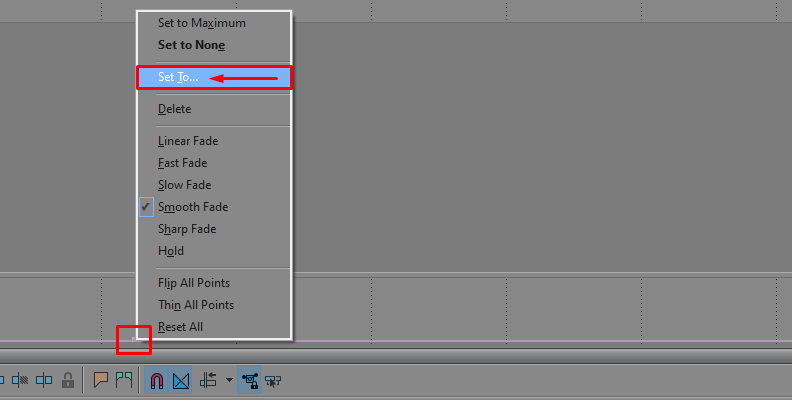
The second option is to right-click the keyframe and select Set To, then type in the percentage number of motion blur you want (the line starts at 0, and the top end is 100%).
After you chose the motion blur length and amount, you can check the video preview box to see the result.
Step 6. Render Your Video
The last step is to render the video to export it. You can preview how your video will look rendered.
Select a section of the video clip you want to play.
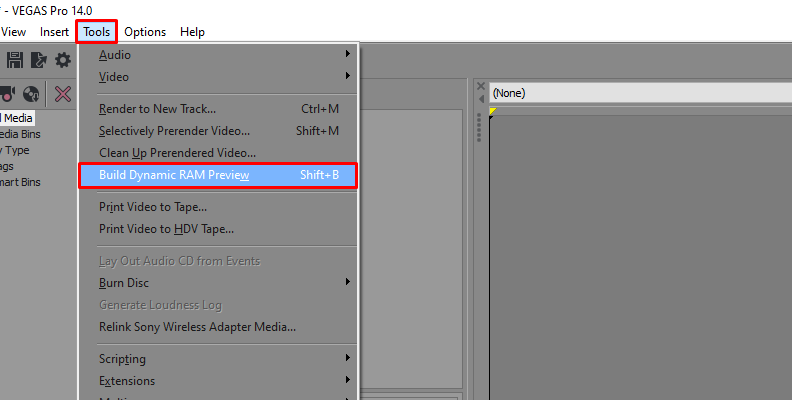
Go to the menu bar Tools and select Dynamic RAM Preview.
![]()
Preview your videos before exporting to ensure everything looks good. Follow these steps to export your video once you finish your video editing.
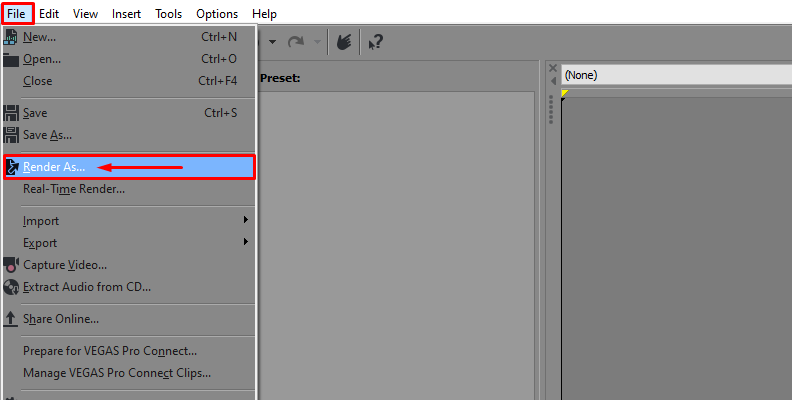
Go to File > Render As. Choose the video format and template.
![]()
Click Browse to select the destination folder, and click Save.
Name your video and click Render to begin the rendering process.
Wait for it to finish rendering. Then choose Open Folder to go to your exported video.
How to Add Motion Blur Effect in VEGAS Pro with Boris FX Continuum
Even though VEGAS Pro offers good motion blur effects for your video clips, professional filmmakers often want to have more control over the settings and parameters, like positioning the effect’s center or the effect’s behavior.
Continuum's motion blur filter offers endless customization to bring to life a realistic moving effect. Thanks to carefully-crafted optical flow technology, you’ll be able to fine-tune your motion blur effect and create a professional result in no time.
Step 1. Set Your Project
Import all your video clip or open a new project to add motion blur. Follow the path File > Import > Media or drag video clips recorded to VEGAS Pro.
Step 2. Add BCC Motion Blur to Your Video Clips
VEGAS Pro allows you to use external audio and video effects in your video clips. Download and install your Continuum to use it as a third-party effect inside VEGAS Pro.
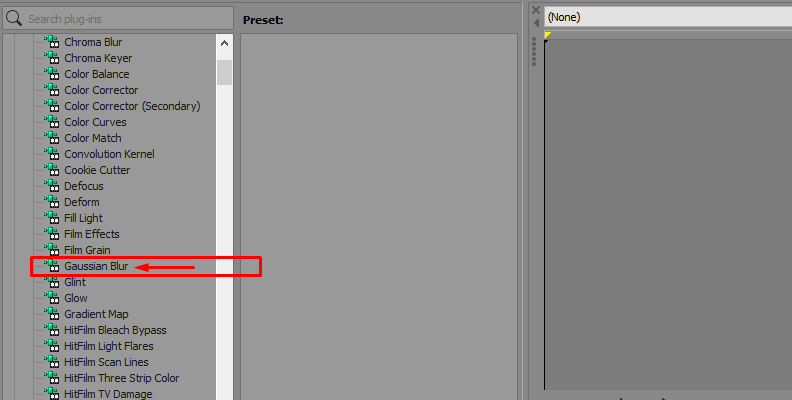
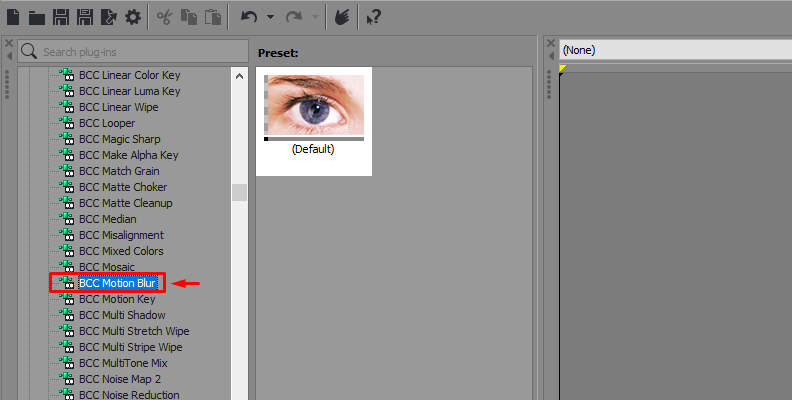
To add the effect to your clips, go to the Video FX tab and search for the BBC Motion Blur.
![]()
Drag and drop the filter to the clip where you want to add motion blur. You can add the motion blur effect to the entire track to create a time-lapse video from multiple video clips in your timeline by dragging the effect to the whole video track.
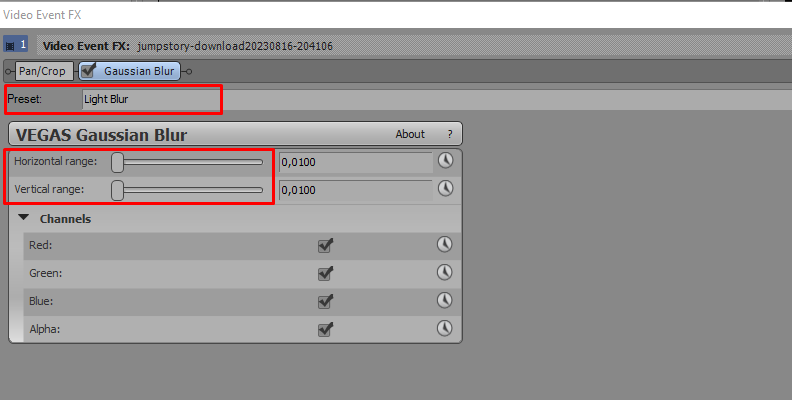
Step 3. Adjust the Motion Blur Effect
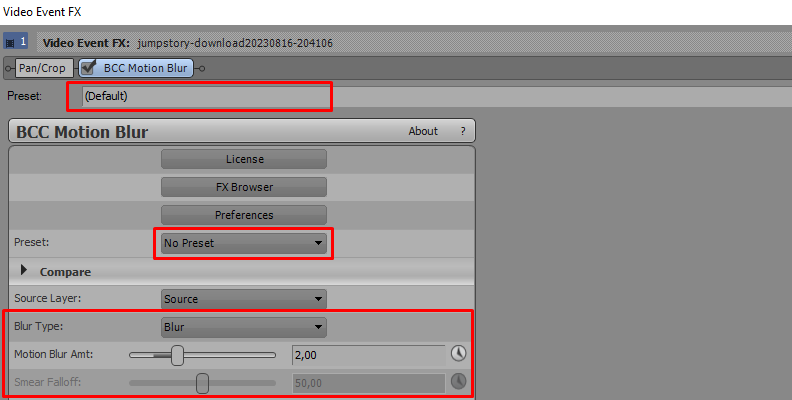
When you drag BCC Motion Blur on to your clip, you can change and adjust its setting from the Video Event FX. With BCC Motion Blur effects, you can adjust and customize many more parameters, such as the amount of blur, type, direction, and focus.
![]()
Even just by using the existing presets of each filter, you can still get impressive results. Presets are a quick way to add motion blur to your videos in VEGAS Pro, but if you want to customize the filters, I recommend experimenting with different blur effects and their settings.
Remember to save your favorite settings for your next works.
Step 4. Render Your Project
Check your clips using Dynamic RAM Preview from the Tools menu, which will open a video preview box. Finally, render your video by going to File > Render As. Choose the video format and template, and name your video. When you're ready, click on Render and wait for the process to end.
Final Thoughts
Motion blur is an effect professionals and independent filmmakers often use in their video productions to create a dynamic and engaging effect. With video editing software like VEGAS, you can quickly and easily add motion blur effect anywhere; however, as you develop your skills, you'll need more customizable tools to create unique effects.
Boris FX Suite gives you access to a plethora of unmissable products: you'll get award-winning FX plug-ins for all your post-production needs, including Continuum's Motion Blur.
These products are available for most video editing programs and include motion blur effects that can transform and upgrade your video footage. With Boris FX Continuum, you’ll have endless resources to get creative and bring outstanding videos to life.
Good luck, and stay creative!


