


Motion blur is amongst the most widely-used video effects in both professional and amateur videography.
Video editors rely on the motion blur effect to "enhance" scenes with movement and action, making the movement look better and, in most cases, more realistic. Motion blur can also be used to emphasize the sense of speed and movement.
This guide will teach you how to add motion blur to a video clip in Adobe Premiere Pro, so without further ado, let's crack straight into it.
What is a Motion Blur Effect?
The motion blur effect is essentially playing with your recording device's shutter speed and shutter angle.
Shutter speed is a term we use to define how long your camera's sensor is exposed to light. To further simplify, it's how much time we "give our camera" to "capture the moment" upon clicking the button, as that's when the shutter opens and allows light to get in contact with the sensor.
The longer the shutter speed, the more motion blurring you'll have in your footage.
Nowadays, we can create motion blur even if we didn't plan to add the effect during the recording phase. Adding motion blur, and artificially adjusting shutter angle, speed, and direction has never been easier, thanks to modern editing software.
What Does the Motion Blur Effect Do?
The blur image "trick" adds a lot of creative value, both in photography and videography.
It can give viewers the impression that a character moves very quickly (like Superman flying) or that someone travels through time. It's also used to make video footage look more cinematic.
The motion blur effect is also regularly used in music videos for smoother transitions, in gaming edits for the visual "wow" factor, and in "everyday videos" to make the movement of animations and animated graphic elements (logos, etc...) look smoother and "fancier."
How To Add A Motion Blur Effect In Premiere Pro
This section contains two methods to help you learn how to add motion blur in Premiere Pro.
Let's start with the first one.
Method 1: Boris FX Continuum (Plug-in)
The Boris FX Continuum contains many useful video editing tools, including filters, transitions, glows, motion blur, and lots of other presets. A free trial version is available.
Once you download and install it, follow the steps below to add motion blur to your video clips.
Step 1: Setting up the sequence
Open Premiere Pro, import the video material you want to work on, then drag and drop a clip to your timeline. This will automatically create a sequence.
You can now move the playhead, pause and play the video to preview it or cut it so you can apply the motion blur effect to only specific parts instead of the whole shot.
Step 2: Adding motion blur
Navigate to the Effects panel within Premiere Pro, then type "Motion Blur" in the search bar. Click on the "BCC Motion Blur" effect and drag it over the clip on your timeline.
The motion blur effect is now applied to your video. If you play it, you'll see an immediate difference. However, the result is not always perfect for everyone right off the box.
Step 3: Adjust the parameters
You can modify the original values to change the effect's behavior.
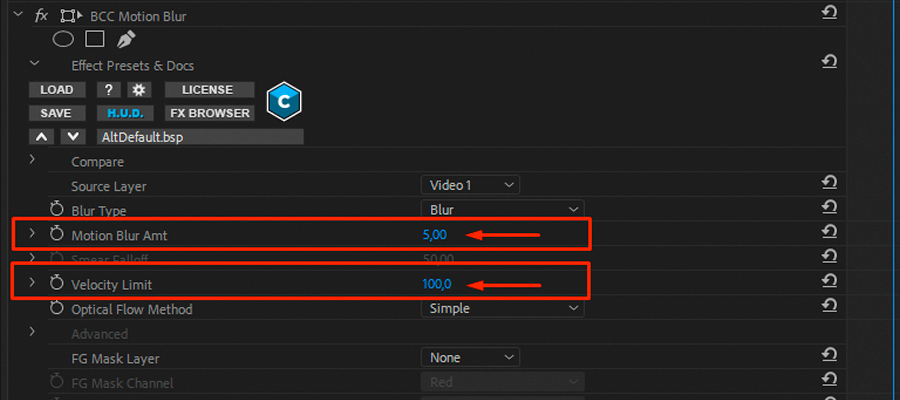
![How To Add Motion Blur In Premiere Pro]()
"Motion Blur Amt" defines the overall blur amount and intensity of the effect.
"Velocity Limit" helps "target" better, with higher values applying motion blur to all motion, while lower values apply the effect only to faster-moving areas.
You can also change the blur type by choosing one of the two options available, "Blur," and "Smear," depending on what works best for your footage.
![Changing the motion blur type]()
Setting this to "Blur" will cause the motion to be blurred in two directions, while "Smear" will make it blurry only in one direction.
This motion blur tutorial by Boris FX covers each setting in detail, and it would be very helpful for you to get a visual explanation of all the settings this Continuum effect offers, so we recommend watching it.
Step 4: Create a mask to isolate part of the footage
Sometimes you don't want to apply motion blur to the entire frame. Depending on the shot, it's often smart to isolate a specific area using a mask.
This is where Continuum's Mocha feature shines, as it makes drawing a mask much easier.
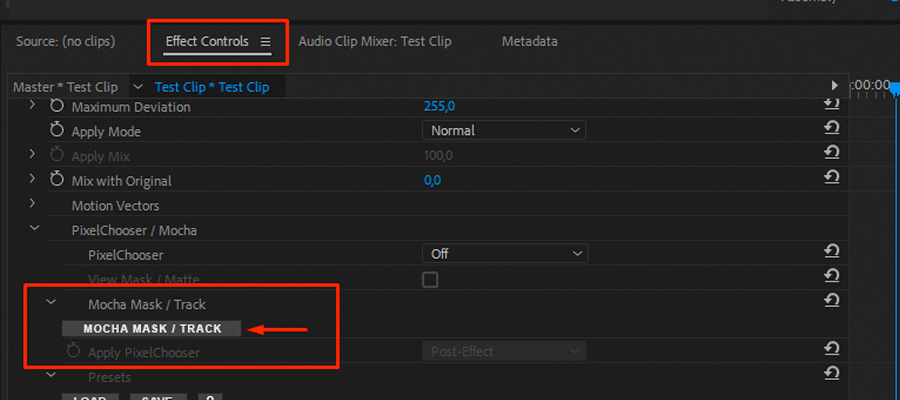
You can access Mocha by clicking on "Mocha Mask / Track" within the "Effect Controls" panel, as shown in the image below.
![Launching Mocha in Adobe Premiere Pro]()
Here's a full tutorial for the powerful, award-winning Mocha tool that covers everything you should know.
Step 5: Save the preset and export
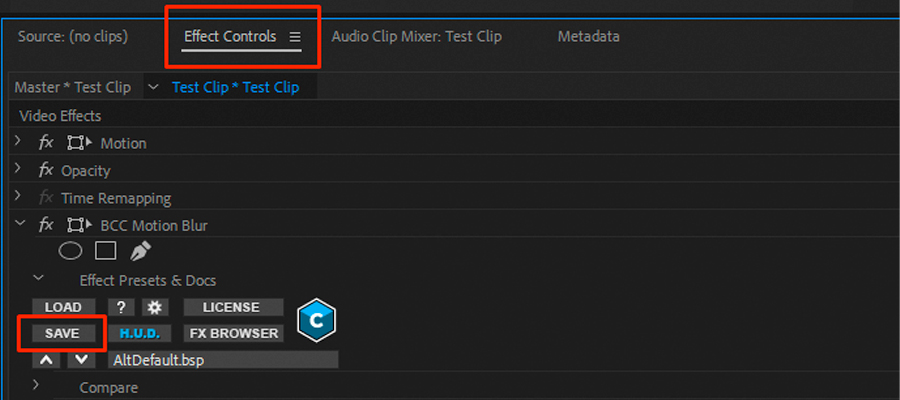
One great thing about Continuum's tools is that you can save custom presets and load them in the future if you ever require the same motion blur for future videos.
![Saving current settings into a preset within the BCC Motion Blur effect control panel]()
Also, you can try some of the already-included presets and see if any of them provide the exact motion blur you have in mind.
That's it! Adding motion blur in Premiere can be an extremely simple task to accomplish.
Method 2: Premiere Pro Directional Blur Effect
Another method to add Premiere Pro motion blur to your video is by using the Directional Blur effect.
Here's what to do:
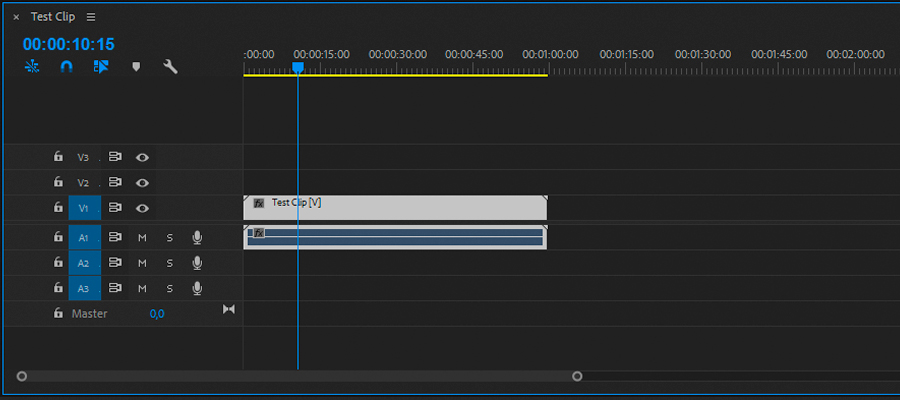
Step 1: Import the video to your timeline
Just like in the previous methods, the first step is always to import the video you want to add motion blur to within Premiere Pro. You can do this by dragging it from your desktop to the timeline.
![]()
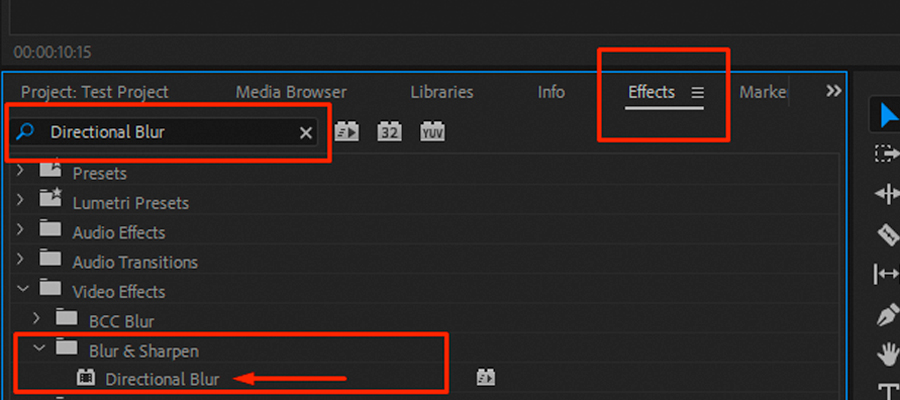
Step 2: find and apply the Directional Blur effect
Click on "Effects" and then type in Directional Blur. Find the effect, click on it, then drag and drop it over the video on your timeline.
![]()
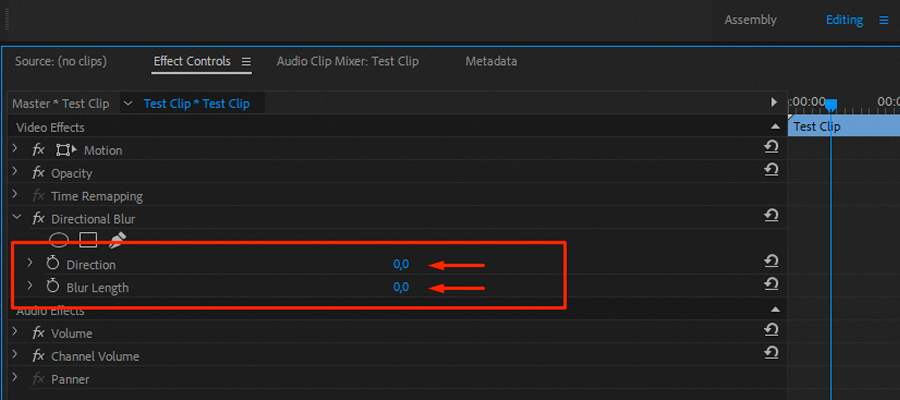
Step 3: Adjust settings for the optimal motion blur
The Directional Motion Blur effect has two parameters you can adjust to get the most optimal result for your content type. Different shots could benefit from different blur effects, depending on the composition's shutter angle, the object in question, the direction, and more.
The two "Directional Blur" values you can adjust to customize the motion blur of your video when this effect is applied are "Blur Length" and "Direction."
Changing the direction and blur length is easy, and it only requires moving the sliders within the effect controls panel. "Blur Length" will determine how much blur you get, and "Direction" will change the angle at which the blur occurs. You can make it horizontal or vertical just by changing the number.
![]()
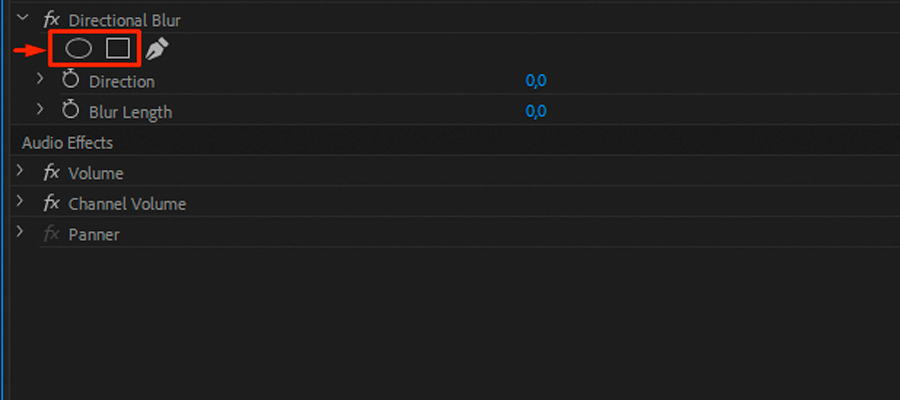
You can also add a directional blur mask to only one part of the shot if you wish to give this effect to only a logo or an object within your shot, and not the entire scene, as well as to create a more subtle motion blur on only one part of the image.
![]()
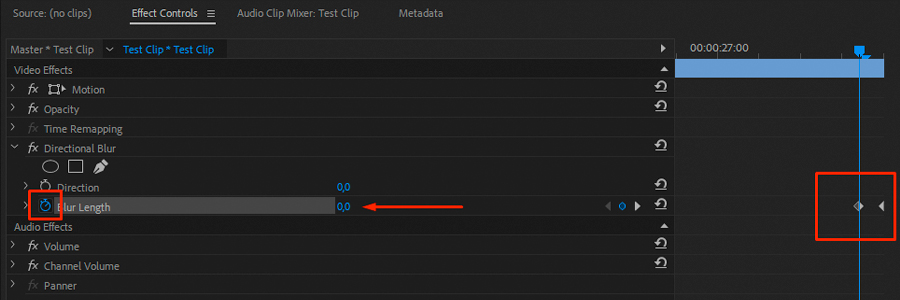
To add motion blur and create a transition using this effect in Premiere Pro, follow these steps:
Now when you play the video you'll have a smooth transition from the first shot to the next one with added motion blur. You can fine-tune this with different values, or add in a transform effect for a more creative final result.
- Place two videos on your timeline, then add Directional Blur to both. Reminder: You can add motion blur by dragging the effect over both videos.
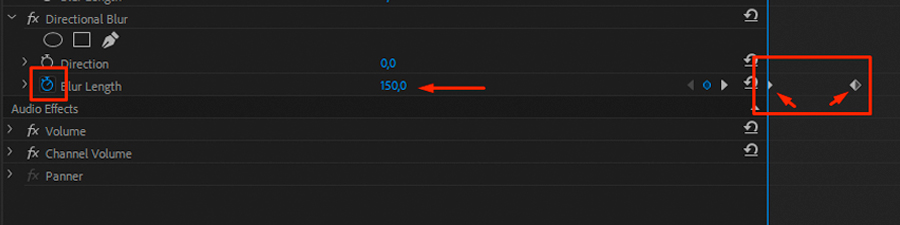
- In the "Effect Controls" panel, move the "playhead" to the very last frame of the first video, then increase the "Blur Length" amount to a higher number, like 150, and click the "Stopwatch" button to record a new keyframe.
- Move the "playhead" three frames backward, set the blur length to zero, and click the "Stopwatch" button once again to record another keyframe.
![]()
- Click on the second video and move the "playhead" at the very start (the first frame of the video). Set the blur length to a higher number as you did in the previous step, and click the "Stopwatch" button to record a keyframe.
- Move the "playhead" three frames forward, set the blur length to zero, and record a new keyframe using the "Stopwatch" button once again.
![]()

Final Words
Now you know how to add motion blur to your videos in Premiere Pro. It should be relatively easy to do using the methods listed in this guide.
The Premiere Pro Motion Blur effect listed in method #2 is free to use, so if you don't want to add motion blur using a plug-in, and instead prefer doing it manually for free, skip method #1 and refer to method #2.
Hopefully, these tips were useful and will help you take your video editing skills to the next level.


