


With the abundance of modern software available today, it's difficult to resist editing your photos whether you're a professional photographer, a graphic designer, or an avid social media user.
The potential to make your image stand out with a few tweaks and filters is too good to ignore, particularly if you value style and aesthetics.
As we are all aware, Photoshop is one of the most extensively used image-editing software programs. In this guide, we'll assist you in learning how to use it to add various lighting effects to your images, including realistic light rays, outer glow, and more! These effects can fully transform your work and take it to the next level in the most creative sense.
Without further ado, let's get straight into it.
How to Add Light Effects in Photoshop
To create realistic light rays or add any type of lighting effect to your image using Adobe Photoshop, you can use the wide variety of tools, filters, the lights panel, and presets available. There are many approaches, some different than others, but they're all viable, and you can use whichever works best for you.
However, for this specific guide, we'll provide the exact steps we use to add light rays and other light effects to images in Adobe Photoshop, so here's what you need to do.
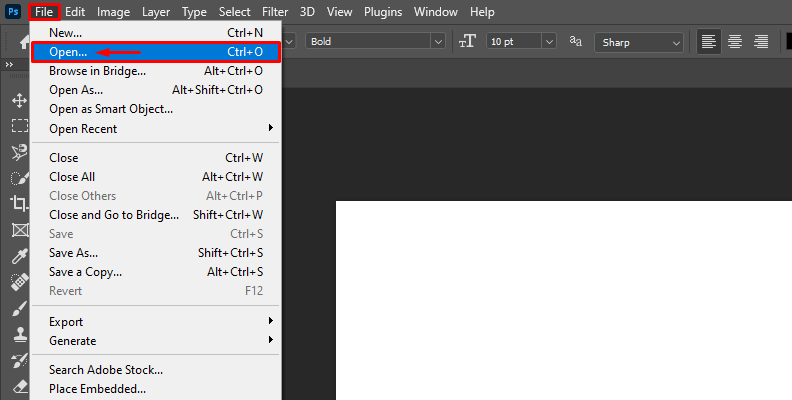
Step 1: Open the Image
Open Photoshop and load the image to which you want to add lighting effects. We prefer creating a new project so that you don't experiment on an already-existing one and risk making any unwanted modifications to your work.
Step 2: Duplicate the Background Layer
To avoid making changes directly to the original image, duplicate the background layer. Right-click on the background layer in the Layers panel and choose "Duplicate Layer." This should be standard practice for all future Photoshop work.
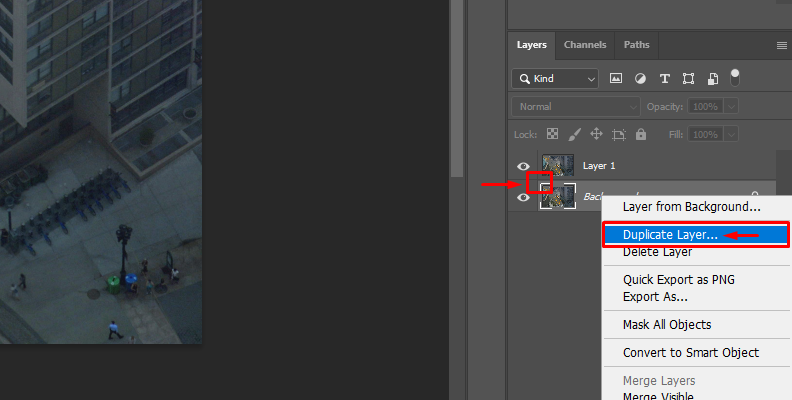
Renaming layers will also help you organize your work better in more complex projects.
By having separate layers for every change, it will be much easier to revert anything if needed later on, and avoid having to undo your latest steps to fix a mistake you made long ago.
Step 3: Create a New Layer
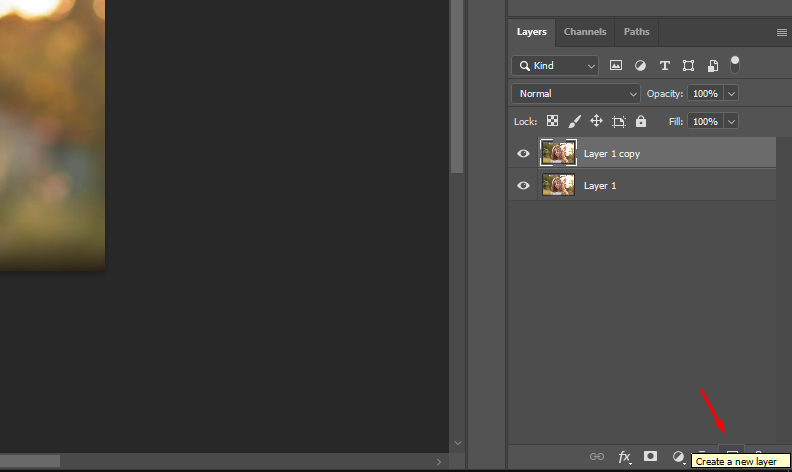
Click on the "New Layer" icon at the bottom of the Layers panel to create a new layer. This will be the layer where you'll apply the lighting effects.

Step 4: Choose the Brush Tool
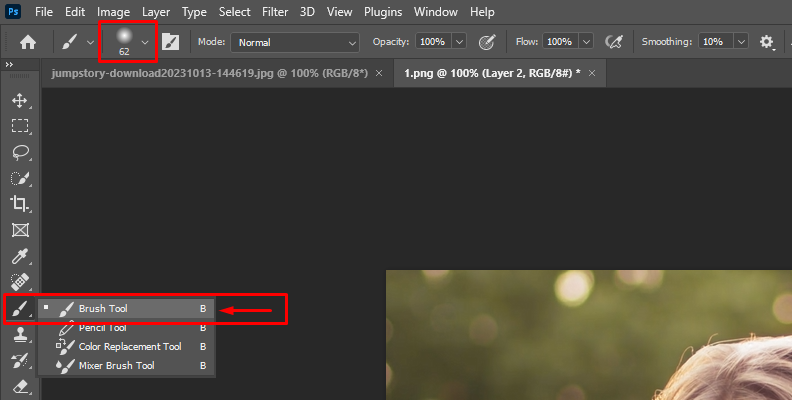
Select the Brush Tool (shortcut: B) from the toolbar. Choose a soft brush with a low hardness for smoother blending of the lighting effects.
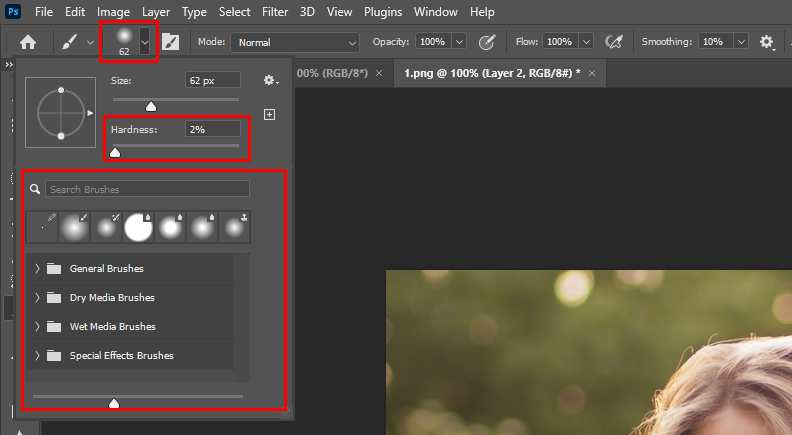
On the right, you can open the brush settings panel and navigate to the shape dynamic subsection to further modify your brush's look.
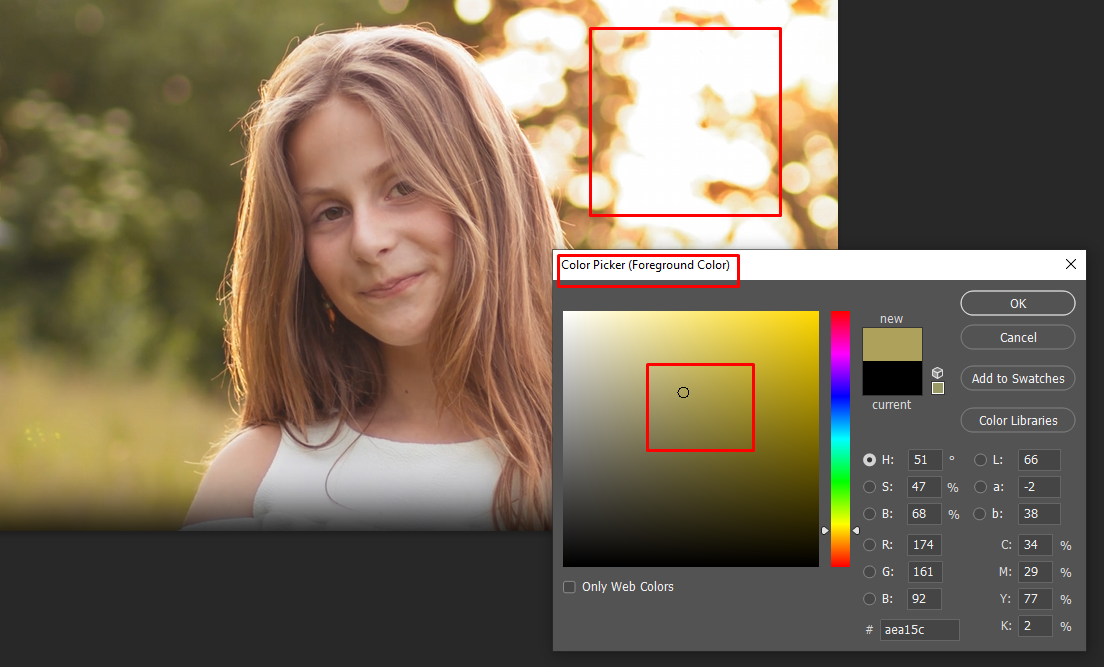
Step 5: Set Foreground Color
Set your foreground color to the color you want to create light effects with. Usually, a warm color like yellow or orange works well for simulating light. This will depend on the environment shown in the image as well as the colors in it.
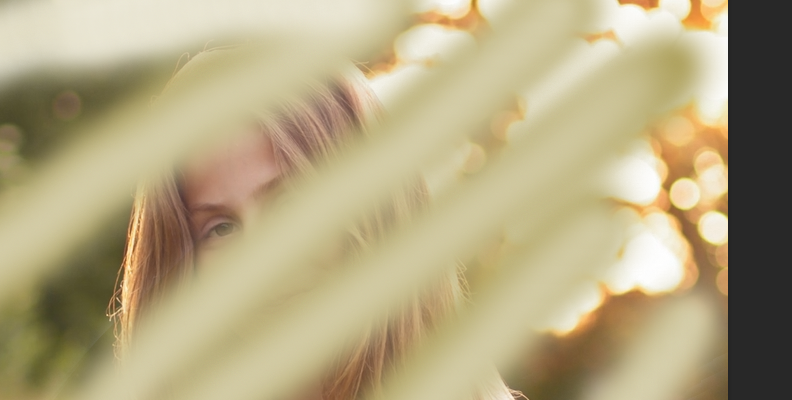
Step 6: Paint the Light
On the new layer you created, use the Brush Tool to paint where you want the light to appear. Start with gentle strokes and build up the intensity gradually. Experiment with different brush sizes and opacities for a more realistic effect.
Don't feel discouraged if the current results look like they're going nowhere, because the real magic happens when you adjust the blend mode and start refining. For example, we created the image below with as "rough" of a brush stroke as possible so you can see how much difference it makes when you switch to a different blend mode later on.
Step 8: Adjust Opacity
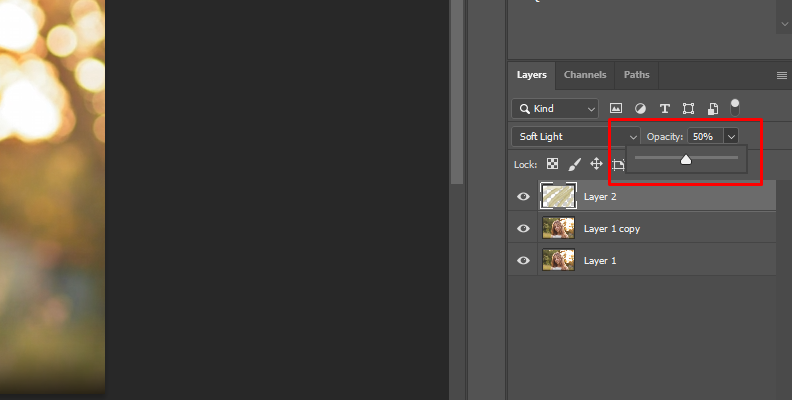
Fine-tune the intensity of the effect by adjusting the layer opacity. Lowering the opacity makes the effect more subtle, while increasing it adds more drama.
Step 9: Add Highlights
Create a new layer and set the blend mode to "Overlay" or "Soft Light" again. Use a white brush to add highlights to the areas where the light would naturally hit. This enhances the realism of the effect.
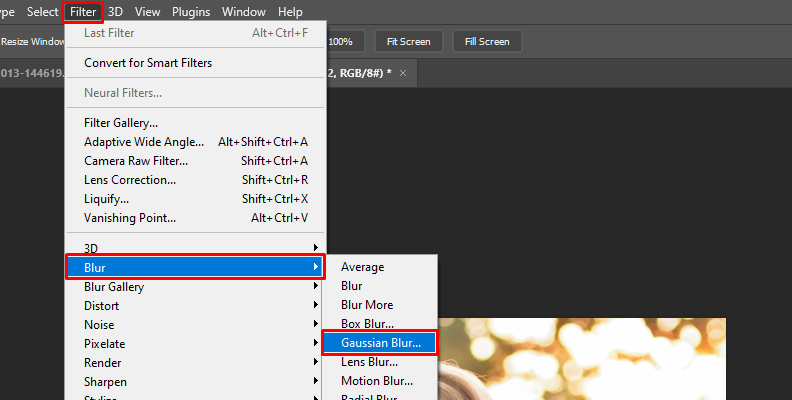
Step 10: Apply Gaussian Blur
To soften and diffuse the lighting, apply a Gaussian Blur to the layers containing the lighting and highlights. Go to Filter > Blur > Gaussian Blur and adjust the radius until you achieve the desired level of softness.
Step 11: Refine with Layer Masks
If you need to hide or adjust specific areas of the light effect, use layer masks. Add a layer mask to the lighting layer and use a soft brush to paint in black to hide parts of the effect or in white to reveal them.
Step 12: Fine-Tune Colors
To make the effect more integrated with the overall color scheme of the image, you can use adjustment layers such as Color Balance or Hue/Saturation. This allows you to tweak the colors to match the scene.
That's all there's to it!
The last step is to save your changes and export the image.
How to Add Light Effects in Photoshop Using Boris FX Optics
This section covers adding light effects in Photoshop using Boris FX's renowned Optics plug-in.
Optics is available both as a standalone software and as a plug-in for the most popular editing software on the market, including Photoshop.
You can try a free version of Optics on Boris FX's website.
Before we begin, it's important to note that plug-ins are not essential for creating masterful work in Photoshop. However, they do make things such as adding a lighting effects filter, a point light, a light source, a directional light, or anything else in terms of effects, much easier, especially if your Photoshop skills are not at the expert level yet.
So, without further ado, here's how to add light effects in Photoshop with Optics.
Step 1: Launch Photoshop, Import Your Media & Launch Optics
If you have Optics installed as a plug-in for Photoshop, launch the software and import your image using the same method shown in the section above.
Then, launch Optics by going to the "Filter" section and then choosing Boris FX -> Optics, as shown in the image below.

Optics will automatically load the image you have open in Photoshop.
Step 2: Apply The Effect Of Your Choice
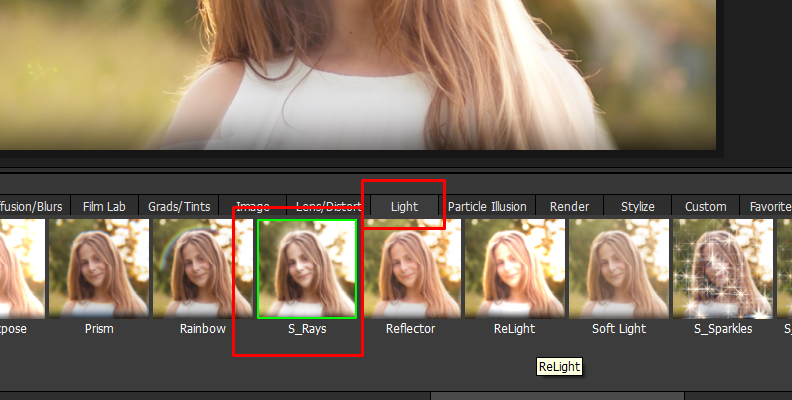
Optics is capable of fully transforming your images with just a few clicks, as well as offering unlimited customization options for the effects applied. But, since we're aiming to add lights specifically to this image, head over to the "Light" tab and choose the effect that seems most suitable for your image.
For this example, we'll work with the "S_Rays" effect as it closely matches the structure of the image.
Once you select the effect, you'll immediately notice a change within your image.
Now, what makes Optics so user-friendly is the tools it offers to modify an image not only by changing numbers in a panel but by moving various indicators on your screen and previewing the changes in real time.
So, in this example, you can move the radial indicator and position it anywhere in your image, depending on where you want the rays to be coming from.
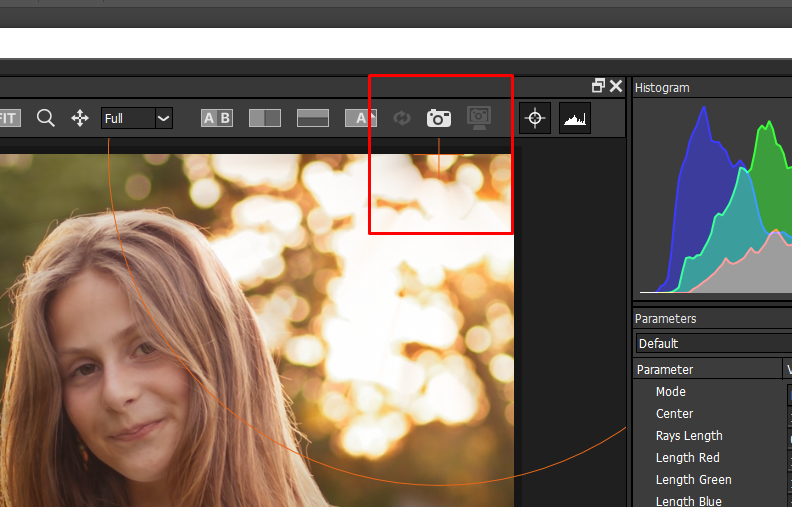
Once you find the right position, you can move on to customizing various parameters for the effect by using the panel on the right.
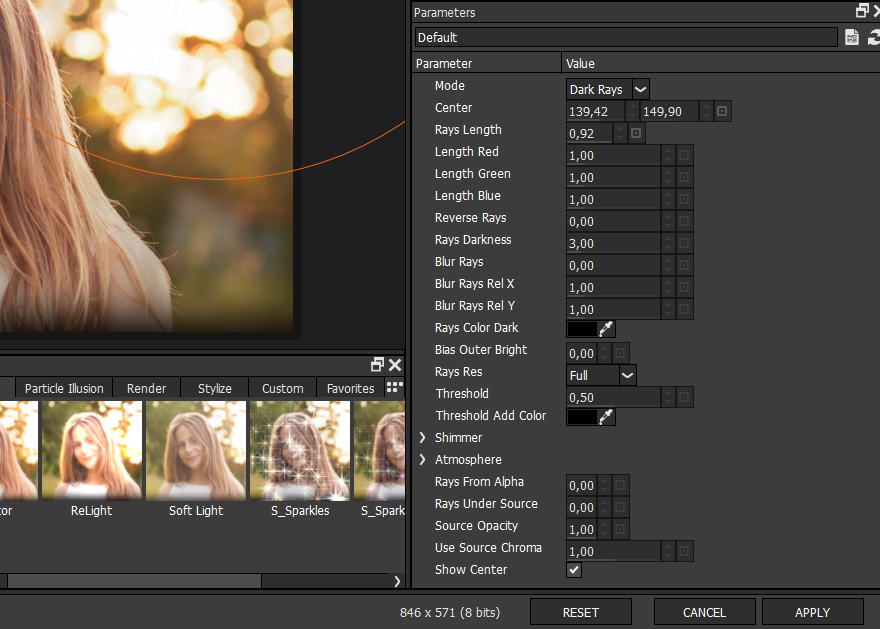
We changed the mode from "Light Rays" to "Dark Rays", increased the "Length Blue" parameter slightly, and added a little bit of blur.
This works for this specific image, but yours may need different customizations. Feel free to experiment, as adding and reverting changes using Optics is easy.
When done, simply click the "Apply" button in the bottom-right and save the changes. Then, you can export your image, or create different versions to compare.
Last but not least, here's a detailed, step-by-step video explaining how to add light effects in Photoshop using Optics that you may find very helpful if you're just starting out.
This tutorial covers adding various lights, light stripes, and more, all coupled with a thorough explanation that should help you do this for all your future work without additional help.
Final Words
That covers everything you should know when it comes to adding additional light, or light rays in Photoshop, both the free way and by using a renowned industry-leading software.
Hopefully, this will take your work to the next level whenever you decide to edit in the near future and apply these methods.
Good luck!
FAQ
This section includes some of the most frequently asked questions and answers on the topic. Hopefully, it should help you find information quickly about any unclear topics.
How do you add sunlight effects in Photoshop?
You can add sunlight effects by creating a Lens Flare in Photoshop. This effect, along with some combination of a light effect, which we cover in this guide, could fully simulate sunlight within your image.
How do you add spotlight effects in Photoshop?
There are numerous ways to add a spotlight in Photoshop.
One of the easiest and most user-friendly ways would be to use Optics, as there are visual, real-time previews throughout the whole process, and you can pick which type of spotlight effect is best for your image, then revert it or replace it with ease, without having to go through the whole, manual creation process from scratch.


