


In film and video editing, effects play an important role in improving the overall viewer experience in different ways. Some are used to make the transitions between shots much smoother, and others to "isolate" important information on-screen or create visual "wow" factors.
Without a doubt, effects are found in almost every modern edited material we stumble upon, whether a music video, a video game trailer, a film school project, or a blockbuster Hollywood movie.
In this guide, we'll help you learn how to add effects in Adobe Premiere Pro, one of the world's most popular editing software. But, we'll also explain a few different types of effects and how you can use them to enrich your work.
Since we have a lot to cover, let's end this introduction part here and jump straight into what you need to know about video effects and Adobe Premiere Pro.
Different Types of Video Effects
In Adobe Premiere Pro you'll find various effects available in the effects panel. These won't only be video-related, but audio effects as well.
From the visual effects category, the most commonly used ones are:
Basic Transition Effects - Cross Dissolve, Fade In/Out, Dip to Black/White, Wipe, Peel, etc.
Stylize Effects - Cartoon, Posterize, Mosaic, etc.
Distortion Effects - Twirl, Bulge, Lens Distortion, Ripple, etc.
Keying Effects - Ultra Key effect, Color Key, Luma Key, and Chroma key.
There are other, often considered more "advanced" effects, such as the warp stabilizer used to create smooth motion when the recorded material suffers from camera shakes, etc.
From the way the effect controls panel is integrated within Adobe Premiere, you'll also come across a section of effects called "fixed effects," which are Motion, Opacity, Time Remapping, and Volume.
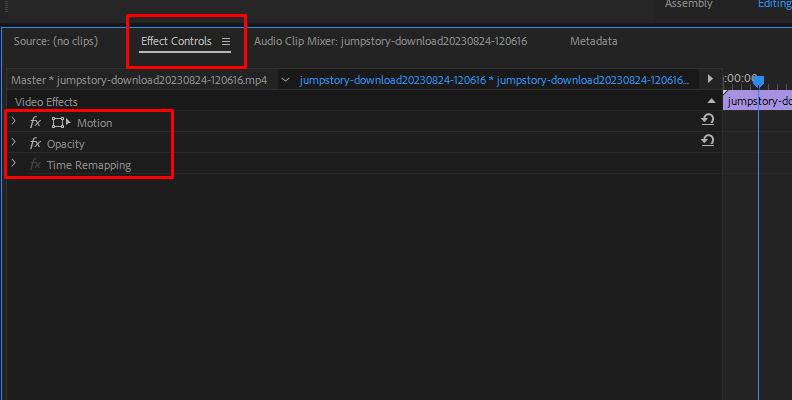
These are applied automatically to any video you add to your timeline by default, and you can modify their values and parameters by selecting the video and opening the effects control panel.
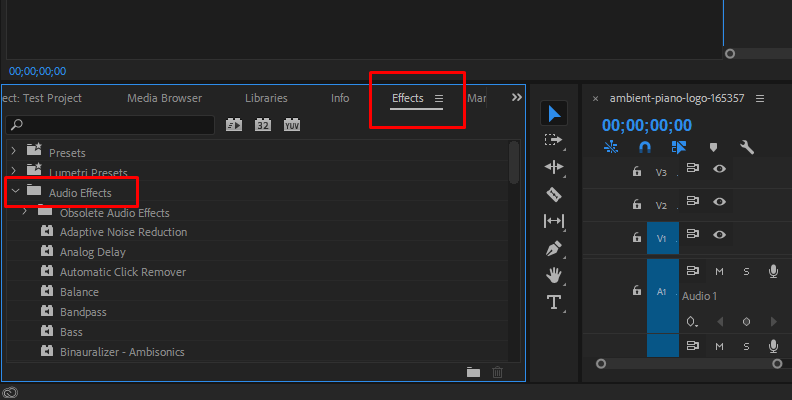
Within Adobe Premiere Pro, you'll also find audio effects that you can apply to any video that has an audio track on your timeline, as well as to single audio clips. They can be used to reduce background noise, filter out some frequencies, "suppress" the audio in some parts of your clip, and more.
These audio effects are modifiable the same way as video effects, within the effects panel that you can access by clicking on your clip and then selecting "Effect Controls" in the top-left corner of the screen.
Some effects available in Adobe Premiere Pro, both audio and video, come with effect presets that make them much easier to use, though you won't find as many presets as you would when using a third-party effects pack, such as Continuum or Sapphire by Boris FX.
In Premiere Pro, you can also open the "Presets" folder which is first on the list under the "Effects" panel, and find an effect preset to apply to one of your clips.
You can also create your own presets, which we'll get into a little bit further down the guide.
You don't need to overcomplicate things when it comes to choosing which effects to add to your videos in Adobe Premiere. Something as "basic" as the Dissolve Transition can be regularly found in high-budget professional films.
It's all about knowing how to use the effects and what their purpose is.
Luckily, we have a guide on how to add video transitions in Premiere Pro which covers some of the reasons why you should consider making this a part of your video/project in the first section.
How to Add Effects in Premiere Pro
Now that we know more about the effects available in Premiere Pro, let's take a look at some of the steps you need to follow to properly add them to your clips.
Please note that the steps may only slightly vary depending on the version of Premiere Pro you're using, but generally, the process should be almost identical.
Step 1: Launch Premiere Pro and Create a New Project
First, you need to launch Premiere Pro on your PC and create a new project. We recommend creating a new project so that you don't cause any unwanted changes that cannot be reversed (if you accidentally save) to an already-existing project that's in progress.
It's best to experiment with a fresh project, so after you make one, it's time to import media.
Step 2: Import Media (Clips You Want to Add Effects to)
Now that your test project is created and all set up, you need to import video or audio material. To do this, select the "Project" tab in Premiere, then right-click on an empty space and choose the "Import" option, as shown in the image below.
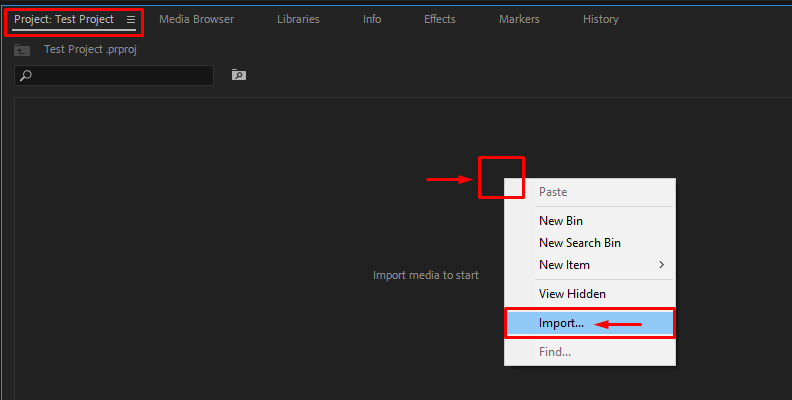
Then, select your material and import it within the software.
Step 3: Add Video/Audio Material to Your Timeline
In Premiere, you don't have to do anything specific to access the timeline panel. You can already see the timeline area on the right side, except it's currently empty, so let's change that.
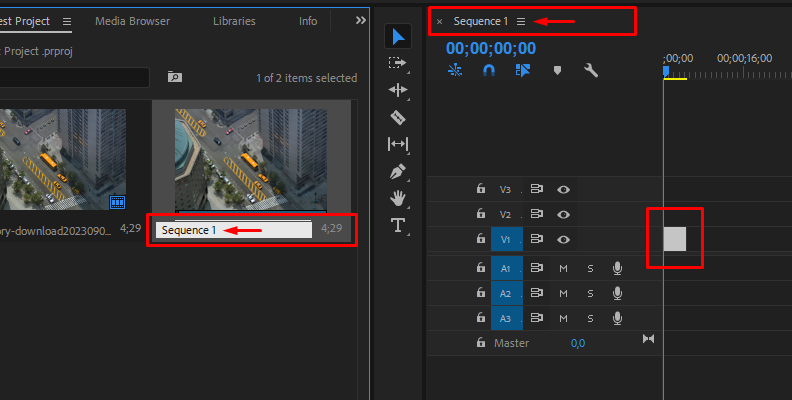
Drag some of the imported material over to the timeline panel/area, as shown in the image below. This can be anything from an image to a video clip or even sound effects.
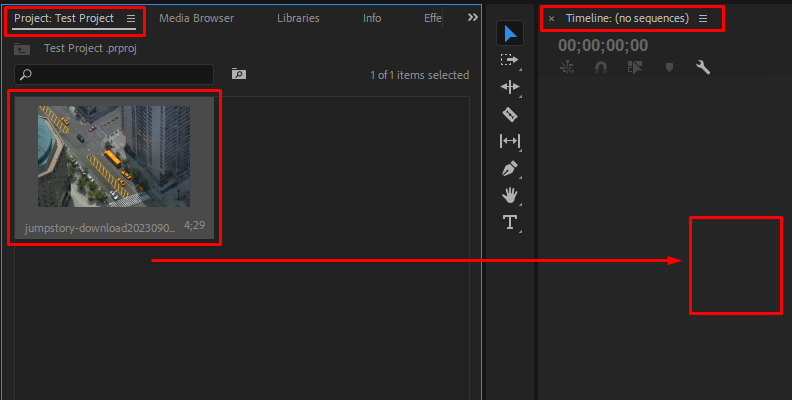
This will create a sequence.
You can rename your sequence for better project organization, which is especially useful when working with multiple sequences or on a project where others may need to change/modify things as well.
When done, it's time to start adding effects.
Step 4: Adding Your First Effect in Premiere Pro
Now that your video/image/sound effect is on the timeline, you can easily add an effect to it.
To do that, click on the "Effects" tab, then use the search bar to find an effect suitable for your current project needs.
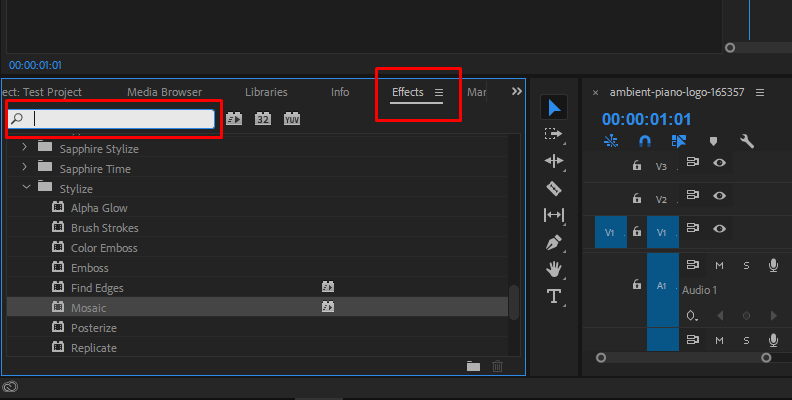
For this example, we'll use the "Mosaic" effect which is under the "Video Effects" -> "Stylize" folder hierarchy.
Click and drag the effect onto the material that's on your timeline, as shown in the image below.
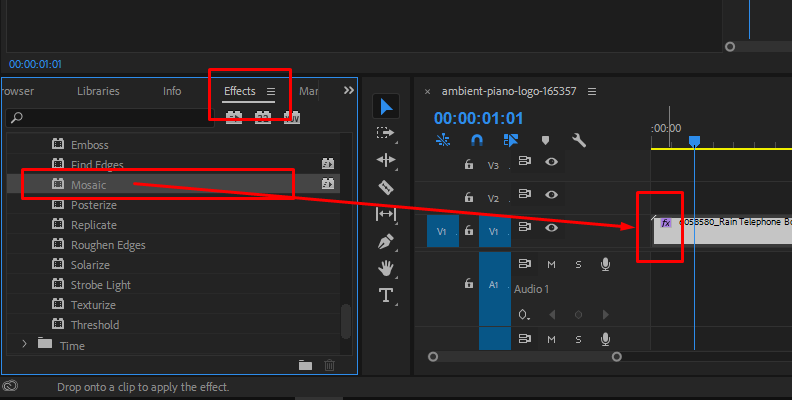
Now the effect is successfully applied!
Step 5: Modifying the Effect's Parameters
Now comes the best part of adding effects to your videos in Premiere, and that is modifying their parameters so that you get the best result possible.
To do this, select the video on your timeline that you just applied an effect to by clicking on it with your mouse. Then, head over to the top-left corner of the screen and click on the "Effect Controls" panel to open it.
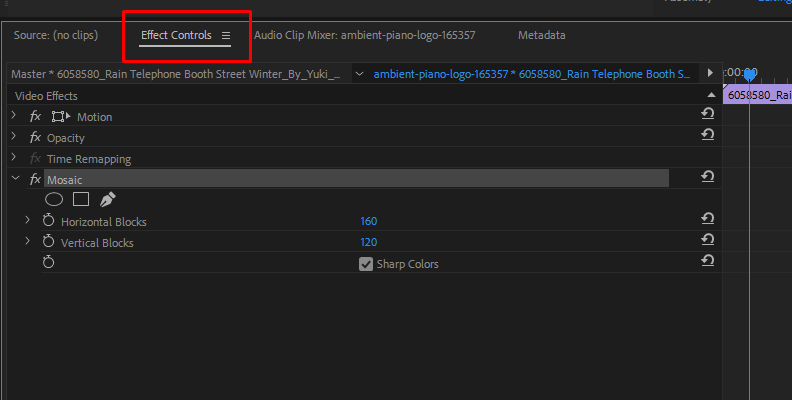
Here, you can modify any parameters that the effect offers, and preview the changes while doing so to know what works best.
When done, simply use the Control + S keyboard shortcut to save your project's changes, and that's all there's to it!
Step 6 (Optional): Creating an Effect Preset
Let's say that you really like how you modified a specific video or audio effect and you wish to use that exact same effect for a different video in the future without having to adjust the values for each one of your multiple clips.
To do this, simply right-click on the effect name after you're done changing the parameters, and choose "Save Preset" as shown in the image below.
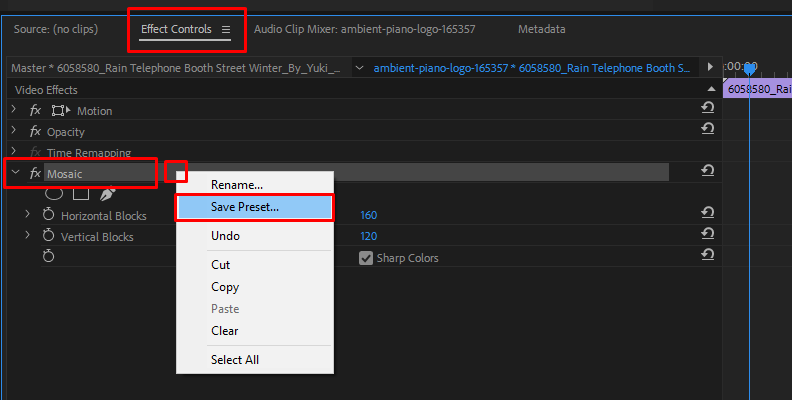
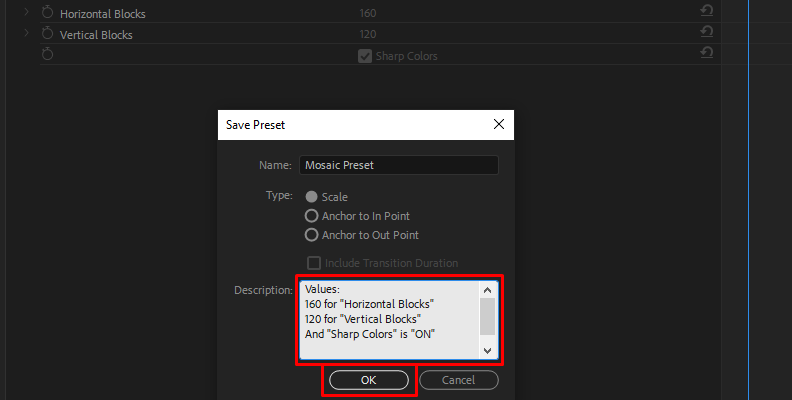
Write a quick explanation in the "Description" section so that you know what the preset is all about, then use the "OK" button to save it.
You will then be able to find the effect under the "Presets" folder, as shown in the image below.
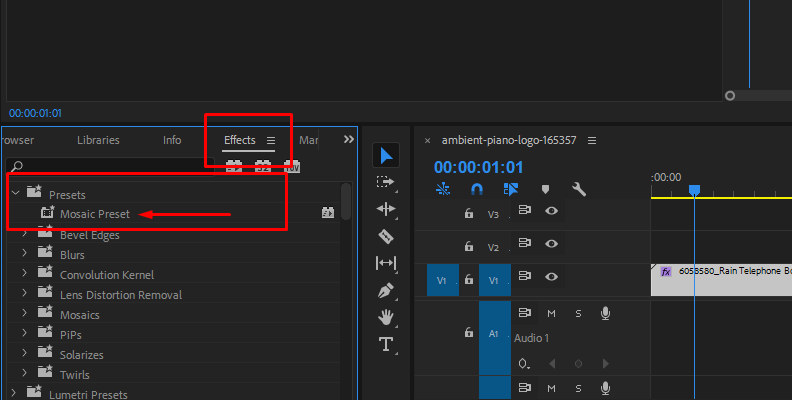
Feel free to apply your new preset to any other videos that go through your editing process in the future.
Copying/Pasting Effects in Premiere Pro
There's also a way to copy and paste attributes for effects in Premiere Pro without having to create a new preset.
You may want to take this approach if you already have way too many presets saved, or you simply don't like the effect that much to save it for future work, but you need to apply it to various other clips on your timeline, although not manually, one by one.
Here's how to copy and paste attributes for effects within the effect controls panel in Premiere:
Step 1: Apply an Effect to Your Video/Image and Modify its Parameters
To be able to copy and paste effects from one clip to another, you first need to have the effect applied. After applying the effect, modify the parameters until you're happy with the results.
This can be any effect, including some of the fixed effects that we mentioned above, like the "Opacity" and "Time Remapping."
As long as it's in the effect controls panel, you can copy and paste attributes.
Step 2: Copy and Paste the Effect's Attributes to Another Clip
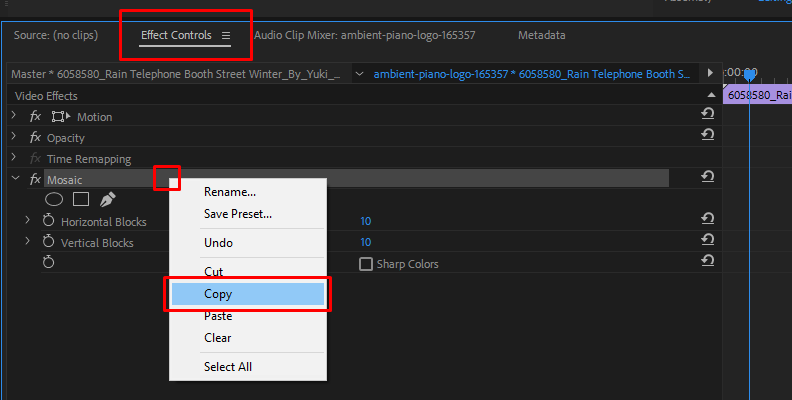
After you're done with Step #1, you need to right-click on the effect that you wish to transfer to a different video and select "Copy" as shown in the image below.
Step 3: Paste the Effect to Your Target Video
Now, select the video on your timeline that you wish to apply the effect to, and open the effect controls panel.
Right-click an empty area and choose the "Paste" option from the menu.
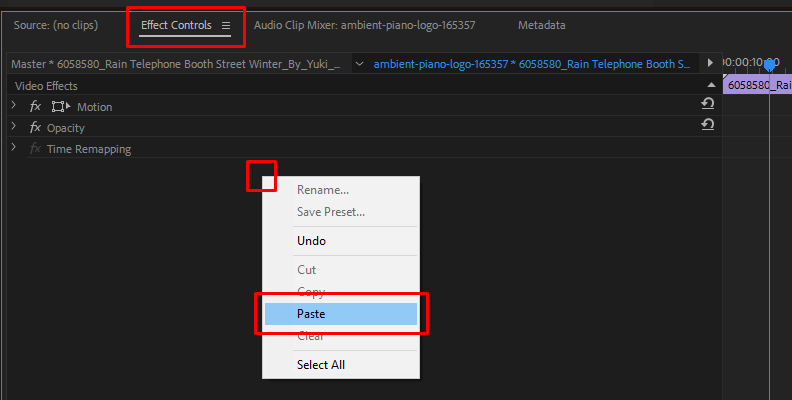
As you can see in the image below, the effect is pasted with the same parameters that we copied from the previous clip.

Please note that the "Paste" option will be greyed out if you are trying to paste a video-only effect to an audio clip on your timeline.
4. Copying and Pasting Transition Effects
When it comes to transition effects, there are easier and quicker ways to transfer them from one "pair" of videos to another.
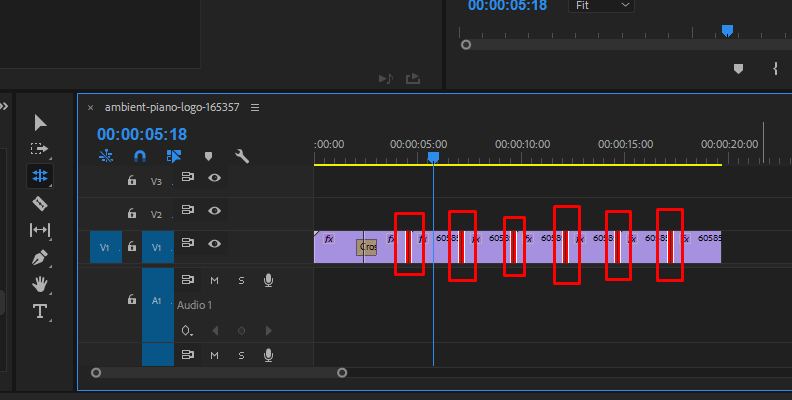
For example, let's say you have the "Cross-Dissolve" effect applied to two videos, as shown in the images below.
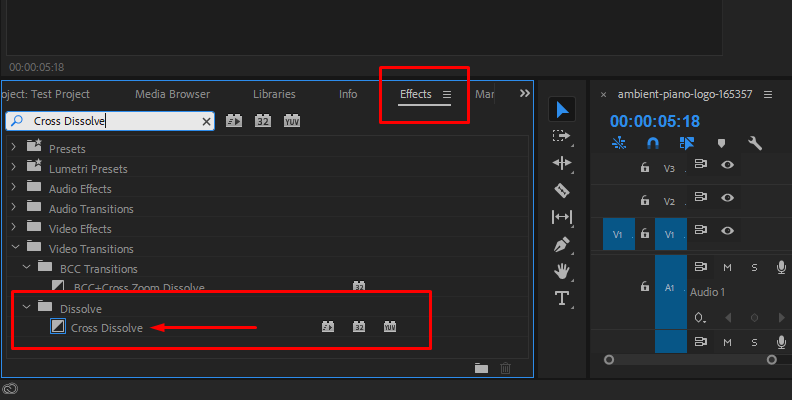
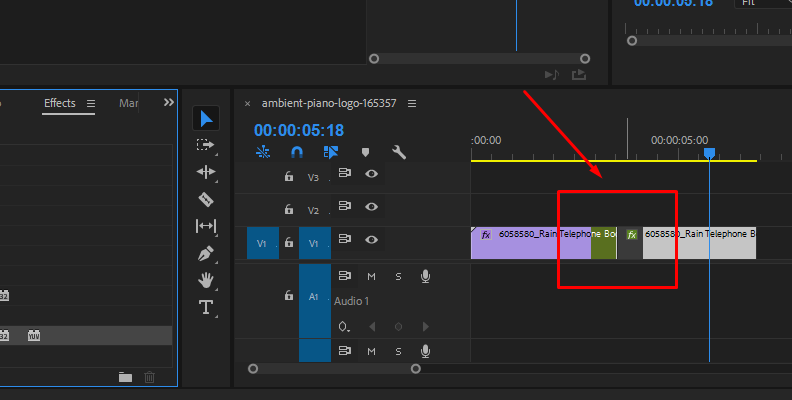
To avoid applying them manually to each other set of videos, you can simply select your transition and press Ctrl + C on your keyboard to copy it. Then, click and hold the "Ripple Edit Tool" button until the menu shows up, and select the "Rolling Edit Tool" as shown in the image below.
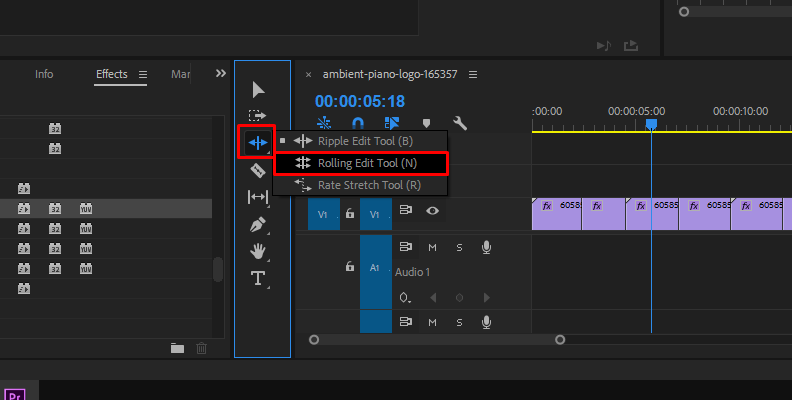
Then while holding the "Shift" key on your keyboard, use your mouse to click on every cut where you want to apply the transition, then use the "CTRL + V" keyboard shortcut to paste the transitions.
It's as easy as that!
Final Words
That's everything you need to know about adding effects in Premiere Pro, using the effect controls panel to modify parameters, create presets, and more!
Hopefully, this will come in very handy for all your work in the future.
FAQ
One of the most frequently asked questions on this topic is how to remove effects in Premiere.
The answer is simple, you can remove effects in Premiere using the effect controls panel. Simply head over there, right-click the effect you wish to remove, and choose the "Clear" option. This will instantly remove the effect from your video, and it works for both audio and video effects.


