


We all know what a green screen in a filming set looks like. Even television and content creators are using green screens today, as it helps composite scenes with less time and resources than going to a shooting location. Filming can be easy, but how do you key out the green screen in post-production?
Today, you'll learn what a green screen is and how to use the chroma key in Adobe After Effects to replace green screen footage with a different background image.
Let’s dive in!
What is a Green Screen?
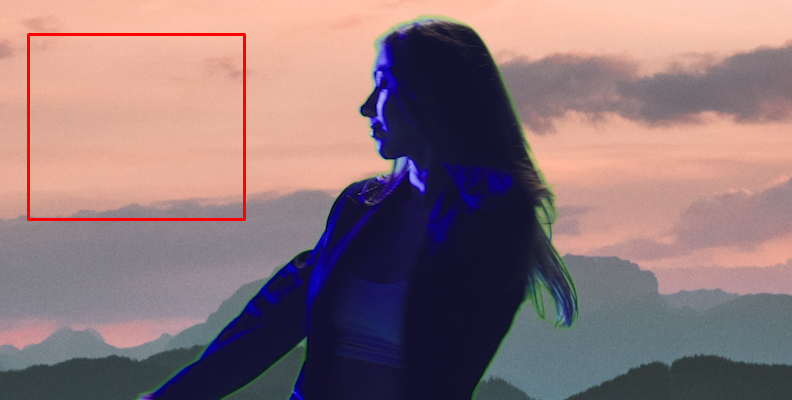
A green screen is a flat surface, wall, LED screen, or a piece of fabric in a green color that is used while shooting a scene. Later in post-production, editors make the screen surface transparent and replace it with other footage or add special effects. Today, this process is called chroma key, green screen, or keying out.
The preferred color is a brilliant green or a blue screen because it differs from natural skin tones and hair colors and can be completely removed without affecting other colors in the scene.
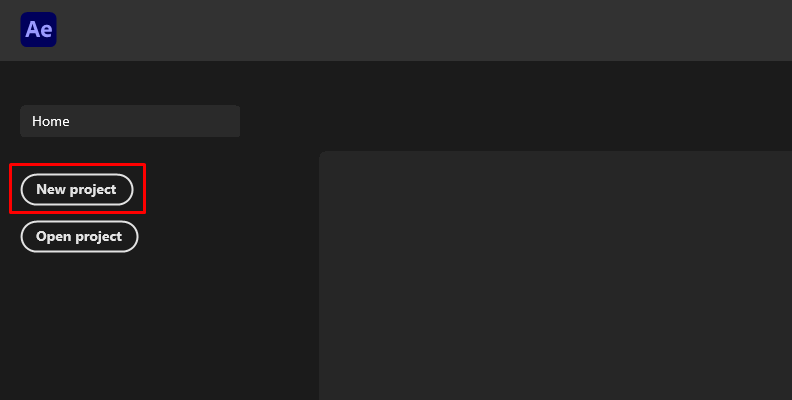
Green Screen After Effects: How to Do It
After Effects features an easy-to-use preset for green screens. Follow this step-by-step guide to use the chroma key to remove the green screen and replace it with your video footage.
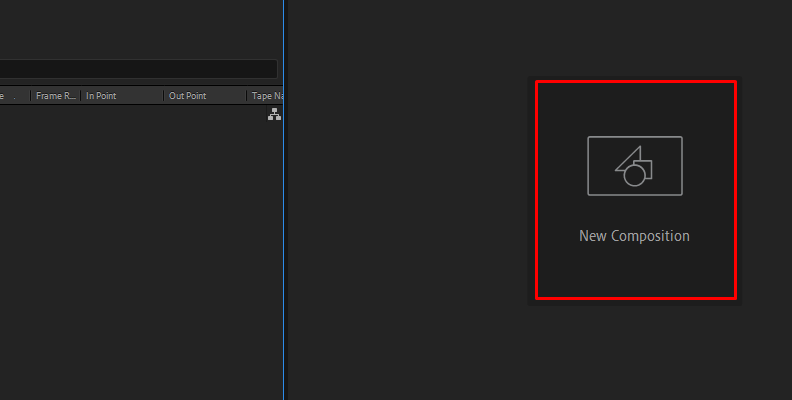
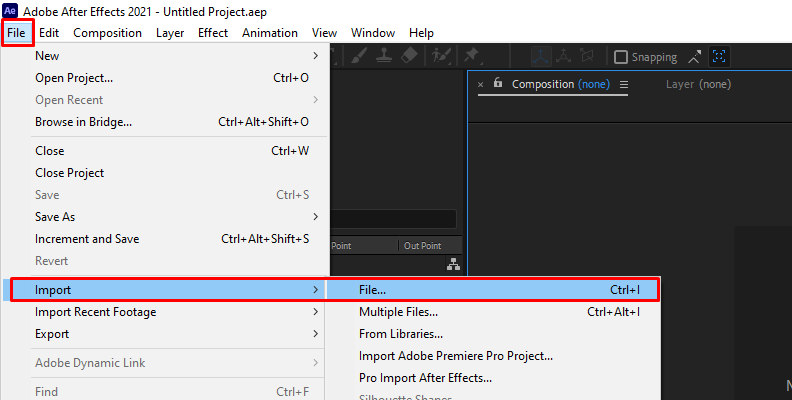
Step 1: Import Green Screen Video Footage
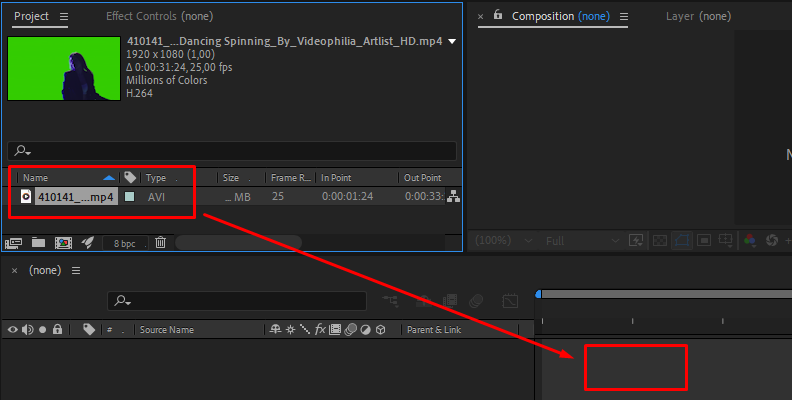
Create a new composition with green screen footage in After Effects. Drag the green screen footage clip to the new composition icon to create a new timeline. The green screen footage will now be visible.
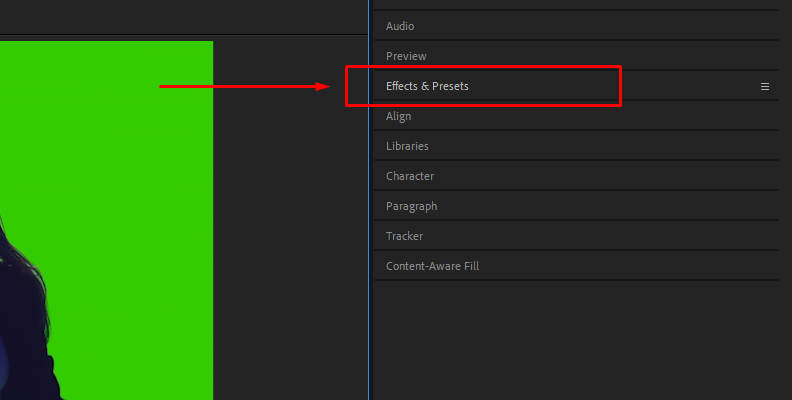
Step 2: Apply After Effects Keying Preset
Go to the Effects & Presets panel and search for Keylight + Key Cleaner + Advanced Spill Suppressor effect. You can browse it under Animation Presets > Image - Utilities. Drag the preset to the video clip in the timeline to apply it.
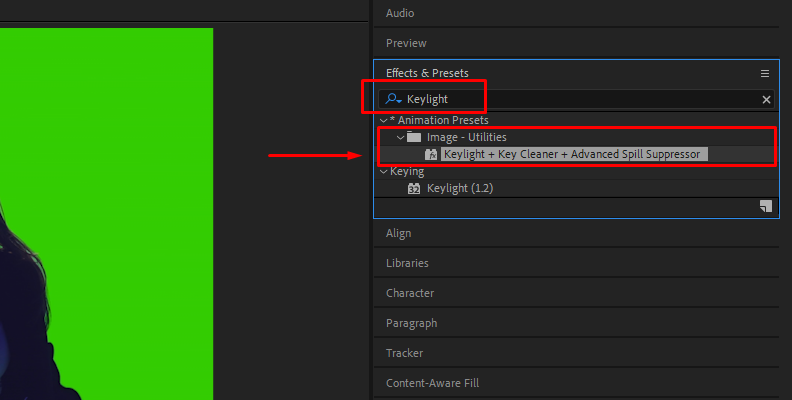
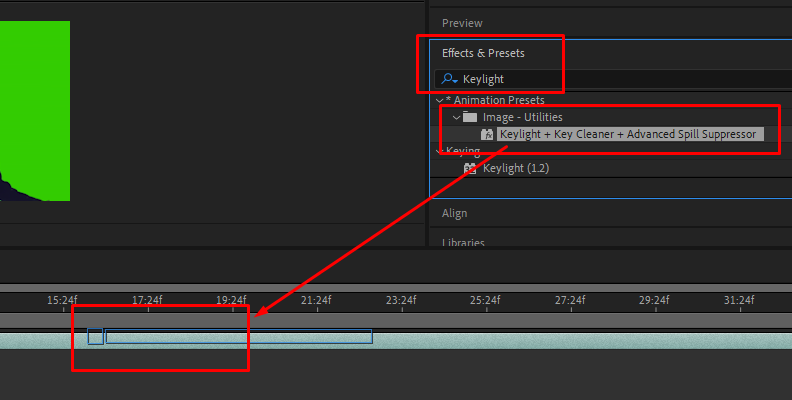
The preset combines three effects: Keylight, Key Cleaner, and the Advanced Spill Suppressor effect for keying out a green screen.
Step 3: Keylight Effect
Go to your Effects window and display the Keylight settings. Click the color picker tool in Screen Color to choose the green screen background color. Toggle the Transparency Grid to see what the effect has done.
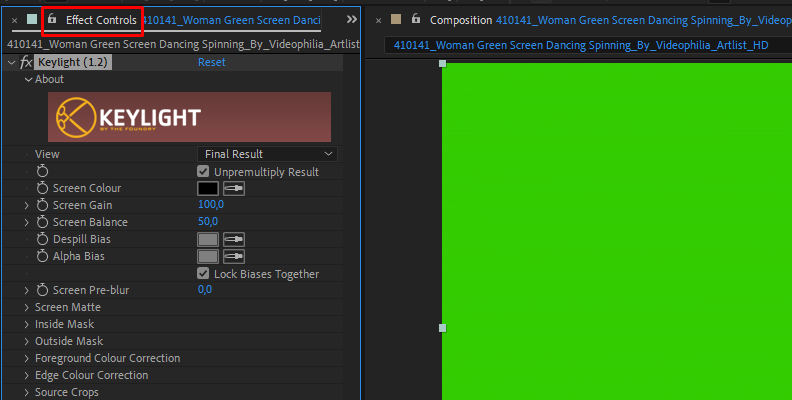
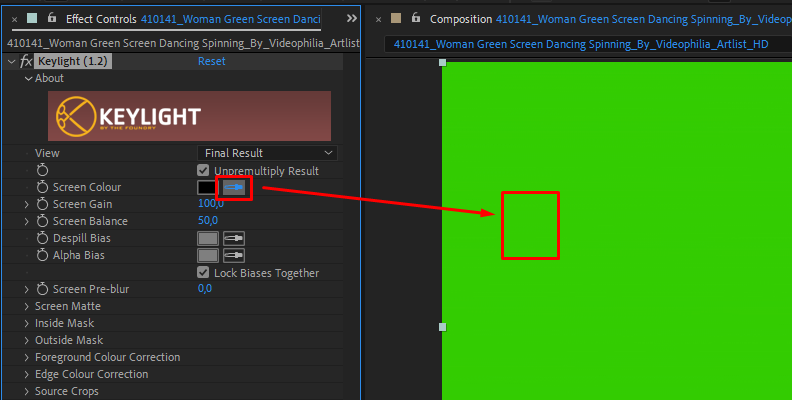
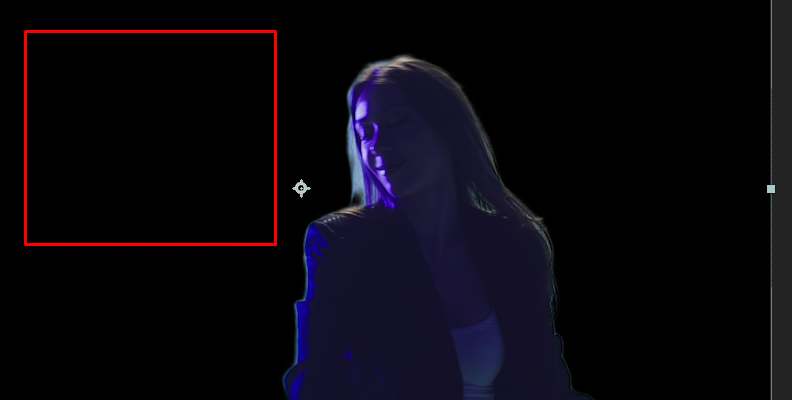
Change the View to Screen Matte to see your footage in black, white, and grey. Scroll down in the Keylight controls panel to find Screen Matte settings and display its options. Here, you can adjust the Clip Black and Clip White values to make the green screen background completely black and your subject white.

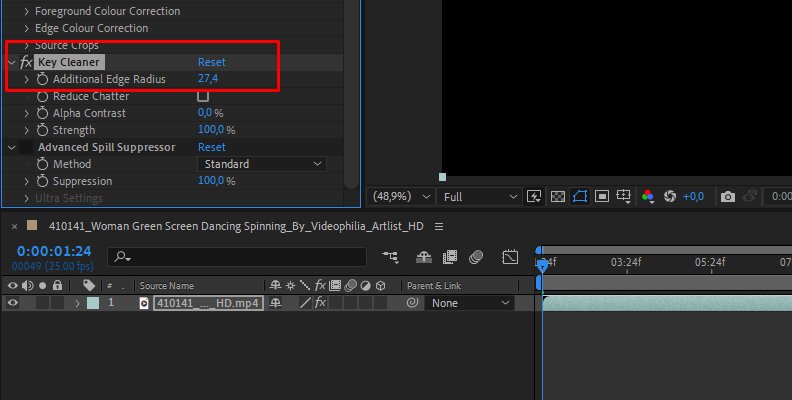
Step 4: Key Cleaner Effect
The Keylight and the Key Cleaner effects interact to smooth the subject's edges over the green screen. It cleans any residue of the green screen properly, including areas that you could not remove with the Screen Matte effect, to achieve a cleaner transparent background, bringing back lost detail. Here, you can adjust the edge radius and reduce chatter for better keying.
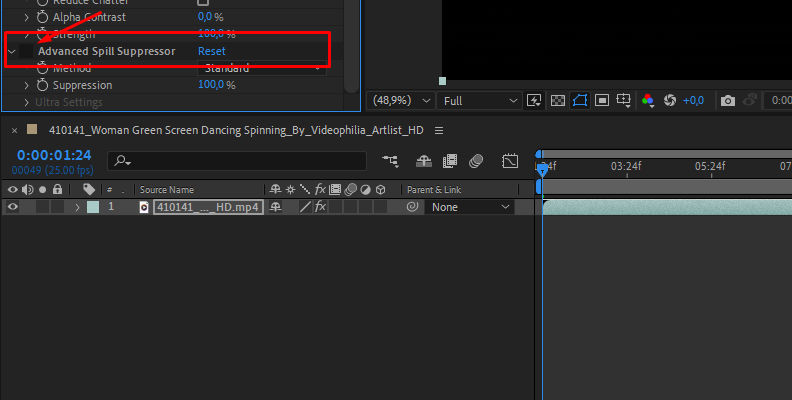
Step 5: Advanced Spill Suppressor
Now, you should have a clean key. However, sometimes while shooting, reflections of the green screen might end up on your subject's clothes, glasses, hair, etc. Spills may not always be present, but it's good to take a closer look at our footage after removing the background to ensure no green color spills on the footage. If there is, then the Spill Suppressor will take care of it.
Go to the Effects panel and check the box for the Advanced Spill Suppressor to enable it. The effect will automatically detect and eliminate spills, but you can adjust Suppression and the spill suppressor method depending on the amount of spill on your video footage.
Step 6: Replace Background
Now, you can add an entirely new background below the green screen footage layer to replace the transparent background and make any further edits before rendering.
How to Use Green Screen in After Effects with Continuum and Mocha
I'll show you how to use a green screen in Adobe After Effects using Primatte Studio and Mocha, which are available in the Continuum Suite.
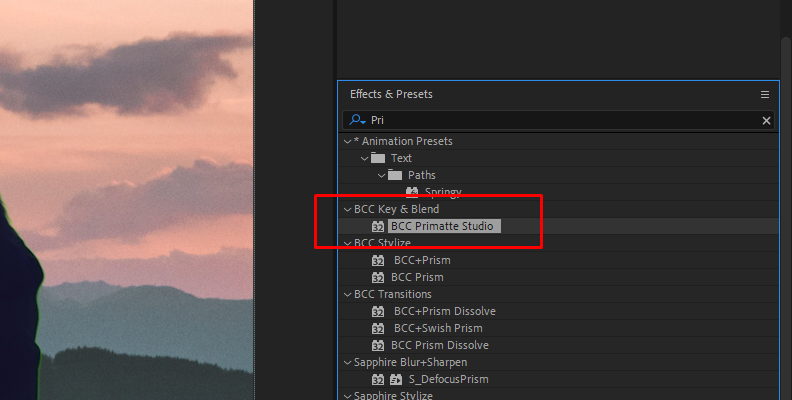
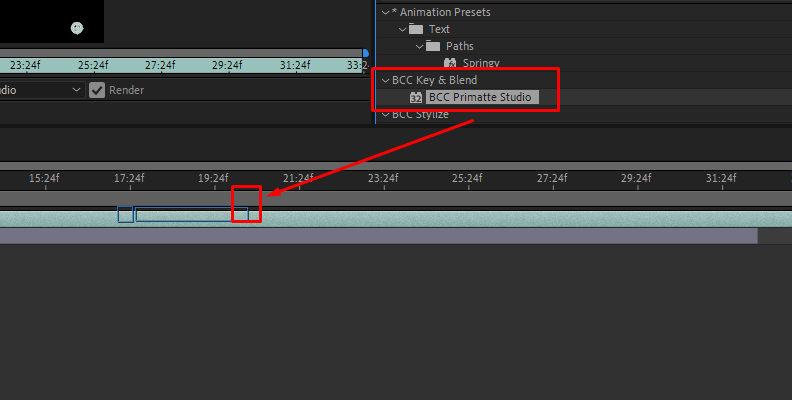
Step 1: Add Primatte Studio to Your Green Screen Video Footage
Import your green screen video and the background to replace the green screen background and create a new composition. Drag the green screen footage and the background to the timeline. Go to Effects & Presets, search for BCC Primatte Studio under BCC Key & Blend, and drag it to the video clip.
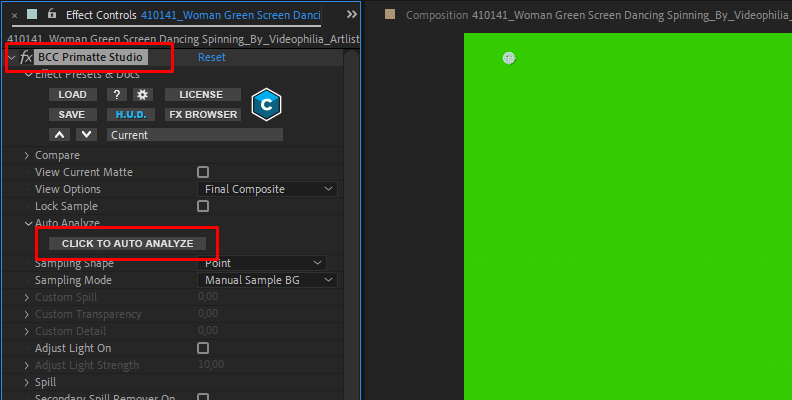
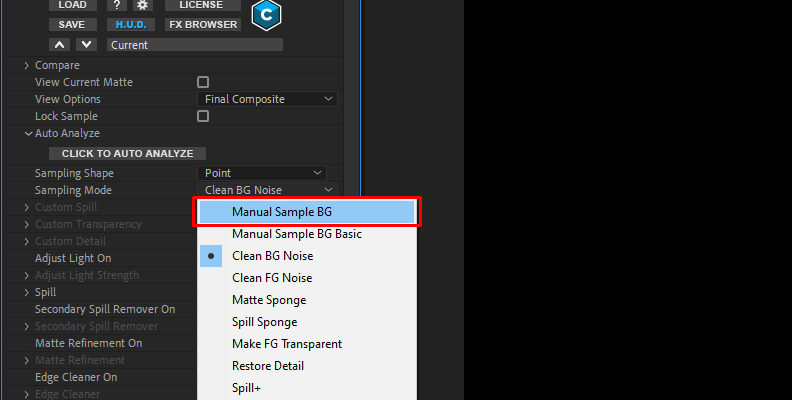
Step 2: Primatte Studio UI
The first thing to pop up when you apply Primatte Studio is its UI. The order of the UI shows you a path to follow, but you can have your own workflow. Click the Auto Analyze button to key out the green screen automatically. You can toggle the Transparency Grid to see how the background was removed. You can also select your sample key color manually using Manual Sample BG.
Step 3: Clean Background and Foreground
Usually, Primatte Studio does a great job of chroma key, but to perfect your matte, click on Matte Status in the final group of options. Refine the matte, making the background black and your foreground white.
To clean the background, select Clean BG. Above, you have two tools: Point and Rect (rectangle). Choose one to take samples of the background you want to clean. Draw over the spot, and it will automatically correct it.
Repeat the same process for the foreground, but use Clean FG. Click Restore Detail and use the "Detail +" and "Detail -" to recover the detail lost.
Step 4: Correct Green Color Spill
You can quickly remove spills using the Spill Sponge option and clicking on the areas of the footage with the color spill. Toggle between "Spill +" to bring back spills and "Spill -" to remove spills.
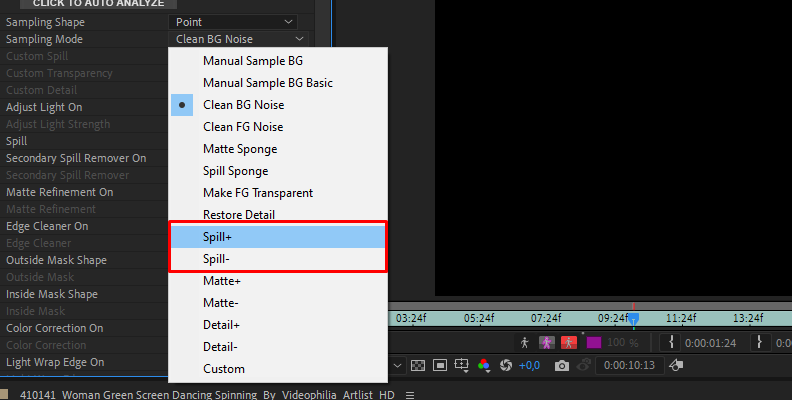
If you go to the Effects Control panel and display the Spill settings, you can change the spill replace mode and enable the Secondary Spill Remover. Experiment with the settings to achieve the best color spill removal.
Step 5: Inside and Outside Masks with Mocha
You can create inside and outside masks if you need to create a garbage matte to quickly remove things you don't need, regardless of the chroma key effect. Enable the Outside Masks Shape to create a mask and select Mocha Mask. Display the Outside Mask settings and click Launch Mocha to go to Mocha UI.
Inside Mocha, select a spline or shape tool. Draw a shape around your subject and right-click to close the shape. You can track motion using the track controls under the layers panel to track forward or backward.
Click save and quit Mocha to return to After Effects and ensure you select Invert Outside Mask in the effect panel to retain the subject.
Step 6: Final Touches
There are some final settings you can tweak in Primatte Studio settings. The first is Color Correction. Enable it to adjust the temperature, saturation, brightness, and more.
Enable Light Wrap Edge and choose your background layer in the Background dropdown menu. Under Light > Wrap Edge, adjust Width, Softness, and Lightness as needed to blend the light from the background with your foreground.
Edge Cleaner is another setting you should look at to smooth edges and enhance details.
PRO TIP: How to Remove Video Background Without a Green Screen
When you want to replace a background from footage without a green screen, you must create a shape of your subject and track it. This is similar rotoscoping in Premiere Pro. You can use the pen tool in After Effects to do it. But an easier way is with the Roto Brush.
Step 1: Select the Roto Brush
Select the Roto Brush or press CTRL + W or Option + W on Mac. Double-click the layer with the footage and start painting using the Roto Brush. It will automatically analyze the strokes and highlight your subject.
Press CTRL + W or Option + W to toggle between the Roto Brush and the Refine Edge tools to fine-tune the matte.
Step 2: Track Shape
Press the space bar to start tracking the roto shape in the footage, and wait. Once it finishes, click Freeze to retain the tracking data.
Step 3: Add New Background Layer
Add a new layer with your new background footage and place it below the keyed footage. You can continue editing with color correction to achieve a natural look.
Final Words
Using a green screen for audiovisual projects will give you more flexibility to edit and easily add visual effects to your footage. Use the After Effects preset to quickly do green screen editing and Primatte Studio to have more control over your matte and chroma keying process with professional-like results.
You can download a free trial of Continuum to try Primatte Studio as well as color correction tools, light effects, and more for seamless green screen removal regardless of your video editing software.
FAQ
What is the color code for green screen?
The value codes for the green screen color are RGB value: 0, 177, 64, CMYK value: 81, 0, 92, 0, Hex value: #00B140, and Websafe value: #009933.


