The halftone effect aims to replicate the halftone printing technique used in the early days of printing. It creates a vintage, comic book, and retro style that’s been quite popular in photography and graphic design.
It uses dots that vary in size and spacing to form the image when looked at from a certain distance. With today's editing tools, you can create halftone styles for your footage using effects built into your favorite software or with external plug-ins.
In this tutorial, you’ll learn how to create halftone effect using multiple effects from After Effects and a powerful plug-in that makes it easier to craft a professional halftone effect quickly.
Let’s get into it!

How to Create a Halftone Effect in After Effects
For this tutorial, we’ll use the Effect CC Ball Action to simulate the dots of Halftone images.
Step 1: Create a New Composition
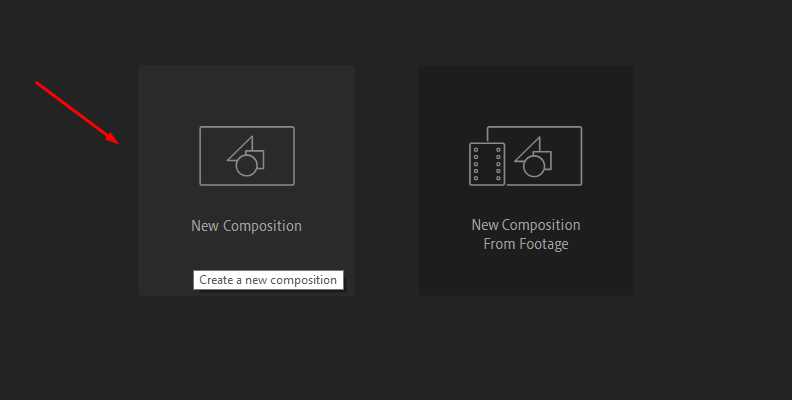
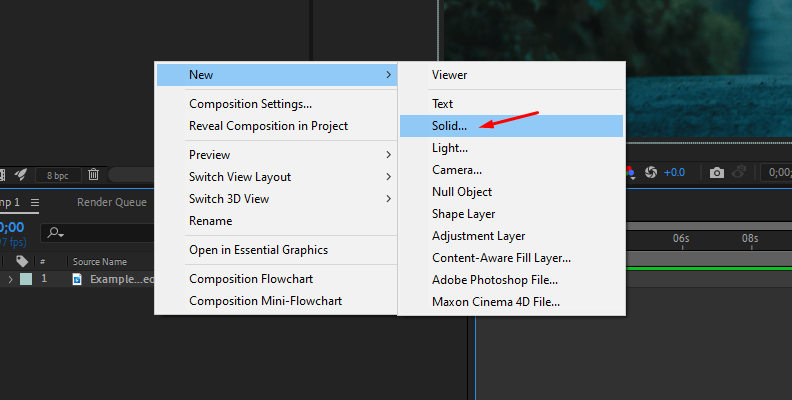
Create a new composition or start one from your video files, pre-compose the layer, and hide it for now. Then, add a new solid layer to the composition, make it white, and label it as a background. Create a new solid layer for the dots of the halftone effect and make it black. You can label it Dots.
Step 2: Add CC Ball Action Effect
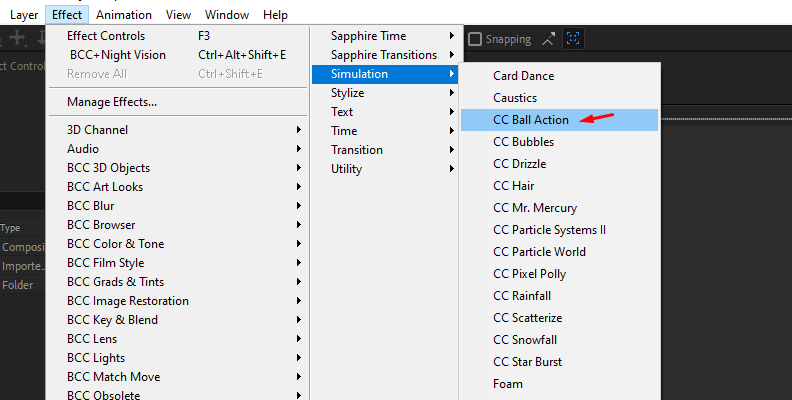
Select the Dots layer and go to the Effect > Simulation > CC Ball Action. This effect creates a grid in the layer resembling the halftone prints' dots. Next, you want to change the Ball Size of the dots and the spacing. For Ball Size, I like to set it at around 18-20 to make smaller dots and the spacing at around 5.
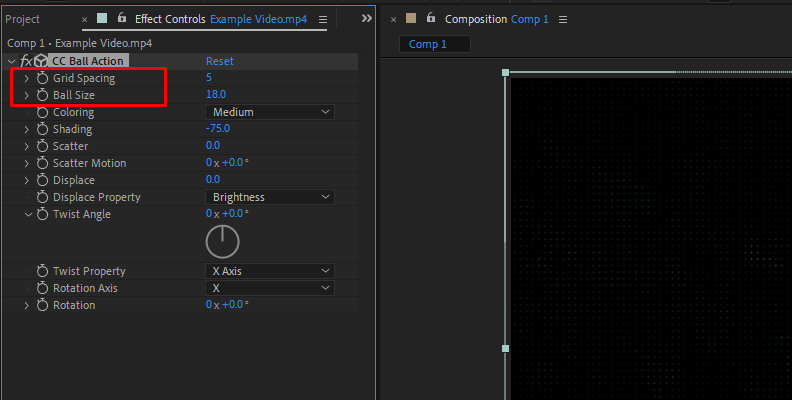
Depending on the video footage, you may prefer big or small dots with less or more spacing. Play with these settings to create a look that fits your footage.
Step 3: Creating the Halftone Effect
For now, you have the base of the halftone effect. Add an adjustment layer and apply the Camera Lens blur effect to it. In the Effect Controls, change the Blur Map Layer from None to the pre-composed video layer and the Source to Effects & Masks. Then, check the Invert Blur Map checkbox.
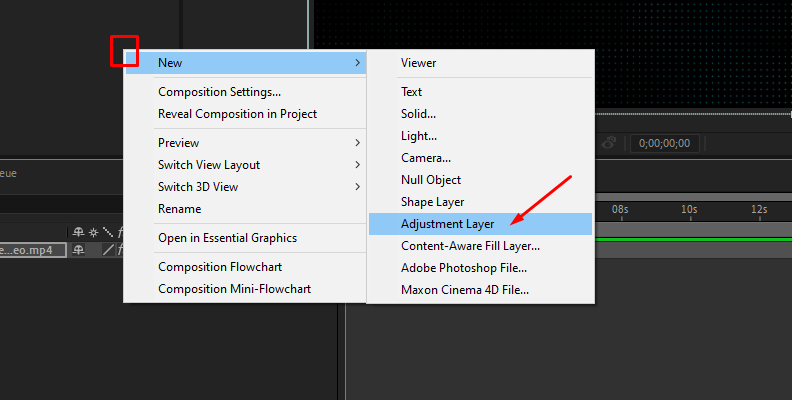
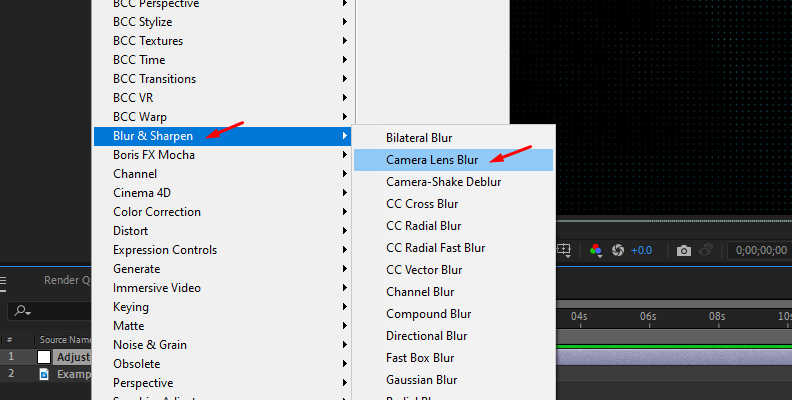
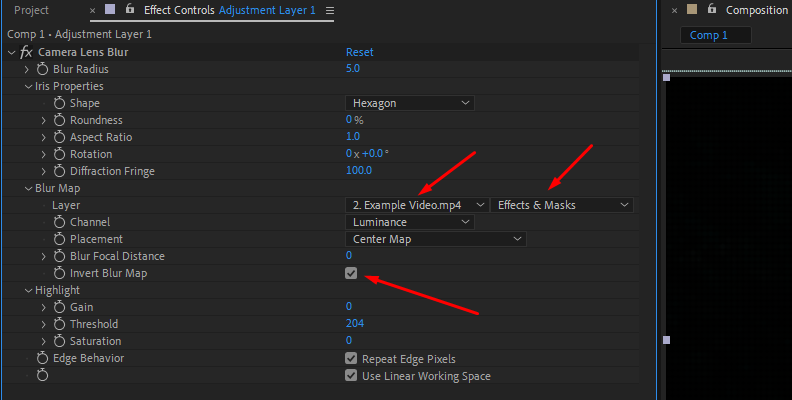
This effect is now blurring the darker areas in the footage, which lightens the dots and makes them bigger in the blurry parts to add variation to the dot size. Next, add a Levels effect to the adjustment layer and increase the Input Black until all the lighter dots are dark.
Step 4: Fine Tune the Halftone Effect
A few tips you can try are adding a Curves effect to the original pre-compose video layer to darken the shadows, make the blurred parts darker in the output image, and change the look of your halftone effect. Another tip is to add a Gaussian Blur effect to soften the image and the dots.
Play with these settings to get different halftone effects for your footage.
How to Create a Halftone Effect in After Effects with BCC Halftone
The next tutorial will teach you how to create a halftone effect in After Effects using Continuum's BCC Halftone filter. This effect adds a halftone pattern with white and black or color dots to the source footage.
Step 1: Set Up Your Project
First, ensure you have the latest Continuum update installed. Download the Boris FX Hub and install Continuum for After Effects.
Open After Effects and import your footage files to create a new composition. Drag the video you want to turn into a halftone print to the timeline.
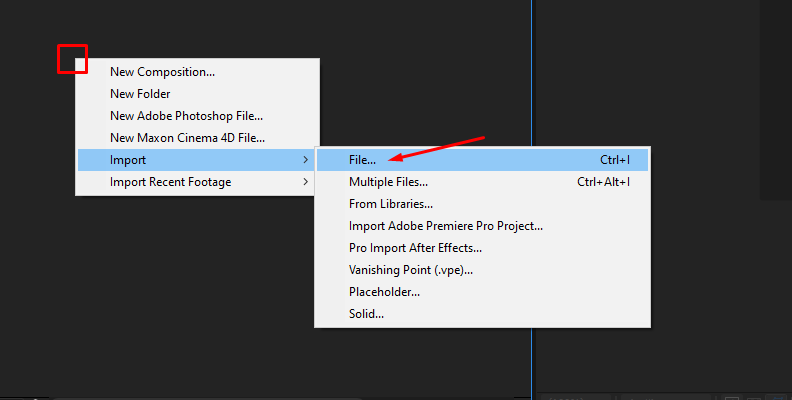
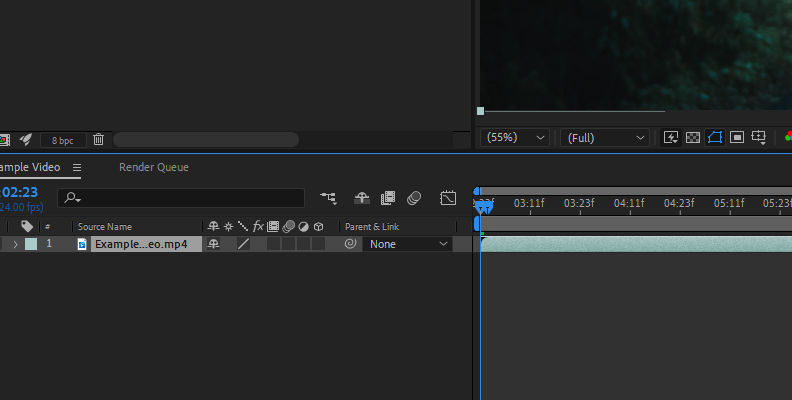
Step 2: Add Continuum's After Effects Halftone Plugin, BCC Halftone
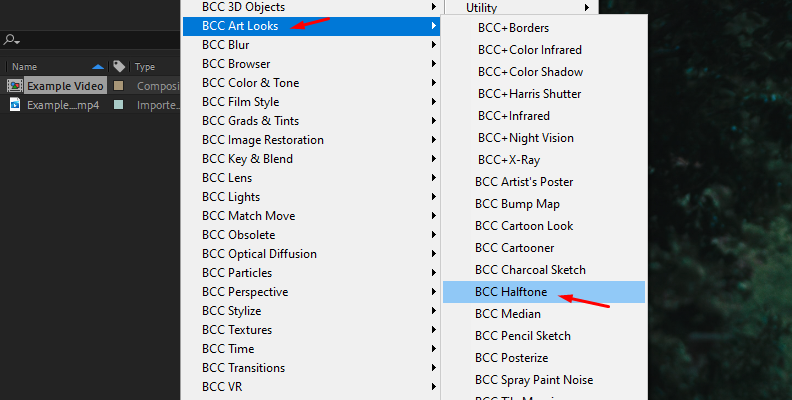
Select the layer with the image and apply the BCC Halftone Effect from the BCC Art Looks category. You’ll begin with the default settings, which automatically give you a black-and-white halftone look. I’ll show how you can modify the settings to create other looks. But first, you may want to check the preset library.
Go to the Effect Controls panel and click the FX Browser button. You can preview and apply presets for different halftone looks, including black and white, color halftone, and different shapes for the dots, including scanline effects.
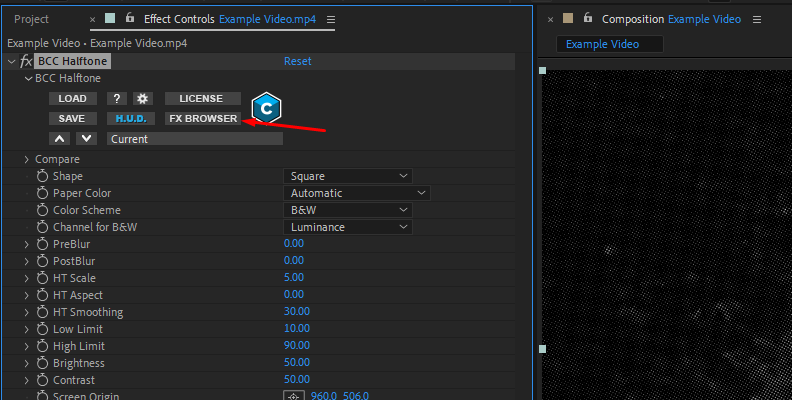
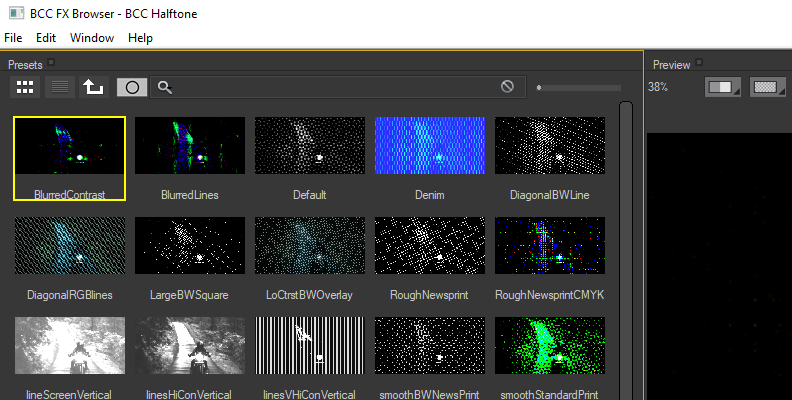
To use a preset, apply and return to After Effects, where you can modify it from the Effects Controls panel.
Step 3: Setting the Halftone Effect
BCC Halftone features many parameters that might look confusing at first. I'll guide you on what these settings do so you can experiment with your compositions to achieve unique and creative halftone effects.
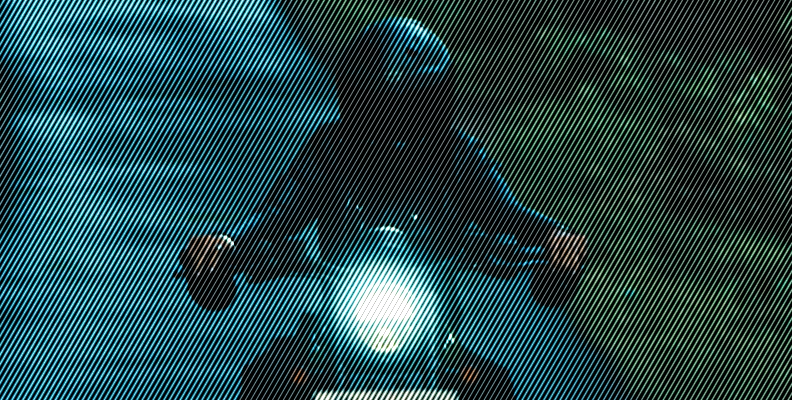
The first thing to do is to choose the dot's shape. Select Circle or Square for dots or lines for a scanline effect. You can change the shape after making further changes if you don't like how the effect is looking.
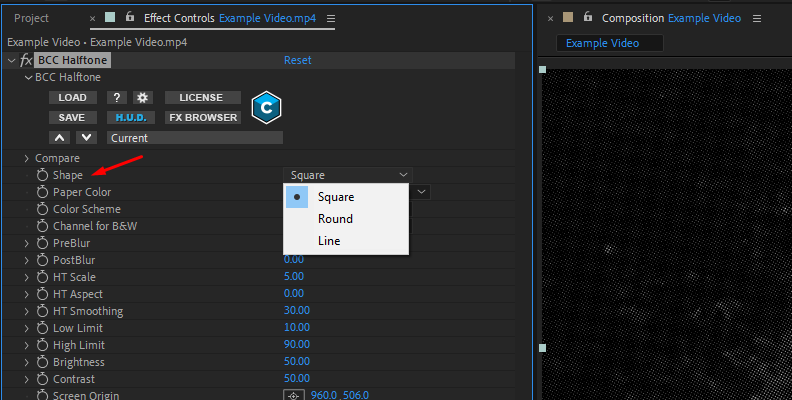
Paper Color defines the paper color for the "printed" version of the processed image. Automatic sets the color to black when the Color Scheme is RGB and white for the rest. When you choose Color, you can set the color in the Color & Angles parameter, and Transparent generates an alpha channel.
In Color Scheme, you can specify the color space to generate the halftone effect. For a more ink print style, use CMY or CMYK with a light paper color. If you choose RGB, pick a darker paper color. With B&W, adjust the Channel for B&W to determine which channel creates the halftone effect.
Step 4: Create Unique Looks
What's great about BCC Halftone is that it includes effects to make halftone effects without the need for extra effects and filters but with the option to add other effects if you still want to. The following settings will help you craft original halftone compositions.
BCC Halftone's Blur settings apply to the original footage and the processed footage in the same layer. PreBlur will soften the source image without altering the output colors, and PostBlur will apply the effect after the halftone is processed in the image, altering the output colors.
To change the distribution of the dots, use HT Scale to make them bigger or smaller, HT Aspect to change the aspect ratio, stretching the dots vertically and horizontally, and HT Smoothing to reduce noise and detail with blur. The Low and High limits control the dot size. The higher the gap between Low and High limits, the more variation the dots will have.
Use Brightness to lighten the color towards black or white and Contrast to set the color intensity.
Finally, by adjusting the Mix with Original values, you can change the intensity of the effect applied to the source footage. It also allows you to create an animation where the image turns into a halftone and then goes back to the original.
Experiment with the tone settings, try presets, modify them to your liking, and stack other Continuum filters to enhance your compositions.
Final Words
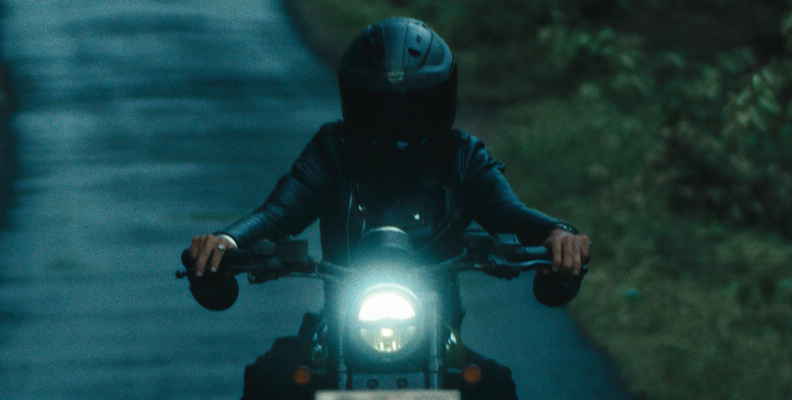
BCC Halftone is an easy-to-use After Effects halftone plug-in that can help beginners create halftone effects and allow professional photo and video editors to experiment with the filter's parameters to design extraordinary halftone styles. With Continuum, you have access to other artistic filters, color correction and grading tools, and a built-in Mocha planar tracker.
Delve into Continuum with a free trial and create your own halftone effects for your video footage.
Good luck!


