


One of the challenges a video editor often faces is working with blurry videos. Regardless of what caused the problem, knowing how to unblur a video will always be a valuable skill to possess.
A blurry video can "drop" the overall quality and reputation of your YouTube channel or Instagram profile, but luckily, today's video editing tools and plug-ins are quite forgiving and allow us to fix blurry videos without much effort.
Want to learn how to improve video quality and unblur videos? Keep on reading, as this guide has everything you could require should you ever run into such a problem.
Let's get started!

Why is My Video Blurry - What Causes Blurry Video Issues?
Your video material, whether you recorded it yourself or received it from someone else, can be blurry due to a few different reasons. Here are some of the most common mistakes that makes video footage blurry.
Blurry Video Due to Zoomed-In Shots
In the past, recording films and videos was more difficult and required extensive planning, like deciding the best shot composition, etc...
Today, that's much simpler due to cameras recording in extremely-high resolutions, meaning even if you go wide on a close-up shot, a simple zoom-in during editing will fix the problem.
![]()
Unfortunately, this only applies when using professional equipment and high-resolution cameras. If you recorded the video on iPhone or an Android device, over-zooming will likely result in the video becoming blurry.
Blurry Video as a Result Of Compression
With the rise of social media, much of the content nowadays is re-used and re-uploaded. If someone wants to make an edit of a specific video, they'll have to download it, which means they are not downloading the original file. The original file was already compressed when the owner first uploaded it, as that's just what social media platforms do to save storage space on their servers.
When you download the file, edit it, and then upload it, it goes through its second compression, further "damaging" its quality and making it even blurrier than it was originally. If someone then downloads your version, you get the idea...
It's also very important to always receive and export files in an output format that's known for quality and doesn't compress, like ".mov" and ".avi" for example.
Blurry Video Due to Dirty Camera Lens or Shooting Out of Focus
Sometimes "amateur mistakes" such as not properly cleaning a part of your camera can lead to a blurry video. Unfortunately, to unblur video material recorded like this is almost impossible.
The best way to prevent this (if you're the camera person) is to ensure your equipment is properly cleaned and your recording settings match the environmental circumstances before starting a new project.
![]()
Also, there's always the most common reason for blurry videos, which is shooting without properly adjusting the focus.
Blurry Video Due to Wrong Brightness Level
If you record at night or in a poorly-lit interior without proper ISO settings, you may get what's called a "grainy" and "noisy" video.
This isn't exactly "blur," but even if you change brightness settings within your editing software, you may be unable to "fix" the material if you recorded with the wrong camera settings.
Remember, you can always make bright videos darker, but rarely dark videos brighter without unwanted video quality changes manifesting.

How to Unblur a Video with Continuum Magic Sharp
With this method, you can easily unblur one or multiple videos in Premiere Pro, but it requires the use of a plug-in called Magic Sharp, which is part of Continuum by Boris FX.
Download and Install the Tool.
There is a free trial version available of Magic Sharp for you to test. We'll use Adobe Premiere Pro for this tutorial, but this plug-in also works for Adobe After Effects, AVID, VEGAS, and VEGAS Pro.
Add the Video to your Timeline and Apply Magic Sharp
Open Premiere Pro and add a blurry video to your timeline.
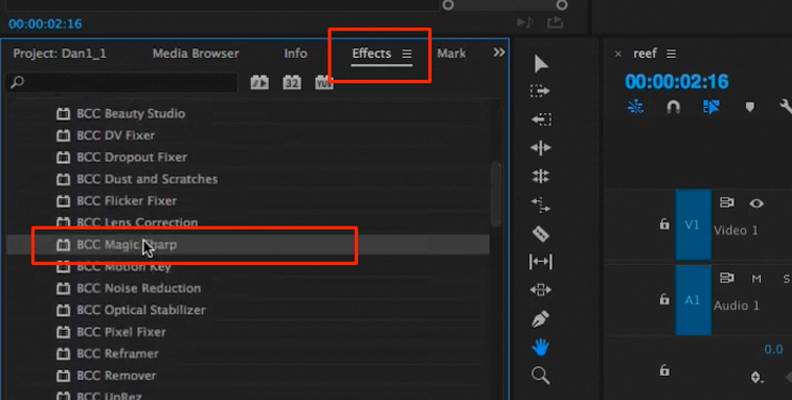
Open the "Effects" panel, expand the "BCC11 Image Restoration" folder, then find "BCC Magic Sharp" on the list. Drag and drop the effect over your video file. You'll notice an immediate difference, as the default settings already make the video clearer.
![]()
Modify Original Effect Parameters
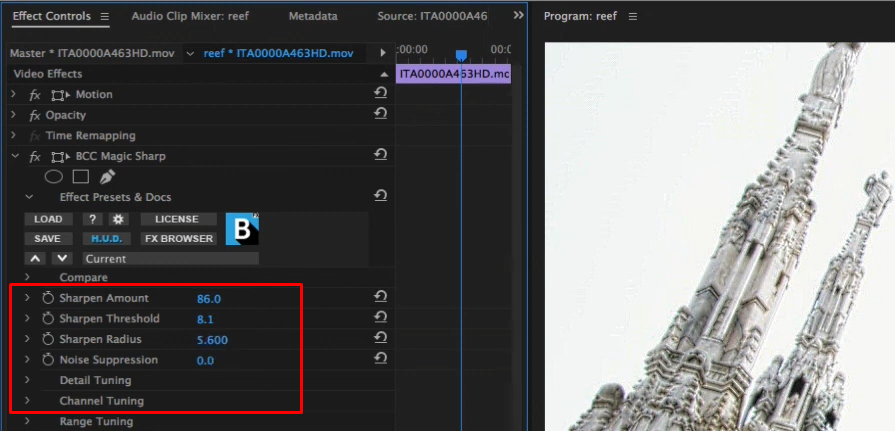
Within the "Effect Controls" panel, you can modify the original values and see if that further results in improving the blurry issues.
The settings are self-explanatory.
![]()
For example, the "Sharpen Amount" value affects how sharper the blurred video will become, and the "Noise Reduction" value controls the smoothing filter after the sharpening effect. This helpful Magic Sharp video tutorial by Boris FX explains further visually.
![]()
Done! It's that easy.
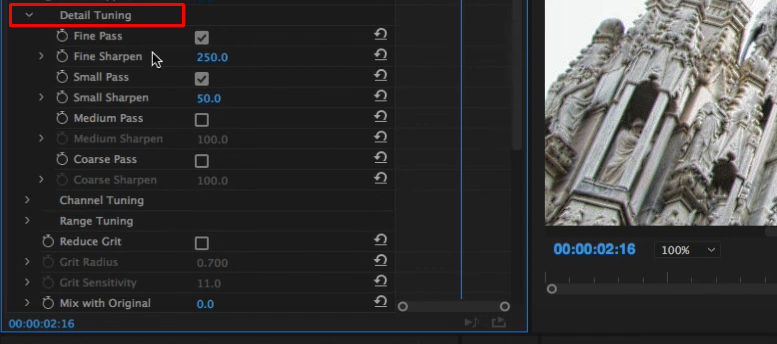
You can further continue to experiment with the advanced options and parameters for other settings, but to remove blur and make a video look better on everyone's screen, that's all you need to do with this simple yet effective blurry video clearer tool.
How to Unblur a Video Using Adobe Premiere
With this method, you can unblur a video for free in just a few easy steps.
Here's how to do it:

Add Blurry Video to Timeline.
Within Adobe Premiere Pro, drag and drop the blurry video to your timeline. This will automatically create a sequence so you can work on your video.
![]()
Slightly Adjust Color Settings
Add Unsharp Mask Effect
Unblur Only a Part of a Blurry Video
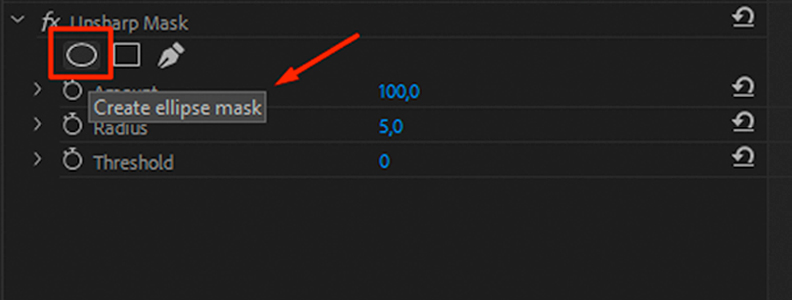
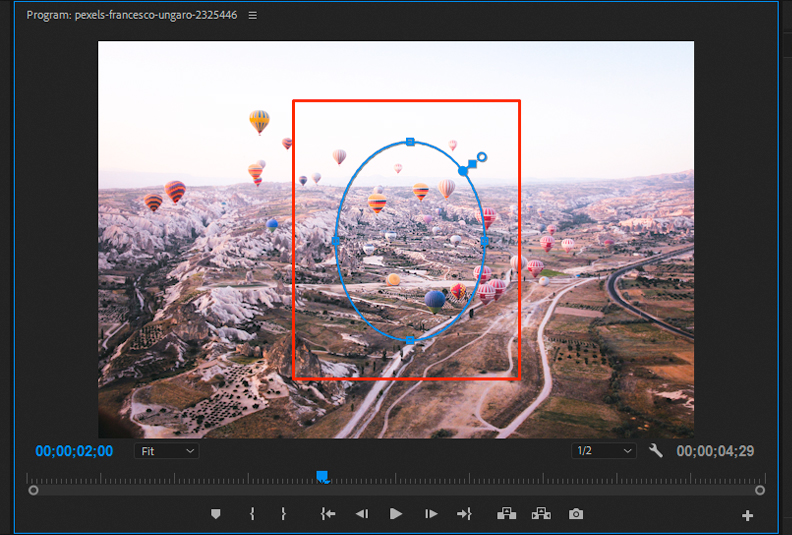
To avoid applying the sharpening effect to the entire shot, click on the ellipse or rectangle shape icons to create a mask, then drag it over the part of the video you want to unblur.
![]()
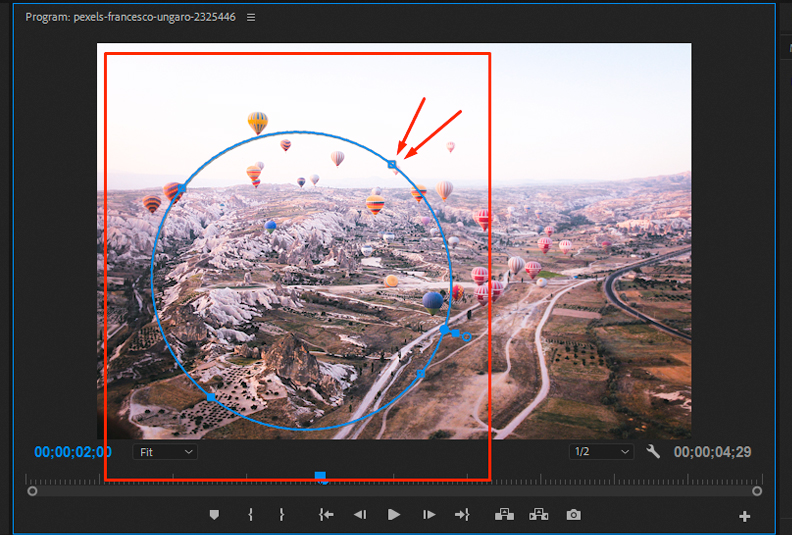
You can resize the mask using the adjust option by clicking on a point and dragging with your mouse. This can help you fit it better over the shape of the item or person within the blurry video.
![]()
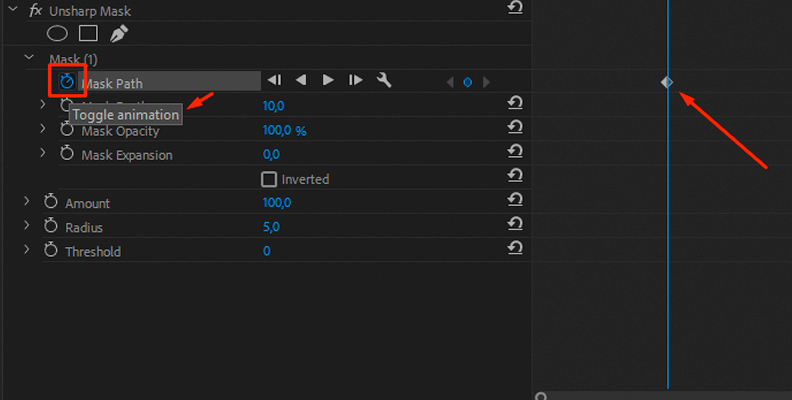
To follow the person or object throughout the shot, position the mask where you want it to be at the beginning of the shot, then click the record icon to add your first keyframe.
![]()
From here, you can manually move both the "playhead" and the mask and click the record button to add a new keyframe, or you can click the "Play" icon to activate Premiere's "Track selected mask forward" automated option.
![]()
That's all you need to do. You now know how to unblur a video for free in Premiere Pro.
Feel free to use this method for as many blurry videos as you need to repair.
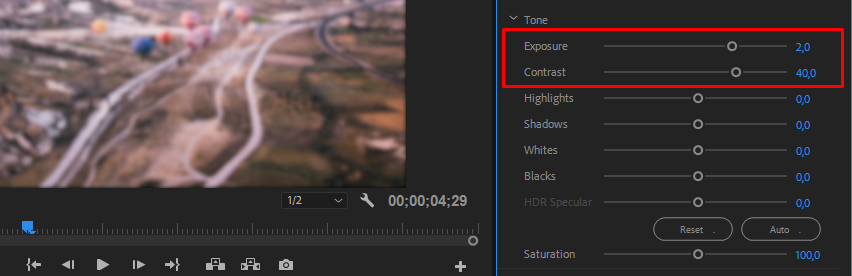
Click on the video on your timeline and open the "Color" panel. Slightly boost the "Exposure" and "Contrast" meters, which will immediately result in at least some improvement in blurriness.
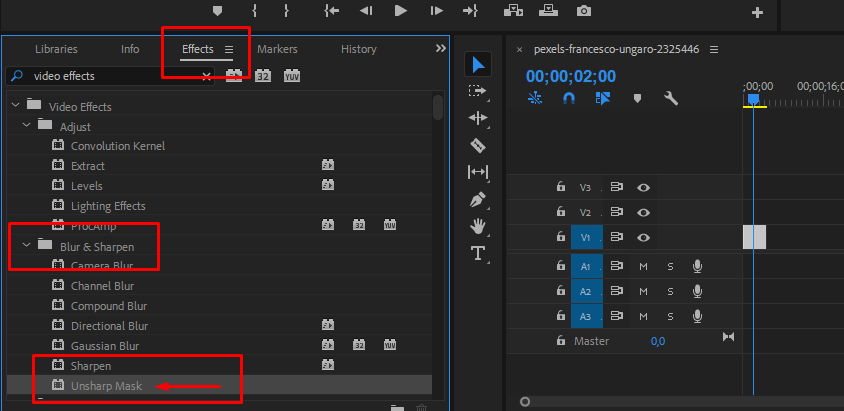
Open the "Effects" panel and expand the "Video Effects" and "Blur & Sharpen" folders. Find the "Unsharp Mask" effect and drag it over the blurry video on your timeline.
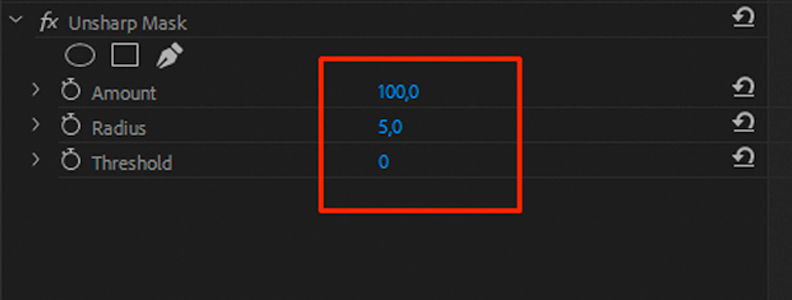
Open the "Effect Controls" panel and find the three available options, "Amount," "Radius" and "Threshold." Modify these while monitoring the blurry video for improvement. Usually, it's best to set the "Amount" to 100 and "Radius" to 5 but it's different for each shot.
Do not overdo it whatsoever, as setting too high values can make your shot look very artificial.

How to Prevent Video Files from Getting Blurred
It's great knowing how to fix blurry videos, but it's even better if you don't need to put in extra effort and make a blurry video clear.
This section includes some best practices you can utilize to end up with a better video file whenever you edit.
Avoid Uploading Blurry Videos and Use Industry-Grade Software Only
Although free online video editors are great for portable work and less-serious projects, the whole process can lead to some unwanted issues along the way.
For example, to upload and fix blurry videos online, you'll likely run into the quality compression factor. This means the original video and the uploaded one will look different, as the website/service's best interest is to save server storage space.
Further, when you download it, the website might set it to reduced video quality for a quicker download, and when the time finally comes for you to upload it on your social media channels, it'll hardly be any good.
Working locally means no uploading and compressions, so a loss of quality is non-existent.
See if the free online video clearer or editor you're using has a desktop version that you can download and use to change the video's settings locally, without needing to upload.
Upload Only on Services with No Video Quality Compression
Sometimes you have to upload a video online, and sometimes others must share videos with you.
When uploading a video online, use services like Google Drive, Dropbox, and other free, reputable cloud-sharing platforms that ensure your uploaded videos don't lose quality, as well as have quick servers so you don't lose too much time waiting for the upload.
![Uncompressed vs compressed image]()
Always Share the "Raw" Unprocessed Files
Although the upload and processing time may be longer, uploading the raw files in their full quality and video size is always recommended. Don't make your editor work to export proxy files, as that can result in poor video quality upon pressing the export button.
If uploading files to an online video repair service is a must, it's best if you choose only reputable ones. You can fix blurry videos online, but it's rare finding quality online video editing services that won't watermark your videos.
Some do exist, though, and one example is the Clideo video clearer.
The Clideo video clearer service allows uploading files from your Dropbox or Google Drive, which correlates to what we mentioned two sections above and can also be accessed through a mobile phone, meaning you can add videos on the go. They also have an online video editor app.
Final Words
You now know how to unblur a video using both a plug-in and "manually" using built-in tools. We also covered how to fix blurry videos online and how to prevent ending up with a blurry video while recording.
Hopefully, you found all this useful and informative, and if so, it should make your blurred video repair work in the future much easier.


