Mocha AE CC Plug-in V6.0.0 User Guide
- Introduction
- Interface Overview
- Using the Mocha AE CC Plugin
- Tracking Basics
- Adjust Track
- Overview
- Starting the Track Adjustment
- Reference Points
- Reference Point Quality
- AdjustTrack with More than Four Reference Points
- Working Backwards
- About Master Reference Points (the red X)
- Changing the Master Frame for a Reference Point
- Selecting Different Reference Points
- Deleting Reference Points
- Nudging Reference Points
- View Options
- Tips for AdjustTrack
- Rotoscoping Basics
- The Art of Rotoscoping
- Mocha Tracking and Roto
- What’s the Überkey?
- Translate, Rotate and Scale your Splines
- Turning On and Off Points
- Add Motion Blur [Mocha Pro Only]
- Changing the Matte Blend Mode
- Viewing your Mattes
- Changing the Background Color
- Colorize your Matte Overlay
- Preview Rendered Mattes [Mocha Pro Only]
- Open Splines
- Tips for Rotoscoping
- The Dope Sheet and Curve Editor
- The Clip Module
- Keyboard Shortcuts
- Preferences
Introduction
Welcome to Mocha, tracking and rotoscoping tools that make your tracking and rotoscoping work much easier.
Our tools are based on our proprietary Planar Tracking technology, an awesome approach to 2D tracking which will help you to generate accurate corner-pins and track and transform your roto splines in a powerful way.
The Art of Tracking
Tracking and rotoscoping are part of almost any visual effects project. For 2D tracking, point trackers are most commonly used, but to get good point tracks requires a mix of experience and luck. You often have to “prime” a clip for optimum tracking using color correctors and other image manipulations. If the point being tracked exits frame, you get into offset tracking, which presents its own set of challenges. If it all fails, you are into hand tracking, which is time consuming and very hard to get accurate.
Mocha is a 2D tracker that requires less experience and luck to be successful with, does not require the image to be primed and is less likely to require a lot of tricks or hand tracking on difficult shots.
There Are No Point Trackers
In Mocha splines are used for both tracking and rotoscoping. This is a different method from standard 1-point or multi-point tracking tools.
Traditional tracking tools require that you locate “points” that remain consistent throughout the entire shot in order to track movement. This is itself a difficult task, especially when tracking a shot that was not originally designed to be tracked. If you wish to also track rotation, perspective and shear you need even more clear and consistent points to track.
Traditional roto methodology would have you outline a shape with the minimum number of points necessary then either manually move the control points or track the shape with a point tracker to “get it close”. Even when using multi-point trackers to impart rotation and scale to the roto spline, the results are often unusable if there is any perspective change during the shot.
Instead, Imagineer’s Planar Tracker tracks an object’s translation, rotation and scaling data based on the movement of a user-defined plane.
A plane is any flat surface having only two dimensions, such as a table top, a wall, or a television screen. Planes provide much more detail to the computer about an object’s translation, rotation and scaling than is possible with point-based tracking tools. Even as an object leaves and enters a frame, there is usually enough information for the Planar Tracker to maintain a solid track of the object.
When you work with the Mocha tools, you will need to look for planes in the clip. More specifically, you will need to look for planes that coincide with movements you want to track. If someone is waving goodbye, you can break their arm into two planes - the upper and lower limbs. Although not all of the points on the arm sections actually lie on the same two-dimensional surface, the apparent parallax will be minimal.
Interface Overview
To quickly get familiar with Mocha before you dive into the rest of the manual, here is a breakdown of the interface and its controls.
| Some parts of the Interface Overview uses the Mocha Pro Interface. Versions of the Mocha Pro Plugin, Mocha HitFilm, Mocha for After Effects etc. may differ in presentation, but their tools perform the same function |
Layouts
Mocha layouts are modifiable, allowing you to hide or reveal many parts of the interface.
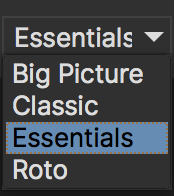
These layouts are clustered into 4 default types you can build from.
Essentials Layout
Mocha begins in the Essentials layout, which provides a simplified interface for basic tracking and roto.
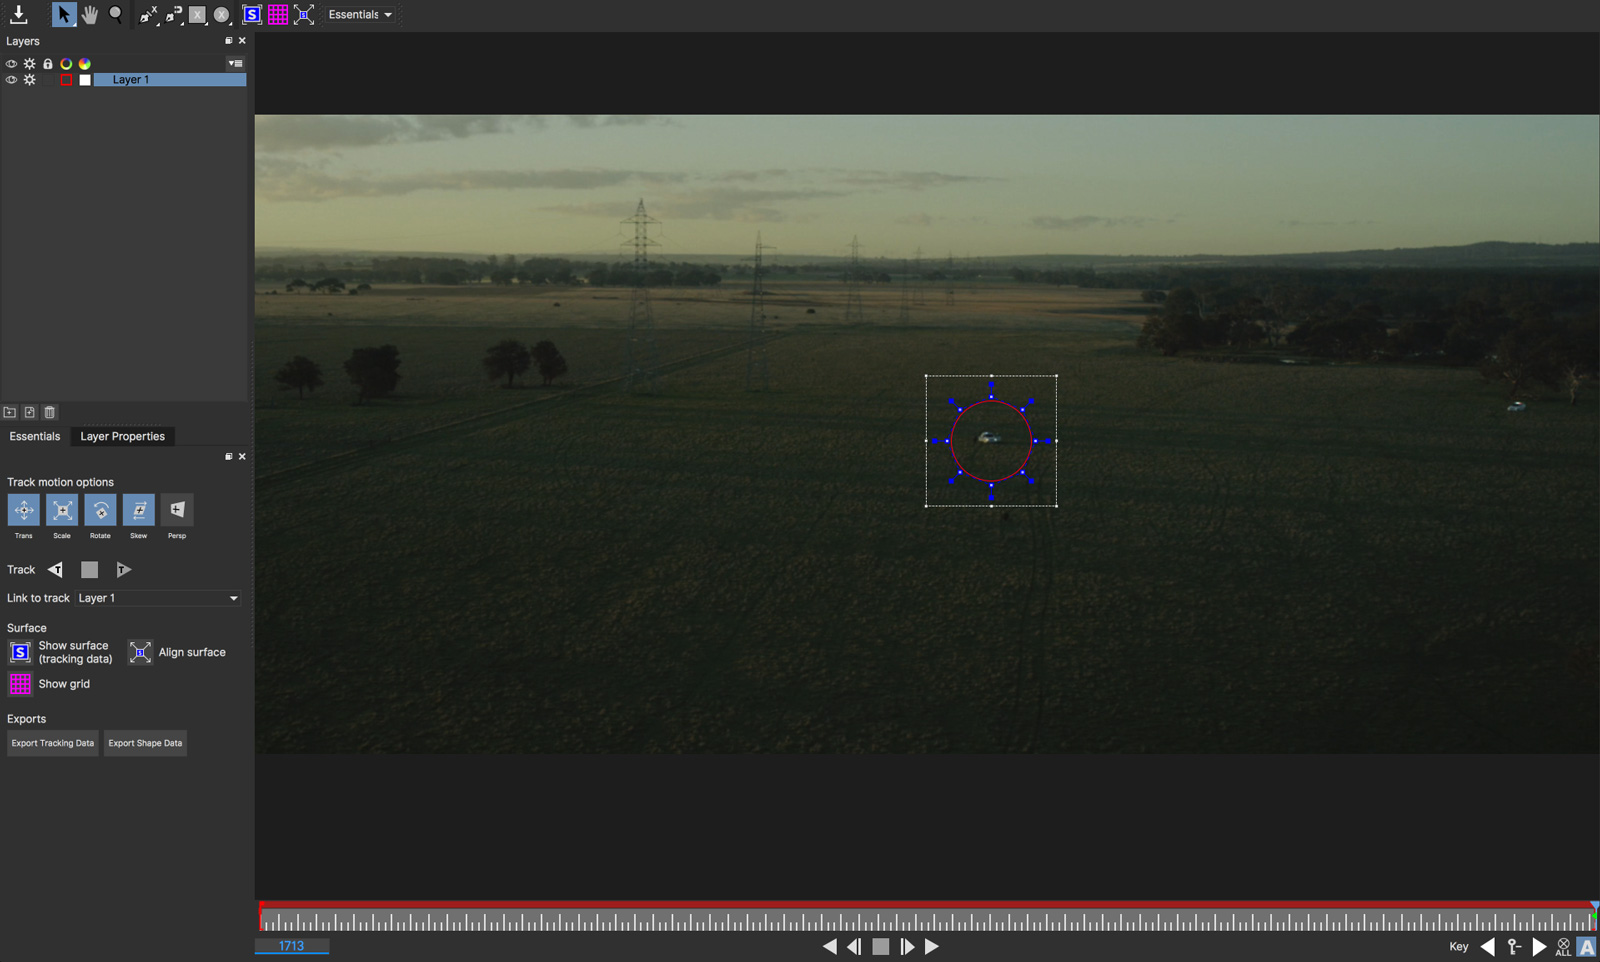
The basic toolbar provides a minimal set of tools without cluttering the interface.
The Essentials panel on the left side of the window combines everything you need for a basic track.
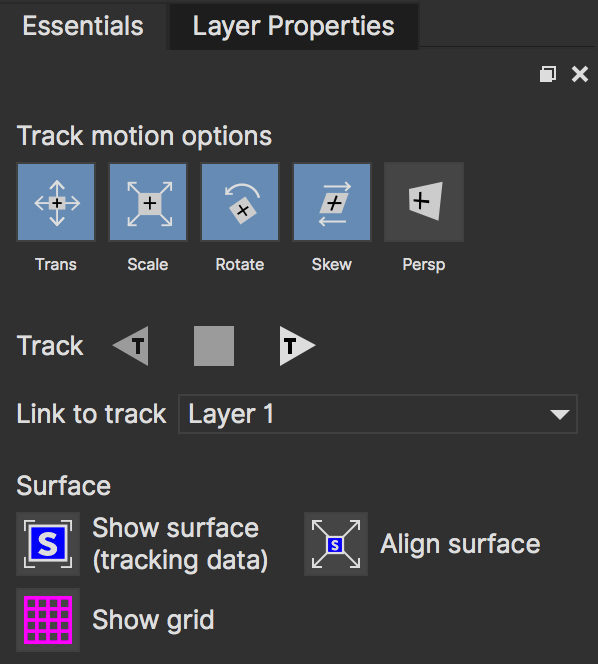
The Panel contains the following features (from top to bottom):
Track Motion Options
The 5 motion types you can track in:
Translation
Scale
Rotation
Shear (sometimes known as Skew)
Perspective
Track Buttons
For tracking backwards, forwards and to stop the track
Link to Track
To attach a spline layer to an existing track, or detach it from a track entirely.
See Tracking Basics and Rotoscoping Basics for more information on the benefits of Link to Track.
Surface
These buttons control viewing and expanding the surface.
See Tracking Basics for how to use the surface effectively.
Show surface (tracking data): Reveals the blue surface that represents the tracking data.
Show grid: Reveals a useful grid for lining up the surface or monitoring for drift in a track.
Align surface: Expands the surface to fit the dimensions of the footage on the current frame.
Classic Layout
For Mocha veterans, the Classic layout is arranged like the original Mocha.
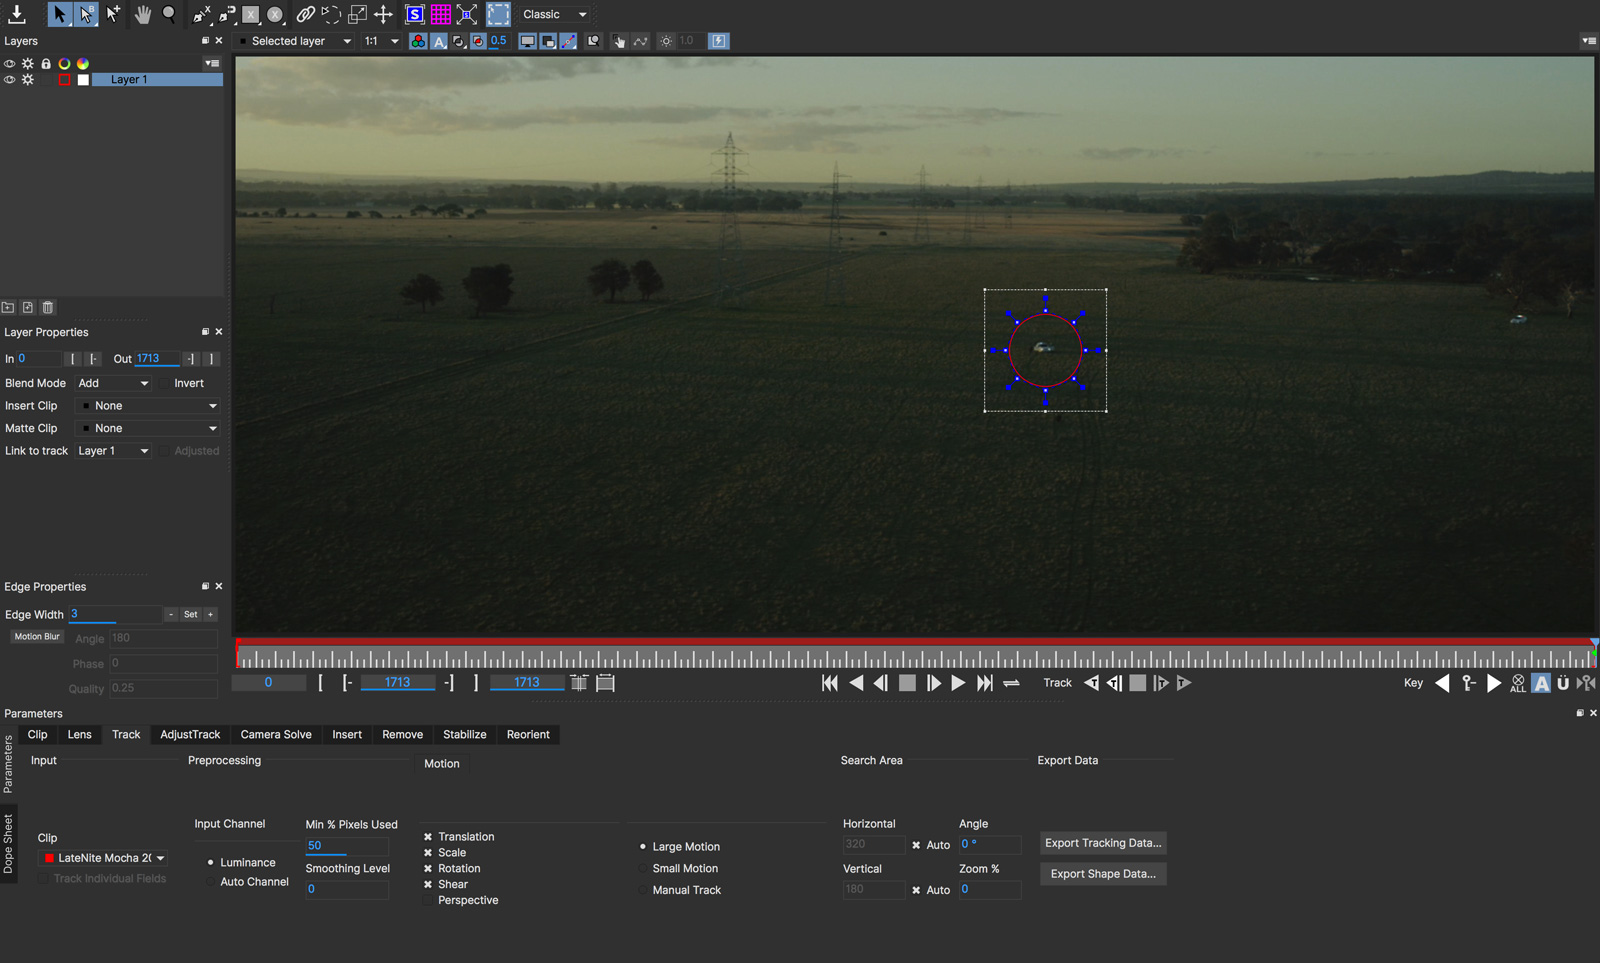
Use this mode if you are familiar with Mocha and want access to all the parameters and tools.
Roto Layout
Like the Essentials layout, this layout is optimized specifically for roto sessions where only the most necessary panels and tools are shown.
Big Picture Layout
If you want to reduce all clutter entirely, the Big Picture layout is very useful for previewing shots without any elements getting in the way.
Saving Layouts
You can add or remove many parts of the Mocha interface, such as:
Timeline controls
Toolbars
View controls
Etc.
These can either be access by right clicking the area of the interface and choosing a GUI element to show or hide, or selecting from the View menu.
Any changes you make to a layout will not be saved unless you choose View | Layout | Save Current Layout.
For example if you like the Essentials layout, but would like the Advanced toolbar from the Classic layout:
Choose "Essentials" from the layout drop-down
Choose "Advanced Tools" from
View | ToolbarsChoose
View | Layout | Save Current Layout
This will now save the Essentials layout with the new toolbar.
If you have made changes to a saved layout want to revert back to the saved version, just choose View | Layout | Revert to saved.
If you want to revert back to the original default layout, just choose View | Layout | Revert to default.
The Advanced Toolbar

At the very top of the interface you have the tools that form the brunt of your time inside Mocha.
| Save Project: Save the project |
| Select: Selection tool for splines and points. Hold the button to choose between Marquee selection and Lasso selection. |
| Select Both: Selects both the Inner spline points and the edge points. Hold this button down to select further options (See below) |
| Select Inner: Only selects the inner spline points |
| Select Edge: Only selects the outer edge points |
| Select Auto: Automatically selects between Inner and Edge points |
| Add Point: Tool to add points to the spline |
| Pan: Used to pan the footage in the Viewer |
| Zoom: Used to zoom into footage in the viewer |
| Create X-Spline Layer: Draw a new X-Spline layer |
| Add X-Spline to Layer: Draw an X-spline that is added to the current spline layer. |
| Create Bezier-Spline Layer: Draw a new B-Spline layer |
| Add Bezier-Spline to Layer: Draw a B-spline that is added to the current spline layer. |
| Create Rectangle X-Spline Layer: Draw a new Rectangle X-Spline layer |
| Create New Magnetic Layer [Mocha Pro Only]: Draw a magnetic line that converts to an X-Spline. |
| Add Magnetic Shape Selected to Layer [Mocha Pro Only]: Add a new magnetic line that converts to an X-Spline in the existing layer. |
| Create New Freehand Layer [Mocha Pro Only]: Draw a freehand line that converts to an X-Spline. |
| Add Freehand Shape Selected to Layer [Mocha Pro Only]: Add a new freehand line that converts to an X-Spline in the existing layer. |
| Add Rectangle X-Spline to Layer: Draw an Rectangle X-spline that is added to the current spline layer. |
| Create Rectangle Bezier-Spline Layer: Draw a new Rectangle B-Spline layer |
| Add Rectangle Bezier-Spline to Layer: Draw a Rectangle B-spline that is added to the current spline layer. |
| Create Circle X-Spline Layer: Draw a new Rectangle X-Spline layer |
| Add Circle X-Spline to Layer: Draw an Rectangle X-spline that is added to the current spline layer. |
| Create Circle Bezier-Spline Layer: Draw a new Rectangle B-Spline layer |
| Add Circle Bezier-Spline to Layer: Draw a Rectangle B-spline that is added to the current spline layer. |
| Attach Layer: Used to select a point and drag-lock it to another layer’s spline point. Useful for lining up individual splines. |
| Rotate: Rotate selection around the axis of the point you click in the viewer |
| Scale: Scale Selection |
| Move: Move selection |
| Transform Tool: Toggles the transform bounding box for manipulating selections |
| Show Planar Surface: Toggles the planar surface view |
| Show Planar Grid: Toggles a grid relative to the planar surface view. You can adjust the number of grid lines under Viewer Preferences (See below) |
| Align Surface: Expands the layer surface to fit the dimensions of the footage at the current frame. All tracked data is made relative to this new alignment. |
Basic Toolbar

In Essentials Mode, only a basic set of tools are shown, to simplify the interface.
The only tools shown here are:
| Save Project: Save the project |
| Select: Selection tool for splines and points. Hold the button to choose between Marquee selection and Lasso selection. |
| Pan: Used to pan the footage in the Viewer |
| Zoom: Used to zoom into footage in the viewer |
| Create X-Spline Layer: Draw a new X-Spline layer |
| Add X-Spline to Layer: Draw an X-spline that is added to the current spline layer. |
| Create Bezier-Spline Layer: Draw a new Bezier-Spline layer |
| Add Bezier-Spline to Layer: Draw a Bezier-spline that is added to the current spline layer. |
| Create Rectangle X-Spline Layer: Draw a new Rectangle X-Spline layer |
| Create New Magnetic Layer [Mocha Pro Only]: Draw a magnetic line that converts to an X-Spline. |
| Add Magnetic Shape Selected to Layer [Mocha Pro Only]: Add a new magnetic line that converts to an X-Spline in the existing layer. |
| Create New Freehand Layer [Mocha Pro Only]: Draw a freehand line that converts to an X-Spline. |
| Add Freehand Shape Selected to Layer [Mocha Pro Only]: Add a new freehand line that converts to an X-Spline in the existing layer. |
| Add Rectangle X-Spline to Layer: Draw an Rectangle X-spline that is added to the current spline layer. |
| Create Rectangle Bezier-Spline Layer: Draw a new Rectangle B-Spline layer |
| Add Rectangle Bezier-Spline to Layer: Draw a Rectangle B-spline that is added to the current spline layer. |
| Create Circle X-Spline Layer: Draw a new Rectangle X-Spline layer |
| Add Circle X-Spline to Layer: Draw an Rectangle X-spline that is added to the current spline layer. |
| Create Circle Bezier-Spline Layer: Draw a new Rectangle B-Spline layer |
| Add Circle Bezier-Spline to Layer: Draw a Rectangle B-spline that is added to the current spline layer. |
| Show Planar Surface: Toggles the planar surface view |
| Show Planar Grid: Toggles a grid relative to the planar surface view. You can adjust the number of grid lines under Viewer Preferences (See below) |
| Align Surface: Expands the layer surface to fit the dimensions of the footage at the current frame. All tracked data is made relative to this new alignment. |
See descriptions in Advanced Toolbar above for the rest of the tools.
The Viewer Controls

These controls cover what can been seen or hidden while working in the Mocha viewer.
| The Viewer controls are turned off in some layouts. You can turn them on via the View menu. |
| Clip to Show: Choose which clip to view from this dropdown |
| Proxy Scale: Adjust the resolution of the footage for performance |
| Show RGB Channels: Turns on the RGB view of the footage |
| Show Alpha Channels: Turns on the Alpha view of the footage |
| Show Layer Mattes: Toggle on or off to show the mattes. Select from the dropdown to choose the type of matte |
| Color Layer Mattes: Fills matte with Color. Decreasing the value lessens the opacity |
| Overlays: Toggles all viewer overlays, including splines, tangents, surface and grid |
| Show Layer Outlines: Toggles all spline overlays, including splines, points and tangents |
| Show Spline Tangents: Toggles spline tangents view. Select from the dropdown to choose the type of view |
| Show Zoom Window: Toggles the Zoom window |
| Stabilize: Turns on stabilize view. This centers the footage around your tracked surface. |
| Trace: Turns on the traced path of the tracked surface. You can adjust the amount of frames to trace under Viewer Preferences (See below) |
| Enable Brightness Scaling: Toggles brightness adjustment to work with low-contrast footage. |
| Viewer Preferences: Adjustments dialog for parameters such as grid lines and trace frames |
| Align Surface: Expands the layer surface to fit the dimensions of the footage at the current frame. All tracked data is made relative to this new alignment. |
The Timeline Controls

The timeline controls cover frame range, playback, tracking controls and key-framing.
| Some timeline controls may not be visible in certain layouts. You can turn them on via the View menu or by right-clicking the timeline. |
| Project In-Point: Frame where timeline playback starts |
| Set In-Point: Set the in-point for the timeline |
| Reset In-Point: Set the in-point back to the start of the clip |
| Current Frame: The frame the playhead is currently on. Enter a new value to jump to that frame. |
| Reset Out Point: Set the out point back to the end of the clip |
| Set Out Point: Set the out point for the timeline |
| Project Out Point: Frame where timeline playback ends |
| Zoom Timeline to In/Out points: Expands the timeline between the in and out points to the edges of the viewer |
| Zoom Timeline to full frame range: Resets the timeline scale to the full range of frames |
| Play Controls: Controls for playing back and forth and moving one frame at a time |
| Change Playback Mode: Toggles tri-state button between Play once, Loop and Bounce playback modes. |
| Tracking Controls: Controls for tracking back and forth and tracking one frame at a time. |
| Go to Previous Keyframe: Jump to the previous keyframe set in the timeline for that layer |
| Go to Next Keyframe: Jump to the next keyframe set in the timeline for that layer |
| Add New Keyframe: Add a new keyframe at the current position for the selected layer. This only appears if you are not hovering over an existing keyframe. |
| Delete New Keyframe: Deletes the keyframe at the current position for the selected layer. This only appears if you are hovering over a keyframe. |
| Delete All Keyframes: Deletes all keyframes on the timeline for the selected layer |
| Autokey: Toggles automatic key insertion when moving points or adjusting parameters |
| Überkey: Toggles the Überkey, which modifies all keys in the layer relative to the key you are now on. |
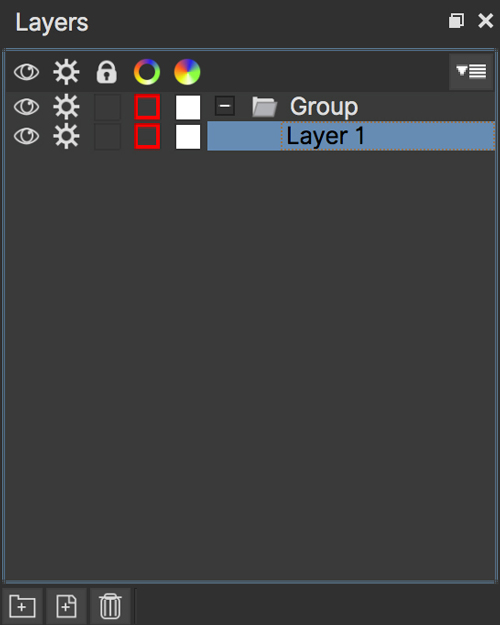
Layer Controls
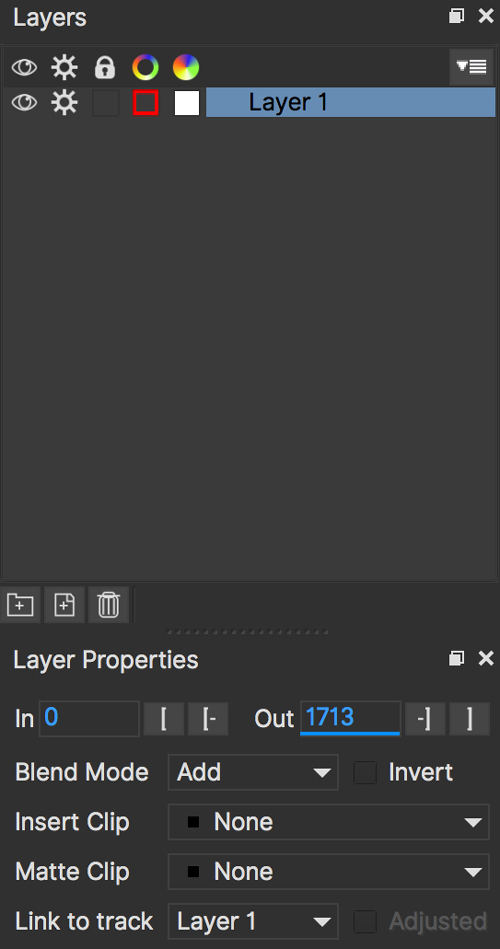
The top left hand panel contains the tools to manage layers.
| Layer Icons:
|
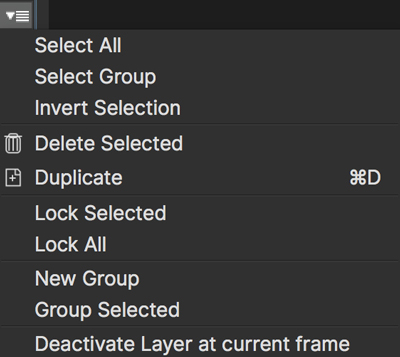
| Layer Actions dropdown:
|
| Group Layer: Groups the currently selected layers. If no layers are selected, creates an empty group. |
| Duplicate Layer: Duplicates the currently selected layers |
| Delete Layer: Delete currently selected layers on all frames |
Layer Properties
The section under the Layer Controls panel contains the properties for each layer.
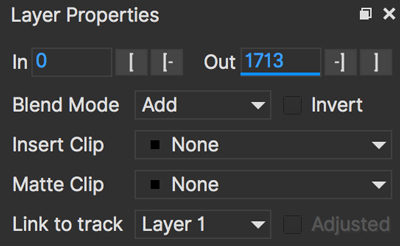
Layer In/Out frames: Settings to change where the layer turns on and off in the clip
Blend mode: Dropdown to add or subtract your spline to the current layer. Invert flips this
Insert Clip: Insert a demo clip to preview your track. You can use one of the default clips to test the tracked insert. For preview purposes only.
Link to Track: Which layer’s track to link your layer splines to. Can also be set to None.
Link to adjusted track: Optional checkbox to link the layer splines to the adjusted track of the selection in “Link to Track”
Cache Management
In Mocha v5 we introduced manual cache clearing to allow you to clear the Mocha cache at the project, render or global level.
You can access the Clear Cache option from the file menu under File → Clear Cache…
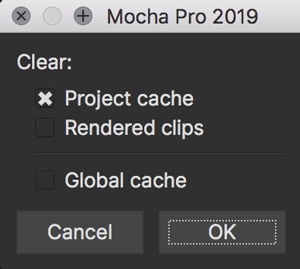
You can check the following options:
Project Cache: Clear the cache for the currently loaded project
Rendered Clips: Clear just the rendered clips for the project
Global Cache: Clear everything in the entire Mocha cache.
Only clear the Global Cache if you are certain you don’t want any of your existing project caches to remain.
Using the Mocha AE CC Plugin
The Mocha AE plugin can be applied as an effect directly onto layers in After Effects.
This reduces the need to swap out of your application and streamlines getting data in and out of Mocha.
The biggest advantage is you can set up layers and module settings in Mocha as normal, and then have the results render directly to the host timeline without having to export.
Applying the Mocha Plugin for Adobe After Effects
The Mocha AE CC Plugin for Adobe appears in the Effects menu like every other effect.
Simply apply the effect to the layer you want to work with.
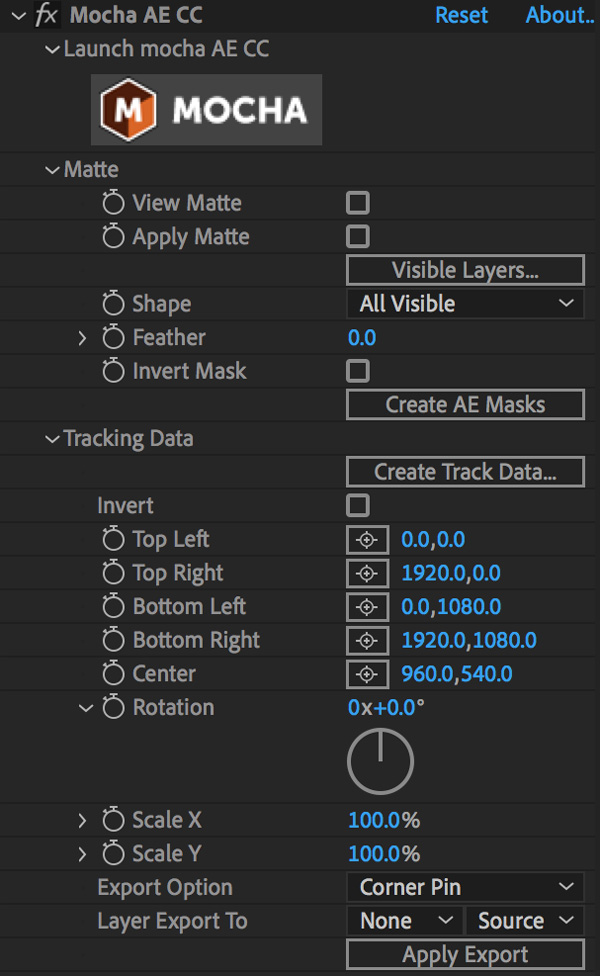
The general workflow for the Mocha Adobe Plugin is as follows:
Select the layer you want to track or rotoscipe
Select the Mocha effect from Effects | Mocha | Mocha AE CC or optionally choose "Track in Mocha" from the Animation menu.
Launch Mocha. This will load a full version of the Mocha interface that you can use just like the standalone version.
Use Mocha as required and then close and save. No rendering is required inside Mocha.
Choose whether you want to use mattes or tracking data from Mocha back in the plugin interface.
Using the Mocha GUI
Once you have applied the Mocha AE CC effect, you can click on the Mocha button to launch the main interface.

This then becomes exactly like working in the standalone version of Mocha, with a few exceptions.
First, you will notice you don’t need to set up a project like in the standalone version. The source layer is automatically loaded and ready to track in the view.
Secondly you don’t need to save out a project file (unless you want to export it). You just close and save the Mocha view when done and the project is saved inside the Effect like any other Adobe effect.
For further details on how to track and roto inside the Mocha GUI, see the rest of the User Guide:
| The Mocha AE CC Plugin interface is almost exactly the same as the standalone interface, so most of the usual guide and video tutorials can be applied to the plugin. |
Controlling Mattes
Once you have tracked layers in Mocha, you can then control the mattes for these layers back in the plugin interface.
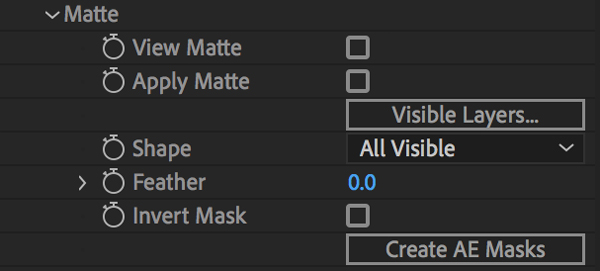
View Matte: Show the black and white matte from the Mocha layers chosen. This is very useful if you want to just see any problems with the matte, or you want to use the output as a track matte.
Apply Matte: Applies the chosen mattes to the current layer,
Visible Layers: This button launches the Visible Layers dialog so you can select the layers you want visible as mattes.
Shape: This drop down lets you switch between All Visible and All mattes. All Visible mattes are controlled by the Visible Layers dialog.
Feather: Applies a blur to the matte. This feathering is independent of the feathering of the individual layers inside Mocha.
Invert Mask: Inverts the currently visible mattes.
Create AE Mask: Creates native AE splines on the effect layer just like "Paste Mocha mask". This function is only available in After Effects.
Controlling Tracking Data
If you have a tracked layer in Mocha you can see the output of its surface back in the After Effects interface.
Each point in the Tracking Data section is a point from the layer surface that automatically updates when you modify it inside Mocha.
To choose a layer to create tracking data from, click the 'Create Track Data' button in the Tracking Data section of the plugin.
![]()
Then choose the layer you want to read tracking data from in the dialog that appears. You can only choose one layer at a time.
![]()
Once you click OK, the plugin will generate keyframes to populate the tracking parameters in the plugin. You can then use this data to copy to other layers, or link via expressions.
| Generating keyframe data can take some time for very long shots. You can cancel generation at any time when the progress bar appears. |
Applying Tracking Data Exports to Other layers
The plugin interface also allows you to apply tracking data to other layers without needing to export from the Mocha GUI.
Do do this, you generate the tracking data from a layer, as described above in Controlling Tracking Data.
You can then choose an export option at the bottom of the Tracking Data section:
Corner Pin: A standard corner pin effect
Corner Pin (Support Motion Blur): A corner pin distortion with separate scale, rotation and position.
Transform: Scale, position and rotation
Clicking 'Apply Export' then copies the information to the specified layer.
Tracking Basics
| Some tools, parameters and techniques listed below may not be visible in Essentials mode. To see additional interface elements, switch to Classic mode. See the Layouts section for more information. |
The Planar Tracker
Imagineer’s Planar Tracker technology provides 2D tracking data by tracking planes rather than points.
The key to getting the most out of the Planar Tracker is to learn to find planes of movement in your shot which coincide with the object that you want to track or roto. Sometimes it will be obvious - other times you may have to break your object into different planes of movement. For instance if you were tracking a tabletop, you would want to draw the spline to avoid the flower arrangement in the center of the table — it is not on the same plane and will make your track less accurate.
To select a plane you simply draw a spline around it. You can be fairly loose with your spline — the Planar Tracker is intelligent enough to discard the pixel movement that doesn’t conform to the movement of the majority of the pixels within the shape.
Mocha features two spline types, X-Splines and Bézier splines:
X-Spline
In general X-Splines work better for tracking, especially with perspective motion. We recommend using these splines where possible.

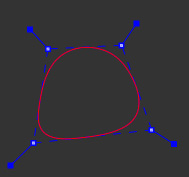
Bézier Spline

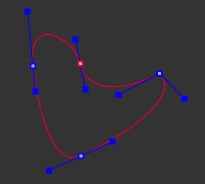
Bézier Splines are also very versatile for roto and is the industry spline standard.
CPU vs GPU Tracking
You can choose between a GPU or a CPU tracker in Preferences. By default, GPU is selected, but will fall back to CPU if an operation is not supported by the GPU version.
The GPU option allows you to select any supported graphics card on your system to take on the brunt of the tracking process. The resulting speed improvement is especially noticeable on high resolution footage or when tracking large areas.
The Relationship Between Splines and Tracking Data
One of the most important concepts to understand with the Mocha planar tracking system is that the spline movement is not the tracking data.
It’s best to think of the splines you draw around objects as search areas. Here’s a breakdown of how the tracking works:
By default, any spline you draw is linked to the tracking data of the layer it is currently in. In hierarchical terms, the spline is the child of the track, even if there is no tracking data.
When you begin to track a layer, the area of detail contained within the spline(s) you have drawn will be searched for in the next frame.
If the planar tracker finds the same area in a following frame, it will tell the tracker to move to that point. Because the spline is linked to the track by default, it will also move along with it and the search begins again for the next frame.
To see this relationship, turn on your surface and/or grid in the viewer after you have tracked something. Scrub the timeline and you will see that the grid and surface move with the spline.
Now select all the points of your spline and move it around the viewer. You will notice that the surface/grid will stay in the same place.
This is because the spline is linked to the track, but the track is not linked to the spline. The spline is merely a search area to tell the track where to go next. It is a common misconception that moving the spline while tracking is affecting the movement of the tracking data. It is not. Moving the spline is only telling the tracker to look in a different place and will not directly affect the motion of the tracking.
This makes the tracker very powerful, as you can move and manipulate your spline area around while tracking to avoid problem areas or add more detail for the search.
You can even unlink the spline from the track entirely so that any planar surface passing under the stationary spline area is tracked and you don’t have to move the spline if tracking starts to go off screen.
Selecting an Area to Track
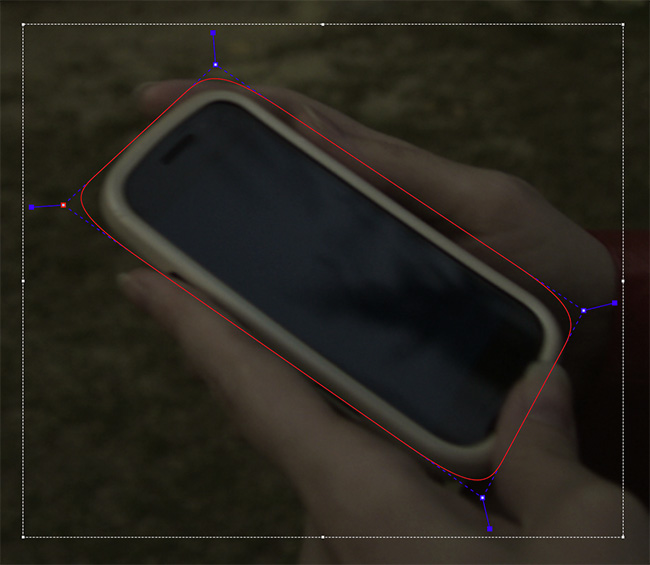
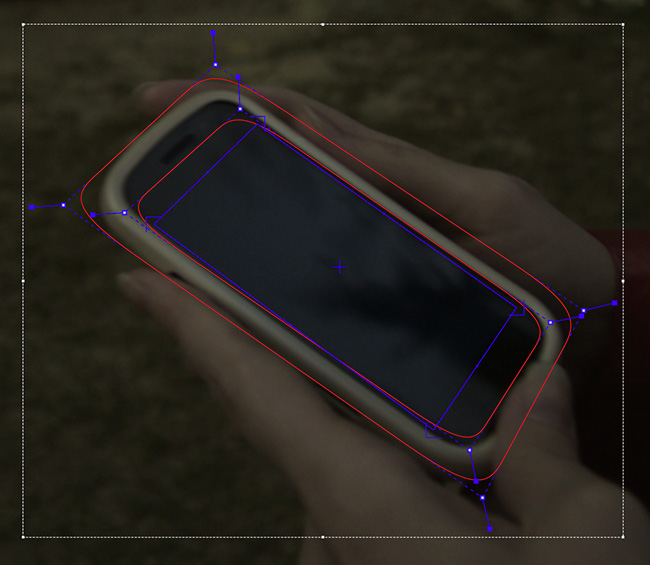
With the Planar Tracker you simply draw a spline around something, as shown with the screen below.
Select one of the spline tools to create a shape around the outside edge of the area you wish to track.
Start creating your shape by clicking onto the screen.
After the third point, the shape will auto-close, but you can continue to add points.
When drawing splines it is best to keep the shape not tight on the edge, but actually give a little space to allow for the high contrast edges to show through, as these provide good tracking data.
Right-click to finish drawing.
If you are using the X-Spline tool you can adjust the handles at each point by pulling them out to create a straight cornered edge, or pull them in to make them more curved. Right clicking a handle will adjust all the handles in the spline at once.
Dealing With Obstructions or Reflective Surfaces
In some cases there are parts of an image that can interfere with the effectiveness of the Planar Tracker. To handle this, you can create an exclusion zone in the area you are tracking.
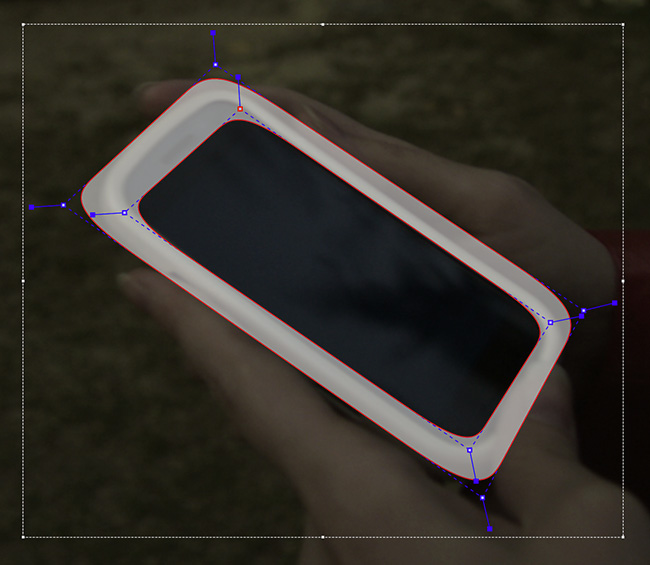
For instance, in the phone example we are using, there are frames where there are strong reflections on the screen. These reflections can make the track jump. So we need to isolate that area so the tracker ignores it. Here’s how this is done:
Select the initial layer you created.
Select the add shape tool to add an additional shape to the current layer, which selects the area you want the tracker to ignore.

Draw this second shape inside the original shape. Note that both splines have the same color, which is an indication that they belong to the same layer. Also you will notice in the Layer Controls panel that you only have a single layer.
By turning on the Mattes button under View Controls you can see the area that will be tracked.
You can also add as many entirely new layers on top of your tracking layer to mask out the layers below.
| The tracking layer uses the matte data of the combined layers you have drawn. This matte is the outer edge of the tracking layer matte minus the inner edge of the layers in front, regardless of feathering. |
This is quite common when moving people, limbs, cars, badgers etc. get in front of the object you are trying to track.
Tracking Parameters
In the Essentials layout, tracking Motion parameters are listed in the Essentials Panel:

In the Classic layout, detailed tracking parameters can be accessed by selecting the Track tab. On the left hand side of the Track tab, you will see two sections: Motion and Search Area.
Understanding the parameters section of the Track parameters is vitally important for obtaining good tracks. Here we provide a breakdown of each parameter and how to use it effectively.
Input Clip
This is the clip you are going to track. By default it is the one currently in the viewer.
Input Channel
When tracking, Mocha looks at contrast for detail. The input channel determines where to look for that contrast.
. Luminance looks for contrast in the light and dark of the image
. Auto Channel looks for contrast in one of the color channels.
By default, Luminance does a good job. If you have low-luminance footage or you are not getting a good track, try Auto Channel.
Min % Pixels Used
One of the most important parameters to look at for tracking.
By default, the minimum percentage of pixels used is dynamic. When you draw a shape, Mocha tries to determine the optimal amount of pixels to look for in order to speed up tracking. If you draw a very large shape, the percentage will be low. If you draw a small shape, the percentage will be high.
In many cases, the cause of a drifting or slipping track is a low percentage of pixels. If you want a more solid and accurate track, try setting the Min % Pixels Used value to a higher amount. Keep in mind however that a larger percentage of pixels can mean a slower track.
Smoothing Level
This value blurs the input clip before it is tracked. This can be useful when there is a lot of severe noise in the clip. It is left at zero by default.
Motion
These parameters control what motion you are looking for when you track:
Translation: The position of the object
Scale: Whether the object gets larger or smaller
Rotation: The angle of rotation of the object
Shear: How the object is skewing relative to the camera
Perspective: How the object is moving in perspective relative to the camera
The main difference between shear and perspective is the relative motion. Shear is defined as the object warping in only two corners, whereas perspective is most often needed where the object is rotating away from the viewer significantly in space.
As an example, if someone is walking towards you, their torso would be showing shear as it rotates slightly back and forth from your point of view.
The front of a truck turning a corner in front of you would be showing significant perspective change.
Large Motion: This is the default. It searches for motion and optimizes the track as it goes. Small Motion is also applied when you choose Large Motion.
Small Motion: This only optimizes. You would use Small Motion if there were very subtle changes in the movement of the object you are tracking.
Manual Tracking: This is only necessary to use when the object you are tracking is completely obscured or becomes untrackable. Usually used when you need to make some adjustments to complete the rest of the automated tracking successfully.
Search Area
This defines ranges for the tracker to search within
Horizontal/Vertical: The distance of pixels in the footage to search for the next object position. This is set to Auto by default.
Angle: If you have a fast rotating object, like a wheel, you can set an angle of rotation to help the tracker to lock onto the detail correctly. The tracker will handle a small amount of rotation, less than 10º per frame, with Angle set to zero.
Zoom: If you have a fast zoom, you can add a percentage value here to help the tracker. Again, the tracker will still handle a small amount of zoom with this set to zero.
Tracking the Spline
Before performing the actual track, adjust the settings depending on the movement in the clip.
Track the plane selected by pressing the Track Forwards button on the right- hand side of the transport controls section.
Stop the track and adjust the shape if it doesn’t seem to be tracking properly. You may keyframe the spline shape so that it tracks only the planar region of a shape by adjusting the shape and hitting Add Key in the keyframe controls menu. Keep in mind that no initial keyframe is set until you first hit Add Key or move a point with Auto-Key turned on.
Checking Your Track
The spline should be tracked in addition to the clip being cached to RAM. You can play it back and get an idea as to how the track went. Feel free to change the playback mode in the transport controls to loop or ping-pong your track.
Another trick you can do to check your track is hit the Stabilize button in the View Controls.
Turning on Stabilize will lock the tracked item in place, moving the image to compensate. In the track module, stabilize view is a preview mode to check your track. Actual stabilization output is handled by the Stabilize Module, explained in the Stabilize Overview chapter.
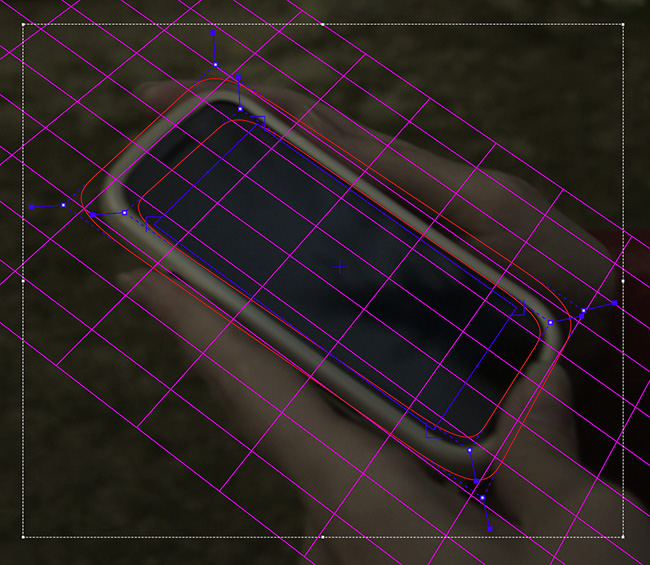
You can check the accuracy of your planar track by turning on the Surface and Grid overlay in the View Control panel. Drag the corners of the Surface overlay (the dark blue rectangle) to match the perspective of your tracked plane. If you play the clip, you should see the surface or grid line up perfectly with the plane you tracked.
| The Surface and Grid have no keyframes; they are simply guides that let you check the accuracy of your track. Note that the position of the Surface WILL affect the exported tracking data, so you MUST position the corners of the Surface before exporting tracking data. |
Next click on the Surface button under View Controls.
When you turn on the surface you will see the blue box that represents the 4 points of the corner-pin. Right now you will see that it is not lined up with the screen.
By selecting each corner one at a time you can adjust the surface area to cover the area of the screen.
The Grid overlay should line up with the plane you’re tracking and move with it as you cycle through the clip. You can change the density of the grid by adjusting the X and Y grid values in View | Viewer Preferences:
The grid overlay can give you a quick representation of the accuracy of the track.
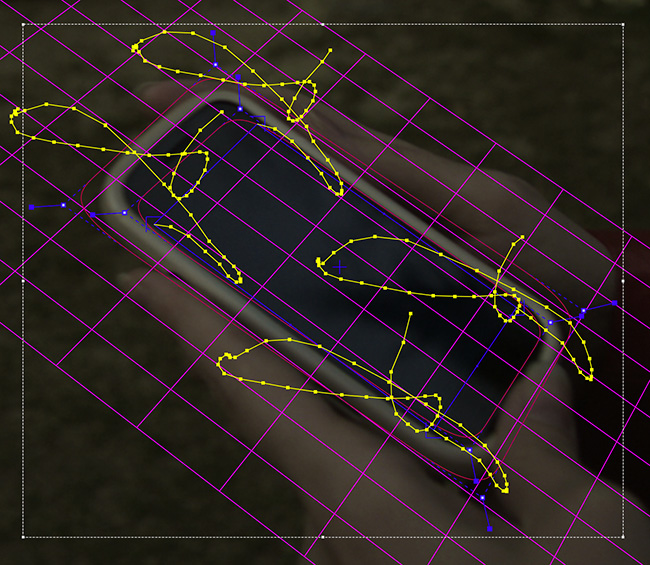
The Trace feature allows you to see the position of the planar corners over time. Skip allows you to work with only every nth frame, useful on particularly long roto shots where the movement is predictable.
| When you track a layer, the mattes of any active layers above the layer itself are subtracted from the matte of the layer and hence influence the area being tracked. To keep your tracking predictable, it is recommended that you keep your tracking layers on the top of the stack unless you specifically wish to use other layers to subtract from the tracking area of layers beneath it. |
To monitor what the tracker "sees" as a tracking area, select the Track Matte button in the view control.
Importing Mattes
There may be instances where you have already created mattes for one or more objects in the shot, for example using a keyer or another roto tool that would help you isolate areas to track. You can import such mattes by creating a new layer and then using the Matte Clip setting under Layer Properties to assign it to the layer.
Tips for Tracking
Scrub your timeline
When starting a new project, go through your footage a few times to see what your best options are for tracking. You will save yourself a lot of time by making note of obstructions and possible problem areas in advance.
Use edges
When tracking surfaces you will usually get a much better track if you include the edges and not just the interior of an object. This is because Mocha can define the difference between the background and the foreground and lock on better.
For example, if you are tracking a greenscreen, it is better to draw your shape around the entire screen rather than just the internal tracking markers. In some cases this means you can avoid tracking markers altogether and save time on cleanup later.
When in doubt, ramp up your pixels
You can quite often get a great result with default settings, but if you’re getting a lot of drift, try setting the Min % Pixels Used value higher. The processing can be slower, but you will usually get a much more solid track.
Draw more shapes
Remember you are not limited to one shape in a layer. Use a combination of shapes to add further areas or cut holes in existing areas to maximize your search. If necessary, make an additional layer to track and mask out foreground obstructions before tracking the object you need.
Use the grid while tracking
It’s common to use the surface and the grid to line up your corners after you track, but it can be much more advantageous to set up your surface before you track and leave the grid on to watch for any subtle drift while you are tracking. This way you can stop your track early to fix any issues and spend less time trying to find them later.
Track from the largest, clearest point
In order for Mocha to keep the best possible track, it is usually best to scrub through the timeline and find the largest and clearest area to begin tracking from, draw your shape there, then use backwards and forward tracking from that point.
For example, if you have a shot of sign coming toward you down a freeway, it is usually better to start at the end of the clip where the sign is largest, draw your shape and track backwards, rather than start from the beginning of the clip.
A planar surface does not necessarily have to be flat
We have a Planar Tracker which specifically tracks planes of motion, but this is not limited to tables, walls and other flat objects.
Distant background is considered flat by the camera where there is no parallax. Faces can be tracked very successfully around the eyes and bridge of the nose. Rocky ground, rumpled cushions, clumps of bushes, human torsos and curved car bodies are all good candidates. The key is low parallax or no obvious moving depth.
When in doubt, try quickly tracking an area to see if it will work, as you can quite often trick the planar tracker into thinking something is planar.
In the end, there is no magic bullet
Mocha is a very flexible tracker and will save a lot of time, but you will eventually run into a piece of footage that just will not track. Large or continuous obstructions, extreme blur, low contrast details and sudden flashes can all cause drift or untrackable situations.
If something just isn’t tracking no matter what you try, consider using Mocha to track as much as possible then move to manual work. You can often get a lot more done fixing shots by hand or using AdjustTrack in Mocha rather than trying to tweak your shapes and parameters over and over again to get everything done automatically.
Adjust Track
Overview
There will be times when tracks can drift due to lack of detail or introduction of small obstructions. When this occurs, manual refinements can be made by using the AdjustTrack tool.
AdjustTrack is primarily used for eradicating drift by utilizing the four-corner surface area to generate keyframable data to compensate. It is generally not practical to use it to remove jitter.
To achieve an adjusted track you would ideally line up the surface area where you want to place your insert or lock down your roto. In situations where you don’t require an insertion you should place the corners of the surface area in distinctive locations, as you will need to refer to these locations when you add keyframes to correct the drift.
Starting the Track Adjustment
When you have the Surface where you want it to stay locked and are ready to refine the track, flip over into the AdjustTrack module by hitting the AdjustTrack tab.

Reference Points
Once you select the AdjustTrack tab, a key frame with four reference points is created.
| You should be on your desired master frame before selecting the AdjustTrack tab. The reference points can then be positioned on distinctive features, such that any drift in the track can be easily seen and corrected. |

As you play though the sequence you will be able to manually adjust the position of each point as drift occurs.
If your track is spot on, these reference points should line up properly throughout the shot. If you see a Reference Point drifting, that will indicate the track is drifting. Find the frame where the drift is worst and move the Reference Point back to the position it had in the Master Frame and the track will automatically be adjusted based on your correction.
Reference Point Quality
When you perform an adjust track and you begin to move a newly created reference point, you will notice the dashed lines which connect all of the reference points. These lines change in color to represent the quality of positioning of any given reference point. For best results keep reference points away from one another.
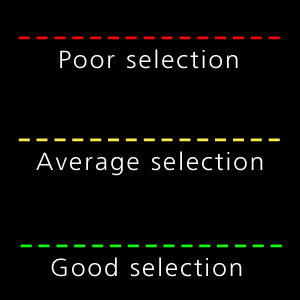
When adjusting the track try to always get at least yellow but shoot for green for a more solid adjust track.
The red lines indicate that this reference point position is a poor choice.
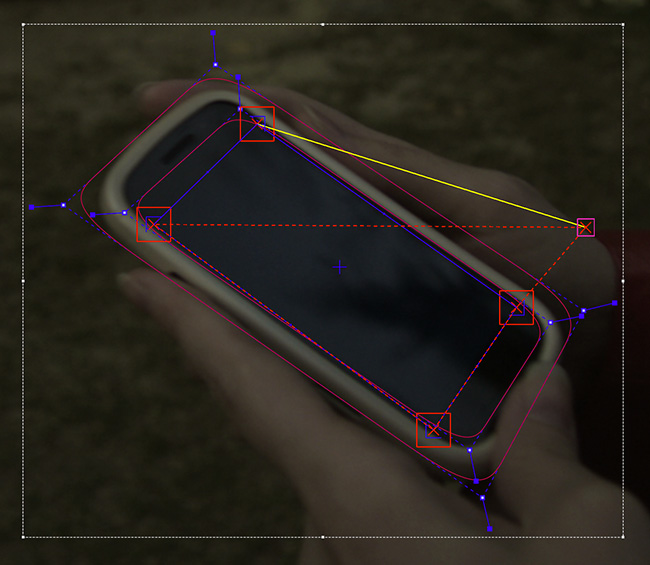
The green lines indicate that this reference point position is a good choice.

AdjustTrack with More than Four Reference Points
Often there are times where your reference points are either obscured or exit frame. In AdjustTrack you have the ability to create multiple reference points per surface corner that can be positioned in alternate locations to handle these situations. Simply click the New Ref button to create a new reference point for the selected corner.
You cannot keyframe the Surface — only the Reference Points. The original track and any refinements you make in AdjustTrack cause the Surface to move however.
Working Backwards
Every so often a shot will come along that is easier to track backwards than forwards. This is fairly simple when running the tracker backwards, but introduces some rather obtuse concepts when keyframing is involved. This is why there are two “New Ref” buttons provided. If you are working backwards and wish to set a new reference point, you will probably want to use the “<- New Ref” button instead of the forward-thinking “New Ref ->” button.

Because keyframing “thinks” forward, hitting “<-New Ref” will not create new Master Reference points on the current frame, but will go backwards in time, looking for any existing keyframes and set new Master Reference points on the frame directly after. For example, if you decide to create a new backwards reference point at frame 20, a new master reference will be created at frame 21.
Some people may be more comfortable doing this manually by moving the playhead themselves and using the traditional “New Ref ->” button. Others who do a lot of tracking and find themselves working backwards often may find the backwards-thinking New Ref button helpful.
About Master Reference Points (the red X)
Every Reference Point has one frame in which its initial placement is determined without causing any adjustment to the track. This is called the Master Reference Point; if you step forward or backward in time you will notice the red X change to a red dot.
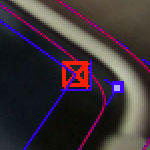
The red X indicates that this particular frame is the starting point for calculating adjustments. Moving a Master Reference Point will NOT change the tracking data.
Go ahead and experiment - move the Reference Point when it is a red X (a Master Reference Point). You will notice the Surface isn’t adjusted at all. Step forward a frame and move the same point - this time the surface will move because you are now adjusting the track.
Changing the Master Frame for a Reference Point
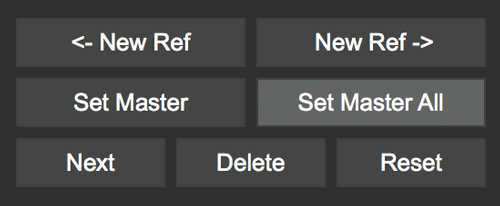
By default, the frame in which you create a Reference Point is its Master Reference frame. This Master Reference can occur on a different frame for each reference point. You can change the Master Reference frame by selecting a Reference Point, going to the appropriate frame and hitting the “Set Master” button.
You may set a new Master Reference Frame for all active points by hitting the Set Master All button.
Selecting Different Reference Points
One method for selecting different reference points is to hit the “Next” button.
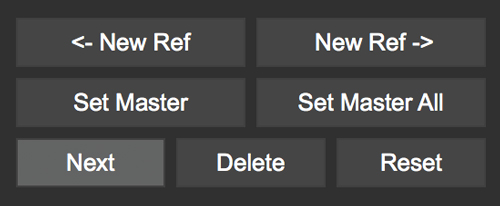
The next button simply cycles through the active reference points for that frame. More fine-grained control of reference points can be obtained through the Nudge control panel, described below.
Deleting Reference Points
Deleting Reference Points is done by selecting the point you wish to remove and hitting the delete key. If there are multiple Reference points on a particular corner, the preceding Reference Point will be extended through your time line until a new Reference point is encountered.
Nudging Reference Points
The Nudge section allows you to move Reference points in 0.1 pixel increments, much more fine grained than would be possible by dragging the points manually. You can easily select any active Reference Point by selecting one of the corner buttons in the Nudge section.
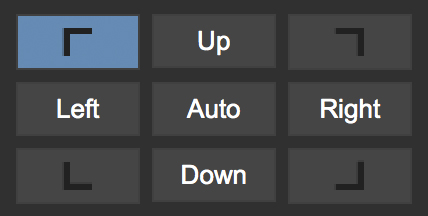
If you hit the Auto button, a tracker will attempt to line up the selected Reference Point based on its position in the Master Reference frame. The Search Region Size and Maximum Motion parameters can be set in pixels in the Auto Nudge section.
You can quickly select any corner by using the Corner selector buttons in the Nudge control panel. In the image below, the user is selecting the upper right corner in preparation for nudging operations.
View Options
The AdjustTrack tab has a View section for cleaning up your AdjustTrack workspace. Deselecting the Inactive Traces button will cause the display to hide the traces of the inactive Reference Points. This is helpful if you have a corner with numerous Reference Points offsetting it.
Deselecting the Unselected Traces button will hide any Reference Point that is not selected.
Finally, deselecting the Search Area button will hide the Search Region Size (in Yellow) and the Maximum Motion search area (in Pink).
Tips for AdjustTrack
Adjust frames at the peak of drift
When you see a drift, carefully cycle through the timeline and look for where the motion starts to change direction. A frame before this, adjust your drift, then go halfway between your master frame and the adjusted frame to check for any further drift. If you keep working by checking halfway between each keyframe you set, you will reduce the amount of keyframes required.
A huge amount of keyframes is not a good sign
If you end up with adjustment keyframes on a large amount of frames it may be better retry the track. AdjustTrack is aimed to help reduce small anomalies and fix drift when a tracked corner has become obscured. If you are fixing every second keyframe it means you have more than a simple drift.
Rotoscoping Basics
| Some tools, parameters and techniques listed below may not be visible in Essentials mode. To see additional interface elements, switch to Classic mode. See the Layouts section for more information. |
The Art of Rotoscoping
Most often a good matte requires a combination of both keying and rotoscoping techniques.
Good rotoscoping artists often think like animators, reverse engineering the movements, the easing in and outs, the holds and overshoots of objects, and set their keyframes accordingly.
In general, the fewer the keyframes, the better your mattes will look. Too many keyframes will cause the edges to 'chatter' and move unnaturally. Too few keyframes will cause the shapes to drift and lose definition. Finding the right number and placement of keyframes often comes with experience but there are a few things to keep in mind when rotoscoping.
Traditional Roto Tips
There is no such thing as a perfect matte. Rotoscoping is an art form that takes into account the background image, the movement of the object, and the new elements to be composited in the background.
Try to start your shape at its most complex point in time, where it will need the most control points.
Break a complex shape into multiple simple shapes. If you are rotoscoping a humanoid form and an arm becomes visible, consider rotoscoping the arm as its own element, rather than adding extra points on the body that will serve no purpose when the arm is obscured.
Imagine you are the animator who created the shot. What would your dope sheet look like? No matter the medium, whether CG, live action or otherwise, most movements are rarely linear. They normally move in arcs; they normally accelerate in and out of stopped positions. Try and understand the mechanics behind how things are moving in your shot. This will help you to minimize keyframes.
Watch and study the shot before you start working. Where are the changes in directions? These will normally have keyframes. Where are the starts and stops? Are there camera moves that can be stabilized to make your work easier?
Don’t be afraid to trash your work and start over. Beginning roto artists often make the mistake of trying to fix a flawed approach by adding more and more keyframes. Experienced roto artists learn to quickly identify an inferior approach and are unashamed to trash their work and start over, often many, many times. It is very difficult to get a good matte without a conscious effort to keep the keyframes to a minimum.
Mocha Tracking and Roto
While you can refine a shape you have tracked to do your rotoscoping, the recommended way is to do a rough shape to track something and then link your roto to that track. This reduces the amount of work required when you are dealing with complex shapes, as you will not have to track and refine each shape as you go. It also means that if you have to retrack something you won’t have to redo a lot of layers. Another reason is reducing the amount of data needed in your project file.
It also helps to remember that your spline shape is linked to your tracking data and not the other way around.
For the following examples you can try out the tools using the BMW tutorial files
available from http://cdn.borisfx.com/borisfx/store/clips/rotoscoping.zip
Rotoscoping Workflow
1. Track the area you want to rotoscope
First of all you want to reduce as much manual work as possible by tracking. In the example below, the front and side plane of the car is being tracked (For a more detailed coverage of tracking, see the Tracking Basics documentation).
![]()
2. Turn off your tracking shape
Once you’ve tracked an area it can be useful to turn it’s visibility off, as well as it’s tracking cog (so it can’t be accidentally retracked later). This means the tracked shape will not be confused with any roto shapes you are making.
3. Start drawing your refined shapes
Once you have a track for a layer we recommend that you add a new layer to use for the actual roto spline, rather than refining the spline you used for the actual track as you might need to do more tracking with it later.
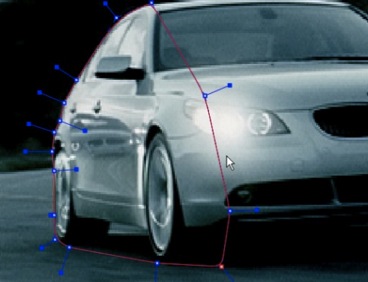

Select the X spline or Bézier spline tool and draw a tight spline around the object you are rotoscoping. Ctrl/Cmd+drag the Bézier tangents if you wish to break them. You will see that a new layer is automatically created.
4. Link the new roto layer to your tracked layer
You don’t want to track with this layer, so disable tracking for the layer by turning off the tracking button (the cog) for the layer in the Layer Properties panel.
Rename the new layer and link it to the movement of your already tracked layer by selecting it from the 'Link to Track' dropdown in the layer properties panel.
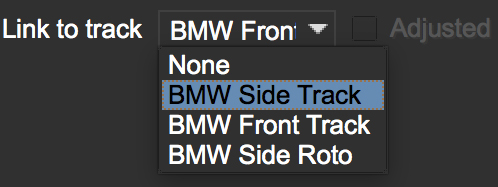
Your newly created roto spline will now follow the motion of the linked track.
5. Refine your roto
Now you have linked the rotoscoping layer to a track, you need to go over the timeline and make sure the roto is correctly animated.
Often you will need to tweak your shape for it to fit correctly, adding new keyframes. Autokey is on by default, so you just need to move along the timeline and adjust your points where necessary (keyframes turn up in the timeline as green dots). The tracking data will help for the majority of the motion.

You can also add additional shapes to the same layer using one of the "Add Spline to Layer" tools. These are the drawing icons with the plus sign next to them ("+").

You can cycle between each point on a spline with the keyboard shortcuts '{' and '}'. This is useful for when you need to do minor adjustments across many points separately.
6. Feather your edges if necessary
Edges can be feathered either by dragging out feathers point by point using the edge pointer tools in the toolbar or by using the parameters in the Edge Properties panel.
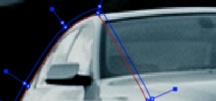
In the toolbar you have four different pointer tools:
The pointer tool with the 'B' will move both the inner and outer spline point (‘B' = ‘Both')
The 'I' pointer will only move the inner spline
The 'E' pointer will only move the outer spline point (‘E' = ‘Edge'). A feathered edge will occur between the inner and outer spline points
The 'A' pointer will remove either the inner or outer point depending on which is selected (‘A' = ‘Any')
You can also use the Set button under Edge Properties to feather the edge at the selected point(s) an exact amount or use the Add button to increase/decrease the feather by the specified amount.

For example, if you deselect all points by clicking anywhere on the canvas you can then use the Set button to apply the default 3 pixel edge width. Because no points are selected the value is applied to all points on the current layer. You can then tweak the position of all spline points to ensure that the inner (red) spline is inside the edge and the outer (blue) spline is outside the edge.
7. Track additional sections as you go
In many instances one track will not be enough. You may need to track more than one plane to drive different sets of roto. In the car example, we have to track the front and the side to get an accurate track for each planar region to assist the roto effectively.
In the case of organic shapes, like people, you will have to break your tracks down to handle the different movement between the torso and the arms etc.
What’s the Überkey?
The Überkey is a powerful tool that allows you to offset the positions of control points without destroying their keyframe data.

Use this tool with care, as it is not setting any keyframes per se, it is offsetting any and all keyframe data on the points you move while it is on. Überkey is very useful, but remember to turn it off again when you don’t need it. Use with care.
Überkey affects only those frames between the timeline’s In and Out point. If you wish to make adjustments to a particular range, set the In and Out points to that range.
Translate, Rotate and Scale your Splines
You can translate, rotate and scale selected points as a group by using the corresponding tools listed in the toolbar.


Or alternatively, use the transform tool to perform all of the above functions in the same tool:

Turning On and Off Points
You can turn on and off individual points in a spline. When they are off, you can still see the points, they can still be animated, but they are not contributing mathematically to the spline. This allows you to have a complex spline only when you need it, rather than having to deal with superfluous points in parts of the shot when they are not needed.

To turn off points, select the points on the spline and hit Shift+Delete. You will see the curve change shapes, but the points will remain.
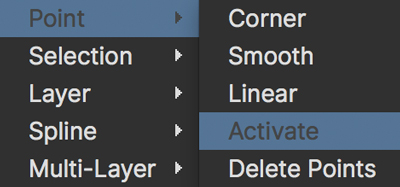
To turn a point back on, right-click on it and select Point | Activate.
If the Autokey button is enabled, a keyframe will be created when you change a point’s active status.
Add Motion Blur [Mocha Pro Only]
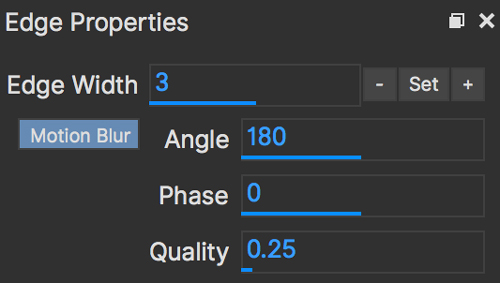
You can use the movement of the individual spline points to determine motion blur. Any movement in the spline, whether through simple X/Y translation or by shape deformation will cause motion blur.
You can control the amount of blur by changing the motion blur value in the Edge Properties panel.
Changing the Matte Blend Mode
Although not necessary in this example, note that you can change how mattes are blended in the Layer Properties panel. You may make each layer’s matte Add or Subtract and you can also invert the matte.
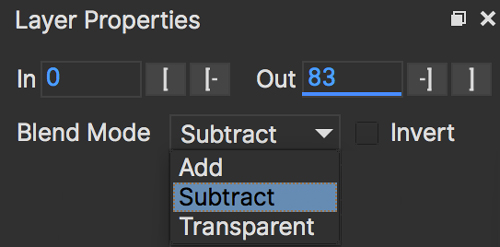
Note that this can’t be keyframed and that these settings apply to the entire layer, not to individual splines of the same layer.
Viewing your Mattes
In the View Controls, several options are offered for viewing your mattes. The Matte drop down is has options to view all mattes, just the mattes you have selected or no mattes.
![]()
Select the Matte button and you will see your rotoscoped object against a flat background.
Changing the Background Color
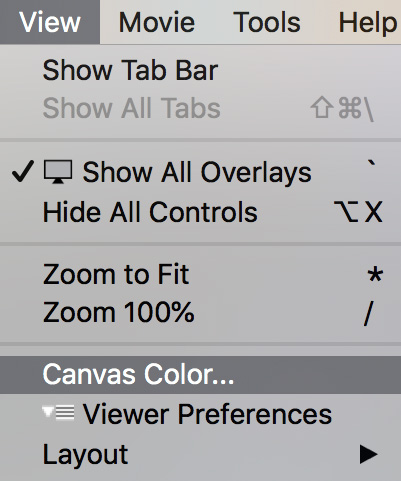
You may wish to rotoscope against a particular color. Select View → Canvas Color… and a color picker will allow you to choose a particular background color
Colorize your Matte Overlay
When you have your Mattes turned on, you may choose for the matte to be filled with a color instead of cutting out the object, using Colorize.

You can adjust the opacity of the color fill by changing the blend value to the right of the Colorize button.
![]()
The color used by Colorize is derived from the Selected and Unselected properties of the Overlay Colors panel, which can be changed per layer.
This is only a preview and will not affect how your mattes are rendered when exporting.
Preview Rendered Mattes [Mocha Pro Only]
In the View Controls panel, you will find a drop-down menu for selecting the clip to view.
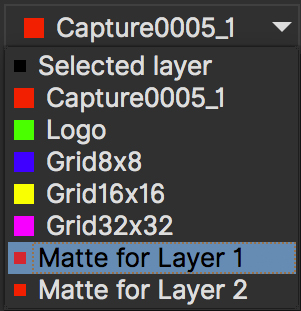
This allows you to view the actual rendered mattes, which can be especially useful when tweaking motion blur. The motion blur you normally see in your canvas is an OpenGL preview and can differ slightly from the actual render.
If you’d like to see what the actual motion blur render looks like, switch to viewing the layer whose matte you wish to see.
Because you can choose specific layers for export when you render, a render pass is created for each layer.
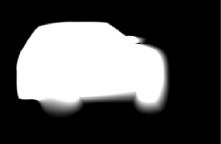
Switch the View Clip drop-down back to your source clip to continue working with that clip.
Open Splines
If you want to draw open splines, you can simply hold shift when you right-click to finish the spline. This will open the shape up.
You can open an existing shape using the Open Spline shortcut key (by default this is 'o')
You can close an existing shape using the Close Spline shortcut key (by default this is 'c')
Both the Open and Close shortcuts also work for finishing a spline rather than using Shift + Right-Click
You can also right-click a spline and choose: Spline | Open/Close Spline
Tips for Rotoscoping
Name your layers
Naming layers is very important to save yourself time later, especially if you are doing a heavy rotoscoping job. Get into the habit of labeling each layer with specific names.
Turn off the splines and just work with points and the matte
If you are working on a tight roto it can sometimes be easier to turn the spline off and just see the matte with the control points. To do this:
Select your layer and turn on the Mattes button (Show Layer Mattes)
Uncheck the Splines option in the 'Show Spline Tangents' dropdown
If your other view options are at default settings you should now see the matte in the viewer with only the tangents and control points visible.
The Dope Sheet and Curve Editor
The Dope Sheet
The Dope Sheet is used to move, copy and paste keyframes in your layers.
Navigating the Dope Sheet
You can navigate the Dope Sheet space by using the scroll bars horizontally and vertically. Holding CTRL/CMD+Scrolling the mouse wheel will let you scale up and down the timeline.
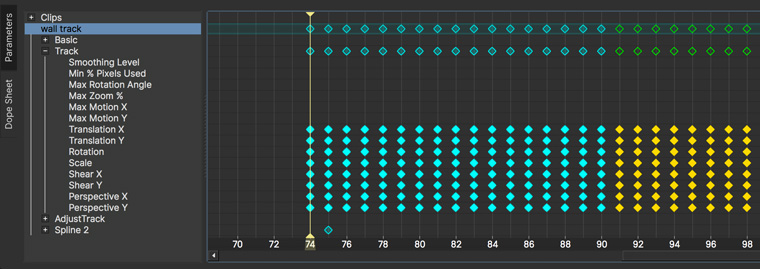
Group Keyframes vs Parameter Keyframes
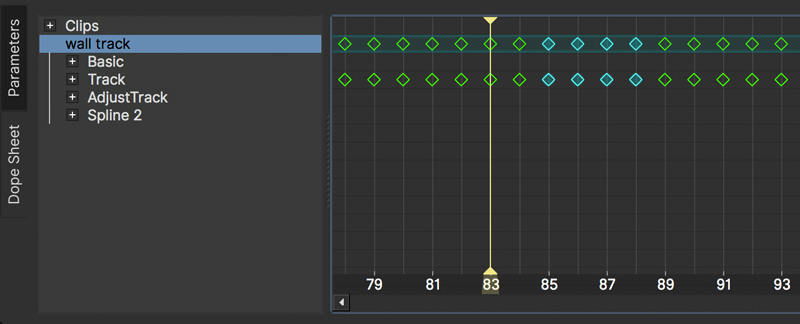
As you create animation or tracking data, you will see a number of hollow keyframes appear in the Dope Sheet. These are known as Group Keyframes which are keys that contain multiple sets of Parameter Keyframes underneath them.
You can move the Group Keyframes like normal animation keyframes, but instead of a single animation key, they will move all the keyframes underneath them.
This is useful when you need to shift a whole section of animation in a layer, and not just an individual point or parameter.
Expanding a section of the layer tree in the dope sheet will reveal either Parameter Keyframes or more Group Keyframes, depending on how many levels in that layer tree there are.
Selecting and Moving Keys
To select keyframes, you either click on one of them in the Dope Sheet, or marquee select a section. You can use SHIFT to pick multiple keys.
You can move the keyframes manually by dragging them with the mouse, or you can use the standard Copy/Paste keys (CTRL/CMD+C, CTRL/CMD+V) to copy keys and paste them at the current playhead position.
| At this time you cannot copy and paste Group Keyframes, only Parameter/Animation keyframes. |
The Curve Editor
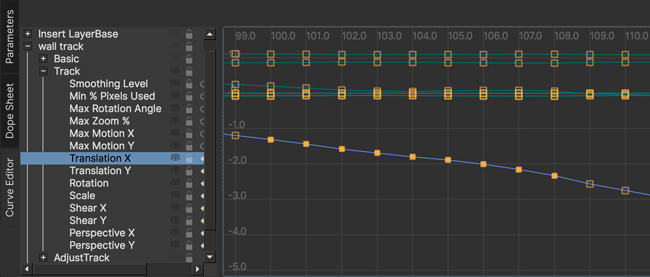
The Curve Editor is used to review how the data in your animation and tracking looks, as well as some value and frame manipulation options.
Navigating the Curve Editor
You may navigate the Curve Editor space by using the middle mouse button to Pan and the mouse wheel to zoom. Alternately, you may pan using the ‘x’ key on the keyboard and zoom using the ‘z’ key on the keyboard. When zooming with the ‘z’ key, left/right mouse movements will zoom in/out horizontally and up/down mouse movements will zoom vertically.
Selecting and Moving Keys
To select keyframes, you must first select the curve, then the keyframes. Keyframes of unselected curves are not selectable.
You may move the keyframes manually by dragging them with the mouse, or you may type in a “Nudge” value at the top right of the Curve Editor.
Entering a negative value in the “Nudge Time” field and hitting the button will move selected keyframes backwards in time by that amount every time you hit the button. Entering a positive value in the “Nudge Value” field and hitting its button will move selected keyframes up in value by that amount every time you hit the button.
Changing the Interpolation of Keys
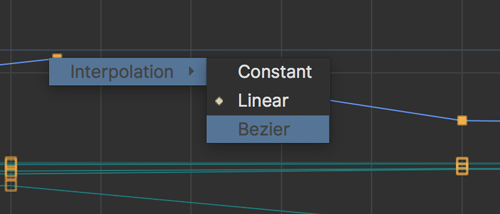
Interpolation describes the method of how values are calculated between keyframes. It defaults to linear interpolations between keyframes but you may wish to convert them to Bezier for easing in and out. Or if you wish them to hold their position until the next keyframe, you may wish to select Constant as the mode of interpolation.
Right click on a selected keyframe and choose Interpolation->Bezier. Bezier tangent controls will appear on your keys and you may adjust them for easing in and out.
Changing the Extrapolation of Keys
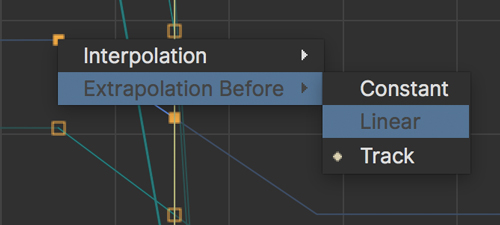
If a keyframe is the first or last keyframe on the curve, its extrapolation can be chosen. Extrapolation describes the method of how values are calculated “off into space” before the first keyframe or after the last keyframe. It defaults to Constant, which simply holds the value steady.
Choose linear extrapolation and the curve editor will continue the value on its current slope (sometimes called Gradient Extrapolation in other applications).
The Clip Module
General Clip View
The Clip module previews your clips in Mocha. It provide basic clip property information.
Managing clips
You cannot manage clips in this version of Mocha. To import additional clips, manage clip streams or handle stereo, you need Mocha Pro.
Crop Mask
You can mask down the clip to only allow Mocha to handle parts of the footage.
This is useful when you only need to track some area of the clip, or need to crop out letter boxing.
You can either adjust the Clip mask by moving the yellow dotted line on screen, or manually entering values into the Crop Mask parameters.
Timeline numbering
Here you can set whether you want the timeline display to be in frames or timecode.
Keyboard Shortcuts
Keyboard Shortcut customization
You can now customize keyboard shortcuts for almost every tool, action and menu item in Mocha.
Directly, via File | Keyboard | Customize…
By going to Mocha Preferences and clicking the Key Shortcuts tab.
You can create a new profile by duplicating a default profile, then customize the keys. These profiles are then available from the Keyboard menu:
Duplicate one of the default profiles and rename it
Select a category and choose an action you want to change or add a key sequence to
Click in the "Shortcut" column
Enter your key sequence
Click anywhere outside of the entry cell to complete
Click "Default" if you want to revert your change back to the default shortcut
| Pressing return or delete/backspace counts as a key entry, so please click outside the cell to complete the entry and use the "Clear" button to clear an entry. |
Default Mocha Shortcuts
Below are some of the common default shortcuts for Mocha
Tools
CTRL/CMD + F | Enable Picker tool |
I | Toggle insert point mode on/off |
Z | Enable Zoom tool while pressed |
X | Enable Pan tool while pressed |
CTRL/CMD + L | Enable X spline tool |
CTRL/CMD + B | Enable Bezier spline tool |
CTRL/CMD + Click | Break Bezier handle |
CTRL/CMD + Z | Undo |
CTRL/CMD + SHIFT + Z | Redo |
C | Close contour |
D | Delete point |
Transform
W | Rotate |
Q | Translate |
E | Scale |
Down Arrow | Nudge Point/Layer down 1 pixel |
Up Arrow | Nudge Point/Layer up 1 pixel |
Left Arrow | Nudge Point/Layer left 1 pixel |
Right Arrow | Nudge Point/Layer right 1 pixel |
SHIFT + Down Arrow | Nudge Point/Layer down 10 pixels |
SHIFT + Up Arrow | Nudge Point/Layer up 10 pixels |
SHIFT + Left Arrow | Nudge Point/Layer left 10 pixels |
SHIFT + Right Arrow | Nudge Point/Layer right 10 pixels |
Viewer Canvas
- | Zoom out |
+ | Zoom in |
/ | Zoom to 100% |
* | Zoom to fit |
Alt + 1 | Show/Hide Mattes |
Alt + 2 | Show/Hide Color Layer Mattes |
Alt + 4 | Show/Hide Layers |
Alt + 5 | Show/Hide Spline Tangents |
Alt + 6 | Show/Hide Surface |
Alt + 7 | Show/Hide Grid |
Alt + 8 | Show/Hide Zoom Windows |
` (Back dash) | Show/Hide All Overlays |
Timeline
Alt + Left Arrow | Go to start of clip |
CTRL/CMD + Left Arrow | Go to previous frame |
CTRL/CMD + Right Arrow | Go to next frame |
Alt + Right Arrow | Go to end of clip |
ESC | Stop processing |
Space | Start/stop playback |
Alt + Down Arrow | Set in-point |
Alt + Up Arrow | Set out-point |
Preferences
| Some of the preferences below relate to Mocha Pro. Some preferences may not be available in the Mocha Pro Plugin, Mocha AE CC and Mocha HitFilm. |
Preferences location
Preferences are accessed through File | Preferences on Windows or Linux (Mocha Pro only) and Application Menu | Preferences on OS X.
Output Settings
File Storage
Output Directory (Standalone only)
The Output Directory settings specify the default location of the directory in which the project file and rendered clips are stored. There is a choice between:
Relative Path: The project directory is a subdirectory of the directory containing the original project clip. By default, the subdirectory is Results. If you often load your project clip over a network, it would be best not to choose Relative Path, because the performance of project and clip I/O will not be as fast as the local disk.
Absolute Path: The project directory as an absolute path. For the best performance choose a folder on a fast disk, with plenty of disk space available.
Autosave
The Autosave box is selected by default. This will automatically save the project you are working on.
Set the interval between saves by increasing or decreasing the value in the Interval (minutes) box.
The default is 5 minutes. If Save Images Every Frame is checked, rendered frames are saved to disk as soon as they are created in memory; otherwise the render to disk only occurs when rendering a sequence of frames.
You can define the Autosave directory or leave it to the system default.
In the standalone, if there is an autosave file available for the project you have loaded, a dialog will appear asking if you want to open that instead.
In the plugin, the dialog will appear if there is an autosave available for a Mocha project done in that host. You can then choose to open, save or remove the project file.
For example, if you are working in After Effects and there is a problem, recovering your AE project and opening the Mocha GUI will show a Mocha Autosave recovery dialog for the project made in After Effects.
If you have other autosaves (for example from another Mocha Pro plugin host), the recovery dialog will NOT appear, as it was a project made in another program.
An example autosave file is called: "mochaAE_plugin-6_aftereffects-16.mocha.autosave" Which literally translates to: "Mocha AE CC Plugin project saved in After Effects v16".
In standalone, Autosave is per-project, i.e it will be directly related to the project you are working on. This is because we work with a 1-to-1 match of the project file name.
In the plugin, we can only save an autosave file per HOST, that is, we have no knowledge of the project/layer that is being worked on, so we can only save based on what we know, i.e the host the mocha project was saved in.
This means that in the plugin, a crash from a previous project will trigger a load prompt in ANY project you open created in the same host. For example:
Create an After Effects project with Mocha
Autosave kicks in
Force quit with mocha still open
Reopen host
Start or open another AE project with Mocha
Open mocha GUI
A Load-Autosave file prompt shows up
We time-stamp the autosave dialog so you can have a better idea of when the file was saved, but if you open the autosave it will replace your existing work.
Cache Directory
Specify here the folder to use for caching image data and storing auto-saved project files. For the best performance, choose a folder on a fast disk with plenty of disk space available. A lot of data is written out in the background while you work, approximately three times as much disk space as the taken up by the original clip will be used.
The Cache Original Clip box (Standalone only) is selected by default. This will cache the original clip to the File Cache when a project is created or opened for a more efficient playback and workflow. It is only necessary to check this if you are getting footage from a slow network.
Disk Space Available
The available space in the given disk drive is shown here.
System
Application
Undo History Size
The Maximum Size of the history is the number of user interactions stored in the undo/redo command list. The limit is used to conserve memory.
Track in Mocha AE
Check the box if you want to open Mocha Pro via the "Track in Mocha AE" option inside After Effects, rather than loading the bundled Mocha AE.
UI Look and Feel
Number of Shown Layouts
Set how many layouts you want to appear in the View menu. The default is 3.
Field Controls
You can set either:
Rotation Controls: Adjusts the value in the field by moving the mouse in a circular motion. The larger the circle motion, the more refined the adjustment.
Linear Controls: Drag left or right in the field to adjust the value.
Invert Mouse Wheel
Inverts the motion of when scrolling in a field increases the value or decreases it.
Layer Settings
Default Colors
Defines the default colors for Splines, Mattes and Points
Default Opacity
Defines the default opacity for mattes
X-Spline Default Weight
Sets the default weight of the x-spline control points
Default Bezier Length
Sets the default normalized length of the bezier tangent handles.
GPU
| Any changes to GPU settings requires a restart of Mocha. For standalone, this is simply closing Mocha and reopening. For the Mocha plugin, you need to restart the host environment to reload the plugin completely. |
Display
Use Vertical Sync
Enable vertical sync in the frame display. We highly recommend you keep this on.
Amount of Texture RAM to Reserve
The amount of memory that you want to be reserved for textures. This determines how many frames can be played back in real-time.
Textured rendering may not be compatible with Microsoft Windows Remote Desktop Connection.
Stereo [Mocha Pro Only]
Here you can enable Active Stereo viewing mode if it is available to you.
Matte Rendering
By default, Mocha will generate matte clips and track mattes by rendering with OpenGL to an offscreen buffer.
If Disable Offscreen Buffers is checked, Mocha will fall back to a software-based matte rendering implementation which is slower and produces lower-quality results, but will work on all hardware.
Most users should not need to use this option.
GPU Processing
This option is on by default and sets the planar tracker to use the graphics card instead of the CPU.
If this option is disabled it means you do not have a supported graphics card for GPU tracking.
OpenCL Device
This option lets you choose the graphics card you want to use for GPU tracking.
By default this is set to Automatic, which attempts to choose the best available option.
Allow unsupported GPUs
This option lets you override the officially supported graphics card list and choose any GPU on your system.
Use this option with care as it may lead to unstable results.
Software Update [Mocha Pro Only]
Settings to check for software updates.
Clip
If you are working on a number of shots that share the same clip attributes (the same video standard, frame rate and color space), it can be useful to set a default clip setting. Then you will not have to re-enter the same clip information each time you load a clip.
Defaults
FPS
Sets the default frame rate.
Custom PAR
Sets the default Custom option in Pixel Aspect Ratio
Frame Offset controls
Options to set you default timeline as frames or timecode, and set a fixed frame offset.
Format
Colorspace
Select Linear if your source clip is stored in linear color space, possibly with gamma applied. Select Log if your source clip is stored in log color space. Select Panalog if your clips originate from a Panavision Genesis camera, and are stored in the native Panalog format.
Convert to Float
Convert to Float causes imported clips to be generated internally as 32-bit float, increasing the precision of compositing operations but using more memory.
Format for result Clips
What to set you rendering result output to. Currently the choice is between DPX and TIFF.
Interlacing
Select the Separate Fields button if you normally use field-based clips. This will usually consist of a video clip with options for PAL (upper field first, also used for SECAM) or NTSC (lower field first) field ordering. Separate Fields will de-interlace the clip and display both fields. When a clip is rendered, the fields will automatically be interlaced back together again. There is also a 3:2 Pulldown option if you mainly work with 3:2 pulldown material.
Mask
Sets the default clip mask.
Lens [Mocha Pro Only]
Camera Model
Sets the default distortion mode. In Mocha VR the default is automatically set to 'Equirectangular'. If you are using Mocha VR for non-VR projects often, you may want to set this value to 'No Distortion'.
Logging
Diagnostic Logging
Enable Diagnostic Logging
This is selected by default. The file generated is useful for Imagineer engineers to diagnose error messages and fix any problems. You can view the log by selecting View Log from the Help menu. You can also change the location of the Log File from its default.
Verbose Mode
This is set to off by default. If you are working on a labor-intensive project, you can switch to only log errors as they occur, rather than constantly checking. This provides less information in the event of an error, but can marginally improve performance.
Key Shortcuts
See the chapter on Keyboard Shortcuts for more information.


