- Introduction
- Interface Overview
- Using the mocha Pro and mocha VR Plugins
- Applying the mocha Plugin for Adobe After Effects
- Applying the mocha Plugin for Adobe Premiere
- Applying the mocha Plugin for Avid Media Composer
- Applying the mocha OFX Plugin
- Adding the mocha Plugin inside The Foundry Nuke
- Adding the mocha Plugin inside Blackmagic Fusion Studio
- Adding the mocha Plugin inside SilhouetteFX Silhouette
- Adding the mocha Plugin inside Vegas Pro
- Basic workflow for the mocha OFX Plugin
- Using the mocha GUI
- Controlling Mattes
- Controlling Module Renders
- Rendering Insert Layers
- Dealing with Alpha Channel Input and Output
- Applying the mocha HitFilm, mocha Pro or mocha VR Plugin inside HitFilm
- Starting a New Project
- Tracking Basics
- Adjust Track
- Overview
- Starting the Track Adjustment
- Reference Points
- Reference Point Quality
- AdjustTrack with More than Four Reference Points
- Working Backwards
- About Master Reference Points (the red X)
- Changing the Master Frame for a Reference Point
- Selecting Different Reference Points
- Deleting Reference Points
- Nudging Reference Points
- View Options
- Tips for AdjustTrack
- mocha Pro - The Stabilize Module
- Rotoscoping Basics
- The Art of Rotoscoping
- Mocha Tracking and Roto
- What’s the Überkey?
- Translate, Rotate and Scale your Splines
- Turning On and Off Points
- Add Motion Blur
- Changing the Matte Blend Mode
- Viewing your Mattes
- Changing the Background Color
- Colorize your Matte Overlay
- Preview Rendered Mattes
- Open Splines
- Stereo Rotoscoping
- Working with Difference Mode and Stereo Offsets
- Merging Projects [Mocha Pro]
- Importing Silhouette SFX projects
- Tips for Rotoscoping
- The Camera Solve Module
- Exporting Tracks
- Exporting Tracks to Adobe After Effects
- Exporting Tracks to Final Cut Pro or Final Cut Express
- Exporting Tracks to Apple Motion
- Exporting Tracks to Apple Shake
- Exporting Tracks to Nuke
- Exporting Tracks to Blackmagic Fusion
- Exporting Tracks to Inferno, Flame, Flint, Smoke and Combustion
- Exporting Tracks to Assimilate SCRATCH
- Exporting Tracks to Boris FX Plugins
- Exporting Tracks to Avid DS
- Exporting Tracks to HitFilm
- Exporting Tracks to Quantel generationQ systems
- Exporting Tracks to MochaBlend
- Exporting Stereo Tracking Data
- Exporting Mattes and Clips
- Exporting Rendered Shapes
- Exporting Stereo Rendered shapes
- Exporting as G-Masks and Shake Rotosplines
- Exporting as mocha shape for After Effects Data
- Exporting Adobe Premiere Pro CC Masks
- Exporting as mocha shape for Final Cut
- Exporting Shapes to HitFilm 3 Pro
- Exporting Roto, RotoPaint and SplineWarp Nodes to Nuke
- Exporting Shape Data to Blackmagic Fusion Shapes
- Exporting Shape Data to MochaBlend
- Exporting Shape Data to Silhouette Shapes
- Exporting Stereo Shape Data
- Exporting Rendered Clips (mocha Pro)
- Exporting Stereo Rendered Clips
- The Remove Module
- The Lens Module
- Overview
- Lens Workflow with Line Detection Calibration
- Equirectangular Lens Workflow with mocha VR
- Lens Parameters
- Using Grid Images
- Anamorphic Camera Model
- Calibrating the Image Center
- Manual calibration
- Lens Workflow with Distortion Maps (mocha Pro/VR only)
- Exporting Lens Data
- Tips for Lens Calibration
- The Insert Module
- mocha VR: Using mocha for 360 workflow
- mocha VR: The Reorient Module
- The Dope Sheet and Curve Editor
- The Clip Tab
- Keyboard Shortcuts
- Preferences
- File Formats
- Command Line
- Installing Node-Locked Licenses
- Installing Floating Licenses
- Installing Render Licenses
Introduction
Welcome to mocha®, tracking and rotoscoping tools that make your tracking and rotoscoping work much easier.
Our tools are based on our proprietary Planar Tracking technology, an awesome approach to 2D tracking which will help you to generate accurate corner-pins and track and transform your roto splines in a powerful way.
|
|
This manual covers all products in the mocha family. Export and interface features may differ between mocha VR, mocha Pro, the mocha Pro Plugin, mocha HitFilm, or mocha AE. Legacy applications such as mokey and monet will have significant interface difference to the current versions. Please refer to their offline manuals. |
The Art of Tracking
Tracking and rotoscoping are part of almost any visual effects project. For 2D tracking, point trackers are most commonly used, but to get good point tracks requires a mix of experience and luck. You often have to “prime” a clip for optimum tracking using color correctors and other image manipulations. If the point being tracked exits frame, you get into offset tracking, which presents its own set of challenges. If it all fails, you are into hand tracking, which is time consuming and very hard to get accurate.
Mocha is a 2D tracker that requires less experience and luck to be successful with, does not require the image to be primed and is less likely to require a lot of tricks or hand tracking on difficult shots.
There Are No Point Trackers
In mocha splines are used for both tracking and rotoscoping. This is a different method from standard 1-point or multi-point tracking tools.
Traditional tracking tools require that you locate “points” that remain consistent throughout the entire shot in order to track movement. This is itself a difficult task, especially when tracking a shot that was not originally designed to be tracked. If you wish to also track rotation, perspective and shear you need even more clear and consistent points to track.
Traditional roto methodology would have you outline a shape with the minimum number of points necessary then either manually move the control points or track the shape with a point tracker to “get it close”. Even when using multi-point trackers to impart rotation and scale to the roto spline, the results are often unusable if there is any perspective change during the shot.
Instead, Imagineer’s Planar Tracker tracks an object’s translation, rotation and scaling data based on the movement of a user-defined plane.
A plane is any flat surface having only two dimensions, such as a table top, a wall, or a television screen. Planes provide much more detail to the computer about an object’s translation, rotation and scaling than is possible with point-based tracking tools. Even as an object leaves and enters a frame, there is usually enough information for the Planar Tracker to maintain a solid track of the object.
When you work with the mocha tools, you will need to look for planes in the clip. More specifically, you will need to look for planes that coincide with movements you want to track. If someone is waving goodbye, you can break their arm into two planes - the upper and lower limbs. Although not all of the points on the arm sections actually lie on the same two-dimensional surface, the apparent parallax will be minimal.
New features in mocha 5.5.2
-
Support for Vegas Pro: The OFX plugin is now officially supported in Vegas Pro
-
Support for multi-core CPUs: Mocha now takes advantage of multiple cores when tracking with the CPU
-
Auto Step for Remove: You can now have the Remove module calculate Step automatically
-
Support for non 2:1 VR footage in mocha VR: You no longer require a 2:1 PAR for footage in mocha VR
-
Speed improvements to Reorient: We’ve added additional speed increases to render and playback of the Reorient module in mocha VR
-
Python can now access the playhead: Provided API to get the playhead position with Python, which makes it easier to control keyframe setting
-
Python can now read/write image data in clips: Provided API to be able to read pixel data from any clip frame and create new output clips with image data. See the Python Guide for more details.
New features in mocha 5.5.1
-
Tracking search areas are optimized: mocha now adjusts the initial ‘Auto’ search area based on the image size. This also scales with proxies.
-
Rendering is faster in Media Composer: We have added several improvements to the AVX rendering speed.
-
Reorient preview render is faster: Reorient preview speed for mocha VR should be increased significantly.
New features in mocha 5.5.0
This version introduces the new mocha VR product:
-
360° Planar Tracking: Imagineer’s award-winning planar tracking solution has been improved to support equirectangular footage delivering the world’s most robust 360 tracking solution for post-production.
-
360° Workspace: Optimized workspace and toolset works simultaneously in rectilinear and lat/long views bringing 360 capability to a variety of applications. Artists can easily track and roto without worrying about equirectangular seams or distorted pixels.
-
360° Masking Tools: Unlimited X-Spline tools for articulate shape creation and masking, saves hours of time versus traditional keyframing techniques. Roto-masks can be rendered back to host or exported to most editing and compositing systems.
-
360° Object Removal: mocha’s famous Remove Module now works on 360 video by analyzing temporal frames and “automatically removing” unwanted camera rigs, shadows, crew members and more for massive time savings.
-
Horizon Stabilization: Designed to reduce unstable motion, the new Reorient Module can drastically improve nausea inducing VR experiences by smoothing or stabilizing shaky, handheld and drone captured footage. Driven by robust planar tracking, a user can even track and stabilize out of focus and most difficult footage.
-
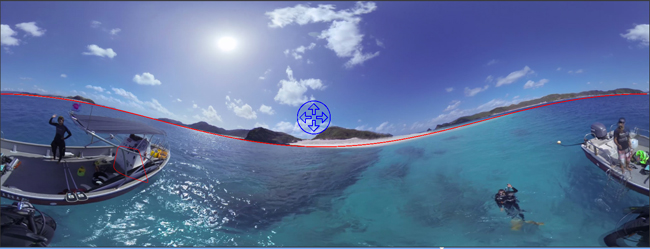
Lens Distort Workflow for 360 Compositing: Plug-in based lens correction workflow converts between lat/long and rectilinear for a simple workflow to add titles, graphics, patches and non 360 enabled filters to your 360 project.
-
Plug-in & Standalone workflows: Running inside industry standard editing and effects applications, provides an immediate bridge for systems that do not currently support 360/VR. Render finished shots to your timeline OR export tracking and roto data in a variety of formats for flexibility and project sharing.
See mocha VR: Using mocha for 360 workflow for more details.
Additionally, mocha 5.5.0 includes:
-
Improved Memory Handling: Memory performance and stability has been greatly improved.
-
Improved performance for large amounts of layers: There is significantly less slow down when working on large amounts of layers.
New features in mocha 5.2.1
-
OFX Support for Silhouette: You can now run the mocha Pro OFX Plugin in Silhouette v6.
-
Step and Range control in mocharender.py: You can now control various frame ranges and step values with the mocha Pro command line render. See the Python Guide for more details (not available in the plugin).
-
EXR and R3D import for mocha Pro Plugin: The plugin can now import R3D and EXR files.
New features in mocha 5.2.0
-
Floating license support for plugins and standalone: You can now run floating licenses for the plugins and the standalone mocha. There is no need to used mocha FL.
-
Render license support for plugins and standalone: You can now use render (i.e. non-interactive) licenses to expand rendering to other machines.
-
Apply Export for mocha Pro Plugin in After Effects: You no longer have to rely on the clipboard, you can generate and apply tracking data directly in the plugin interface.
-
Improved GPU Tracker: Additional improvements speed, stability and accuracy.
New features in mocha 5.1.1
-
Improved Remove Performance: Improved remove performance, especially when using clean plates.
-
Improved GPU Tracker: Support for Lens calibration. Additional improvements to card support, speed, stability and accuracy.
-
Customize Preferences with Python: You can now set preferences with Python using a Settings API (mocha Pro Standalone only)
-
Python Frame Buffer Control: Python mocharender.py and mochaexport.py scripts now accept arguments to turn on and off frame buffers (mocha Pro Standalone only)
-
Other Python API improvements: (see Python Guide and mocha Python reference. mocha Pro Standalone only)
New features in mocha 5.1.0
-
OFX Version: The first release of the OFX version of the mocha Pro Plugin.
-
Export Shapes to Blackmagic Fusion from Plugin: You can now export Fusion shapes from the plugin.
New features in mocha 5.0.0
mocha V5.0.0 is a major overhaul for performance and architecture, the key features being GPU tracking and plugin versions of the standalone software.
New features include:
-
Plugin Version: You can now load mocha Pro as a plugin into Adobe After Effects, Adobe Premiere and Avid Media Composer and OFX.
-
GPU Tracking: Our advanced planar tracking is now even faster, utilizing the speed of top end graphics cards.
-
Export Shapes to Blackmagic Fusion: You can now export shape data to the clipboard and paste it directly into Fusion.
-
Export Shapes to Silhouette: You can now export shape data and import it directly into a Silhouette session.
-
Import shapes to Silhouette: You can also import Silhouette projects to mocha to make round-tripping between software easier.
-
Export tracking data to HitFilm 4 Pro: Previously you could only do this directly in mocha HitFilm, now you can export from mocha Pro.
-
Massive Python API updates: Don’t have an exporter you need? Make your own! Python now supports custom exporters and importers, as well as custom tool creation (mocha Pro standalone only)
-
Built-in Python script editor: You can now experiment inside mocha or load fully operational scripts into the GUI using our script editor.
-
Command line rendering and exporting: Utilizing the Python API you can now render and export outside of the mocha GUI on the command line, taking the load off while you get back to work.
-
Redesigned Insert Module: We have overhauled the insert module to make it easier to navigate and control, including full layer matting.
-
Copy and paste layers and contours to different layers or other projects: Now rather than having to recreate roto elements you can simply copy and paste them inside the layer or outside to a new project.
-
Improved export for Adobe After Effects shapes: Shape exports for After Effects has been modified to paste directly to the playhead like tacking data, without the addtional padding.
-
Manual cache clearing tools for easier disk space management: Using the Clear Cache tools under the edit menu, you can clear global or project caches manually without needing to close the project.
-
Option to choose Marquee or Lasso for selection: Now holding down the mouse button over the selection tool shows you the option of using a marquee or a lasso tool, for easier point selection.
Interface Overview
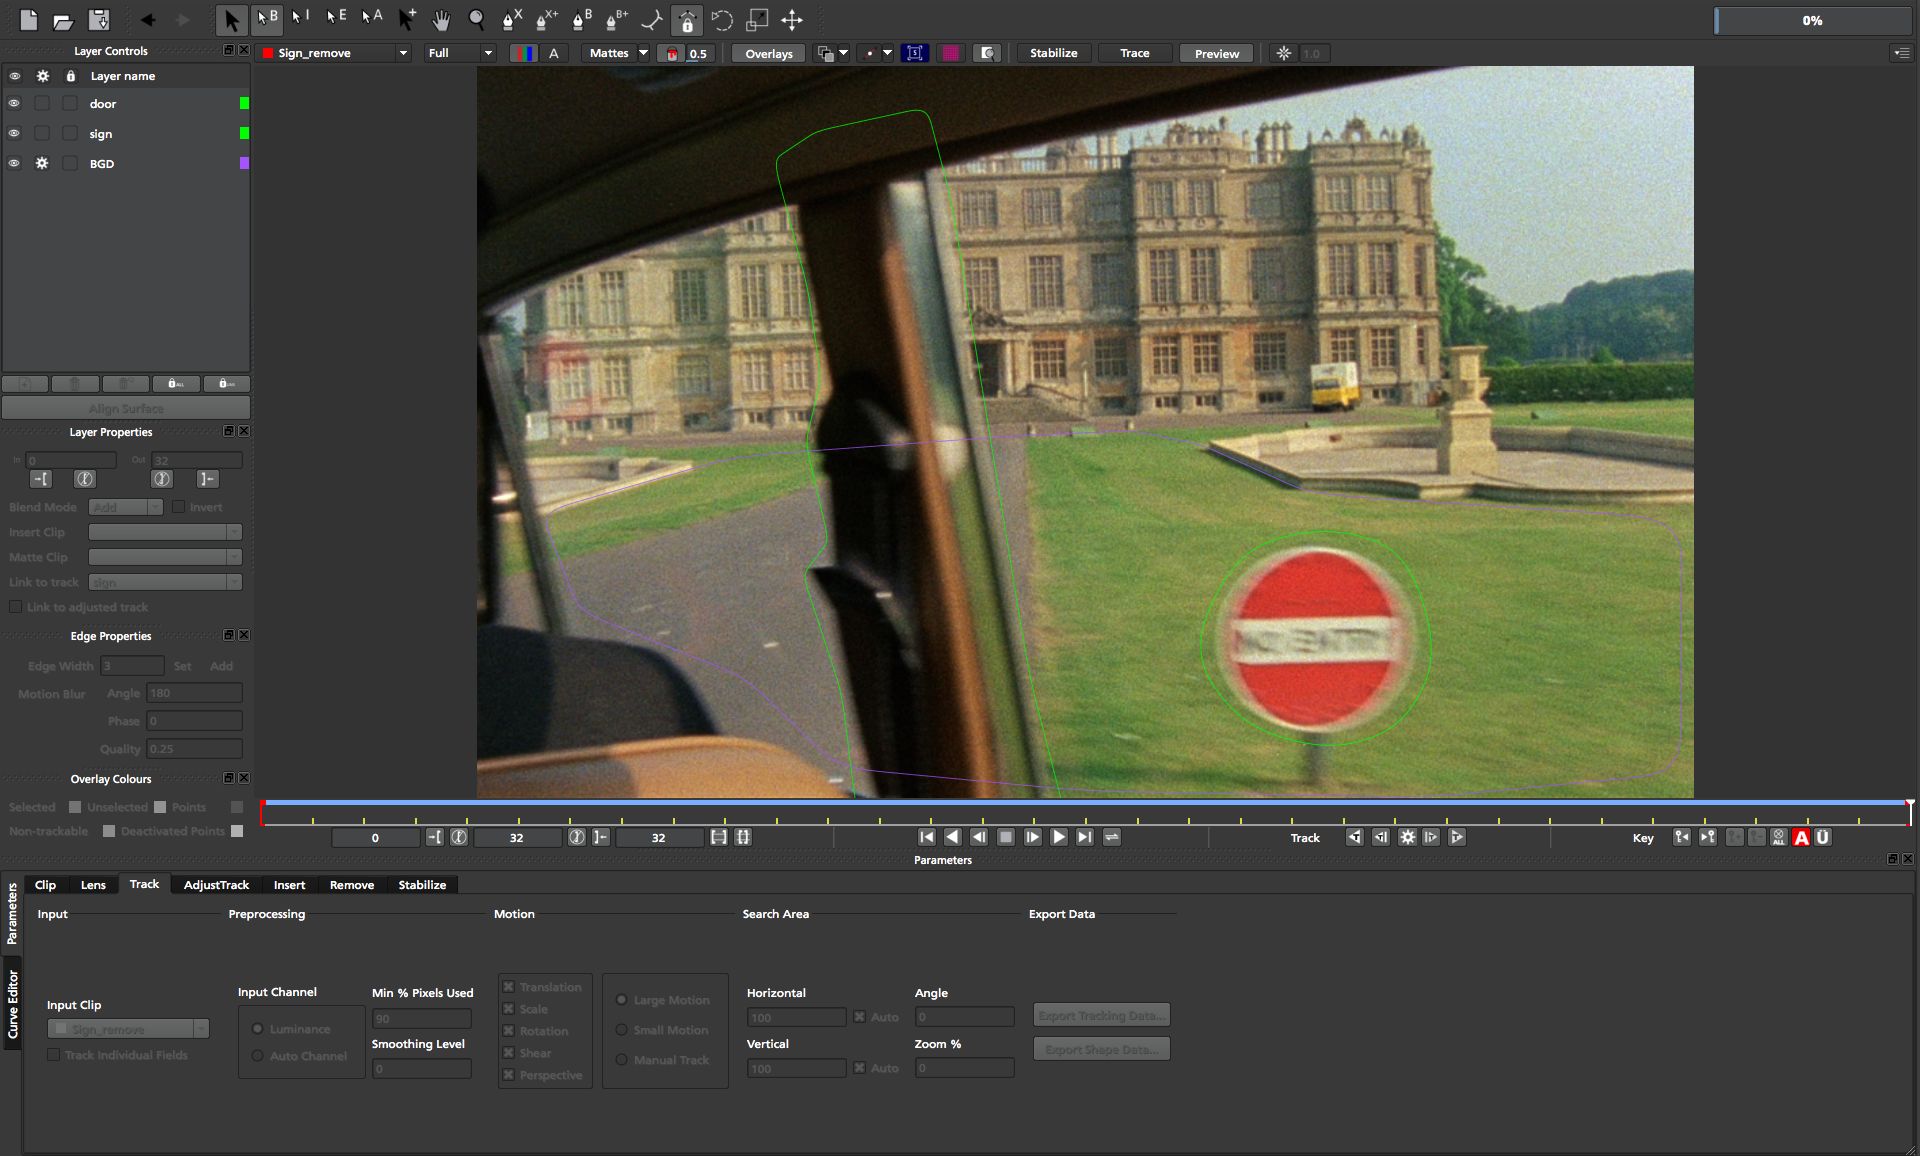
To quickly get familiar with mocha before you dive into the rest of the manual, here is a breakdown of the interface and its controls.
|
|
Interface Overview uses the mocha Pro Interface. Versions of the mocha Pro Plugin, mocha HitFilm, mocha for After Effects etc. may differ in presentation, but their tools perform the same function |
The Main Toolbar

At the very top of the interface you have the tools that form the brunt of your time inside mocha.
|
New Project: Starts a project wizard for a new clip |
|
Open Project: Open a previously saved project |
|
Save Project: Save the project |
|
Undo: Undo tasks |
|
Redo: Redo tasks revoked by Undo |
|
Select: Selection tool for splines and points. Hold the button to choose between Marquee selection and Lasso selection. |
|
Select Both: Selects both the Inner spline points and the edge points. Hold this button down to select further options (See below) |
|
Select Inner: Only selects the inner spline points |
|
Select Edge: Only selects the outer edge points |
|
Select Auto: Automatically selects between Inner and Edge points |
|
Add Point: Tool to add points to the spline |
|
Pan: Used to pan the footage in the Viewer |
|
Zoom: Used to zoom into footage in the viewer |
|
Create X-Spline Layer: Draw a new X-Spline layer |
|
Add X-Spline to Layer: Draw an X-spline that is added to the current spline layer. |
|
Create Bezier-Spline Layer: Draw a new B-Spline layer |
|
Add Bezier-Spline to Layer: Draw a B-spline that is added to the current spline layer. |
|
Attach Layer: Used to select a point and drag-lock it to another layer’s spline point. Useful for lining up individual splines. |
|
Rotate: Rotate selection around the axis of the point you click in the viewer |
|
Scale: Scale Selection |
|
Move: Move selection |
|
Transform Tool: Toggles the transform bounding box for manipulating selections |
The Viewer Controls

These controls cover what can been seen or hidden while working in the mocha viewer.
|
Clip to Show: Choose which clip to view from this dropdown |
|
Proxy Scale: Adjust the resolution of the footage for performance |
|
3D: View a stereo shot in 3D stereo mode. See below. |
|
Show RGB Channels: Turns on the RGB view of the footage |
|
Show Alpha Channels: Turns on the Alpha view of the footage |
|
Show Layer Mattes: Toggle on or off to show the mattes. Select from the dropdown to choose the type of matte |
|
Color Layer Mattes: Fills matte with Color. Decreasing the value lessens the opacity |
|
Overlays: Toggles all viewer overlays, including splines, tangents, surface and grid |
|
Show Layer Outlines: Toggles all spline overlays, including splines, points and tangents |
|
Show Spline Tangents: Toggles spline tangents view. Select from the dropdown to choose the type of view |
|
Show Planar Surface: Toggles the planar surface view |
|
Show Planar Grid: Toggles a grid relative to the planar surface view. You can adjust the number of grid lines under Viewer Preferences (See below) |
|
Show Zoom Window: Toggles the Zoom window |
|
Stabilize: Turns on stabilize view. This centers the footage around your tracked surface. |
|
Trace: Turns on the traced path of the tracked surface. You can adjust the amount of frames to trace under Viewer Preferences (See below) |
|
Enable Brightness Scaling: Toggles brightness adjustment to work with low-contrast footage. |
|
Viewer Preferences: Adjustments dialog for parameters such as grid lines and trace frames |
Viewing in Stereo
You can preview stereo work at any time by turning on the 3D button in the view controls. Clicking and holding on the 3D button will give you a range of stereo view options.
-
Interlaced: Each view is show on every other line in fields
-
Active: If you have an active shutter monitor available, you can view in this mode (Note: Only tested on Windows)
-
Anaglyph: Probably the most common mode to view stereo work through. You can choose from Red/Cyan or Green/Magenta
-
Difference: A difference mode of the views laid over each other. This view also has additional functionality explained below
The Timeline Controls

The timeline controls cover frame range, playback, tracking controls and key-framing.
|
Project In-Point: Frame where timeline playback starts |
|
Set In-Point: Set the in-point for the timeline |
|
Reset In-Point: Set the in-point back to the start of the clip |
|
Current Frame: The frame the playhead is currently on. Enter a new value to jump to that frame. |
|
Reset Out Point: Set the out point back to the end of the clip |
|
Set Out Point: Set the out point for the timeline |
|
Project Out Point: Frame where timeline playback ends |
|
Zoom Timeline to In/Out points: Expands the timeline between the in and out points to the edges of the viewer |
|
Zoom Timeline to full frame range: Resets the timeline scale to the full range of frames |
|
Play Controls: Controls for playing back and forth and moving one frame at a time |
|
Change Playback Mode: Toggles tri-state button between Play once, Loop and Bounce playback modes. |
|
Tracking Controls: Controls for tracking back and forth and tracking one frame at a time. |
|
Go to Previous Keyframe: Jump to the previous keyframe set in the timeline for that layer |
|
Go to Next Keyframe: Jump to the next keyframe set in the timeline for that layer |
|
Add New Keyframe: Add a new keyframe at the current position for the selected layer |
|
Delete New Keyframe: Deletes the keyframe at the current position for the selected layer |
|
Delete All Keyframes: Deletes all keyframes on the timeline for the selected layer |
|
Autokey: Toggles automatic key insertion when moving points or adjusting parameters |
|
Überkey: Toggles the Überkey, which modifies all keys in the layer relative to the key you are now on. |
Layer Controls

The top left hand panel contains the tools to manage layers.
|
Layer Icons:
|
|
Layer Actions dropdown:
|
|
Group Layer: Groups the currently selected layers. If no layers are selected, creates an empty group. |
|
Duplicate Layer: Duplicates the currently selected layers |
|
Delete Layer: Delete currently selected layers on all frames |
|
Align Surface: Expands the layer surface to fit the dimensions of the footage at the current frame. All tracked data is made relative to this new alignment. |
Layer Properties
The section under the Layer Controls panel contains the properties for each layer.
|
Layer In/Out frames: Settings to change where the layer turns on and off in the clip |
|
Blend mode: Dropdown to add or subtract your spline to the current layer. Invert flips this |
|
Insert Clip: Insert a demo clip to preview your track. You can use one of the defaults or import your own. For preview purposes only |
|
Matte Clip: Replaces the current layer splines with a matte clip. |
|
Link to Track: Which layer’s track to link your layer splines to. Can also be set to None. |
|
Link to adjusted track: Optional checkbox to link the layer splines to the adjusted track of the selection in “Link to Track” |
Cache Management
In mocha v5 we introduced manual cache clearing to allow you to clear the mocha cache at the project, render or global level.
You can access the Clear Cache option from the file menu under File → Clear Cache…

You can check the following options:
-
Project Cache: Clear the cache for the currently loaded project
-
Rendered Clips: Clear just the rendered clips for the project
-
Global Cache: Clear everything in the entire mocha cache.
Only clear the Global Cache if you are certain you don’t want any of your existing project caches to remain.
Using the mocha Pro and mocha VR Plugins
The mocha Pro and mocha VR plugins are separate applications from the standalone mocha that can be applied as an effect directly onto layers in host applications.
This reduces the need to swap out of your host application and streamlines getting data in and out of mocha.
Apart from a few minor differences, the mocha Pro and mocha VR plugins are the same as the standalone versions. You can still track, roto, render, import, export and so on all inside the mocha GUI.
The biggest advantage is you can set up layers and module settings in mocha as normal, and then have the results render directly to the host timeline without having to export.
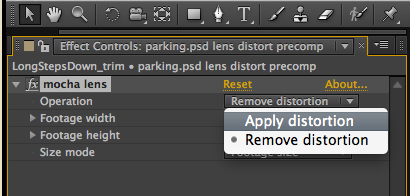
In addition to the controls below, the mocha VR plugin also contains a separate area in the Module Renders section to control lens distortions without having to first open the mocha VR GUI:

|
|
The guides below are using examples of the mocha Pro plugin. For more information on using the mocha VR Plugin, see mocha VR: Using mocha for 360 workflow |
Applying the mocha Plugin for Adobe After Effects
The mocha Pro Plugin for Adobe appears in the Effects menu like every other effect.
Simply apply the effect to the layer you want to work with.

The general workflow for the mocha Adobe Plugin is as follows:
-
Select any additional source layers you want to use inside mocha
-
Launch mocha. This will load a full version of the mocha interface that you can use just like the standalone version.
-
Use mocha as required and then close and save. No rendering is required inside mocha unless you want to.
-
Choose whether you want to use mattes, renders or any other data from mocha back in the plugin interface.
Using the mocha GUI
Once you have applied the mocha Pro effect, you can click on the mocha button to launch the main interface.

This then becomes exactly like working in the standalone version of mocha, with a few exceptions.
First, you will notice you don’t need to set up a project like in the standalone version. The source layer is automatically loaded and ready to track in the view.
Secondly you don’t need to save out a project file (unless you want to export it). You just close and save the mocha view when done and the project is saved inside the Effect like any other Adobe effect.
For further details on how to use anything inside the mocha GUI, see the rest of the User Guide!
|
|
The mocha Pro Plugin interface is almost exactly the same as the standalone interface, so most of the usual guide and video tutorials can be applied to the plugin. |
Controlling Mattes
Once you have tracked layers in mocha, you can then control the mattes for these layers back in the plugin interface.

-
View Matte: Show the black and white matte from the mocha layers chosen. This is very useful if you want to just see any problems with the matte, or you want to use the output as a track matte.
-
Apply Matte: Applies the chosen mattes to the current layer,
-
Visible Layers: This button launches the Visible Layers dialog so you can select the layers you want visible as mattes.
-
Shape: This drop down lets you switch between All Visible and All mattes. All Visible mattes are controlled by the Visible Layers dialog.
-
Feather: Applies a blur to the matte. This feathering is independent of the feathering of the individual layers inside mocha.
-
Invert Mask: Inverts the currently visible mattes.
-
Create AE Mask: Creates native AE splines on the effect layer just like "Paste mocha mask". This function is only available in After Effects.
Controlling Module Renders
Once you have set up layers in mocha, you can then control the renders for each module back in the plugin interface.
Note that you do need to have set up and tracked the correct layers in order for a render to work back in the host.

You have the following options to render a module back in the plugin:
-
Render: A simple checkbox to turn renders on and off.
-
Module: The module render you want to see. You have options of 'Insert: Composite', 'Insert: Cutout', 'Remove', 'Stabilize', 'Lens: Distort' and 'Lens: Undistort'.
-
Insert Layer: For any inserts you want to apply to a layer surface and render back to the host.
Rendering Insert Layers
To use the Insert Layer in Insert renders:
-
Pick the layer you want to use as an insert from the 'Insert Layer' drown down in the mocha Pro effect
-
Launch the mocha GUI
-
Create a layer (or pick an existing layer)
-
On the Layer Properties panel, choose the 'Insert Clip' dropdown
-
Select 'Insert Layer'

Your Insert should then appear inside the layer where you have placed your surface.
Controlling Tracking Data
If you have a tracked layer in mocha you can see the output of its surface back in the After Effects interface.
Each point in the Tracking Data section is a point from the layer surface that automatically updates when you modify it inside mocha.
To choose a layer to create tracking data from, click the 'Create Track Data' button in the Tracking Data section of the plugin.
![]()
Then choose the layer you want to read tracking data from in the dialog that appears. You can only choose one layer at a time.
![]()
Once you click okay, the plugin will generate keyframes to populate the tracking parameters in the plugin. You can then use this data to copy to other layers, or link via expressions.
This option is only available in the After Effects version of the plugin.
|
|
Generating keyframe data can take some time for very long shots. You can cancel generation at any time when the progress bar appears. |
Applying Tracking Data Exports to Other layers
The plugin interface also allows you to apply tracking data to other layers without needing to export from the mocha GUI.
Do do this, you generate the tracking data from a layer, as described above in Controlling Tracking Data.
You can then choose an export option at the bottom of the Tracking Data section:
-
Corner Pin: A standard corner pin effect
-
Corner Pin: (Support Motion Blur): A corner pin distortion with separate scale, rotation and position.
-
Transform: Scale, position and rotation
Clicking 'Apply Export' then copies the information to the specified layer.
Applying the mocha Plugin for Adobe Premiere
The mocha Pro Plugin for Adobe appears in the Effects menu like every other effect.
Simply apply the effect to the layer you want to work with.

The general workflow for the mocha Adobe Plugin is as follows:
-
Select any additional source layers you want to use inside mocha
-
Launch mocha. This will load a full version of the mocha interface that you can use just like the standalone version.
-
Use mocha as required and then close and save. No rendering is required inside mocha unless you want to.
-
Choose whether you want to use mattes, renders or any other data from mocha back in the plugin interface.
|
|
The mocha Pro Plugin interface is almost exactly the same as the standalone interface, so most of the usual guide and video tutorials can be applied to the plugin. |
Using the mocha GUI
Once you have applied the mocha Pro effect, you can click on the mocha button to launch the main interface.

This then becomes exactly like working in the standalone version of mocha, with a few exceptions.
Firstly, you will notice you don’t need to set up a project like in the standalone version. The source layer is automatically loaded and ready to track in the view.
Secondly you don’t need to save out a project file (unless you want to export it). You just close and save the mocha view when done and the project is saved inside the Effect like any other Adobe effect.
For further details on how to use anything inside the mocha GUI, see the rest of the User Guide!
Controlling Mattes
Once you have tracked layers in mocha, you can then control the mattes for these layers back in the plugin interface.

-
View Matte: Show the black and white matte from the mocha layers chosen. This is very useful if you want to just see any problems with the matte, or you want to use the output as a track matte.
-
Apply Matte: Applies the chosen mattes to the current layer,
-
Visible Layers: This button launches the Visible Layers dialog so you can select the layers you want visible as mattes.
-
Shape: This drop down lets you switch between All Visible and All mattes. All Visible mattes are controlled by the Visible Layers dialog.
-
Feather: Applies a blur to the matte. This feathering is independent of the feathering of the individual layers inside mocha.
-
Invert Mask: Inverts the currently visible mattes.
Controlling Module Renders
Once you have set up layers in mocha, you can then control the renders for each module back in the plugin interface.
Note that you do need to have set up and tracked the correct layers in order for a render to work back in the host.

You have the following options to render a module back in the plugin:
-
Render: A simple checkbox to turn renders on and off.
-
Module: The module render you want to see. You have options of 'Insert: Composite', 'Insert: Cutout', 'Remove', 'Stabilize', 'Lens: Distort' and 'Lens: Undistort'.
-
Insert Layer: For any inserts you want to apply to a layer surface and render back to the host.
Rendering Insert Layers
To use the Insert Layer in Insert renders:
-
Pick the video track you want to use as an insert from the 'Insert Layer' drown down in the mocha Pro effect
-
Launch the mocha GUI
-
Create a layer (or pick an existing layer)
-
On the Layer Properties panel, choose the 'Insert Clip' dropdown
-
Select 'Insert Layer'

Your Insert should then appear inside the layer where you have placed your surface.
Applying the mocha Plugin for Avid Media Composer
|
|
Due to extensive frame access by the mocha plugin, it is recommended that you use Avid storage media (i.e. DNxHD) when working, rather than linked files. (Use of linked files which use codecs such as H.264 will significantly slow down render time as such media is not designed for random access.) |
The mocha Pro Plugin for Adobe appears in the Effects menu like every other effect.
Simply apply the effect to the layer you want to work with.

The general workflow for the mocha Adobe Plugin is as follows:
-
Select any additional source layers you want to use inside mocha
-
Launch mocha. This will load a full version of the mocha interface that you can use just like the standalone version.
-
Use mocha as required and then close and save. No rendering is required inside mocha unless you want to.
-
Choose whether you want to use mattes, renders or any other data from mocha back in the plugin interface.
|
|
The mocha Pro Plugin interface is almost exactly the same as the standalone interface, so most of the usual guide and video tutorials can be applied to the plugin. |
Using the mocha GUI
Once you have applied the mocha Pro effect, you can click on the mocha button to launch the main interface.

This then becomes exactly like working in the standalone version of mocha, with a few exceptions.
Firstly, you will notice you don’t need to set up a project like in the standalone version. The source layer is automatically loaded and ready to track in the view.
Secondly you don’t need to save out a project file (unless you want to export it). You just close and save the mocha view when done and the project is saved inside the Effect like any other AVX effect.
For further details on how to use anything inside the mocha GUI, see the rest of the User Guide!
Controlling Mattes
Once you have tracked layers in mocha, you can then control the mattes for these layers back in the plugin interface.

-
View Matte: Show the black and white matte from the mocha layers chosen. This is very useful if you want to just see any problems with the matte, or you want to use the output as a track matte.
-
Apply Matte: Applies the chosen mattes to the current layer,
-
Visible Layers: This button launches the Visible Layers dialog so you can select the layers you want visible as mattes.
-
Visible Layers Dropdown: This drop down lets you switch between All Visible and All mattes. All Visible mattes are controlled by the Visible Layers dialog.
-
Feather: Applies a blur to the matte. This feathering is independent of the feathering of the individual layers inside mocha.
-
Invert Matte: Inverts the currently visible mattes.
Controlling Module Renders
Once you have set up layers in mocha, you can then control the renders for each module back in the plugin interface.
Note that you do need to have set up and tracked the correct layers in order for a render to work back in the host.

You have the following options to render a module back in the plugin:
-
Render: A simple checkbox to turn renders on and off.
-
Module: The module render you want to see. You have options of 'Insert: Composite', 'Insert: Cutout', 'Remove', 'Stabilize', 'Lens: Distort' and 'Lens: Undistort'.
-
Insert Layer: For any inserts you want to apply to a layer surface and render back to the host. Choose from the current layer or below the current video track.
|
|
Processing larger frame sizes and more complex rendering in mocha may take a long time per frame. When a frame render exceeds a certain interval in Media Composer, a BlipPlayer error can occur. If you see this message, you should render the effect prior to playing back, or preview the render inside the mocha UI before rendering back on the timeline. |
Rendering Insert Layers
To use the Insert Layer in Insert renders:
-
Pick the video track you want to use as an insert from the 'Insert Layer' drown down in the mocha Pro effect. This will most commonly be "1st Below" the current layer with the effect applied.
-
Launch the mocha GUI
-
Create a layer (or pick an existing layer)
-
On the Layer Properties panel, choose the 'Insert Clip' dropdown
-
Select 'Insert Layer'

Your Insert should then appear inside the layer where you have placed your surface.
Applying the mocha OFX Plugin
|
|
The OFX version of the mocha Plugin is fully supported in Nuke, Fusion, HitFilm Pro, Vegas Pro and Silhouette. |
If you have a license for the OFX version it will work in any of the OFX hosts listed below.
Keep in mind that while the mocha OFX plugin is designed to be used in multiple applications, it does not support all OFX hosts.
In many cases some functionality may be possible for unsupported hosts, but there is no guarantee of functionality or stability, so please take care when experimenting!
Adding the mocha Plugin inside The Foundry Nuke
Inside Nuke, the mocha Pro Plugin for OFX appears in the toolbar menu like every other effect.
You can also call the mocha Pro effect from the Tab key by searching for 'mocha Pro' or right-click and choose 'mocha by Imagineer Systems' > 'mocha Pro'.
mocha Pro node in Nuke node graph (Footage courtesy of Chris Heuer):

Once loaded into the node graph, simply plug the image node you want to work with into the 'Source' input of the mocha Pro effect node.

Adding the mocha Plugin inside Blackmagic Fusion Studio
Inside Fusion Studio, the mocha Pro Plugin for OFX appears in the Tool menu like every other effect.
Just choose 'mocha by Imagineer Systems' > 'mocha Pro'.
mocha Pro node in Fusion (Footage courtesy of Chris Heuer):

Once loaded into the flow graph, simply plug the image node you want to work with into the 'Source' input of the mocha Pro effect node.

Adding the mocha Plugin inside SilhouetteFX Silhouette
Silhouette v6 introduced OFX support, so the mocha Pro Plugin for OFX appears in the nodes menu like every other effect.
Just choose 'Mocha by Imagineer Systems' > 'mocha Pro'.
mocha Pro node in Silhouette:

Once loaded into the tree window, simply plug the image node you want to work with into the 'Source' input of the mocha Pro effect node.

Linear Workflow
Silhouette v6 includes Linear support for the mocha plugin.
If you are using rec709 8-bit images, you need to enable the 'Mocha > Linearize Images In Mocha Pro' preference in Silhouette so images look correct in the mocha GUI.
When using EXR or Cineon images, this preference should remain off.
Adding the mocha Plugin inside Vegas Pro
Inside Vegas Pro, the mocha OFX Plugin appears under 'Mocha by Imagineer Systems' in the Plug-in Chooser dialog for the following effect chains:
-
Event FX: Click the effect icon on the video event segment you want and then select the mocha effect and click OK.
-
Track FX: Click the effect icon on the appropriate video track and then select the mocha effect and click OK.
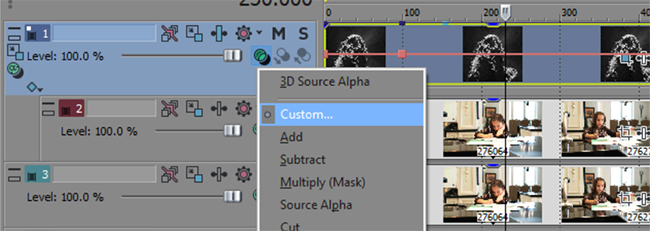
-
Track Composite Mode: Choose 'Custom…' in the Compositing Mode options then select the mocha effect and click OK.
mocha Pro node in Vegas Plug-in Chooser:

Once loaded, you can begin with the 'Launch mocha UI' button at the top of the effect panel.

Using the Insert Layer clip in Vegas
Mocha uses two sources from the timeline for inserting clips: The main background image source to track from and a secondary image source to insert into a tracked layer.
To use a secondary source input in Vegas for Insert clips you need to composite your tracks together:
-
Set the Insert clip you want to use as the parent layer and the plate you want the insert to be rendered over as the child
-
Click the Track Compositing mode on the parent insert layer and select 'Custom…'

-
Select the mocha effect and click OK
-
Launch the mocha GUI in the Composite Mode panel
This will then load the secondary source into any layer Insert clip dropdown as a clip called 'Insert Layer'. See Rendering Insert Layers below.
Basic workflow for the mocha OFX Plugin
One your source clip is hooked up to you mocha Pro Effect, the general workflow for the mocha OFX Plugin is as follows:
-
Select any additional source you want to use as an insert in mocha and plug it into the 'Insert' input (See Rendering Insert Layers below.)
-
Launch the mocha UI using the button at the top of the panel. This will load a full version of the mocha interface that you can use just like the standalone version.
-
Use mocha as required and then close and save. No rendering is required inside mocha unless you want to.
-
Choose whether you want to use mattes, renders or any other exported data from mocha back in the plugin interface.
|
|
The mocha Pro Plugin interface is almost exactly the same as the standalone interface, so most of the usual guide and video tutorials can be applied to the plugin. Plugin interface examples below use the Nuke UI. |
Using the mocha GUI
Once you have applied the mocha Pro effect, you can click on the 'Launch mocha UI' button to launch the main interface.

This then becomes exactly like working in the standalone version of mocha, with a few exceptions.
Firstly, you will notice you don’t need to set up a project like in the standalone version. The source layer is automatically loaded and ready to track in the view.
Secondly you don’t need to save out a project file (unless you want to export it). You just close and save the mocha view when done and the project is saved inside the effect.
For further details on how to use anything inside the mocha GUI, see the rest of the User Guide!
Controlling Mattes
Once you have tracked layers in mocha, you can then control the mattes for these layers back in the plugin interface.

-
View Matte: Show the black and white matte from the mocha layers chosen. This is very useful if you want to just see any problems with the matte, or you want to use the output as a track matte.
-
Apply Matte: Applies the chosen mattes to the source node.
-
Visible Layers Button: This button launches the Visible Layers dialog so you can select the layers you want visible as mattes.
-
Visible layers Dropdown: This drop down lets you switch between All Visible and All mattes. All Visible mattes are controlled by the Visible Layers dialog.
-
Feather: Applies a blur to the matte. This feathering is independent of the feathering of the individual layers inside mocha.
-
Invert Matte: Inverts the currently visible mattes.
Controlling Module Renders
Once you have set up layers in mocha, you can then control the renders for each module back in the plugin interface.
Note that you do need to have set up and tracked the correct layers in order for a render to work back in the host.

You have the following options to render a module back in the plugin:
-
Render: A simple checkbox to turn renders on and off.
-
Module: The module render you want to see. You have options of 'Insert: Composite', 'Insert: Cutout', 'Remove', 'Stabilize', 'Lens: Distort' and 'Lens: Undistort'.
Rendering Insert Layers
You can use secondary clips in the host application to render tracked inserts into your shots.
See the User Guide Chapter on the Insert Module for more details on manipulating and warping inserts.
To use the Insert input from your host application in Insert renders:
-
Pick the image you want as an insert and make it available for the mocha plugin to use:
-
For node based compositors you can plug the insert image into the 'Insert' input on the the mocha Pro effect node.
-
In Vegas you need to make the insert image the parent in compositing mode. See Using the Insert Layer clip in Vegas for this method.
-
In HitFilm, you select the insert image from one of your other layers in the comp listed in the "Insert" dropdown
-
-
Launch the mocha GUI
-
Create a layer (or pick an existing layer)
-
On the Layer Properties panel, choose the 'Insert Clip' dropdown
-
Select 'Insert Layer'

Your Insert should then appear inside the layer where you have placed your surface.
Alternatively you can import an image or sequence directly to the plugin:
-
Launch the mocha GUI
-
Create a layer (or pick an existing layer)
-
On the Layer Properties panel, choose the 'Insert Clip' dropdown
-
Select 'Import'
-
Import an image or image sequence
The imported Insert should then appear inside the layer where you have placed your surface.
Dealing with Alpha Channel Input and Output
In cases where your input source has an alpha channel, you may wish to change the Alpha view inside the mocha GUI.

You can either turn Alpha off entirely by toggling off the button, or choose from one of the following options:
-
Auto alpha: Reads in alpha if it is not opaque or premultiplied. This is the default setting.
-
Source alpha: This option shows the alpha as given from the source.
Auto alpha may be necessary when working with some source inputs in Nuke.
When rendering back out to the host, there are cases where you may also need to premultiply the alpha using the premultiply options in the plugin interface.
In these cases you can choose an option from the 'Premultiply' dropdown:
-
Auto: Premultiplies based on the original source input
-
On: Always premultiply output
-
Off: Never premultiply output
You can also choose to premultiply using standard premultiply nodes.
Applying the mocha HitFilm, mocha Pro or mocha VR Plugin inside HitFilm
We now include a light version of mocha, called mocha Hitfilm, as a plugin in HitFilm Pro 2017 onwards. This includes:
-
Tracking and roto export for HitFilm
-
3D Camera solving
-
Matte rendering
However, you can also use the mocha Pro and mocha VR OFX plugins in the HitFilm interface.
Adding the mocha Plugin to a layer
To add mocha, simply locate it in the Effects panel like any other effect and drag it onto your layer.
mocha HitFilm Effect Controls in a HitFilm comp:

Basic workflow for the mocha Plugin in HitFilm
Once your layer is hooked up to your mocha Effect, the general workflow for the mocha Plugin is as follows:
-
Launch the mocha UI using the 'Launch mocha UI' button at the top of the panel. This will load a full version of the mocha interface that you can use just like the standalone version.
-
Use mocha as required
-
Export any data if needed (tracks, shapes or camera solve data) then close and save
-
Choose any mattes you want to use from mocha back in the plugin interface
-
If you are using mocha Pro or mocha VR, choose renders you wish to use from the "Module Renders" section and check "Render"
|
|
The mocha HitFilm Plugin interface is almost exactly the same as the standalone interface, so most of the usual guide and video tutorials can be applied to the plugin. |
Using the mocha GUI
Once you have applied the mocha effect, you can click on the 'Launch mocha UI' button to launch the main interface.

This then becomes exactly like working in the standalone version of mocha, with a few exceptions.
First, you will notice you don’t need to set up a project like in the standalone version. The source layer is automatically loaded and ready to track in the view.
Secondly, you don’t need to save out a project file (unless you want to export it). You just close and save the mocha view when done and the project is saved inside the effect.
For further details on how to use anything inside the mocha GUI, see the rest of the User Guide!
Controlling Mattes
Once you have tracked layers in mocha, you can then control the mattes for these layers back in the plugin interface.

-
View Matte: Show the black and white matte from the mocha layers chosen. This is very useful if you want to just see any problems with the matte, or you want to use the output as a track matte.
-
Apply Matte: Applies the chosen mattes to the source node.
-
Visible Layers Button: This button launches the Visible Layers dialog so you can select the layers you want visible as mattes.
-
Visible layers Dropdown: This drop down lets you switch between All Visible and All mattes. All Visible mattes are controlled by the Visible Layers dialog.
-
Feather: Applies a blur to the matte. This feathering is independent of the feathering of the individual layers inside mocha.
-
Invert Matte: Inverts the currently visible mattes.
Controlling mocha renders in HitFilm
If you are using the mocha Pro or mocha VR version of the plugin, controlling renders is exactly like the standard OFX rendering controls.
See Controlling Renders and Rendering Insert Layers in the section above.
Starting a New Project
Workflow inside mocha
Mocha workflow is designed around a project structure. It is good practice to only work on one shot per project file to minimize layer management and to keep the work streamlined.
-
Import your footage
-
Draw a loose spline around the shape you want to track
-
Track the spline
-
Set the 'Surface', or corner pin where you want the inserted image
-
Adjust your track if necessary
-
Export the completed track
-
Import your footage
-
Draw a loose spline around the shape you want to track.
-
Track the spline
-
Adjust your track if necessary
-
Add new shapes for rotoscoping and link them to your track
-
Adjust shapes where necessary
-
Export the rendered mattes or the shape data
Creating a New Project
When you start the application you are presented with an empty workspace. No footage is loaded and most of the controls are consequently disabled.
To begin working, you must open an existing project or start a new project.

Select the clip to import by clicking on the Choose… button to the right of the top line. This will bring up a file browser, where you can select almost any industry standard file formats. Image sequences will show up as individual frames. You can select any one of the frames and the application will automatically sequence the frames as a clip when importing.

Name
A project name will automatically be generated based on the filename of the imported footage, but you can change it by editing the Name field.
Location
Your project file and cache files will output to a directory called “Results” by default. This is created in the same folder your clip is imported from. You can change this using the Change… button or using the dropdown box to set a different relative or absolute path.
Frame Range
The range of frames to import. We recommend to only work with the frames you need, rather than importing very large clips or multiple shots edited together.
Frame offset
This is set to the starting frame number or timecode by default. You can also define a fixed frame (You can set a default for the fixed frame in Preferences).
You also have the option to view as Timecode or Frame numbers. If your clip has an embedded timecode offset and you switch to Timecode, the offset will be used in your project.
If you need to adjust this value later, you can open Project Settings from the file menu. See "Project Frame Offsets and Clip Frame Offsets" below for more details.
Frame Rate
Normally this is automatically detected, but you have options to adjust if necessary. Make sure you check the frame rate before you close the New Project dialog.
If you need to adjust this value later, you can open Project Settings from the file menu.
Separate Fields
If you are using interlaced footage, set your field separation here to Upper or Lower. Make sure you check your fields match your footage before you close the New Project dialog. If you don’t set them correctly, you cannot modify them and will have to restart the project.
Remove Pulldown
If your footage has pulldown, set it here.
Advanced options

Caching
If you wish the clip to be cached into memory, check the Cache clip checkbox here. Caching is recommended if you are working a computer that has fast local storage, but your shot is stored in a slow network location. If your shot is already stored on fast storage, you don’t need to cache. More often than not, you can leave this setting off.
Color space
Set to Linear, Log and Panalog.
Conversion
Set to None, Float or 8-Bit
Offset
If working with log color space, set any offset here.
Soft clip
If working with log color space, set soft clip value here. Default is zero making falloff linear, rather than curved.
Log reference black
If working with log color space, set white reference value here.
Log reference black
If working with log color space, set black reference value here.
Gamma
If working with log color space, you can adjust Gamma here.
Setting Up a New Project For Stereo
When you start a New Project you are also presented with the option of creating a multiview project in the Views tab.

If you check Multiview project you are then presented with the view names and their abbreviated names.
The abbreviated name is used in the interface for the view buttons, but is also used as the suffix for renders.
You can also choose the hero view. By default this is the left. Defining a hero eye determines the tracking and roto order for working in the views.
If you want to define the footage for both views, you can add additional footage streams view the Add button below the initial clip chooser.

If you forget to set up Multiview when you start a new project, you can set it in the new Project Settings Dialog from the File menu.
Once you are in Multiview mode, you will see a colored border around the viewer based on the current view you are in.
This is to help artists to identify which view they are currently in without having to refer to the buttons
You can switch between Views by pressing the corresponding L|R buttons in the view controls, or using the default 1 and 2 keys on the keyboard.
Creating a New Project in the mocha Pro Plugin
The mocha Pro plugin has a slightly different project workflow to the stand alone mocha applications.
-
Apply the mocha Pro effect to your layer or footage track
-
Launch mocha from effects panel in your host application

This action loads the footage from the host clip you applied the effect to. It automatically applies the correct frame rate and other clip settings, so there is no need for the standard new project dialog.
After you have done the usual work inside the mocha Pro interface, you simply close and save the mocha Pro GUI and then you can control the output from the effect editor interface.
Creating a New Project in the BCC 10 mocha PixelChooser
Boris FX introduced the mocha PixelChooser in BCC 10. The plugin has a slightly different project workflow to the stand alone mocha applications.
-
Apply a BCC effect to your layer or footage track
-
Launch mocha from the PixelChooser section of the plugin
![]()
This action loads the footage from the host clip you applied the effect to. It automatically applies the correct frame rate and other clip settings, so there is no need for the standard new project dialog.
After you have done your tracking and/or roto work, you simply close and save the mocha PixelChooser and it applies any visible layers as mattes back to the effect.
|
|
The mocha PixelChooser plugin is limited to Tracking and Roto and only exports data formats to BCC plugins. |
Setting the In and Out Points

If you will only be working on a section of the shot you can use the In and Out points to set the range on the timeline. Note that the In and Out points affect the range of the Überkey button. You can zoom the timeline to only show you the part between you In and Out points by clicking the Zoom Timeline button.
Project Frame Offsets and Clip Frame Offsets
Frame offsets are important to get right in mocha so that they export correctly to your target program.
There are two kinds of frame offsets:
-
Project Frame Offset: This frame offset sets the starting frame for keys in your timeline. For example if you have imported a sequence of 100 frames and you need the index of frames to start at 1001, you can change this under the Project Settings in the file menu.
-
Clip Frame Offset: This frame offset is to offset the actual clip frames to slide the starting point of the clip back and forth. You can adjust clip frame offset under the Display tab in the Clip module.
For the vast majority of cases the Project Frame Offset is the value you want to adjust for working with data.
The frame offset is usually already set correctly at the New Project dialog stage, but there may be cases where offsets change, such as adding new clip frames.
Tips for New Projects
Only import as much as you need
Working with very long files can be time consuming for the artist and can slow down the tracking as it searches for more frames. Try to only use what you need, and work on individual shots, rather than multiple shots in one piece of footage.
Frame rate, dimensions and pixel aspect ratio are important
Make sure these values match the settings in your compositor or editor, otherwise tracking and shape data will not match when you export it.
If you are unsure which field your interlaced footage is in, import it and check
If you quickly start your project with a guessed field order, you can check to make sure it is correct by using the right arrow key to step through the footage. If you footage stutters or steps back a frame while you’re stepping through, it is probably in the wrong field order, or you may have to set pulldown.
Try to avoid interlaced footage where possible
Interlaced footage is painful to work with. For your own sanity, try not to use it unless you have to!
Tracking Basics
The Planar Tracker
Imagineer’s Planar Tracker technology provides 2D tracking data by tracking planes rather than points.
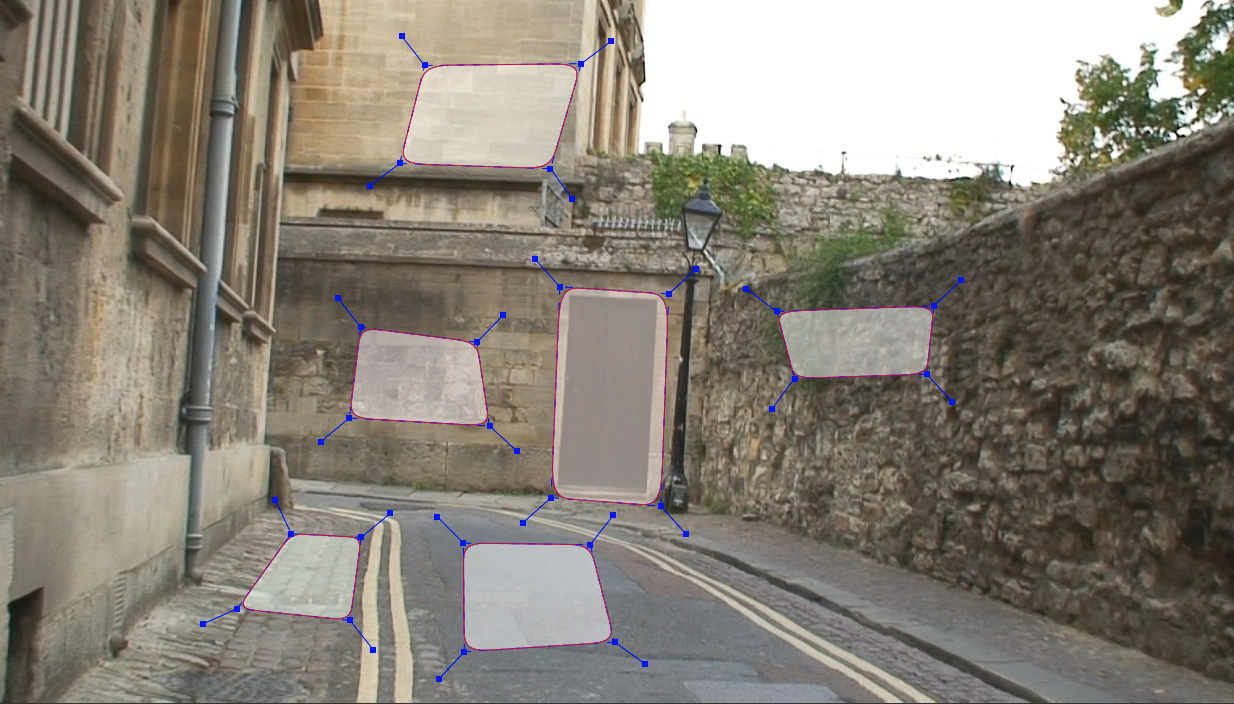
The key to getting the most out of the Planar Tracker is to learn to find planes of movement in your shot which coincide with the object that you want to track or roto. Sometimes it will be obvious - other times you may have to break your object into different planes of movement. For instance if you were tracking a tabletop, you would want to draw the spline to avoid the flower arrangement in the center of the table — it is not on the same plane and will make your track less accurate.
To select a plane you simply draw a spline around it. You can be fairly loose with your spline — the Planar Tracker is intelligent enough to discard the pixel movement that doesn’t conform to the movement of the majority of the pixels within the shape.
Mocha features two spline types, X splines and Bézier splines:
In general X splines work better for tracking, especially with perspective motion. However we also provide Bezier Splines as they can be versatile and is the industry spline standard.
CPU vs GPU Tracking
You can choose between a GPU or a CPU tracker in Preferences. By default, GPU is selected, but will fall back to CPU if an operation is not supported by the GPU version.
The GPU option allows you to select any supported graphics card on your system to take on the brunt of the tracking process. The resulting speed improvement is especially noticeable on high resolution footage or when tracking large areas.
The Relationship Between Splines and Tracking Data
One of the most important concepts to understand with the mocha planar tracking system is that the spline movement is not the tracking data.
It’s best to think of the splines you draw around objects as search areas. Here’s a breakdown of how the tracking works:
-
By default, any spline you draw is linked to the tracking data of the layer it is currently in. In hierarchical terms, the spline is the child of the track, even if there is no tracking data.
-
When you begin to track a layer, the area of detail contained within the spline(s) you have drawn will be searched for in the next frame.
-
If the planar tracker finds the same area in a following frame, it will tell the tracker to move to that point. Because the spline is linked to the track by default, it will also move along with it and the search begins again for the next frame.
To see this relationship, turn on your surface and/or grid in the viewer after you have tracked something. Scrub the timeline and you will see that the grid and surface move with the spline.
Now select all the points of your spline and move it around the viewer. You will notice that the surface/grid will stay in the same place.
This is because the spline is linked to the track, but the track is not linked to the spline. The spline is merely a search area to tell the track where to go next. It is a common misconception that moving the spline while tracking is affecting the movement of the tracking data. It is not. Moving the spline is only telling the tracker to look in a different place and will not directly affect the motion of the tracking.
This makes the tracker very powerful, as you can move and manipulate your spline area around while tracking to avoid problem areas or add more detail for the search.
You can even unlink the spline from the track entirely so that any planar surface passing under the stationary spline area is tracked and you don’t have to move the spline if tracking starts to go off screen.
Selecting an Area to Track
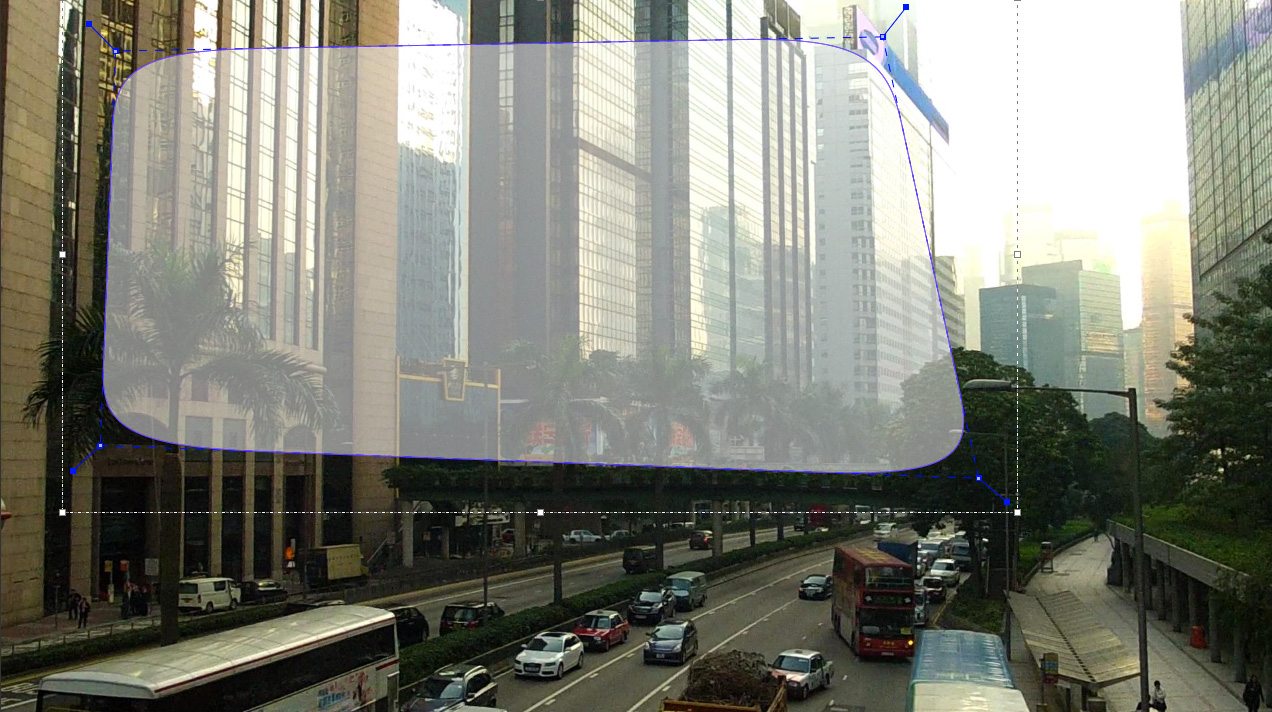
With the Planar Tracker you simply draw a spline around something, as shown with the screen below.
-
Select one of the spline tools to create a shape around the outside edge of the area you wish to track.
-
Start creating your shape by clicking onto the screen.
-
After the third point, the shape will auto-close, but you can continue to add points.
-
When drawing splines it is best to keep the shape not tight on the edge, but actually give a little space to allow for the high contrast edges to show through, as these provide good tracking data.
-
Right-click to finish drawing.
-
If you are using the X-Spline tool you can adjust the handles at each point by pulling them out to create a straight cornered edge, or pull them in to make them more curved. Right clicking a handle will adjust all the handles in the spline at once.
Dealing With Obstructions or Reflective Surfaces
In some cases there are parts of an image that can interfere with the effectiveness of the Planar Tracker. To handle this, you can create an exclusion zone in the area you are tracking.
For instance, in the phone example we are using, there are frames where there are strong reflections on the screen. These reflections can make the track jump. So we need to isolate that area so the tracker ignores it. Here’s how this is done:
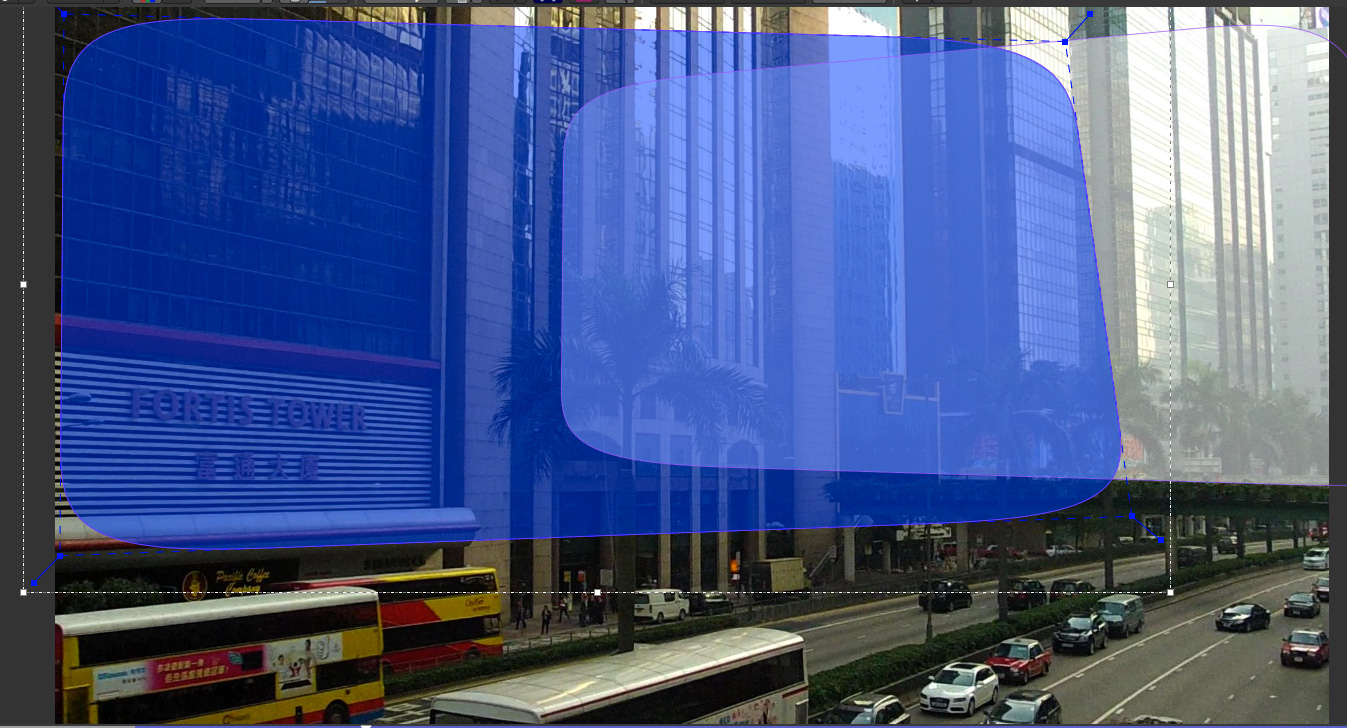
1. Select the initial layer you created.
2. Select the add shape tool to add an additional shape to the current layer, which selects the area you want the tracker to ignore.
![]()
3. Draw this second shape inside the original shape. Note that both splines have the same color, which is an indication that they belong to the same layer. Also you will notice in the Layer Controls panel that you only have a single layer.
4. By turning on the Mattes button under View Controls you can see the area that will be tracked.
Tracking Parameters
Various tracking parameters can be accessed by selecting the Track tab. On the left hand side of the Track tab, you will see two sections: Motion and Search Area.
Understanding the parameters section of the Track tab is vitally important for obtaining good tracks. Here we provide a breakdown of each parameter and how to use it effectively.
Input Clip
This is the clip you are going to track. By default it is the one currently in the viewer.
Input Channel
When tracking, mocha looks at contrast for detail. The input channel determines where to look for that contrast.
. Luminance looks for contrast in the light and dark of the image
. Auto Channel looks for contrast in one of the color channels.
By default, Luminance does a good job. If you have low-luminance footage or you are not getting a good track, try Auto Channel.
Min % Pixels Used
One of the most important parameters to look at for tracking.
By default, the minimum percentage of pixels used is dynamic. When you draw a shape, mocha tries to determine the optimal amount of pixels to look for in order to speed up tracking. If you draw a very large shape, the percentage will be low. If you draw a small shape, the percentage will be high.
In many cases, the cause of a drifting or slipping track is a low percentage of pixels. If you want a more solid and accurate track, try setting the Min % Pixels Used value to a higher amount. Keep in mind however that a larger percentage of pixels can mean a slower track.
Smoothing Level
This value blurs the input clip before it is tracked. This can be useful when there is a lot of severe noise in the clip. It is left at zero by default.
Motion
These parameters control what motion you are looking for when you track:
-
Translation: The position of the object
-
Scale: Whether the object gets larger or smaller
-
Rotation: The angle of rotation of the object
-
Shear: How the object is skewing relative to the camera
-
Perspective: How the object is moving in perspective relative to the camera
The main difference between shear and perspective is the relative motion. Shear is defined as the object warping in only two corners, whereas perspective is most often needed where the object is rotating away from the viewer significantly in space.
As an example, if someone is walking towards you, their torso would be showing shear as it rotates slightly back and forth from your point of view.
The front of a truck turning a corner in front of you would be showing significant perspective change.
-
Large Motion: This is the default. It searches for motion and optimizes the track as it goes. Small Motion is also applied when you choose Large Motion.
-
Small Motion: This only optimizes. You would use Small Motion if there were very subtle changes in the movement of the object you are tracking.
-
Manual Tracking: This is only necessary to use when the object you are tracking is completely obscured or becomes untrackable. Usually used when you need to make some adjustments to complete the rest of the automated tracking successfully.
Search Area
This defines ranges for the tracker to search within
-
Horizontal/Vertical: The distance of pixels in the footage to search for the next object position. This is set to Auto by default.
-
Angle: If you have a fast rotating object, like a wheel, you can set an angle of rotation to help the tracker to lock onto the detail correctly. The tracker will handle a small amount of rotation, less than 10º per frame, with Angle set to zero.
-
Zoom: If you have a fast zoom, you can add a percentage value here to help the tracker. Again, the tracker will still handle a small amount of zoom with this set to zero.
Tracking the Spline
Before performing the actual track, adjust the settings depending on the movement in the clip.
Track the plane selected by pressing the Track Forwards button on the right- hand side of the transport controls section.
Stop the track and adjust the shape if it doesn’t seem to be tracking properly. You may keyframe the spline shape so that it tracks only the planar region of a shape by adjusting the shape and hitting Add Key in the keyframe controls menu. Keep in mind that no initial keyframe is set until you first hit Add Key or move a point with Auto-Key turned on.
Checking Your Track
The spline should be tracked in addition to the clip being cached to RAM. You can play it back and get an idea as to how the track went. Feel free to change the playback mode in the transport controls to loop or ping-pong your track.
Another trick you can do to check your track is hit the Stabilize button in the View Controls.
Turning on Stabilize will lock the tracked item in place, moving the image to compensate. In the track module, stabilize view is a preview mode to check your track. Actual stabilization output is handled by the Stabilize Module, explained in the Stabilize Overview chapter.
You can check the accuracy of your planar track by turning on the Surface and Grid overlay in the View Control panel. Drag the corners of the Surface overlay (the dark blue rectangle) to match the perspective of your tracked plane. If you play the clip, you should see the surface or grid line up perfectly with the plane you tracked.
|
|
The Surface and Grid have no keyframes; they are simply guides that let you check the accuracy of your track. Note that the position of the Surface WILL affect the exported tracking data, so you MUST position the corners of the Surface before exporting tracking data. |
Next click on the Surface button under View Controls.
When you turn on the surface you will see the blue box that represents the 4 points of the corner-pin. Right now you will see that it is not lined up with the screen.
By selecting each corner one at a time you can adjust the surface area to cover the area of the screen.
The Grid overlay should line up with the plane you’re tracking and move with it as you cycle through the clip. You can change the density of the grid by adjusting the X and Y grid values in View | Viewer Preferences:
The grid overlay can give you a quick representation of the accuracy of the track.
The Trace feature allows you to see the position of the planar corners over time. Skip allows you to work with only every nth frame, useful on particularly long roto shots where the movement is predictable.
|
|
When you track a layer, the mattes of any active layers above the layer itself are subtracted from the matte of the layer and hence influence the area being tracked. To keep your tracking predictable, it is recommended that you keep your tracking layers on the top of the stack unless you specifically wish to use other layers to subtract from the tracking area of layers beneath it. |
To monitor what the tracker "sees" as a tracking area, select the Track Matte button in the view control.
Importing Mattes
There may be instances where you have already created mattes for one or more objects in the shot, for example using a keyer or another roto tool that would help you isolate areas to track. You can import such mattes by creating a new layer and then using the Matte Clip setting under Layer Properties to assign it to the layer.
Stereo Tracking
|
|
Please note that stereo features are only available in mocha Pro. |
Tracking in Stereo is very similar to tracking in Mono. In fact we’ve designed it specifically to be as transparent as possible to those used to the standard Mono workflow.
-
Select your hero view (By default this is the Left view)
-
Draw your shape as you would normally in mono mode (See mocha User Guide for an introduction to mono mocha tracking techniques)
-
Press the "Operate in all views" button on the right side of the tracking buttons. It will turn orange.
-
Select your tracking parameters as normal
-
Track forwards (and/or backwards if required).
If you now switch between Left and Right views you will see the Right view has automatically been tracked and offset from the Left view.
If you would prefer to only track and work with the Hero view initially then offset your data manually, you can also do this using the Stereo Offset tab in Track.
-
Select your hero view (By default this is the Left view)
-
Draw your shape as you would normally in mono mode (See mocha User Guide for an introduction to mono mocha tracking techniques)
-
Make sure the "Track in all views" button on the right side of the tracking buttons is switched off.
-
Select your tracking parameters as normal
-
Track forwards (and/or backwards if required).
This will only track the current view you are on. If you switch to the other view you will see the layer still moves with the track, but is not offset like when you do an all-views track.
You can then use the Stereo Offset parameters in the Track module to offset your view.
If you decide later that you want to track the non-hero view, you can do so by selecting the non-tracked view then track as normal.
You have the following options in the Stereo Offset tab (see above) when tracking another view based on the hero view:
-
Track from other views: This will reference the existing track to help track and correctly offset the current view.
-
Track this view: This will reference the current view to get the tracking information.
Note that by default these are both selected to give best results. If you only use Track this view and not Track from other views, the current view will be tracked independently of the hero view and will not offset.
You can also open existing mono projects that have additional views and track them without having to manually offset. Just set the mono project to Multiview in the Project Settings and add the additional footage streams to the clip.
Tips for Tracking
Scrub your timeline
When starting a new project, go through your footage a few times to see what your best options are for tracking. You will save yourself a lot of time by making note of obstructions and possible problem areas in advance.
Use edges
When tracking surfaces you will usually get a much better track if you include the edges and not just the interior of an object. This is because mocha can define the difference between the background and the foreground and lock on better.
For example, if you are tracking a greenscreen, it is better to draw your shape around the entire screen rather than just the internal tracking markers. In some cases this means you can avoid tracking markers altogether and save time on cleanup later.
When in doubt, ramp up your pixels
You can quite often get a great result with default settings, but if you’re getting a lot of drift, try setting the Min % Pixels Used value higher. The processing can be slower, but you will usually get a much more solid track.
Draw more shapes
Remember you are not limited to one shape in a layer. Use a combination of shapes to add further areas or cut holes in existing areas to maximize your search. If necessary, make an additional layer to track and mask out foreground obstructions before tracking the object you need.
Use the grid while tracking
It’s common to use the surface and the grid to line up your corners after you track, but it can be much more advantageous to set up your surface before you track and leave the grid on to watch for any subtle drift while you are tracking. This way you can stop your track early to fix any issues and spend less time trying to find them later.
Track from the largest, clearest point
In order for mocha to keep the best possible track, it is usually best to scrub through the timeline and find the largest and clearest area to begin tracking from, draw your shape there, then use backwards and forward tracking from that point.
For example, if you have a shot of sign coming toward you down a freeway, it is usually better to start at the end of the clip where the sign is largest, draw your shape and track backwards, rather than start from the beginning of the clip.
A planar surface does not necessarily have to be flat
We have a Planar Tracker which specifically tracks planes of motion, but this is not limited to tables, walls and other flat objects.
Distant background is considered flat by the camera where there is no parallax. Faces can be tracked very successfully around the eyes and bridge of the nose. Rocky ground, rumpled cushions, clumps of bushes, human torsos and curved car bodies are all good candidates. The key is low parallax or no obvious moving depth.
When in doubt, try quickly tracking an area to see if it will work, as you can quite often trick the planar tracker into thinking something is planar.
In the end, there is no magic bullet
Mocha is a very flexible tracker and will save a lot of time, but you will eventually run into a piece of footage that just will not track. Large or continuous obstructions, extreme blur, low contrast details and sudden flashes can all cause drift or untrackable situations.
If something just isn’t tracking no matter what you try, consider using mocha to track as much as possible then move to manual work. You can often get a lot more done fixing shots by hand or using AdjustTrack in mocha rather than trying to tweak your shapes and parameters over and over again to get everything done automatically.
Adjust Track
Overview
There will be times when tracks can drift due to lack of detail or introduction of small obstructions. When this occurs, manual refinements can be made by using the AdjustTrack tool.
AdjustTrack is primarily used for eradicating drift by utilizing the four-corner surface area to generate keyframable data to compensate. It is generally not practical to use it to remove jitter.
To achieve an adjusted track you would ideally line up the surface area where you want to place your insert or lock down your roto. In situations where you don’t require an insertion you should place the corners of the surface area in distinctive locations, as you will need to refer to these locations when you add keyframes to correct the drift.
Starting the Track Adjustment
When you have the Surface where you want it to stay locked and are ready to refine the track, flip over into the AdjustTrack module by hitting the AdjustTrack tab.

Reference Points
Once you select the AdjustTrack tab, a key frame with four reference points is created.
|
|
You should be on your desired master frame before selecting the AdjustTrack tab. The reference points can then be positioned on distinctive features, such that any drift in the track can be easily seen and corrected. |

As you play though the sequence you will be able to manually adjust the position of each point as drift occurs.
If your track is spot on, these reference points should line up properly throughout the shot. If you see a Reference Point drifting, that will indicate the track is drifting. Find the frame where the drift is worst and move the Reference Point back to the position it had in the Master Frame and the track will automatically be adjusted based on your correction.
Reference Point Quality
When you perform an adjust track and you begin to move a newly created reference point, you will notice the dashed lines which connect all of the reference points. These lines change in color to represent the quality of positioning of any given reference point. For best results keep reference points away from one another.

When adjusting the track try to always get at least yellow but shoot for green for a more solid adjust track.
The red lines indicate that this reference point position is a poor choice.

The green lines indicate that this reference point position is a good choice.

AdjustTrack with More than Four Reference Points
Often there are times where your reference points are either obscured or exit frame. In AdjustTrack you have the ability to create multiple reference points per surface corner that can be positioned in alternate locations to handle these situations. Simply click the New Ref button to create a new reference point for the selected corner.
You cannot keyframe the Surface — only the Reference Points. The original track and any refinements you make in AdjustTrack cause the Surface to move however.
Working Backwards
Every so often a shot will come along that is easier to track backwards than forwards. This is fairly simple when running the tracker backwards, but introduces some rather obtuse concepts when keyframing is involved. This is why there are two “New Ref” buttons provided. If you are working backwards and wish to set a new reference point, you will probably want to use the “<- New Ref” button instead of the forward-thinking “New Ref ->” button.

Because keyframing “thinks” forward, hitting “<-New Ref” will not create new Master Reference points on the current frame, but will go backwards in time, looking for any existing keyframes and set new Master Reference points on the frame directly after. For example, if you decide to create a new backwards reference point at frame 20, a new master reference will be created at frame 21.
Some people may be more comfortable doing this manually by moving the playhead themselves and using the traditional “New Ref ->” button. Others who do a lot of tracking and find themselves working backwards often may find the backwards-thinking New Ref button helpful.
About Master Reference Points (the red X)
Every Reference Point has one frame in which its initial placement is determined without causing any adjustment to the track. This is called the Master Reference Point; if you step forward or backward in time you will notice the red X change to a red dot.

The red X indicates that this particular frame is the starting point for calculating adjustments. Moving a Master Reference Point will NOT change the tracking data.
Go ahead and experiment - move the Reference Point when it is a red X (a Master Reference Point). You will notice the Surface isn’t adjusted at all. Step forward a frame and move the same point - this time the surface will move because you are now adjusting the track.
Changing the Master Frame for a Reference Point
By default, the frame in which you create a Reference Point is its Master Reference frame. This Master Reference can occur on a different frame for each reference point. You can change the Master Reference frame by selecting a Reference Point, going to the appropriate frame and hitting the “Set Master” button.

You may set a new Master Reference Frame for all active points by hitting the Set Master All button.

Selecting Different Reference Points
One method for selecting different reference points is to hit the “Next” button.

The next button simply cycles through the active reference points for that frame. More fine-grained control of reference points can be obtained through the Nudge control panel, described below.
Deleting Reference Points
Deleting Reference Points is done by selecting the point you wish to remove and hitting the delete key. If there are multiple Reference points on a particular corner, the preceding Reference Point will be extended through your time line until a new Reference point is encountered.
Nudging Reference Points
The Nudge section allows you to move Reference points in 0.1 pixel increments, much more fine grained than would be possible by dragging the points manually. You can easily select any active Reference Point by selecting one of the corner buttons in the Nudge section.

If you hit the Auto button, a tracker will attempt to line up the selected Reference Point based on its position in the Master Reference frame. The Search Region Size and Maximum Motion parameters can be set in pixels in the Auto Nudge section.
You can quickly select any corner by using the Corner selector buttons in the Nudge control panel. In the image below, the user is selecting the upper right corner in preparation for nudging operations.
View Options
The AdjustTrack tab has a View section for cleaning up your AdjustTrack workspace. Deselecting the Inactive Traces button will cause the display to hide the traces of the inactive Reference Points. This is helpful if you have a corner with numerous Reference Points offsetting it.
Deselecting the Unselected Traces button will hide any Reference Point that is not selected.
Finally, deselecting the Search Area button will hide the Search Region Size (in Yellow) and the Maximum Motion search area (in Pink).
Tips for AdjustTrack
Adjust frames at the peak of drift
When you see a drift, carefully cycle through the timeline and look for where the motion starts to change direction. A frame before this, adjust your drift, then go halfway between your master frame and the adjusted frame to check for any further drift. If you keep working by checking halfway between each keyframe you set, you will reduce the amount of keyframes required.
A huge amount of keyframes is not a good sign
If you end up with adjustment keyframes on a large amount of frames it may be better retry the track. AdjustTrack is aimed to help reduce small anomalies and fix drift when a tracked corner has become obscured. If you are fixing every second keyframe it means you have more than a simple drift.
mocha Pro - The Stabilize Module
Overview
|
|
This section only relates to mocha Pro and mocha VR. The Stabilize module is unsupported for 360 Equirectangular footage in mocha VR. Use the Reorient module to stabilize 360 footage. This feature is not available in mocha HitFilm or mocha AE. For a full comparison of features, please refer to the comparison chart online. |
The stabilize feature in uses the data you have tracked to lock down a moving shot. You can think of it as the inverse of what tracking does: It moves the footage around an area rather than an area around the footage. Stabilization is useful for:
-
Removing camera jitter and bumps
-
Locking off a shot so it is easier to work with, before restoring the motion back into the final composition
The Main Stabilization Parameters Interface
Stabilization is a fairly straightforward operation. Once you have selected the tracked layer you wish to work with you have options to restrict the stabilization to key details.

Input Tab
Select the clip that you wish to use to stabilize here.
Range Tab
Select the frame range for the stabilization.
Fixed Frames
Here you can enter the frames you want to be unaffected by stabilization. Mocha will adjust the stabilization between these frames. You can either enter them into the field, or go to a frame and press the + key.
Fixed frames can be useful when you want stabilization across a shot but would like to keep the general motion of the original shot intact.
Smooth
This is the main section for controlling how you want the shot to stabilize.
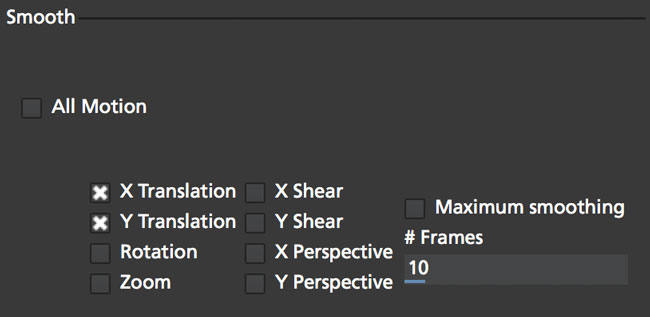
All Motion
This checkbox sets all the options below it.
X Translation
Stabilize translation in X
Y Translation
Stabilize translation in Y
Rotation
Stabilize rotation
Zoom
Stabilize the scale/zoom
X Shear
Distort the footage according to the tracked surface’s shear data in X
Y Shear
Distort the footage according to the tracked surface’s shear data in Y
X Perspective
Distort the footage according to the tracked surface’s perspective data in X
Y Perspective
Distort the footage according to the tracked surface’s perspective data in Y
Shear and Perspective stabilization can be useful when you want to straighten out a plane in your footage to work on it flat before restoring it to its original perspective and motion.
Maximum Smoothing
Stabilize across the entire track. Setting this value will override the #Frames value beneath it.
# Frames
Stabilize variation across a certain amount of frames. Setting this to a low value will focus the stabilization to only pick up motion that occurs in short bursts (such as a bump in the road). A higher value will try to adjust longer movements.
The Borders Tab
This tool helps automate removing the black edges you gain from the footage being stabilize.
Center
This centers the footage around the stabilized area.
Zoom
This zooms into the footage to push the edges out of frame.
Crop
This crops down the edges and makes the footage smaller.
The Auto Fill Tab
You can use Auto Fill to help fill in the black edges with previously tracked layers, similar to how the Remove Module uses tracked background layers to remove foreground objects.
If you have sufficient usable background available, you can avoid reducing the quality or resolution of footage, which is a common problem in stabilization.
For a better understanding of background fills, please refer to the Remove documentation.
Auto Fill
This turns on the auto fill function. You will not see the effect of fill however until you render the result.
Search Range
The range of frames to look for possible fill frames.
Model Illumination
Like the Illumination modeling in the remove tool, this tries to calculate the correct lighting for a filled-in edge.
Dissolve
This gives the option of dissolving the edge of frame into the filled frame to reduce obvious mismatches.
Fill from Background
If you haven’t set up a tracked background layer to use to help fill the edges, you can let mocha attempt to fill by analyzing the footage. This is mostly useful for filling in frames where there is only position and rotation jitter.
Stabilizing Shaky Camera Footage
One of the most common reasons to stabilize is to remove jitter from a shaky camera shot. With shaky camera footage you are primarily concerned with removing position and rotation data. This means you do not have to use the shear or perspective options when tracking. Here is the common method:
-
Track a static area of the shot using Translation, Scale and Rotation only. You don’t want to track a moving object within the shot as this will throw off the stabilization.
-
Once tracked, switch to the Stabilization tool.
-
Choose which fields of motion you wish to stabilize in the Smooth parameters. By default, translation is automatically selected. In many cases you may only be interested in position stabilization, but hand-held cameras can introduce scale and rotation jitter as well.
-
Adjust the number of frames you want to look for jitter over. A small amount of frames will look for tiny adjustments in the overall motion, whereas bigger values in this field will adjust larger ranges of motion.
-
If there is a significant amount of motion being stabilized and you are losing a lot of your picture in some frames, try fixing those frames by adding them to the Frame List on the left. Mocha will then interpolate the stabilization between these fixed frames.
Locking Down Areas of Motion
Sometimes you want to be able to completely lock down a section of the footage so that it stays in one place and everything else moves around it. For this you can use more aggressive stabilization:
-
Track the area you want to lock down using whichever of the motion parameters you require. Tracking perspective also works for this technique.
-
Once tracked, switch to the Stabilization tool.
-
Choose which fields of motion you wish to lock down in the Smooth parameters. By default, translation is automatically selected. If you want to completely lock down everything, just choose the “All Motion” checkbox.
-
Adjust the number of frames you want to use to look for stabilization. A small amount of frames will look for tiny adjustments in the overall motion, whereas bigger values in this field will adjust larger ranges of motion. Again, if you want to completely lock down everything for all motion, choose the “Maximum Smoothing” option.
-
When you play back the timeline you will see the rest of the footage warp and move around your locked off area.
Exporting Stabilized Tracking Data

Exporting Stabilization is similar to exporting tracking. When you hit the Export Stabilized Tracking Data button you will be presented with a dropdown box with options for various applications.

Stabilize in Stereo
All stabilization occurs in stereo if you have tracked both views.
You can render the stabilization for both views by selecting Operate on All Views button next to the Render buttons on the timeline.

Rotoscoping Basics
The Art of Rotoscoping
Most often a good matte requires a combination of both keying and rotoscoping techniques.
Good rotoscoping artists often think like animators, reverse engineering the movements, the easing in and outs, the holds and overshoots of objects, and set their keyframes accordingly.
In general, the fewer the keyframes, the better your mattes will look. Too many keyframes will cause the edges to 'chatter' and move unnaturally. Too few keyframes will cause the shapes to drift and lose definition. Finding the right number and placement of keyframes often comes with experience but there are a few things to keep in mind when rotoscoping.
Traditional Roto Tips
-
There is no such thing as a perfect matte. Rotoscoping is an art form that takes into account the background image, the movement of the object, and the new elements to be composited in the background.
-
Try to start your shape at its most complex point in time, where it will need the most control points.
-
Break a complex shape into multiple simple shapes. If you are rotoscoping a humanoid form and an arm becomes visible, consider rotoscoping the arm as its own element, rather than adding extra points on the body that will serve no purpose when the arm is obscured.
-
Imagine you are the animator who created the shot. What would your dope sheet look like? No matter the medium, whether CG, live action or otherwise, most movements are rarely linear. They normally move in arcs; they normally accelerate in and out of stopped positions. Try and understand the mechanics behind how things are moving in your shot. This will help you to minimize keyframes.
-
Watch and study the shot before you start working. Where are the changes in directions? These will normally have keyframes. Where are the starts and stops? Are there camera moves that can be stabilized to make your work easier?
-
Don’t be afraid to trash your work and start over. Beginning roto artists often make the mistake of trying to fix a flawed approach by adding more and more keyframes. Experienced roto artists learn to quickly identify an inferior approach and are unashamed to trash their work and start over, often many, many times. It is very difficult to get a good matte without a conscious effort to keep the keyframes to a minimum.
Mocha Tracking and Roto
While you can refine a shape you have tracked to do your rotoscoping, the recommended way is to do a rough shape to track something and then link your roto to that track. This reduces the amount of work required when you are dealing with complex shapes, as you will not have to track and refine each shape as you go. It also means that if you have to retrack something you won’t have to redo a lot of layers. Another reason is reducing the amount of data needed in your project file.
It also helps to remember that your spline shape is linked to your tracking data and not the other way around.
For the following examples you can try out the tools using the BMW tutorial files available from http://cdn.borisfx.com/borisfx/store/clips/rotoscoping.zip
Rotoscoping Workflow
1. Track the area you want to rotoscope
First of all you want to reduce as much manual work as possible by tracking. In the example below, the front and side plane of the car is being tracked (For a more detailed coverage of tracking, see the Tracking Basics documentation).
![]()
2. Turn off your tracking shape
Once you’ve tracked an area it can be useful to turn it’s visibility off, as well as it’s tracking cog (so it can’t be accidentally retracked later). This means the tracked shape will not be confused with any roto shapes you are making.
3. Start drawing your refined shapes
Once you have a track for a layer we recommend that you add a new layer to use for the actual roto spline, rather than refining the spline you used for the actual track as you might need to do more tracking with it later.


Select the X spline or Bézier spline tool and draw a tight spline around the object you are rotoscoping. Ctrl/Cmd+drag the Bézier tangents if you wish to break them. You will see that a new layer is automatically created.
4. Link the new roto layer to your tracked layer
You don’t want to track with this layer, so disable tracking for the layer by turning off the tracking button (the cog) for the layer in the Layer Properties panel.
Rename the new layer and link it to the movement of your already tracked layer by selecting it from the 'Link to Track' dropdown in the layer properties panel.

Your newly created roto spline will now follow the motion of the linked track.
5. Refine your roto
Now you have linked the rotoscoping layer to a track, you need to go over the timeline and make sure the roto is correctly animated.
Often you will need to tweak your shape for it to fit correctly, adding new keyframes. Autokey is on by default, so you just need to move along the timeline and adjust your points where necessary (keyframes turn up in the timeline as green dots). The tracking data will help for the majority of the motion.

You can also add additional shapes to the same layer using one of the "Add Spline to Layer" tools. These are the drawing icons with the plus sign next to them ("+").

You can cycle between each point on a spline with the keyboard shortcuts '{' and '}'. This is useful for when you need to do minor adjustments across many points separately.
6. Feather your edges if necessary
Edges can be feathered either by dragging out feathers point by point using the edge pointer tools in the toolbar or by using the parameters in the Edge Properties panel.

In the toolbar you have four different pointer tools:
-
The pointer tool with the 'B' will move both the inner and outer spline point (‘B' = ‘Both')
-
The 'I' pointer will only move the inner spline
-
The 'E' pointer will only move the outer spline point (‘E' = ‘Edge'). A feathered edge will occur between the inner and outer spline points
-
The 'A' pointer will remove either the inner or outer point depending on which is selected (‘A' = ‘Any')
You can also use the Set button under Edge Properties to feather the edge at the selected point(s) an exact amount or use the Add button to increase/decrease the feather by the specified amount.

For example, if you deselect all points by clicking anywhere on the canvas you can then use the Set button to apply the default 3 pixel edge width. Because no points are selected the value is applied to all points on the current layer. You can then tweak the position of all spline points to ensure that the inner (red) spline is inside the edge and the outer (blue) spline is outside the edge.
7. Track additional sections as you go
In many instances one track will not be enough. You may need to track more than one plane to drive different sets of roto. In the car example, we have to track the front and the side to get an accurate track for each planar region to assist the roto effectively.
In the case of organic shapes, like people, you will have to break your tracks down to handle the different movement between the torso and the arms etc.
What’s the Überkey?
The Überkey is a powerful tool that allows you to offset the positions of control points without destroying their keyframe data.

Use this tool with care, as it is not setting any keyframes per se, it is offsetting any and all keyframe data on the points you move while it is on. Überkey is very useful, but remember to turn it off again when you don’t need it. Use with care.
Überkey affects only those frames between the timeline’s In and Out point. If you wish to make adjustments to a particular range, set the In and Out points to that range.
Translate, Rotate and Scale your Splines
You can translate, rotate and scale selected points as a group by using the corresponding tools listed in the toolbar.
![]()
![]()
![]()
An overlay shows the delta change. The center or anchor point of these movements appears where you first click your mouse.

Turning On and Off Points
You can turn on and off individual points in a spline. When they are off, you can still see the points, they can still be animated, but they are not contributing mathematically to the spline. This allows you to have a complex spline only when you need it, rather than having to deal with superfluous points in parts of the shot when they are not needed.

To turn off points, select the points on the spline and hit Shift+Delete. You will see the curve change shapes, but the points will remain.

To turn a point back on, right-click on it and select Point→Activate.
If the Autokey button is enabled, a keyframe will be created when you change a point’s active status.
Add Motion Blur

You can use the movement of the individual spline points to determine motion blur. Any movement in the spline, whether through simple X/Y translation or by shape deformation will cause motion blur.
You can control the amount of blur by changing the motion blur value in the Edge Properties panel.
Changing the Matte Blend Mode
Although not necessary in this example, note that you can change how mattes are blended in the Layer Properties panel. You may make each layer’s matte Add or Subtract and you can also invert the matte.

Note that this can’t be keyframed and that these settings apply to the entire layer, not to individual splines of the same layer.
Viewing your Mattes
In the View Controls, several options are offered for viewing your mattes. The Matte drop down is has options to view all mattes, just the mattes you have selected or no mattes.
![]()
Select the Matte button and you will see your rotoscoped object against a flat background.
Changing the Background Color
You may wish to rotoscope against a particular color. Select View → Canvas Color… and a color picker will allow you to choose a particular background color

Colorize your Matte Overlay
When you have your Mattes turned on, you may choose for the matte to be filled with a color instead of cutting out the object, using Colorize.

You can adjust the opacity of the color fill by changing the blend value to the right of the Colorize button.
![]()
The color used by Colorize is derived from the Selected and Unselected properties of the Overlay Colors panel, which can be changed per layer.
This is only a preview and will not affect how your mattes are rendered when exporting.
Preview Rendered Mattes
In the View Controls panel, you will find a drop-down menu for selecting the clip to view.

This allows you to view the actual rendered mattes, which can be especially useful when tweaking motion blur. The motion blur you normally see in your canvas is an OpenGL preview and can differ slightly from the actual render.
If you’d like to see what the actual motion blur render looks like, switch to viewing the layer whose matte you wish to see.
Because you can choose specific layers for export when you render, a render pass is created for each layer.

Switch the View Clip drop-down back to your source clip to continue working with that clip.
To actually render your matte for use in a composite, refer to the section on exporting mattes.
Open Splines
If you want to draw open splines, you can simply hold shift when you right-click to finish the spline. This will open the shape up.
-
You can open an existing shape using the Open Spline shortcut key (by default this is 'o')
-
You can close an existing shape using the Close Spline shortcut key (by default this is 'c')
-
Both the Open and Close shortcuts also work for finishing a spline rather than using Shift + Right-Click
You can also right-click a spline and choose: Spline | Open/Close Spline
|
|
This version of mocha does not currently render open spline mattes. Only data export is available. At present we support export of open splines to:
|
Stereo Rotoscoping
Stereo Roto works in a very similar fashion to stereo tracking.
-
Select the hero view (by default this is Left)
-
Draw a new basic shape and track the object you want to rotoscope as outlined above in "Stereo Tracking"
-
Draw a new refined roto layer around your tracked object
-
Click the "Link to track" drop down in Layer Properties and choose the previously tracked layer
-
Continue to refine the Hero view roto until you are happy with that view
-
Switch to the non-Hero view and begin refining this view.
When you switch to the non-Hero view the rotoscoping will be offset by the tracking data. While this will not completely refine the result, it will save you a lot of time.
Whenever you manipulate a control point in the Hero view it will offset that control point in the non-Hero view.
When you start to tweak the non-Hero view it will also generate new keyframes for that view only and will not affect the Hero view. You can see these keyframes represented in the timeline by split left and right keys.

If you wish to directly modify the control point in both views when working in either view, you can turn on the "Apply Keyframe Changes to All Views" button at the very end of the timeline controls to the right.
|
|
If you insert additional points to a shape while in the non-Hero view, they will be automatically deactivated in the Hero view to avoid destroying the work done in the Hero view. You can reactivate these points in the Hero view by right clicking them and choosing "Point > Activate" |
Working with Difference Mode and Stereo Offsets
If you need to offset your tracking or roto manually (see below), you can use the Difference 3D view to help align the layer.
-
Select the layer you want to align
-
Turn on Difference mode.
-
Go to the Stereo tab in the Track module
-
Select your Non-Hero View.
-
Offset X and Y until the screen gets as close to blank middle grey as possible. You can optionally also adjust the other Stereo parameters.
-
Turn off Difference view and review your results on your Non-Hero view.


Merging Projects [Mocha Pro]
If you are working on a large roto project you will sometimes need to have more than one person working on the same shot.
When it comes time to export out mattes or do final tweaks you can use the Merge Project option to combine any files that have been used on the same piece of footage.

Simply select the Merge Project option from the File menu, and select a project you wish to merge. You can only merge projects that are the same dimensions, aspect ratio and frame length as the shot you are merging into.
NOTE: You cannot merge projects from versions of mocha earlier than 3.0.0.
Importing Silhouette SFX projects
In mocha V5 we introduced support to import Silhouette .sfx project files. To import a project:
-
Open or create a project with matching footage and same dimensions as the Silhouette file
-
Go to File → Import Shapes…
-
Choose a Silhouette sfx project file. If you are in OS X, you may need to navigate inside the sfx package to find the actual project file.
-
Click Open
The Silhouette project will then convert to native mocha splines and appear in the project.
|
|
Your Silhouette project file will need to match the frame rate, dimensions and length of the mocha project to correctly import. |
Tips for Rotoscoping
Name your layers
Naming layers is very important to save yourself time later, especially if you are doing a heavy rotoscoping job. Get into the habit of labeling each layer with specific names.
Turn off the splines and just work with points and the matte
If you are working on a tight roto it can sometimes be easier to turn the spline off and just see the matte with the control points. To do this:
-
Select your layer and turn on the Mattes button (Show Layer Mattes)
-
Uncheck the Splines option in the 'Show Spline Tangents' dropdown
If your other view options are at default settings you should now see the matte in the viewer with only the tangents and control points visible.
The Camera Solve Module
|
|
The Camera Solve module is presently unsupported for 360 Equirectangular footage in mocha VR |
Overview

The Camera Solve module is used to take planar tracking information and convert it to 3d space.
This is particularly useful if you cannot get a good track on the plane you need, as you can track other planes in the shot and use them to give you track in 3D space instead
As we are dealing with 3D calculations rather than 2D planar projections, the workflow is slightly different to a usual planar track.
Identifying the type of camera movement
In order to get a good camera solve you must first identify what type of track it is. Mocha recognizes three types of camera situations:
Pan, Tilt, Zoom (PTZ)
Pan, tilt. zoom cameras are generally fixed in place and do exactly what their name suggests; pan, tilt and zoom.
PTZ cameras are looking for overall movement in the camera plane, rather than changes in the physical planes within your scene.
Small Parallax
Small Parallax is where the camera is not fixed to one point in space and has a lot of mid-ground planes that can be tracked.
Large Parallax
Large Parallax is where the camera is not fixed to one point in space and has trackable planes very close to the camera. It is referred to as Large Parallax because closer objects move at much greater perspective and distance to the camera than objects further away.
The Camera Solve Process
Once you have identified the type of camera motion you can start tracking your shot.
Tracking for PTZ-type Camera Solves
PTZ solves are a little different from perspective solves in that they only need to look for how the camera is behaving when fixed, such as on a tripod.
To set up a PTZ solve, take the following steps:
-
Locate a large area in the shot that can be tracked. If you can’t find a single large area, you can also use a variety of smaller ones using "Add Spline To Layer".

-
Turn on the grid so you can see how the plane is moving.
-
Set any parameters you need for the track and begin tracking.
-
If your track pans around more than around 60 degrees, stop the track and create another shape to continue tracking. The second shape will need to start further back in time than where the first one stopped tracking, so their tracking information overlaps on the timeline. This will help the solver blend together the tracking information of multiple shapes.

-
Once you have tracked the shot, switch to the Camera Solve tab.
-
Select all tracked layers you wish to use for the solve
-
Choose either Auto to let mocha guess the right solve, or choose Pan, Tilt, Zoom from the drop-down.
-
If you select Pan, Tilt, Zoom, set the focal length. Most commonly this will be 35-70mm. You can choose more than one if the focal length changes. Also choose Zooming if the is any camera zoom in the shot.
-
Once you have chosen your settings, click Solve.
Once mocha finishes solving the shot, you can then export the solved scene. See "Exporting Camera Solves" below for further details.
Tracking for Small Parallax Camera Solves
Small Parallax shots require at least 2 non-coplanar tracks to solve the scene. Non-coplanar means not on the same plane as each other. Examples of non-coplanar areas include:
-
A floor and a wall
-
The side and back of a truck
-
Two camera-facing areas at noticeably different distances from the camera, such as one building in front of another
-
Two mountain slopes at different angles
-
Two opposing walls of a corridor
To set up a Small Parallax solve, take the following steps:
-
Locate planar areas in the mid-ground of the shot that can be tracked. These objects should not be moving in the shot, so choose areas like walls, ground, tree trunks etc. Planes too close or too far away from the camera may not help a Small Parallax solve.

-
Turn on the grid so you can see how the planes are moving. Adjust the surface to fit the planar perspective if you need to see this movement more accurately
-
Set any parameters you need for the track and begin tracking.
-
If you lose the track due to obstructions or the object moving off screen, stop the track and create another shape to continue tracking. The second shape will need to start further back in time than where the first one stopped tracking, so their tracking information overlaps on the timeline. This will help the solver blend together the tracking information of multiple shapes.
-
Once you have tracked the shot, switch to the Camera Solve tab.
-
Select all tracked layers you wish to use for the solve
-
Choose either Auto to let mocha guess the right solve, or choose Small Parallax from the drop-down.
-
If you select Small Parallax, set the focal length. Most commonly this will be 35-70mm. You can choose more than one if the focal length changes. Also choose Zooming if the is any camera zoom in the shot.
-
Once you have chosen your settings, click Solve.
Once mocha finishes solving the shot, you can then export the solved scene. See "Exporting Camera Solves" below for further details.
Tracking for Large Parallax Camera Solves
Like Small Parallax, Large Parallax shots also require at least 2 non-coplanar tracks to solve the scene. (See examples of non-coplanar areas above)
To set up a Large Parallax solve, take the following steps:
-
Locate planar areas in the shot that can be tracked. These objects should not be moving in the shot, so choose areas like walls, ground, tree trunks etc.
-
Turn on the grid so you can see how the planes are moving. Adjust the surface to fit the planar perspective if you need to see this movement more accurately
-
Set any parameters you need for the track and begin tracking.
-
If you lose the track due to obstructions or the object moving off screen, stop the track and create another shape to continue tracking. The second shape will need to start further back in time than where the first one stopped tracking, so their tracking information overlaps on the timeline. This will help the solver blend together the tracking information of multiple shapes.
-
Once you have tracked the shot, switch to the Camera Solve tab.
-
Select all tracked layers you wish to use for the solve
-
Choose either Auto to let mocha guess the right solve, or choose Large Parallax from the drop-down.
-
If you select Large Parallax, set the focal length. Most commonly this will be 35-70mm. You can choose more than one if the focal length changes. Also choose Zooming if the is any camera zoom in the shot.
-
Once you have chosen your settings, click Solve.
Once mocha finishes solving the shot, you can then export the solved scene. See "Exporting Camera Solves" below for further details.
Solve Quality Indicator

When a solve is complete, the Solve Quality bar will tell you how accurate the solve has been. If you get a poor percentage check to make sure your tracks are locked on accurately, add additional layers to help the solver or try a different solve type or focal distance.
Stereo Camera Solve
Camera solves now also work with Multiview. Like with tracking, a stereo camera solve is designed to be as similar to the Mono process as possible.
New additions to the camera solve for Stereo are:
-
Providing the user the option of converged or parallel solves
-
Adjustment for vertical alignment
-
Export of stereo FBX to Maya
-
Export of individual views to other supported applications (AE, Nuke, etc)
-
Go to the Camera Solve module
-
Select the layers in the layer control panel you want to solve with. (See full documentation for more information)
-
Select the solve type, or choose "Auto"
-
Select your Focal length types
-
Tell mocha if this is a Parallel Stereo camera or a Converged Stereo camera
-
Check "Vertical Alignment" if you need to estimate vertical alignment for the shot
-
Click Solve

You can then export out to left and right views, or for Standard FBX, you can export full Stereo cameras. The full stereo camera solve FBX presently works in Maya.
All other exports can only be exported as a single camera view and the solved nulls.

Exporting Camera Solves
You have two steps for camera solves:
1. Export Camera Data from Static Objects
This is the standard export. The basic procedure is:
-
Select the layers you used to do the initial solve in the layer panel (these are still selected if you have just completed a camera solve). These layers are normally tracked to static objects, such as walls, ground, a parked vehicle, a dinosaur fossil etc.
-
Do not choose any layers that are tracking moving objects (people, moving cars, badgers etc.)
-
Click Export Camera Data…
-
Choose the format you wish to use from the drop-down.

-
If you are exporting to After Effects, click Copy to Clipboard.
-
If you choose FBX, click Save and create a filename.
-
If you choose HitFilm Composite Shot, click Save and create a filename.
-
You can then paste into After Effects using the "Paste mocha camera" option in the Edit menu, or import your FBX or HitFilm data into the program of your choice.
-
-
When you paste into After Effects you will get a camera and a number of nulls depending on the type of solve you did. PTZ will only export a single null to help define the camera motion. The other 2 solves will create a null for each corner of your layer surface objects in mocha.
2. Export Camera Data from Moving Objects
This is a secondary export. The basic procedure is:
-
Once you have exported a camera from the static solve, select any layers that you used to track moving objects in the shot. If you have not tracked any moving objects you can do this now.
-
Click Export Camera Data…
-
Choose the format you wish to use from the drop-down.
-
If you are exporting to After Effects, click Copy to Clipboard.
-
If you choose FBX, click Save and create a filename.
-
If you choose HitFilm Composite Shot, click Save
and create a filename.
-
-
You can then paste into After Effects using the "Paste mocha camera" option in the Edit menu, or import your FBX or HitFilm data into the program of your choice.
When you paste into After Effects you will get a camera and a number of nulls depending on the type of solve you did. PTZ will only export a single null to help define the camera motion. The other 2 solves will create a null for each corner of your layer surface objects in mocha.
|
|
You will get a second camera object when you export moving layers. You can delete this camera if you have already exported the camera from step 1 of the export. |
Tips for Camera Solves
The resulting track drifts or jumps
This can be from the solver not having enough reliable information from the tracks.
-
Check the Solve Quality bar to make sure the solve has been accurate
-
Make sure your planar tracks are accurate and locked on well to their static objects.
-
Check that there is enough overlapping frames in the layers if you have had to do more than one track along the timeline. If you start one track exactly where the last finished, the solver may not be able to accurately blend the resulting data.
-
You may not have enough layers tracked to get an accurate solve. Try adding further tracks to help the solve.
-
Try a different solve type. Sometimes one solver may give better results than another.
-
Try a different focal length.
Exporting Tracks
|
|
Some sections only relate to mocha Pro. Some export features are not available in mocha HitFilm or mocha AE. For a full comparison of features, please refer to the comparison chart online. |
|
|
Tracking data is not supported across 360 seams and poles in mocha VR and may not export as expected. |
![]()
Exporting Tracks to Adobe After Effects
|
|
It is important that the clip length, frame rate, frame size, interlace mode, pulldown mode and pixel aspect ratio in the project match the corresponding settings in the After Effects project where you plan to use the data. You can change the frame rate and pixel aspect ratio settings in the Film and Time sections of the Clip tab. |
To export tracking data to After Effects, press the Export Tracking Data button on either the Track or AdjustTrack tabs.
Choose either the After Effects Corner Pin Data or the After Effects Transform Data.

After Effects Corner Pin Data:
The corner pin data records and exports the 4 point x, y information from either the adjusted track or the raw track. There are three exports – two for recent After Effects versions and one for CS3 and older versions of After Effects.
After Effects Transform Data:
The transform data exports x and x positions as well as the scale and rotation for the whole surface.
If you click Save, this will display a file browser for saving the tracking data for use later. By default, the files will take the name of the layer, so for a layer name Track_Layer the export will create a file named "Track_Layer.txt".
If you don’t need to save the export, you can press Copy to Clipboard, and then go straight to After Effects and paste the data. If you are saving to file you will need to open the text file you saved with the data, select the entire body of text and copy it.
In After Effects, load the footage you tracked and the footage/image/composition you wish to apply the transform or corner pin data to.

Select the item on the timeline that is the insert object. Paste the data to the selected layer. You can do this by selecting the ‘paste' option in the edit menu or by typing 'command- v' (Mac) or 'ctrl-v' (Windows).

With the layer’s information expanded you can see either the 4-point tracking data for the corner pin, or the position, rotation and scale information from the tracking is now applied to the insert layer.
If you are pasting transform data rather than corner pin data then you will need to delete the anchor point keyframes to see a result. We export both position and anchor point keyframes so that stabilization or tracking can be achieved. See below.
Applying Corner Pin for Layers with different dimensions
If your insert is not the same size as the dimensions of the composition in After Effects, you will need to take a few further steps to make sure your corner pin data fits correctly. The reason for this is that tracking data is basing itself on the relative size and aspect ratio of the footage, whereas After Effects treats the corner pin data relative to the size of the layer you are applying it to.
To get around this, you can take the following steps to modify the insert layer in After Effects:
-
Precompose the layer and move all attributes into the new composition.

-
Open the Precomp you just made and fit the layer to the composition dimensions (Layer | Transform | Fit to Comp).

-
Go back to the original composition, select the precomposed layer and paste the data.
Alternatively you can use Align Surface in mocha to define the full dimensions:
-
Apply a manual corner pin to your insert layer in After Effects and place it in the desired position for any frame.
-
On this frame, Precompose the layer and make sure all attributes are inside it.
-
You will now have a precomposed layer that is the same dimensions as the tracked footage.
-
In mocha, go to the same frame in the footage you applied the corner pin to in After Effects and select the track.
-
On this frame, turn on your surface and click "Align Surface" in the Layer Properties panel.
-
You will see the surface fit to the full dimensions of the footage.
-
Export this newly aligned track to After Effects corner pin.
-
Back in After Effects, select the precomposed layer and paste the data.
This will apply the tracking data relative to the full dimensions of the footage instead. If you need to adjust the insert, just open the precomposed layer and tweak the manual corner pin you made.
Using Tracks For Stabilizing In After Effects
You can use the tracking data created to stabilize a shot in After Effects.
-
Track your footage as normal, then turn on the Surface button and center the surface box on the area you wish to use as the stabilize center.

-
Export the tracking data in the After Effects Transform format. Select the Invert checkbox option

-
Switch to After Effects, select the layer you wish to apply the stabilize data to and paste it to that layer.
You should now have a stabilized image.
Alternatively you can also use the After Effect Corner Pin export using Invert in the same way to get a correctly warped stabilized image.
Exporting Tracks to Final Cut Pro or Final Cut Express
This example illustrates how to export Basic Motion data to Final Cut Pro or Final Cut Express, and use it to matchmove one clip to another, with translation, rotation and scale.
Track an object in the usual way, and use AdjustTrack to correct for any drift if necessary. The exported tracking points will be the four corner points of the Surface, so you should position these appropriately before export.
Press the Export Tracking Data button on either the Track or AdjustTrack tabs. Next, choose either the Final Cut Basic Motion or the Final Cut Distort options.

Final Cut Distort:
The distort option exports the 4 point x, y information from either the adjusted track or the raw track. The points exported are the four corners of the surface.
Final Cut Basic Motion:
The basic motion option exports x and y positions as well as the scale and rotation for the whole surface. The position exported is the center of the surface.
Now click Save. This will display a file browser; you need to select a filename and directory for the files to be saved. By default, the files will take the name of the layer, so for a layer name Track_Layer this export produced a file named:
Track_Layer.xml
Now open the Final Cut project where you want to use the tracking data. To import the XML file in Final Cut Pro, click File | Import | XML…. In Final Cut Express, click File | Import | FCP XML from iMovie…
You will now see a new clip in your bin, named 'mocha distort – layer_name' or 'mocha basic motion – layer_name'. If your original footage was a QuickTime file, then the new clip in Final Cut will point to this footage. If it was an image sequence, the clip will be connected to the first frame of the sequence, stretched to the duration of the whole clip.
In most situations, you want to apply the tracking data to a different clip in your timeline. To do this, you can copy and paste the data from the imported clip onto any other.
Drop your imported clip into the timeline, then select it and press Cmd-C to copy it to the clipboard. Now select the clip you want to apply the tracking data to and press Opt-V (Paste Attributes). You will see a dialog asking you to choose which data to paste.

Depending on the kind of data you exported, tick either 'Basic Motion' or 'Distort' and untick all the other boxes.
You should now see the clip following you tracked.
Using Tracks for Stabilizing in Final Cut
To use our tracking data for stabilization in Final Cut, follow the same procedure as for a basic motion export, but tick the Invert checkbox in the export dialog.
Now when you import the XML file into Final Cut, you should have a fully stabilized clip. You can also copy the stabilized data onto another clip using Copy and Paste Attributes as before.
Troubleshooting Tracking Export to Final Cut
Many issues of track misalignment can be corrected by choosing the right film type, frame rate and interlacing settings in our software. These controls are on the Clip page in the Film, Interlaced and Time tabs.
The layer doesn’t line up in Final Cut
If the layer doesn’t line up but the overall motion looks right, the most likely problem is mismatched pixel aspect ratio (PAR). In Final Cut, check the sequence settings to confirm the correct PAR for the clip, then use the equivalent setting when tracking in our software. If you have already tracked with the wrong film type setting, you will need to re-track after changing it. The table on the next page shows the corresponding settings between Final Cut and Imagineer products.
Although film types are included in our software for anamorphic HD sizes (DVCPRO HD and HDV), you are unlikely to need to use them as QuickTime will normally apply the anamorphic scaling and our software will treat the video as full HD.
The layer lines up on the first frame, but then it drifts
This is usually caused by a frame rate mismatch. Check that the frame rate and interlacing settings match between final Cut and our software.
The layer appears much wider or thinner than it should
This can be caused by a mismatch in the Final Cut Anamorphic setting. If you are working with anamorphic footage, ensure that you have the 'Anamorphic' setting checked in your Final Cut sequence settings, and in the clip properties. You also need to use one of the anamorphic film types when tracking: any of the film types with 'Anamorphic' in the name should give correct results when importing the data into Final Cut.
Exporting Tracks to Apple Motion
Track an object in the usual way, and use AdjustTrack to correct for any drift if necessary. The exported tracking points will be the four corner points of the Surface, so you should position these appropriately.
Press the Export Tracking Data button on either the Track or AdjustTrack tabs. Next, choose 'Motion basic transform(.motn)' or 'Motion corner pin (.motn)' and click 'Save' to save the file.
Inside Motion, you can either choose to open the exported file as a new project or drag it into an existing project. You will see a Group containing the footage you tracked as well as a blue solid called "Surface".

Then take the following steps to insert your footage:
-
Drag the desired footage or image to the group, above the surface
-
Go to Motion Tracking in Behaviors and drag the Match Move behavior onto your insert
-
If the surface layer does not automatically apply to the behavior, drag the surface layer onto the Match Move behavior
-
If you are just using transform, Match Move defaults to this option and you can set transform, scale and rotation
-
If you are using corner pin, select the 'Four Corners' option from the 'Type' drop down.

Troubleshooting Tracking Export to Apple Motion
Many issues of track misalignment can be corrected by choosing the right film type, frame rate and interlacing settings in our software. These controls are on the Clip page in the Film, Interlaced and Time tabs.
The layer lines up on the first frame, but then it drifts
This is usually caused by a frame rate mismatch. Check that the frame rate settings match between Motion and mocha.
The layer tracks correctly but is offset or scaled oddly
This is normally due to the layer you are inserting not being the same frame size as your project media. You can fix this by either changing the insert to fit the dimensions, or scaling the insert inside motion to match the dimensions. If you are going to scale the layer to fit, you should do this step before you apply Match Move.
Exporting Tracks to Apple Shake
This section explains how to export tracking data in a format readable by Apple Shake, how to import the data into Shake and how to use it for match move, corner pinning and stabilization tasks.
Track an object in the usual way, and use AdjustTrack to correct for any drift if necessary. The exported tracking points will be the four corner points of the Surface, so you should position these appropriately.
Press the Export Tracking Data button on either the Track or AdjustTrack tabs. Next, choose 'Shake Script (*.shk) and click 'Save' to save the script to disk or 'Copy to Clipboard' to simply copy-and-paste the data into Shake.

Now let’s use that data in Shake. To load the tracking data in a file into an existing Shake Script follow these steps:
In the File menu, select ‘Add script'.

Navigate to the Shake script file you exported and select it.
If you have the data on your clipboard, simply press Ctrl/Cmd+V or right-click and choose 'Paste'.
Three nodes will now appear in your script: Stabilizer, MatchMoveLayer, and CornerPinLayer.

At this point you have successfully imported your tracking data from mocha into Shake. But what exactly did you import? Let’s start with the MatchMoveLayer layer.

The MatchMoveLayer is used to apply the tracking data to a foreground element that you wish to matchmove to a background. It consists of two inputs, the background and the foreground. The foreground element will be the element you wish to apply the match moving data to. The foreground is connected to the left side input of the node while the original tracked background element goes into the right hand side.

The next node is the CornerPinLayer node. This node has a single input and works just like the left input of the MatchMoveNode.

It takes your foreground element and applies the scaling, rotation, and translation data to it and prepares it for compositing into your next layer.
The last exported node is the Stabilizer Node. Just as the name implies, it takes all of the exported tracking data and uses that data to stabilize your input clip.
With this node, for example, you may apply this data to the background element you tracked to make for an easier composite.
Now that you have successfully exported and imported your data into Shake you are ready to continue working on your project.

Exporting Tracks to Nuke
This section explains how to export tracking data in a format readable by Nuke, how to import the data into Nuke and how to use it for match move, corner pinning and stabilization tasks.
Track an object in the usual way, and use AdjustTrack to correct for any drift if necessary. The exported tracking points will be the four corner points of the Surface, so you should position these appropriately.
Press the Export Tracking Data button on either the Track or AdjustTrack tabs. Next, choose Nuke Ascii (*.txt)' and click 'Save' to save the script to disk.

In Nuke, append a tracker to the background clip, e.g. by selecting the node and pressing tab, then typing 'tracker' and finally selecting the 'Tracker' node in the list of nodes.

In the tracker properties window, select the animation submenu button for Tracker 1, then choose File | Import Ascii… in the menu.

On the import Ascii dialog, press the folder button next to the file name, browse to the file you exported, select it, click 'Open' and then click 'OK'.
Repeat these steps for tracker 2, 3 and 4.
Exporting to Nuke 7 Tracker Node
If you’re in Nuke 7 or above and you don’t want to go through the process of exporting out your ascii files, you can instead export to the Nuke 7 Tracker node.
![]()
If you choose Copy to Clipboard you can immediately switch over to Nuke and Paste the data. Alternatively you can import your saved Nuke Script from the File menu.
Exporting Corner Pin tracks to Nuke Corner Pin Node
You can export a Corner Pin straight to the clipboard or to a .nk script by choosing Nuke Corner Pin (*.nk) from the Export Tracking Data dialog.
If you choose Copy to Clipboard you can immediately switch over to Nuke, select the node you wish to apply the corner pin to and Paste the data. Alternatively you can import your saved Nuke Script from the File menu.

Exporting Tracks to Blackmagic Fusion
This section explains how to export tracking data in a format readable by Fusion, how to import the data into Fusion and how to use it for match move, corner pinning and stabilization tasks.
Track an object in the usual way, and use AdjustTrack to correct for any drift if necessary. The exported tracking points will be the four corner points of the Surface, so you should position these appropriately.
Press the Export Tracking Data button on either the Track or AdjustTrack tabs. Next, choose 'Blackmagic Fusion COMP Data (*.comp)' and click 'Save' to save the script to disk.
In Fusion, open the .comp file, then drag the tracker node into the right view.

Now import the clip that you want composited onto the background and tie the output of the clip to the input of the tracker node.

In the settings of the tracker node, select the 'Operation' tab and select either 'Corner Positioning' or 'Match Move' to composite the insert clip on top of the background. Notice that you can switch 'Position', 'Rotation' and 'Scaling' on and off for different effects.

Exporting Tracks to Inferno, Flame, Flint, Smoke and Combustion
This section explains how to export tracking data in a format readable by Autodesk Inferno, Flame, Flint, Smoke and Combustion.
Track an object in the usual way, and use AdjustTrack to correct for any drift if necessary. The exported tracking points will be the four corner points of the Surface, so you should position these appropriately.
Press the Export Tracking Data button on either the Track or AdjustTrack tabs. Select 'Autodesk IFFFSE Point Tracker Data (.ascii)' as the format, and save this to a file. Next select the 'Autodesk IFFFSE Stabilizer Data (.ascii)' export and save this to another file.

Importing into Combustion
Let’s look at how we use the data. In Combustion, create a layer with the foreground graphic and set the layer shape to 'Four-Corner'.

Now select all four corners of your layer, enable the 'Tracker' tab and select 'Import Tracking Data.'
Import the single Ascii file with the stabilizer tracking data.
Activate the insert layer visibility and you will see that the insert layer is now tracked to the background element, even though the image is not sized correctly yet. Select all trackers and set the mode to 'Absolute' to resolve this.
If you prefer to import your data one point at a time you can instead select one track point and import the Ascii file with the corresponding tracking data. Remember to switch to 'Absolute' mode once all data has been imported.
Importing into Inferno, Flame, Flint or Smoke for Corner Pinning
Firstly, we will set-up a corner-pin composite in the Action module, to reproduce the basic compositing operation.
Enter Action and delete the default Axis and Image nodes.
Create a new Bilinear Surface. Tap on bilinear1 then press ~ to view its settings. Go to Surface then click the S button next to Track.

You should now be in the familiar stabilizer module. For this example we are doing a corner-pin so we will need to use all four trackers.
Tap Tracker 1 then press 'Imp' under 'Track Y'.

Now browse to the corresponding file, e.g. xxxx_top_left.ascii. The files correspond to trackers as shown below.
You should see the marker for Tracker 1 move into the correct position.
Repeat the process for the other three trackers, making sure that you use the correct files as shown in above. You should also mark each tracker as Active if it is not already.
Tap Return to return to Action, and you should now see your finished corner pin.
Importing into Inferno, Flame, Flint or Smoke for Stabilization
An alternative use for the tracking data is for stabilization. You can use the Stabilizer module to do 1-, 2-, 3- or 4-point stabilization. In this example, we will do a 1-point stabilization to stabilize for position only, using the center point.
Enter the Stabilizer module. Click the Imp button under Track Y, as for the Corner Pin.
Select the _center file, in my example this is PDA_center.ascii. You should now see the key-frames loaded and be able to process
If you want to use more points to stabilize zoom, rotation, affine and perspective moves, just load the corner tracks as described in the Corner Pin section.
Exporting Tracks to Assimilate SCRATCH
To import data into SCRATCH requires SCRATCH v7 or later.
To import the data into Assimilate, do the following:
-
Enter the SCRATCH player with the background shot

-
Create a scaffold with a the image you want to insert (Make it a bicubic since you want a 4-corner pin deformation)
-
Either load the background shot into mocha and track or send the shot from SCRATCH to mocha by creating a custom command

-
Track an object in the usual way, and use AdjustTrack to correct for any drift if necessary. The exported tracking points will be the four corner points of the Surface, so you should position these appropriately.
-
Press the Export Tracking Data button on either the Track or AdjustTrack tabs. Select 'Assimilate SCRATCH (*.txt)' as the format, and save this to a file or copy to clipboard

-
Switch back to SCRATCH, select the scaffold with the bicubic and click on TRACK.

-
Once on the TRACKING interface you will see "Paste mocha data" highlighted, which is detecting that you have mocha data on the clipboard.
-
Click on "Paste mocha data" and the data will be applied to the element.

Exporting Tracks to Boris FX Plugins
You can export either Corner Pin or Center Point data out to any Boris FX plugin that supports motion tracking data. These include effects such as the BCC Corner Pin effect and Witness Protection.
The files are import only, so you can’t copy them to the clipboard. You can save the data as a text file and import it.

Importing the track is as simple as locating the Motion Tracker section of your BCC plugin and clicking either the "L" button or selecting "Load…" from the Import-Export dropdown, depending on the plugin you are using.
Exporting Tracks to Avid DS
|
|
It is important that the clip length, frame rate, frame size, interlace mode, pulldown mode and pixel aspect ratio in the project match the corresponding settings in Avid DS project where you plan to use the data. You can change the frame rate and pixel aspect ratio settings in the Film and Time sections of the Clip tab. |
This section explains how to export tracking data in a format readable by Avid DS.
Track an object in the usual way, and use AdjustTrack to correct for any drift if necessary. The exported tracking points will be the four corner points of the Surface, so you should position these appropriately.
Press the Export Tracking Data button on either the Track or AdjustTrack tabs. Select 'Avid DS Tracking Data (*.fraw)' as the format, and save this to a file. This stores the x/y coordinates of the four surface points defining the track in eight .fraw text files using the following naming convention:
…._R1x.fraw Lower left X coordinate
…._R1y.fraw Lower left Y coordinate
…._R2x.fraw Lower right X coordinate
…._R2y.fraw Lower right Y coordinate
…._R3x.fraw Upper left X coordinate
…._R3y.fraw Upper left Y coordinate
…._R4x.fraw Upper right X coordinate
…._R4y.fraw Upper right Y coordinate
Where "…." is replaced by the name of the exported layer.
On your DS v10.x system, create a Tracker node and open the Animation Editor for it. In the left window check the little Blue Animation box to the left of R1x, R1y, R2x, R2y, R3x, R3y, R4x, and R4y. Now right-click "R1 Tracker Y" and select "Import tracking coordinates". Navigate to the folder containing the eight FRAW files that Mocha created and DS will load them. If you have an older version of DS then you will have to load each of the eight FRAW files individually.
Exporting Tracks to HitFilm
From HitFilm 4 onwards we have introduced mocha transform and corner pin support, so you can now export mocha tracking data directly to a HitFilm Composite Shot file.
Exporting tracks to HitFilm 4 is very similar to exporting HitFilm Camera solves or Shapes:
-
Select a layer and go to "Export Tracking Data…"
-
Choose HitFilm Corner Pin [supports motion blur] or HitFilm Transform Data [postion, scale and rotation]
-
Click Save and choose a file name

Importing is done via the Compositing section in HitFilm 4:
-
In HitFilm 4 go to your Composite section
-
Choose Import > Composite Shot
-
Select the saved HFCS file from mocha
-
HitFilm will then load the Composite Shot with the footage you tracked in mocha and layers with either a Quad Warp (for corner pin) or the layer with transform animation applied (for Transform).
-
You can then either relink the media in the composite file to the desired insert, or copy the Effect or Keyframes to the desired media in your existing composite.
Exporting Tracks to Quantel generationQ systems
To import data into the Quantel requires Imagineer’s TrackImport plug-in for Quantel.
You can import tracking data into Quantel systems by using Imagineer’s TrackImport plug-in.
Track an object in the usual way, and use AdjustTrack to correct for any drift if necessary. The exported tracking points will be the four corner points of the Surface, so you should position these appropriately.
Press the Export Tracking Data button on either the Track or AdjustTrack tabs. Select 'Quantel Corner Pin Data (*.xml)' as the format, and save this to a file.
In the Quantel system, select the TrackImport plug-in, and use the plug-ins file browser interface to select the tracking data file to import. Then click 'Settings' and choose 'Tracker' in the settings window and click 'Save'.
The tracking data can now be used in a manner identical to tracking data generated within the Quantel system.
Exporting Tracks to MochaBlend
To export tracking data to the Good Spirit Graphics MochaBlend plugin, click the Export Tracking Data… button on the Track module, AdjustTrack module or from the File menu.
You can export the tracking data by either saving it to file, or copying to the clipboard:

To import the tracking data into the plugin, you start by selecting an available Data slot and then either paste from the clipboard or open the exported file:

Once imported, you can then adjust your scene to fit the data. It is important to make sure you check the warnings and correct any relevant items before setting up your rig:

-
If there is a warning about format mismatch, click the green "Import Format" link in the MochaBlend window
-
If there is a warning about no camera rig, click the green "Create Rig" or "Set Active Rig" according to your needs
-
Finally make sure that you click the "Set Timeline to Data" if your project timeline is different from the frame range you tracked in mocha
You can then go ahead and tweak individual settings in the MochaBlend plugin. See MochaBlend documentation for further information on working with tracking data in the plugin.
Exporting Stereo Tracking Data
Exporting stereo Track data from mocha is the same as exporting in mono mode, however when you are in multiview mode you can choose the view you want to export.
-
Select a layer
-
Click "Export Tracking Data…" from the Track module or choose the option from the file menu (File | Export Tracking Data…)
-
Select the Application you wish to export to
-
Select the view you want to export (or check "Export all views" if it is available for that export format)
-
Choose whether you want to export the currently selected layer, all visible layers or all layers
-
Click "Copy to Clipboard" or "Save" depending on your preference. Note that some exports only allow you to save the data.
Exporting Mattes and Clips
|
|
Some export formats listed below are not available for mocha HitFilm or mocha AE. For a full comparison of features, please refer to the comparison chart online. |
|
|
Some shape data formats are not supported across 360 seams and poles in mocha VR and may not export as expected. |
Exporting Rendered Shapes
|
|
This feature is available in mocha Pro and mocha VR |
When your roto work is complete and you would like to export your mattes, choose the menu item File → Export Rendered Shapes… to be guided through the rendering process.

The render dialog will give you options to choose either the currently selected layer, all visible layers or all the layers in the project.

Options include:
Colorize output
Choose whether you want to render grayscale mattes or by their layer fill color.
Export to
The export options for Image Sequences and QuickTime movies.
For Image Sequence you have the following options:
-
Directory: The directory where you want to export your image sequence.
-
File Format: A list of available image formats to render to.
-
Prefix: The name of the clip to go in front of the frame numbers.
-
Suffix: The name of the clip to go after the frame numbers (blank by default).
-
Index Start: The number to start the exported sequence from. By default this is the first frame in the timeline.
-
Index Width: The number of padding zeroes to use.
Choosing QuickTime movie will bring up the standard QuickTime export options when you click OK.
Exporting Stereo Rendered shapes
The render dialog also allows you to render to single footage streams or a combined stream via EXR.
-
Go to File | Export Rendered Shapes…
-
Choose the mattes you want to export in the top radio buttons.
-
Selected: The last selected layer.
-
All Visible: Only the layers that have visibility turned on in the layer controls
-
All: All layers except ones you have specifically deactivated.
-
-
Choose the Color Output:
-
Grayscale: The default black and white mattes with feather.
-
By matte color: The same as Grayscale, only the mattes are colored according to what you defined each layer matte color to be in the Layer Controls.
-
By layer ID: A special use case for those that want the mattes to be colored by their layer ID.
-
-
Under "Export Views" select the render option you want:
-
Current Only: Renders the current view you have selected.
-
To single footage stream: Renders all views to a single file. You are limited to rendering to EXR or SXR.
-
To separate footage streams: Renders the views as individual sequences.
-
-
Then choose your file path and render format.

If you have chosen to render the current view or separate footage streams, the view abbreviation will be suffixed to the rendered export automatically, so there is no need to define this in the file name.
Exporting as G-Masks and Shake Rotosplines
Choose a shape (not a layer) and select Export Shape Data… from the File menu. A dialog will show with a drop-down containing 3 different saving options.
Choose the target application and hit Save. The data going into the file is not binary, and is shown in the dialog so that you may copy and paste it directly into a text editor if you prefer to work that way.
Because of differences in the way Splines are handled in the applications (Combustion and Flame handle splines differently), maintaining accurate keyframe interpolation between our software and the other applications requires that the exported shapes have a keyframe on every frame. This is not a bug but required to ensure your mattes look right once they’ve been imported into your compositing application.
Exporting as mocha shape for After Effects Data
|
|
It is important that the clip length, frame rate, frame size, interlace mode, pulldown mode and pixel aspect ratio in the project match the corresponding settings in the After Effects project where you plan to use the data. You can change the frame rate and pixel aspect ratio settings in the Film and Time sections of the Clip tab. |
The mocha shape plug-in will import the following data into After Effects:
-
One or more shapes, which may be either Bezier or X-Spline
-
The 'plane' that was generated by the Planar Tracker. This defines the overall movement of the shape(s)
-
Shape point keyframes set in the project
-
Per-point feathered edges
If you wish to export a single layer, select it before proceeding with the export.
When you are ready to export, select Export Shape Data button. On the dialog that opens, choose if to export the selected layer, all visible layers or all layers.

When you have made the right selection, click Copy to Clipboard, then switch to After Effects.
In After Effects, import the same footage and ensure that the frame rate and pixel aspect ratio are the same as those used when generating the shape. You can change these values in After Effects by selecting File | Interpret Footage | Main….
Bring the footage into a composition, then select Edit | Paste to add the shape effects to the composition. Each shape exported will come across as its own plug-in effect.
|
|
In mocha V5 onwards we changed the shape export for After Effects to remove key padding. This means you must now paste to the same frame in After Effects as the project in point in mocha, rather than the beginning of the clip. |
In the plug-in controls you can change the following parameters:
Blend mode
You can choose to change the blend mode from the one assigned to the shape by selecting Multiply, Add or Subtract from the dropdown menu.
Invert
When checked, inverts the matte.
Render soft edge
If you have created the shape with feathered edges but wish to switch these off, untick this parameter. Note that if you have not created feathered edges this will have no effect.
Render type
This setting allows you to choose between various render effects. The default is the 'Shape cutout' which uses the matte to cut out the corresponding area in the background footage. 'Color composite' will apply a single color to the area within the matte, useful when wanting to preview the positions of multiple layers. Note that the Opacity setting affects this color fill, allowing you to blend it with the background footage. 'Color shape cutout' combines the effects of the previous two.
Shape color
Defines the color of the color fill applied when selecting the 'Color composite' render type.
Opacity
Defines the opacity of the color fill applied when selecting the 'Color composite' render type.
Exporting Adobe Premiere Pro CC Masks
Exporting shapes to Adobe Premiere Pro CC is very similar to exporting shapes to After Effects
-
Select a shape and go to "Export Shape Data…"
-
Choose Adobe Premiere shape data
-
Choose if you want to export the selected layer, all visible layers or all layers
-
Copy to the Clipboard
Importing is just as straightforward:
-
In Adobe Premiere Pro CC, select your clip on the timeline
-
In the Effects panel, click on Opacity
-
Paste the data using CMD/Ctrl + V or right-click and choose Paste
-
You can also apply the masks to most effects, by adding the effect to your clip, selecting the effect in the Effects panel and pasting.

Exporting as mocha shape for Final Cut
The mocha shape plug-in will import the following data into Final Cut:
-
One or more shapes, which may be either Bezier or X-Spline
-
The 'plane' that was generated by the Planar Tracker. This defines the overall movement of the shape(s)
-
Shape point keyframes set in the project
-
Per-point feathered edges
If you wish to export a single layer, select it before proceeding with the export.
When you are ready to export, select Export Shape Data button. On the dialog that opens, choose if to export the selected layer, all visible layers or all layers.
When you have made the right selection, click Save and select a destination to save the XML file to, then switch to Final Cut.
In Final Cut, import the XML file by CTRL-clicking in the project asset window.

Select 'Import', then 'XML…' and finally select the XML file that you exported.
Accept all the defaults in the 'Import XML…' dialog.
Your mocha shape sequence will now appear in your list of project assets.

To use the shape to composite the rotoscoped object over a new background, simply place the mocha shape sequence in a video track above the background sequence.

Additional controls
If you want access to the actual matte, individual layers of the matte or control that affect the appearance of the matte, double click on the mocha shape sequence to reveal the two main sequences it consists of - the original sequence and the ContourSequence.

Double clicking the ContourSequence will reveal the individual layers that the ContourSequence consists of. Dragging a layer into the viewer and selecting 'Controls' will give you access to controls of that layer, as shown below.

Invert
When checked, inverts the matte.
Soft edge
If you have created the shape with feathered edges but wish to switch these off, untick this parameter. Note that if you have not created feathered edges this will have no effect.
Render mode
'Luma' will cause the layer to render itself in the RGB channels, whereas 'Alpha' will cause the layer to render itself in the alpha channel of the generated sequence.
Matte color
Defines the color of the matte being rendered.
Exporting Shapes to HitFilm 3 Pro
HitFilm 3 Pro has introduced mask support, so you can now export mocha shape data directly to a HitFilm Composite Shot file.
Exporting shapes to HitFilm 3 Pro is very similar to exporting HitFilm Camera solves:
-
Select a shape and go to "Export Shape Data…"
-
Choose HitFilm [Transform & Shape]
-
Choose if you want to export the selected layer, all visible layers or all layers
-
Click Save and choose a file name

Importing is done via the Compositing section:
-
In HitFilm 3 Pro go to your Composite section
-
Choose Import > Composite Shot
-
Select the saved HFCS file from mocha
-
HitFilm will then load the Composite Shot with the footage you tracked in mocha and layers with shape masks.
Exporting Roto, RotoPaint and SplineWarp Nodes to Nuke
You can export a Roto, RotoPaint or SplineWarp node straight to the clipboard or to a .nk script by choosing Nuke Roto Paint (*.nk) from the Export Shape Data dialog.
To export shapes to Nuke:
-
Select a shape and go to "Export Shape Data…"
-
Choose one of the Nuke exports
-
Choose if you want to export the selected layer, all visible layers or all layers
-
If you choose Copy to Clipboard you can immediately switch over to Nuke, select the node you wish to apply the shape data to and Paste the data.
-
Alternatively you can import your saved Nuke Script from the File menu.

You have the option of exporting Basic Roto data which bakes the keyframes, or Transform and Shape data which separates the tracking data from the manual keyframes.
The latter makes the data less heavy and is only supported in Nuke 6.2 and above.
The SplineWarp node exports each layer as a joined set of splines with the spline keyframes separate from the tracked data (which is set in each curves transform).
For example if you only have 1 tracked layer to export, mocha will export that layer to SplineWarp as two joined splines in A.
You can then modify the second spline for the warp, or delete it and choose another.
Exporting Shape Data to Blackmagic Fusion Shapes
To export shape data to the Fusion shape format, click the Export Shape Data… button in the Track module or from the File menu.
You can export the shape data by saving it to file or by copying it to the clipboard:

To import the shape data into Fusion, either paste directly into the Fusion Flow View or open the comp file from the file menu.
The mocha layers will come in as separate nodes into the Flow View.
Exporting Shape Data to MochaBlend
To export shape data to the Good Spirit Graphics MochaBlend plugin, click the Export Shape Data… button in the Track module or from the File menu.
You can export the shape data by either saving it to file, or copying to the clipboard:

To import the shape data into the plugin, you start by selecting an available slot in MochaBlend and then either paste or open the data file:

Once imported, you can then adjust your scene to fit the data. It is important to make sure you check the warnings and correct any relevant items before setting up your rig:

-
If there is a warning about format mismatch, click the green "Import Format" link in the MochaBlend window
-
If there is a warning about no camera rig, click the green "Create Rig" or "Set Active Rig" according to your needs
-
Finally make sure that you click the "Set Timeline to Data" if your project timeline is different from the frame range you tracked in mocha
You can then go ahead and create the splines under the Objects settings. See MochaBlend documentation for further information on working with shape data in the plugin.
Exporting Shape Data to Silhouette Shapes
To export shape data to the Silhouette FXS shape format, click the Export Shape Data… button in the Track module or from the File menu.
You can export the shape data by saving it to file:

To import the shape data into Silhouette, either start a new session or import into the existing session from the File → Import… → Silhouette Shapes menu option:

Exporting Stereo Shape Data
Exporting stereo Shape data from mocha is the same as exporting in mono mode, however now you can choose the view you want to export.
-
Select a layer
-
Click "Export Shape Data…" from the Track module or choose the option from the file menu (File | Export Shape Data…)
-
Select the Application you wish to export to
-
Select the view you want to export (or check "Export all views" if it is available for that export format)
-
Choose whether you want to export the currently selected layer, all visible layers or all layers
-
Click "Copy to Clipboard" or "Save" depending on your preference. Note that some exports only allow you to save the data.

Nuke Roto exported as "Export All Views" will paste to Nuke as a combined roto node. If you would prefer the nodes to be separate, export using the different views instead of checking the all views option.
Exporting Rendered Clips (mocha Pro)
You can export a clip to an image sequence or QuickTime format by choosing "Export Rendered Clip…" from the file menu.

Options include:
Clip
Choose the clip you want to export.
Frame range
The range of frames you wish to export. If you choose to export the full range but have not rendered all your frames, the next drop down, "Revert to clip" will be used.
Revert to clip
Choose how to export frames that have not been rendered. If you choose None or the current clip to export, black frames will be exported for non-rendered frames.
Save channels
By default, this will just export the flattened render (Color), but if your render has alpha you can choose this also.
Export to
The export options for Image Sequences and QuickTime movies.
For Image Sequence you have the following options:
-
Directory: The directory where you want to export your image sequence.
-
File Format: A list of available image formats to render to.
-
Prefix: The name of the clip to go in front of the frame numbers.
-
Suffix: The name of the clip to go after the frame numbers (blank by default).
-
Index Start: The number to start the exported sequence from. By default this is the first frame in the timeline.
-
Index Width: The number of padding zeroes to use.
Choosing QuickTime movie will bring up the standard QuickTime export options when you click OK.
Exporting Stereo Rendered Clips
The render dialog also allows you to render to single streams or a combined stream via EXR.
-
Go to File | Export Rendered Clips…
-
Choose the clip you want to export in the top drop down. By default it chooses the last render.
-
Select your frame range you want to export. This defaults to the In/Out range.
-
Under "Export Views" select the render option you want:
-
Current Only: Renders the current view you have selected.
-
To single stream: Renders all views to a single file. You are limited to rendering to EXR or SXR.
-
To separate footage streams: Renders the views as individual sequences.
-
-
Then choose your file path and render format.

If you have chosen to render the current view or separate footage streams, the view abbreviation will be suffixed to the rendered export automatically, so there is no need to define this in the file name.
The Remove Module
|
|
This section only relates to mocha Pro and mocha VR. This feature is not available in mocha HitFilm or *mocha AE. For a full comparison of features, please refer to the comparison chart online. |
Overview
The remove module is designed to remove foreground objects from your footage to create clean plates. A removed object can be anything: wires, poles, signs, people and so on. The only requirement for a good removal is enough background to use.
To understand how mocha Pro removes a foreground object consider how you would do it yourself. A common method is to select a source image where the foreground object does not obscure the background region you are trying to paint in the target frame. You would then clone or otherwise copy the pixels from the source frame to the target frame. If the background is not in the same position in the two frames you would have to track the patch of pixels into the frame, and if the lighting is different between the two frames you would have to adjust the brightness of the patch.
The remove module attempts to do this for you automatically using a method called motion keying. As it has tracked the background areas you have defined, it can move pixels of these background areas from one frame to another. Hence, if a part of a background area is obscured in one frame, mocha Pro can search the rest of the clip for a frame where the obscured background area is visible, and move the pixels correctly into the target frame. During this process mocha Pro will evaluate and compensate for the lighting differences between the source and the target frame.
The Removal Process
Object removal requires a few simple steps to work correctly. The key to a good remove is adequate, tracked background and a correctly masked foreground.
1. Identify your foreground and background planes
First of all, scrub through your timeline and identify the planes of depth within your shot. Background often consists of multiple planes of motion, and there can also be obstructing foreground material. For example, in the shot below, the sign is in front of the ground, and the car door is in front of (but not obscuring) the sign.

2. Track and roto your foreground elements
We handle the foreground first as we need to mask them off from the background plane and from each other. You don’t actually need to worry too much about tracking the foreground: If the object is untrackable for whatever reason, just hand-animate a spline around it. You absolutely must track an object if it is going to be used as a background pass to replace foreground. For more information on effective tracking, please refer to the tracking section of the documentation.
In the example below, we have tracked and rotoscoped the sign and the door frame, which would otherwise obscure the ground plane.

3. Make sure your layer order is correct
Layer order matters in mocha. The closer to the camera an object is, the higher in the layer stack it should be. Far background should be on the bottom layer, foreground objects should be on top, in order of closeness.
In the example here, we show the door layer is above the sign layer, and the sign is above the ground layer in the stack.

4. Track your background plane
Once you have your foreground objects masked out across the timeline, draw as big a shape as possible to cover as much of the possible area you want to remove. Make sure the background layer is under the foreground layers, and track. For multiple planes of background, such as a floor and a wall, you will have to track two separate planes of motion. You must specifically track the background layer in order for the removal to work, even if you are working with a locked-off shot.
Here we can see the background drawn on a layer at the bottom of the layer stack, covering the large area of grass.

5. Select the layer you want to remove and adjust your removal parameters
Switch to the remove tab and adjust your parameters (see Remove Parameters below). Key things to focus on are your search range, whether or not you need to create or adjust a cleanplate, and if you need to use an illumination model.
We recommend trying a remove with Illumination modeling set to None first. This is the fastest setting for removals, and can quite often be all you need if there is not much light difference in the background over time.
6. Render
Once your layers are ready and the parameters are set, click the render button or render forward.

|
|
Removal can be a slow process depending on the resolution of the footage and the amount of frames you are removing on. You can optimize your search range (see Remove Parameters below) but keep in mind that removal quality can vary. |
Removal Troubleshooting
One or more background layers must be defined that include all areas that the foreground object moves across during the shot.
To get the result you expect you should observe the following rules:
-
As the tracker computes the motion of planar objects in the scene, you get the best results if the background is planar, or it has been subdivided into planar elements. Otherwise you might see artifacts.
-
If mocha Pro cannot track the background accurately you will probably get artifacts. If your selection of the background includes objects that move differently to the background this can reduce the accuracy of the computed motion.
-
If your selection of the background includes parts of the foreground objects then this can cause problems for the tracker as it will compute a motion for the background that is influence by the movement of the foreground. This may also cause artifacts when the removal is performed.
-
If the background contains e.g. a waterfall or another object that changes appearance from frame to frame, you will most likely get artifacts if you try to remove a foreground object that moves across such a background. mocha Pro will not know how to handle the changes. Another cause of such artifacts is moving specular reflections.
Remove Parameters
Here we provide a breakdown of each remove tool parameter and how to use it effectively.

When changing parameters in mocha Pro the change only affects the currently selected layer. To change the parameters of a layer other than the currently selected layer that layer must first be selected.
Input Tab
Here you specify the input clip for the remove process and any cleanplates you wish to import.

Input Clip
You can choose from any of the mocha Pro result clips to be used as the source clip to fill the requested foreground layers, instead of the default, which is to use the originally imported clip as the input clip. This can be useful if you have to do multiple passes to get an effective remove.
Cleanplates
Here you can import cleanplates to replace frames in your footage. If you don’t have enough background to use in your shot, importing your own cleaned up version of a frame can assist the remove tool greatly.
To import one or more cleanplates:
-
Click on Import. This pops up the Cleanplates window.
-
Click on the file Import… button to specify the file(s) you want to use. If they are numbered in the same way as the input clip, they will be given corresponding frame numbers. Otherwise, edit the Frame Number field for each cleanplate to set up the correct frame number. The entries for two cleanplates will look like this:

-
By default the Preview option is switched on. This means that the selected (highlighted) cleanplate will be shown in the display window. The current frame viewed on the timeline is also changed to the selected cleanplate frame. When Preview is switched off, the view switches back to the clip you are viewing.
-
Click on the File name or Frame Number for any cleanplate to change the selection. The Preview option allows you to select the correct frame number for your cleanplate(s). If you import a single cleanplate, the frame number will be listed as “All”. This means that the cleanplate will be used for all the frames of the clip. Use this option if the camera is locked off. Change “All” to a particular frame if want to change this behavior and track the cleanplate from the specified frame into the other frames.
|
|
The All option only applies when you are using a single cleanplate. |
If you import two or more cleanplates, mocha Pro will try to guess the frame numbers from any numbering in the file name. When using the cleanplates between those frame numbers, mocha Pro will blend the nearest two cleanplates to produce a smooth transition through the clip.
If you want to change the cleanplate settings after exiting the cleanplate window, click on Edit… You would need to do this if you are using the frames on a new machine where the cleanplates are stored in a different location, or just to add new cleanplates. If you re-import files with the same name but different directory to existing cleanplate files, mocha Pro will update the file to the new directory.
Create (Cleanplate)
One useful option within mocha Pro is to create a cleanplate from the currently viewed frame.
To do this, make sure you are viewing the frame you want to use and click on the Create button. This will create a clip containing the frame you are viewing, and set the Cleanplates clip to the new clip. You can then touch up this cleanplate from your Results folder.
When you save your edits, it will automatically be updated in mocha Pro to be used in the cleanplate list.
Use Cleanplates Exclusively
If this option is checked, only the cleanplates will be used by Remove to remove the pixels in the selected layer. If it is unchecked, the normal Remove process will be used, pulling in pixels from other frames in the input clip. The cleanplates will then only be used to remove the remaining pixels.
Output Tab
This assigns an output clip for the removal render. You can create new output clips if needed here.
Search Range
Used to specify which frames should be used when removing a layer. The First Frame, Last Frame, # Frames Before and# Frames After settings can be keyframed.
-
First Frame and Last Frame specify an absolute range in the input clip
-
# Frames Before and # Frames After settings specify the range relative to the currently rendered frame. If both options are used the intersection of the two frame ranges is used.

Step
With this option you can specify that not every frame in the reference range is to be used.
Setting it to three, for instance, means that only every third frame will be accessed.
This feature can speed up the removal process for large projects, especially film projects, which are very memory intensive.
|
|
Setting a step value can skip over clean plates for specific frames causing them to not be used in the Remove calculation. |
Auto Step
This is an automatically calculated version of the manual Step field. If you’re not quite sure what step is optimal,
Auto Step will look at the motion of the layers and try to determine the best step to use.
Illumination Model
This specifies how to model changes in illumination.

-
The None option will not model changes, giving you a result very quickly.
-
Linear will model global changes and should hence be used if the brightness change between frames are caused by e.g. changes in aperture.
-
Interpolated will model global and local changes and is often useful when a cleanplate is used.
Smoothing Level
This controls the amount of smoothing applied in the Interpolated model. Increase the value if there are artifacts which might be resolved with more smoothing, either spatial variations or temporal variations.
Dissolve Width
Select either Blend or Randomize and increase the width value to reduce artifacts which sometimes can be seen when illumination modeling fails. This option causes pixels from different frames to be dissolved into each other to avoid tearing artifacts. Blend uses alpha blending from the replaced areas to either the original pixels or the recently replaced areas. Randomize mixes original and replaced pixels in a random way to achieve a similar effect.
3D Compensation
3D compensation can be switched on to try to remove artifacts due to the background layer not being planar. For example, if you have tracked a background that has subtle parallax it can cause removal in other frames to look incorrect. 3D compensation attempts to model the parallax change in the target removal frame.
Flood Fill
If part of the missing background has not been found anywhere in the clip, and the foreground object therefore cannot be completely removed, Flood Fill can be switched on to fill the remaining region using a flood fill method. This is especially useful when it is the matte you are interested in, as you then don’t care too much about the quality of the removal but require that the foreground object is completely removed to avoid holes in the matte. The Smoothing Level should be increased if you result is not as smooth as it should be or there are temporal variations in the results.
Stereo Remove
Stereo Remove works in exactly the same way as Mono Remove above, with the additional bonus of being able to render both views at the same time and also choosing whether or not each view assists the other view during the remove process.
-
Track the background in both views with a layer as outlined in "Stereo Tracking" above
-
Mask out and animate the foreground object you want to remove. You will need to check to make sure the object is correctly covered by the layer in both views.
-
Make sure the foreground layer is above the background layer in the layer controls.
-
Adjust your remove parameters (See the full User Guide for details on Remove parameters)
-
If it is not already on, press the "Operate in all views" button on the right side of the render buttons.

-
Click the render button

By default "Prefer Same View" is checked on in the search range section of the Remove tab. This will attempt to use the current view rather than both views to perform the remove.
If you have useful information in the other view that may assist the remove, you can uncheck this option.
Tips for Removal
Some of the object is still visible after removal.
-
Remember that you can only remove an object if the background behind it is also tracked. Track the background layer(s) before removing a foreground object.
-
Check that the object is inside the selection contour in every frame. If it isn’t, move the control points outwards as necessary to completely enclose the object. Use linking forwards/backwards to apply changes to the contour in multiple frames.
-
Check whether the relative motion of the foreground and background layers is sufficient to see “behind” the whole of the foreground object. mocha Pro only needs to see the background in one frame to achieve good results. If more images are available in the clip, track the selections over a few more images. This may provide mocha Pro with the extra information it needs.
-
Try pulling the selection contour closer to the edge of the object. This will provide mocha Pro with extra background pixels.
The replaced background region is brighter/darker than the surrounding image.
-
Changes in illumination or camera aperture will change the overall brightness of the image, making direct replacement of pixels inappropriate. Select the Linear illumination model to compensate for the brightness changes and repeat the object removal.
-
If the variation is more complex than a simple brightness change, try the Interpolated illumination model, which will compute and compensate for changes in apparent brightness and color that vary across the region being removed.
The background patches don’t line up with the surrounding image.
-
This may be due to inaccurate tracking of the background. If you think this is possible, see the above hints on improving the tracking.
-
If the tracking accuracy cannot be improved, increase the Dissolve Width. This will dissolve the patches into the original image and reduce the tearing artifacts.
-
For small foreground objects such as wires, in front of a non-planar background, switch on 3D Compensation. This will attempt to model the effect of the varying 3D depth of the background.
-
If there is more than one background selection behind the foreground selection, special treatment of the boundary between them is often required. If the background layers are joined, such as a wall and floor selection, use the Attach Layers tool to join them together and avoid artifacts at the boundary. If they are moving independently, you need to adjust the boundary in the front background selection to accurately delineate the boundary between the two background selections.
Remove is slow.
If you have a long clip, especially working with HD or film, Remove can be slow because it has to search over a large number of images with a large memory footprint.
Remove is the most memory intensive module in mocha Pro, and it will always benefit the performance to add more memory. If mocha Pro can fit all the images it needs in memory, performance will be dramatically accelerated when rendering Remove in multiple frames, because it will minimize the amount of disk accesses.
Your aim should be where possible to change the settings to achieve this. Within mocha Pro there these options:
-
Change the First Frame and Last Frame in Range to a smaller range of frames. Sometimes mocha Pro can spend a lot of time removing a small part of the foreground image, and if your layers were chosen loosely, not all of the foreground needs to be removed. Experiment by reducing the range of frames searched.
-
Increase the Step in Range to sample less frames.
The Lens Module
Overview
|
|
Some features in the Lens Module are not available in mocha HitFilm or mocha AE and only relate to mocha Pro or mocha VR (such as rendering). For a full comparison of features, please refer to the comparison chart online. |
The mocha lens module helps locate and undistort lens distortion.
To compute lens distortion you need an image with one or more distorted straight lines or a distortion map (mocha Pro only).
For line calibration you can either use your source material if it has suitable lines or take an image of a calibration grid. Using either 1-Parameter or 2-Parameter radial distortion models will allow you to straighten up the image. There is also an Anamorphic model that will accurately model the distortion in anamorphic and extreme wide-angle lenses.
If you have a Distortion Map, you can also remove or work with distortion by importing your maps instead of calibrating.
Distortion of the images can also influence the performance of other modules in mocha Pro, because the tracker tools assume that the camera obeys a simple pinhole camera model. Severe distortion effects are most likely when a fish-eye or other short focal length lens is used.
Typical lens distortion makes a square object appear either barrel shaped or pin cushion shaped in the image.
The most obvious way to tell whether your images are distorted is to look at the straight edges of objects in the scene. If lines that should be straight are actually curved in the image, this is indicative of distortion. If there are no long straight edges in the scene (for instance a natural scene) then it is much more difficult to discern distortion, even when it is significant.
With the mocha lens module you can compute, apply and remove distortion automatically. There are two parts to this process – firstly compute the distortion and secondly correct the distortion.
To compute distortion automatically you will need to have some straight lines in your image(s).
It is useful to toggle the grid on and off during the different stages of calibrating the lens to see a visual representation of what is actually happening. Just select the Grid button in the View Controls bar to switch the grid on and off.
Lens Workflow with Line Detection Calibration
Lens calibration is dependent on working with the parameters, which are described in detail below. The basic workflow for lens calibration is as follows:
-
Set your input clip and your calibration clip. These can be the same if there are obvious distorted lines in your input clip, but you can also opt to use a Grid Image (see Using Grid Images)
-
Use the Locate Lines button to find the straight lines in your calibration clip. Adjust the Min Line Length if needed.
-
Click the new line button (Or press N on your keyboard) and click on line segments to define what should be straight lines. Every time you need to define a new line, make sure you click on the button again or press N.
-
Once you have defined enough lines, click on the Calibration dropdown and select a camera model (Usually 1-Parameter or 2-Parameter).
-
If you are calibrating with a grid, choose Equidistant Lines
-
Click the Calibrate button.
-
To check the distortion, turn on your grid
You can now choose to render out the distortion, or use the current calibration to assist your tracking and insertion workflow.
For further detail on the calibration tools, see Lens Parameters below.
Equirectangular Lens Workflow with mocha VR
|
|
The Equirectangular and other 360 video features are only available in mocha VR and not accessible via other mocha products such as mocha Pro or mocha AE. |
Mocha VR should correctly calibrate your Equirectangular image by default, but just in case it doesn’t:
-
Create a project with your footage (either by starting a new project in the mocha VR standalone or applying the mocha VR plugin effect and opening the mocha GUI in the plugin)
-
Go to the Lens module
-
In the “Calibrate” section, choose “Equirectangular” from the drop down.
|
|
VR footage with an odd pixel width may not wrap correctly and you could see artifacts. |
And that’s it! You’re now ready to work in VR lens space and don’t need any further calibration. If at any time you want to adjust the 360 view numerically, the fields Longitude, Latitude and Field of View are available to adjust in the Lens page.
Note that if you are rendering a 360 lens distortion the mocha VR plugin, you can control the Lens distortion from the plugin interface without having to open the mocha GUI.
See mocha VR: Using mocha for 360 workflow for more details on using the Equirectangular lens calibration effectively.
In mocha VR the default lens calibration in Preferences is automatically set to 'Equirectangular'. If you are using mocha VR for non-VR projects often, you may want to set this value to 'No Distortion' to avoid having to change the calibration on every new project.
Lens Parameters

Input tab
Here you have two options:
-
The Calibration Clip is the clip used for finding and selecting lines to calibrate with – just select the clip from the pulldown menu if you have imported it or import it by selecting the Import button and using the file browser to locate the file.
-
The Input Clip is the input for the distort/undistort process – just select the clip you want to distort or undistort from the pulldown menu.

Output tab
This is a way to re-name a distortion setting if you want to have more than one distortion applied. You can choose to leave the input clip intact and create a new clip containing the output from the Lens module, and then rename the rendered distorted or undistorted file and carry on working. Just select the clip from the pulldown menu and select the New… button to name the new clip. The new clip will be the same as the current output if you choose to select that it inherits the attributes of that output clip.
Distortion Map tab
Here you have two options:
-
The Undistort (Inverse) is the distortion map clip used to set Undistortion for the input clip
-
The Distort (Direct) is the distortion map clip used to set distortion for the input clip
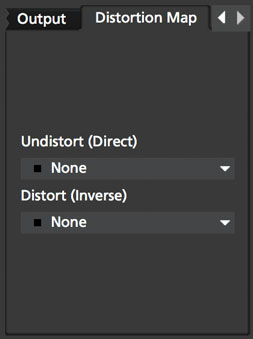
Calibration Lines
Line calibration is the most important part of the process for 1-parameter, 2 parameter and Anamorphic calibration: These buttons work to locate and then define the straight lines in your shot. See below.

Locate Lines
Select the Locate Lines button once for the image you want to use for calibration.
The output of the Locate Lines process is an overlay showing all the line segments that were detected in the image. Typically longer lines will be divided into two or more line segments. See “Min Line Length” below.

New Line
Using the New Line button you can start selecting line segments to define the straight lines in your scene.
-
To select which lines you want to use for calibrating the distortion, select the New Line button each time you want to select an entirely new line.
-
Select one or more line segments lying on the same line in the scene by placing the cursor over each segment and selecting them.
-
As you hover over the lines the currently closest line will be highlighted in red to indicate which line will be selected.
-
As you add more segments, the completed line is rendered so that you can check for mistakes. Each line you select will be colored differently to clarify the groupings of the line segments.
-
Try to choose lines that exhibit the most distortion, typically those reaching towards the edge of the image, and not pointing towards the center .
-
Try also to achieve good coverage of the whole image, because otherwise the distortion may only be computed correctly in the part of the image where the lines are chosen. If you select a line segment incorrectly, click on it again to deselect it.
It is important to remember to select New Line each time you want to select the segments of a new line in the scene.
Min Line Length
Increase the Min Line Length parameter to show only longer lines and simplify the display, or if you only short line details, try a smaller line value.
Calibrate Parameters

Having chosen your lines (see above), you need to select a camera model:
-
If only a small amount of distortion is present in the images, choose the 1-Parameter radial distortion model. Then press the Calibrate button. This will find the optimal value for the radial distortion parameter to straighten the selected lines.
-
You can use the 2-Parameter radial distortion model if the 1-Parameter model doesn’t capture all the distortion in the image. This distortion model is often used when there is a wave or irregularity in the lens.
-
Anamorphic can be used for any lens with Anamorphic or different vertical and horizontal distortion.
-
Distortion Map is only used with Distortion Maps and is not related to line-selection based calibration (see below)
-
Equirectangular (available in mocha VR) will automatically set and calibrate the lens to standard Equirectangular lens format and needs no further calibration. See the Equirectangular Lens Workflow with mocha VR section above for more details.
The Grid display option will show a reference grid with the computed distortion added.
Here is an example grid of a 1-Parameter distortion model:

Here is an example grid of a 2-Parameter distortion model:

Here is an example grid of an anamorphic distortion model:

Calibrate button
Once you have selected your lines and set either the 1-Parameter, 2-Parameter or Anamorphic models, you can click this button to start computing the calibration. This will invoke the mocha Pro camera calibration algorithm which will apply the new calibration parameters to any image you are working on in the current project.
The No Distortion parameter does not compute any distortion and the 1- Parameter Inv model is only for use with RealViz Rz3 files.
If you have a grid image, select the Equidistant Lines box and then select lines appropriately for a grid as explained above.
Note: You only need to render the image and remove the computed distortion if you want to save the output – mocha Pro will use the calibration data generated without having to use an undistorted clip. To render the clip use the Distort/Undistort controls.

Lens
The image center is naturally set at the center of the image by default. Again the coordinates can be entered manually if you want to eye match the center position of the lens by dragging the Center %X or Center %Y sliders or highlighting the current value and typing in a new value. Alternatively, switch on the Calibrate option so that it will be adjusted automatically when you invoke the camera calibration algorithm.

Distortion
The distortion values for the current camera model can be entered manually if you want to match the lens distortion by eye, or they can be computed automatically using the Calibrate button – which is considerably quicker and easier. To adjust manually simply drag the sliders to increase or decrease the values in the K1/Cxx, K2/Cyx, Cxy & Cyy fields or highlight the current value and type in a new value.
Function
Select whether when you render an image you want to remove or add distortion here by selecting the Undistort radio button to remove distortion or the Distort radio button to add distortion.
Distort/Undistort
These buttons are for rendering the clip with the distortion or undistortion values selected.
Selecting the right arrow renders the clip forward from the current point in time. Selecting the left arrow renders the clip backwards from the current point in time.
Selecting the central button with a square stops mocha Pro from rendering, which can also be done by selecting the escape or space keys on the keyboard instead.
Selecting the down arrow just renders the single frame at the current point in time. This is useful for testing a single frame before deciding to render an entire sequence.
Selecting the lock button enables re-rendering for this module. If the button is locked mocha Pro will render the frame each time a parameter is changed.
Export Lens Data
You can export the lens parameters to a variety of formats. See "Exporting Lens Data" below for more information:
-
mocha Lens for After Effects: This format is used exclusively with the mocha Lens plugin for After Effects, which you can download separately from the Imagineer Systems Website.
-
Distortion Map (mocha Pro/VR only): A renderable Distortion map to use in supported applications, such as Nuke.
-
Imagineer Lens Data (mocha Pro/VR only): You can export the lens parameters in a simple XML file format by selecting the Export Lens Data.. button. The parameters are written in a resolution-independent way. The focal distance and image center x/y are represented as multiples of the image width and height. The distortion parameters are written directly. They are defined in the later section called “For the technically minded”.
Using Grid Images
A common way to generate accurate distortion models is to take an image of a calibration grid, which not only provides long straight lines that exhibit the distortion clearly, but also restricts the lines to a rectilinear grid. The latter constraint can be used to improve on the simple “straightening lines” technique.
If you are using a grid image, select the Equidistant Lines
button. This will enforce a regular grid structure on the selected lines, by forcing the distance between adjacent horizontal and vertical lines to be a constant fixed value.
To use this feature, select lines a fixed distance apart on the grid. You can use a different separation horizontally and vertically. You don’t have to select the lines in the right order - mocha Pro will re-order the lines according to their horizontal and vertical position on the image.
You also don’t have to select all the grid lines. All that matters is that the distances on the grid between adjacent sampled horizontal lines are the same, with the same rule applying vertically as well.

Grid image with sampled equidistant horizontal and vertical lines. Image courtesy of Jean-Yves Guillernaut, University of Surrey
Note that when you fit a grid, the Grid display option attaches the rendered grid lines to the image grid, so that you can easily see the result.
Anamorphic Camera Model
In cases where even the radial distortion models are not sufficient, or you have an anamorphic shot for which a radial distortion model is not suitable, select the Anamorphic camera model. This allows for different horizontal and vertical distortion. This is the model used in 3D Equalizer V3, although without the inversion of the model used in that product, and we use the “raw” curvature parameters cxx , cxy , cyx , cyy .
You will probably need a grid image to compute the parameters of this model accurately.
Calibrating the Image Center
The image center is by default set to the center of the frame, i.e. 50% of the frame dimensions in both directions. If the center of distortion is or may be offset from the center of the frame, these values need to be modified.
You can either select the correct image center manually by eye or switch on calibration for the image center , which will then calibrate for the image center along with the distortion parameters. A yellow cross indicates the image center position.
Manual calibration
If you don’t get good results from the mocha Pro calibration procedure, or you have known distortion parameters that you wish to use in mocha Pro, you can select the distortion parameters manually.
By manipulating the distortion parameters and observing the effect on the image, choose the parameters that straighten up the curved lines as accurately as possible. This should at least deal with the worst effects of the distortion.
Mocha Pro also has the capability to import camera parameters computed by Realviz’s MatchMove 3D camera tracking software.
Lens Workflow with Distortion Maps (mocha Pro/VR only)
If you are working with Distortion Maps (sometimes called UV maps or ST Maps), a lot less calibration is required. You can simply bring in your map and it will automatically set the lens.
|
|
Distortion maps need to be 32-bit floating-point component RGBA in order to be read correctly by mocha. |

An example of a Distortion Map
-
Go to the "Distortion Map" tab on the left side of the Lens Module

-
Use the "Undistort (Inverse)" and "Distort (Direct)" drop downs to import your maps files
-
Click on the Calibration dropdown and select "Distortion Map"

-
To check the distortion, turn on your grid
You can now choose to render out the distortion, or use the current calibration to assist your tracking and insertion workflow, as you would a line calibration.
Keep in mind the hard boundaries of the Distortion map being imported may affect the tracking of your shot.
|
|
You cannot export Lens Data with a Distortion Map calibration. You will only be able to perform track and render operations. |
Exporting Lens Data
The Lens Module provides different exports for getting your lens data out to other applications.
mocha Lens for After Effects
This format provides a way to get the Lens data into After Effects via the mocha Lens for After Effects plugin which you can download and install separately.
Exporting data to After Effects is done via the clipboard, similar to the tracking and shape data methods. To bring data into After Effects:
-
Click on Export Lens Data in the Lens Module or the File menu
-
Select "mocha Lens for After Effects" in the drop down

-
Click "Copy to Clipboard"
-
Switch to After Effects
-
Select the layer you wish to add the effect to
-
Press CMD/Ctrl+V to paste the data
A lens effect will then be created in the layer with parameters from mocha. You can choose to Remove Distortion or Add Distortion from the Effects panel.

Distortion Maps
|
|
Distortion maps feature in the Lens Module only relate to mocha Pro or mocha VR and are not available in mocha HitFilm or mocha AE |
This format will render a map for programs that support color-based displacement or distortion (such as UV or STMaps). This is also useful if you want to save a calibration so it can be used on another shot, by importing the Distortion Map back into mocha.
By default the Distortion Map will only render 1 frame, unless you have an animated distortion calibrated in mocha.
Distortion Maps may also generate a map larger than your footage dimensions in order to accommodate overscan of the distortion.
-
Click on Export Lens Data in the Lens Module or the File menu
-
Select "Distortion Map" in the drop down

-
Note that:
-
The dimensions of the distortion map will be automatically calculated at a larger size to your footage to make sure there is enough overscan for correct distortion.
-
The frame range is automatically set to only render 1 frame unless you have an animated distortion.
-
-
Choose whether you want to render a map to Undistort or Distort with the radio buttons on the right
-
Choose a destination folder for the image
-
Distortion maps must be 32 bit floats, so TIF or DPX will be the best options
-
Click "Save"
-
Load the Distortion Map into the program of your choice
Using Tracking Data Exports with Lens
Using Tracking Data Exports with Undistorted Shots
If you have undistorted a shot and plan to export tracking data to the result, you will need to check "Remove lens distortion" in the tracking data export dialog in order to match the undistorted data.
![]()
This will make sure the tracking information is set to fit the same flattened information you are using elsewhere.
Using Tracking Data Exports with Distorted Shots in After Effects
|
|
mocha VR does not support After Effects Lens data export. |
If you want to keep a shot distorted and plan to export tracking data, you will also need to check "Remove lens distortion" in the tracking data export dialog and then apply the lens distortion to the result in After Effects.
Because of the way After Effects handles render order, you need to do a few extra steps to get a corner pin working correctly:
-
Click on Export Tracking Data… in the Track Module or the File menu.
-
Select your format and select the "Remove lens distortion" checkbox.

-
Click "Copy to Clipboard".
-
Switch to After Effects.
-
Make sure your insert layer is the same size as the source comp. If not:
-
Precompose the layer and move all attributes into the new composition.

-
Open the Precomp and fit the layer to the composition dimensions (Layer | Transform | Fit to Comp).

-
Paste the tracking data you exported on the clipboard to the insert layer. You will notice that it will probably not be sitting in the right spot. This is normal.

-
-
In order to apply the lens distortion to the insert layer correctly, you now need to Precompose the layer to make it fit the same dimensions as the original source.

-
You can now go back to mocha and export the mocha Lens for After Effects data.

-
Paste the lens data you exported on the clipboard to the Precomposed insert layer.
-
Choose "Apply Distortion" from the drop down in the effect.

If you notice your insert is clipping, this may be because the precomposed layer is going past the boundaries of the pre-composition. You can fix this by opening the precomp and making it larger:
-
Open the Lens-Distorted Precomp
-
Open Composition Settings
-
Increase the dimensions of the Composition. For example with a 1920x1080 shot with large distortion try adjusting the width to 2500.
-
Close Composition Settings and go back to your original composition to check the clipping
Tips for Lens Calibration
When working on large files, drop the proxy scale
If you set the proxy scale in View Controls from Full Res to Half Res it should still give enough information to locate good lines, and will be a lot faster.
Make sure your aspect ratio is correct
Note that for the radial distortion models you need to have selected the correct pixel aspect ratio for the images when you started the project. If you have chosen the correct aspect ratio the image will appear in the correct proportions on the screen.
The film back width and height selected when you started the project determine the pixel aspect ratio. Mocha Pro will normally select the correct film back from the image dimensions, but sometimes it may be necessary to make manual adjustments if the correct match was not found.
The Insert Module
Overview
|
|
This section only relates to mocha Pro and mocha VR. This feature is not available in mocha HitFilm or mocha AE. For a full comparison of features, please refer to the comparison chart online. |
The Insert module is where you choose the image you would like to insert into your tracked layer. You can import a still frame or a moving sequence. Once imported, the Insert module provides a comprehensive range of tools for matching this new image to the original background layer. The skill here, naturally, is to make the newly imported image look like it was in the original shot all along.

Input
This is where you choose the Input Clip or background layer and the Insert Clip or foreground layer, and optionally a separate input clip with an alpha channel for compositing.

Background Clip
By default mocha Pro selects the last clip that was tracked as the input. If you want to change the input, just select a different clip from the pulldown menu.
Insert Clip
This clip mirrors the Insert Clip inside Layer properties, i.e. if you change one, the other also changes.
By default mocha Pro selects None as the foreground input, expecting you to make a choice of your own. To choose an insert select the Import button and use the file browser to locate a still frame or a file sequence that you would like to appear over the tracked background clip.
In the mocha Pro Plugin, you can choose an 'Insert Layer' placeholder that reads from layers back in the host timeline to render in mocha.
Output
Here you can select the name of the clip to be output. Once a clip has been rendered it is automatically named Composite_<clipname>.
To choose a different name for the output clip select the New… button and choose a new name.
The remainder of the controls in the Insert module dictate both how much of the insert is displayed and how it is displayed during the course of the shot.
Source
The Source region of interest (ROI) can move anywhere on the insert image, including outside it. It is the area of the insert that you would like to be displayed in the tracked layer. As you adjust the ROI, the insert is scaled to fit the surface. There is also a Reset button to reset the ROI to the corners of the insert image. By default, the aspect ratio is locked. Uncheck Lock Aspect Ratio to allow arbitrary ROI changes.

To adjust the ROI aspect ratio to match that of the background image given its current position and shape in the background image, click on Fit ROI to Surface. Conversely, the Fit Surface to ROI button moves the surface position to match the aspect ratio of the insert image, given its ROI settings. These controls will work best if you are in a frame where the insert is as front-on as possible. For them to work correctly, the pixel aspect ratio of both the input clip and insert clip must be correct. A common issue is that if the resolution of either clip was not recognized when the clip was imported, it is assigned the PAL camera type. This often does not give the correct pixel aspect ratio. To check this, switch to the Camera tool and select each clip in turn, checking the appearance on the screen to make sure that each clip appears correct on the screen. If not, change the Film Type. If you know that the pixel aspect ratio of the clip is one (square pixels) select Custom as the Film Type and set the pixel aspect ratio to one.
The number fields are positioned in the menu to relate to the edge of the ROI that they adjust. So, to reduce the height of the insert ROI at the top of the frame, decrease the value in the top ROI number field by dragging or highlighting the current value and typing in a new value. Similarly, to reduce the height of the insert ROI at the bottom of the frame, increase the value in the bottom number field by dragging or highlighting the current value and typing in a new value. The same applies for the left and right edges of the frame with the left and right number fields.
Comp

Blend
Opacity
This parameter controls the opacity of the foreground image insert. It is a multiplier of the alpha of the insert, applied before the composite.
Gain
This is where you color correct the insert once it has been added to the tracked layer.
Masks
Use All Foreground Layers
If you want to mask off an area of your insert, clicking on this tool will cause the rendered insert to only change the pixels within the mattes above the current layer.
If the checkbox is switch off, you can select an individual matte to use instead.
Invert
Inverts the mattes of the Insert.
Invert Alpha
Inverts the Insert Alpha if it exists.
Erode Alpha
Change this value from its default zero value to erode the alpha channel of the insert by the given number of pixels.
Warp

Warp uses a warp mesh to distort your insert. If you turn on "Show Mesh" in the warp tools you can use the dropdown to set the level of detail in the mesh and then warp the grid points in the viewer to adjust your insert, as well as the outer yellow lines to bulge or pinch the edges.
This is especially useful if you have to insert something that does not look completely planar, like a t-shirt logo.
Feather
If you want to add a soft edge around the edges of the insert, use the Feather controls. There are separate controls for the left, right, top and bottom edge widths, which are between 0 and 1, where the value 0 indicates no edge and 1 means that the edge covers the whole of the insert.

If you switch on Lock, all four edges are locked to the same edge width. H Lock and V Lock apply lock separately to the left/right and the top/bottom edges respectively.
Transform
This section controls a level of corner pin control on top of the adjusted track. This feature is particularly useful for curved surfaces. It allows the corners of the surface to be used in the same way as the warp control points (described below) – by aligning the newly imported insert with a region of the tracked image independently of the blue surface contour, which follows the adjusted track.
The offset region is drawn in yellow underneath the existing blue surface. You can use the new points either by dragging the sliders to increase or decrease the value of the coordinates, or by highlighting the numeric field and typing in a new value. In addition to this you can hold down the Alt and Control keys on the keyboard (Alt+Cmd on a Mac) whilst dragging a surface point or line to achieve the same result. The new points created are offset in a controlled way from the adjusted track.
Hold down Alt, Control and Shift (Alt+Shift+Cmd on a Mac) to gear the changes down 10 times. There is finally a Reset button to return the offset parameters to their defaults.

When using the rotate tool to rotate the offset surface, the pixel aspect ratio of the insert clip will be used to create the correct effect. If it is not correct the offset surface will appear to squeeze or stretch as it is rotated. See the ROI section to see how to fix this problem.
Export Offset Tracking Data
Export the transformed track. The offsets are keyframed settings of the position of the insert.
Render
Motion Blur
Select this button if you want to apply motion blur to your insert.
Render Insert Cutout (RGBA)
This renders the cut out of the insert with alpha along with the composite file. Turn off if you only want the composite render of the insert.
Inserting in Stereo
All inserts are warped in stereo if you have tracked both views.
You can render the insert for both views by selecting Operate on All Views button next to the Render buttons on the timeline.

mocha VR: Using mocha for 360 workflow
|
|
This section applies specifically to mocha VR and not other versions of mocha such as mocha Pro, mocha AE or mocha HitFilm. |
The mocha VR product is specifically designed to work on 360 equirectangular shots, however it also has all the features of regular mocha Pro.
To use mocha VR on a 360 equirectangular shot you need to first set up the 360 image. You can then begin using mocha just like you would any other footage.
Using Equirectangular footage in mocha VR
1. Load Equirectangular footage into mocha and set the Lens type
The first step for working in VR mode is to import and define you are working in Equirectangular space.
Mocha VR should calibrate this by default, but just in case it doesn’t:
-
Create a project with your footage (either by starting a new project in the mocha VR standalone or just applying the mocha VR plugin effect and opening the mocha GUI in the plugin)
-
Go to the Lens module
-
In the “Calibrate” section, choose “Equirectangular” from the drop down.

|
|
VR footage with an odd pixel width may not wrap correctly and you could see artifacts. |
And that’s it! You’re now ready to work in VR lens space. If at any time you want to adjust the 360 view numerically, the fields Longitude, Latitude and Field of View are available to adjust in the Lens page.
2. Switch to the Track module and view your footage in 360 mode
As soon as you have set the Equirectangular lens type, a new “360” button will appear in the view controls. Switch over to the Track module and click on this button to immediately jump to 360 Rectilinear space.

If you press and hold the 360 button, you can also jump to a specific 360 view, such as Zenith, Nadir, Front, etc.
To navigate in the 360 view:
-
The Pan tool (X by default) pans the view in all directions
-
The Zoom tool (Z by default) changes the Field of View (FOV). You can reset the FOV in the Lens module
You can change the Pan and Zoom shortcut keys in preferences.
|
|
Panning and Zooming in 360 mode also updates the Latitude, Longitude and FOV parameters in the Lens module. Panning and Zooming outside of 360 mode just zooms and pans the image as normal. |
3. Draw a layer and start tracking
You can draw layers in either 360 view or Equirectangular mode.
We recommend working in 360 view, as this is the intended workflow and is much more natural because you don’t have to consider seams or poles.

See the Tracking Basics chapter for more details on how to set up layers for optimal tracking.
(Images courtesy of Makoto Hirose, SeaPics Japan)
4. Rotoscope in 360 mode
Like tracking, we recommend doing all roto in 360 mode. Roto will automatically warp, cross over poles and seams and create seam duplicates to make it easier for rendering and export.

Feathering is also handled in 360 mode using the inner and outer edges.
You can preview the flattened version of the roto at any time by simply toggling off the 360 button.
See the Rotoscoping Basics section for more details on Rotoscoping effectively.
(Images courtesy of Makoto Hirose, SeaPics Japan)
5. Work in Insert, Remove and Reorient modules
The Insert module and Remove module work exactly like regular mocha Pro. See their respective chapters in the user guide for more details.
You still draw the layers and set up renders in the same way, and they are rendered across the 360 seams correctly.
For Reorienting and stabilzing the horizon of a VR shot, you will need to use the Reorient module, which is only available in mocha VR.
See mocha VR: The Reorient Module for more details on how to Reorient a VR shot.
See other relevant module sections of this user guide for more details on each module use.
|
|
The Camera Solve and Stabilize module are presently unsupported in VR mode. |
6. Render and Export
Rendering
Renders work in the same way as they do in the standard mocha Pro workflow. You can either render them to file, or render via the plugin host.
You can render the current 360 view from the Lens tab, as panning and zooming in 360 mode is a lens calibration. In the standalone, this is controlled via the Lens tab.
In the plugin, you can control and render the lens directly from the mocha VR plugin interface. See mocha VR Lens Plugin Rendering Workflow below for more details.
For everything else, such as Remove and Insert, renders are rendered into Equirectangular space.
Exporting
Currently export of tracking data is unsupported. Tracking data will paste to the correct location in your equirectangular view,
but will not be corrected for Lens distortion due to most editors and compositors not correctly supporting pole or seam splitting of tracking data.
It is best to use the Insert module render process to get what tracking data you need out of mocha.
Shape export data presently exports as duplicate splines. This means that any roto shape that crosses the seam will automatically be duplicated into two separate splines on either side of the Equirectangular view.
Split VR shape data is presently supported for:
-
After Effects and Premiere shapes
-
Nuke Roto and RotoPaint
-
SSF
For other compositors and editors you can either use the matte rendering in the mocha VR plugin, or render matte clips from mocha directly.
See Using the mocha Pro and mocha VR Plugins for more details on controlling mattes in the plugin interface and Exporting Rendered Shapes for how to render mattes to file.
mocha VR Plugin Lens Rendering Workflow
You can use the Lens: Undistort and Lens: Distort options in mocha VR Plugins to render out 360 patches for easier paint and effect work back in the host.
The patch workflow is a one-way control system in the plugin interface independent of the mocha GUI, which means you don’t need to open mocha to control the lens view.

By choosing Lens: Undistort from the render options in the plugin, you can then control the view by adjusting three controls:
-
VR Lens Latitude
-
VR Lens Longitude
-
VR Lens FOV
Alternatively you can pick a view using the Views dropdown option.
This replicates the 360 views in the mocha GUI, allowing you to choose between specific angles such as Zenith, Nadir, Front, etc.
The lens distortion workflow for the plugin is:
-
Click Render in the 'Module Renders' section of the plugin interface and choose Lens: Undistort from the 'Module' drop down. You should see the view change to a rendered 360 view.
-
If you don’t see the view change after choosing Lens: Undistort:
-
Open the mocha GUI and set your footage to Equirectangular mode in the Lens module.
-
Close and save mocha
-
-
Set your view using the VR lens parameters in the plugin interface
-
Copy the current mocha effect
-
If necessary, Nest/precomp the rendered lens patch. You must precomp in After Effects for the next steps to work correctly.
-
Paste the original effect back on top of the nested comp.
-
Choose Lens: Distort from the 'Module' drop down in the pasted effect to restore the warp back to its original position
-
Merge/layer the final result back on top of your original footage.
You can then perform any paint or effect work on the lens-distorted version of the footage and it will be re-distorted correctly on top of the original footage.
mocha VR: The Reorient Module
|
|
This section applies specifically to mocha VR and not mocha Pro or other versions of mocha such as mocha AE or mocha HitFilm. |
To use the Reorient module on a 360 equirectangular shot you need to first set up the 360 image.
See the mocha VR: Using mocha for 360 workflow section for details on how to set up and work in a 360 shot.
Reorienting Equirectangular Footage in mocha VR
The mocha VR Reorient Module provides two useful tools for adjusting the VR camera:
-
The ability to track and stabilize the VR horizon in each rotational axis
-
The ability to control the position of the VR horizon in tilt in each rotational axis
1. Adjusting the Horizon
Like most modules in mocha, to use the Reorient module stabilization you first need a tracked layer.
-
Track a layer (or series of layers) near the horizon. It doesn’t have to be exactly on the horizon, but it helps to be as close as possible. Multiple layers will concatenate for a single solution.
-
Move to the Reorient module. This will turn on the 'View Horizon' checkbox, which shows the red horizon line on screen. It will also disable Preview so you can work with the original clip.
 +
+ -
Adjust the red horizon line to fit your horizon using the column “Horizon Align”. You can do this in either 360 mode or in Equirectangular mode. We recommend Equirectangular mode, as it is much easier to see the whole horizon.
-
If you would prefer a visual control, you can turn on “Show Control” under the Horizon Align rotation fields:
-
Move up and down to control tilt
-
Left and right to control pan
-
Rotating the circle controls roll.
 +
+
-
-
Once your line fits the horizon, you can turn off the 'View Horizon' check box.
-
If 'Preview' doesn’t turn on immediately, you can toggle it in the view controls. This is the large ‘P’ next to the 360 icon in the view controls.

2. Smoothing the Horizon
You can control the Smoothing to any rotational axis by turning off the tilt, roll and pan controls.
For example, if you’re only interested in stopping the camera from panning, you can just leave “Pan” on.
If you don’t want to lock the smoothing completely, you can turn off “Maximum Smoothing” and adjust the number of frames to stabilize the horizon jitter.

3. Reorienting the Horizon
Finally, if you want to position the camera exactly, you can do so by using the ‘Horizon Reorient’ column.
This has exactly the same parameters as the Horizon Adjust column, allowing you to either move the camera via the fields, or via the on-screen control.

If you have the Preview button turned on, it will update in the view automatically.
4. Rendering
Like all modules, you can choose to either render in the mocha GUI, or choose “Reorient” from the render options in the main plugin interface back in the host.
(Footage images courtesy of Makoto Hirose, SeaPics Japan)
The Dope Sheet and Curve Editor
The Dope Sheet
The Dope Sheet is used to move, copy and paste keyframes in your layers.
Navigating the Dope Sheet
You can navigate the Dope Sheet space by using the scroll bars horizontally and vertically. Holding CTRL/CMD+Scrolling the mouse wheel will let you scale up and down the timeline.
Group Keyframes vs Parameter Keyframes
As you create animation or tracking data, you will see a number of hollow keyframes appear in the Dope Sheet. These are known as Group Keyframes which are keys that contain multiple sets of Parameter Keyframes underneath them.
You can move the Group Keyframes like normal animation keyframes, but instead of a single animation key, they will move all the keyframes underneath them.
This is useful when you need to shift a whole section of animation in a layer, and not just an individual point or parameter.
Expanding a section of the layer tree in the dope sheet will reveal either Parameter Keyframes or more Group Keyframes, depending on how many levels in that layer tree there are.
Selecting and Moving Keys
To select keyframes, you either click on one of them in the Dope Sheet, or marquee select a section. You can use SHIFT to pick multiple keys.
You can move the keyframes manually by dragging them with the mouse, or you can use the standard Copy/Paste keys (CTRL/CMD+C, CTRL/CMD+V) to copy keys and paste them at the current playhead position.
|
|
At this time you cannot copy and paste Group Keyframes, only Parameter/Animation keyframes. |
The Curve Editor
The Curve Editor is used to review how the data in your animation and tracking looks, as well as some value and frame manipulation options.
Navigating the Curve Editor
You may navigate the Curve Editor space by using the middle mouse button to Pan and the mouse wheel to zoom. Alternately, you may pan using the ‘x’ key on the keyboard and zoom using the ‘z’ key on the keyboard. When zooming with the ‘z’ key, left/right mouse movements will zoom in/out horizontally and up/down mouse movements will zoom vertically.
Selecting and Moving Keys
To select keyframes, you must first select the curve, then the keyframes. Keyframes of unselected curves are not selectable.
You may move the keyframes manually by dragging them with the mouse, or you may type in a “Nudge” value at the top right of the Curve Editor.
Entering a negative value in the “Nudge Time” field and hitting the button will move selected keyframes backwards in time by that amount every time you hit the button. Entering a positive value in the “Nudge Value” field and hitting its button will move selected keyframes up in value by that amount every time you hit the button.
Changing the Interpolation of Keys
Interpolation describes the method of how values are calculated between keyframes. It defaults to linear interpolations between keyframes but you may wish to convert them to Bezier for easing in and out. Or if you wish them to hold their position until the next keyframe, you may wish to select Constant as the mode of interpolation.
Right click on a selected keyframe and choose Interpolation->Bezier. Bezier tangent controls will appear on your keys and you may adjust them for easing in and out.
Changing the Extrapolation of Keys
If a keyframe is the first or last keyframe on the curve, its extrapolation can be chosen. Extrapolation describes the method of how values are calculated “off into space” before the first keyframe or after the last keyframe. It defaults to Constant, which simply holds the value steady.
Choose linear extrapolation and the curve editor will continue the value on its current slope (sometimes called Gradient Extrapolation in other applications).
The Clip Tab
|
|
The Clip tab has had an overhaul in V4.0 to accommodate handling multiple footage streams in a single mocha clip. This is a significant change from the old method of working. Please take some time to read over the changes so you understand the new workflow. |
Clip and Footage Stream Workflow
The Clip tab now handles multiple footage streams in a single mocha clip.
Clips now consist of a container and one or more footage streams. Clips can contain any number of footage streams, which you can then map to a view if required.
Most commonly you will only be working with one footage stream, which is mapped to the Mono view. If you are working in stereo (mocha Pro only) you will have multiple views.
If you import multiple footage streams into the same clip, you can use the View Mapping dropdown to change which footage stream is shown.

If you are dealing with multi-channel clips such as EXR files, all views are loaded automatically.
If you are working with individual views (TIF, DPX, JPG etc), you can import the additional footage streams using the Add… button under the Footage Streams dropdown (mocha Pro only).
Managing clips
You can import any number of clips into the project. Much like a compositing application, you can have a multitude of assets in the application you may wish to work with at any given time. As clips are imported into the project, they populate Clip list drop-down menus found throughout the application.
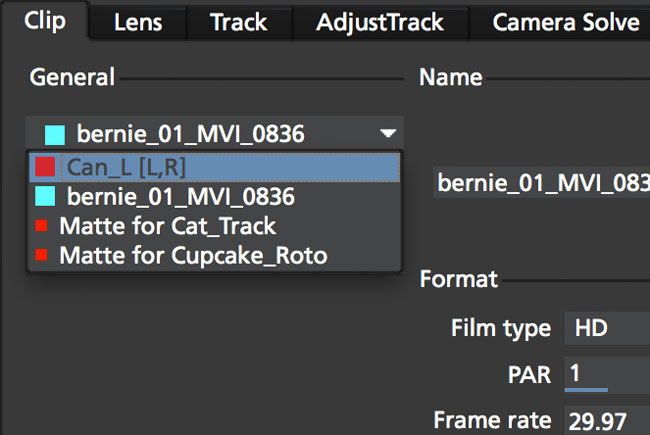
Above is shown a list of clips that have been loaded into a project.
You can also add additional footage streams to each clip in mocha Pro using the Add… button.
Importing New Clips
The first clip is always imported when you start a new project, and the location of the clip’s footage stream is shown in the Footage Streams section to the right.
The first clip you start with establishes the aspect ratio and resolution for that project. This can be adjusted in the clip tab.
Additional clips can be imported into the project through the Clip tab.

The clips should match the original project clip ratio set for the project (the dimensions of the first clip you imported when you started the project). You can choose the "inherit attributes" drop down to match the original project clip settings.

Importing New Footage Streams to an existing Clip
|
|
This feature is only available in mocha Pro. |
If you want to import additional footage streams in mocha Pro, you can do so using the Import button under the Footage Streams dropdown.

You can then choose a new footage stream to add to the current clip from the Import dialog.

Removing Clips
You may clean up the project by deleting clips you no longer need. Select the clip in the clip drop-down list and hit Delete. That clip will be removed from the project.
Relinking Clips
When moving project files or updating footage, you may need to relocate the footage on your system. To do this:
-
Select the clip you need to relink from the clip drop-down list

-
In the Footage Streams section of your clip, choose the footage stream you want to relink. Most commonly for non-stereo projects there will only be one clip stream.

-
You will be presented with a relink dialog. Click the Choose… button to browse for a new clip you wish the original to be replaced by.

-
Make sure an imported footage stream has the same aspect ratio as the original project clip. You can conform your relinked clip to the current settings in the project, or keep them the same.
Selecting a Clip to Track
Most often, the first clip you imported will be the one you wish to track. There are times when you may get an updated shot with color correction or some other enhancements to make tracking easier. To use this new clip, you must first import it into the project as described above.
To select to track on this new clip, you must choose it in the Track tab’s Input drop-down.
|
|
An imported clip must have inherited attributes from the original base clip to become trackable. See "Importing Clips" above. |
Selecting a Clip to Rotoscope
Rotoscoping can be done on any of the clips you have imported. To change the clip you are viewing in the canvas, select the clip in the View Controls drop-down list. You will notice that any clip you’ve imported into the project will appear here.

|
|
An imported clip must have inherited attributes from the original base clip to be able to roto correctly. See "Importing Clips" above. |
Keyboard Shortcuts
Keyboard Shortcut customization
You can now customize keyboard shortcuts for almost every tool, action and menu item in mocha.
-
Directly, via File | Keyboard | Customize…
-
By going to mocha Preferences and clicking the Key Shortcuts tab.
You can create a new profile by duplicating a default profile, then customize the keys. These profiles are then available from the Keyboard menu:
-
Duplicate one of the default profiles and rename it
-
Select a category and choose an action you want to change or add a key sequence to
-
Click in the "Shortcut" column
-
Enter your key sequence
-
Click anywhere outside of the entry cell to complete
-
Click "Default" if you want to revert your change back to the default shortcut
|
|
Pressing return or delete/backspace counts as a key entry, so please click outside the cell to complete the entry and use the "Clear" button to clear an entry. |
Default mocha Shortcuts
Below are some of the common default shortcuts for mocha
Tools
CTRL/CMD + F |
Enable Picker tool |
I |
Toggle insert point mode on/off |
Z |
Enable Zoom tool while pressed |
X |
Enable Pan tool while pressed |
CTRL/CMD + L |
Enable X spline tool |
CTRL/CMD + B |
Enable Bezier spline tool |
CTRL/CMD + Click |
Break Bezier handle |
CTRL/CMD + Z |
Undo |
CTRL/CMD + SHIFT + Z |
Redo |
C |
Close contour |
D |
Delete point |
Transform
W |
Rotate |
Q |
Translate |
E |
Scale |
Down Arrow |
Nudge Point/Layer down 1 pixel |
Up Arrow |
Nudge Point/Layer up 1 pixel |
Left Arrow |
Nudge Point/Layer left 1 pixel |
Right Arrow |
Nudge Point/Layer right 1 pixel |
SHIFT + Down Arrow |
Nudge Point/Layer down 10 pixels |
SHIFT + Up Arrow |
Nudge Point/Layer up 10 pixels |
SHIFT + Left Arrow |
Nudge Point/Layer left 10 pixels |
SHIFT + Right Arrow |
Nudge Point/Layer right 10 pixels |
Viewer Canvas
- |
Zoom out |
+ |
Zoom in |
/ |
Zoom to 100% |
* |
Zoom to fit |
Alt + 1 |
Show/Hide Mattes |
Alt + 2 |
Show/Hide Color Layer Mattes |
Alt + 4 |
Show/Hide Layers |
Alt + 5 |
Show/Hide Spline Tangents |
Alt + 6 |
Show/Hide Surface |
Alt + 7 |
Show/Hide Grid |
Alt + 8 |
Show/Hide Zoom Windows |
` (Back dash) |
Show/Hide All Overlays |
Timeline
Alt + Left Arrow |
Go to start of clip |
CTRL/CMD + Left Arrow |
Go to previous frame |
CTRL/CMD + Right Arrow |
Go to next frame |
Alt + Right Arrow |
Go to end of clip |
ESC |
Stop processing |
Space |
Start/stop playback |
Alt + Down Arrow |
Set in-point |
Alt + Up Arrow |
Set out-point |
Preferences
|
|
The preferences below relate to mocha Pro. Some preferences may not be available in the mocha Pro Plugin, mocha AE and mocha HitFilm. |
Preferences location
Preferences are accessed through File | Preferences on Windows or Linux and Application Menu | Preferences on OS X.
Output Settings
File Storage
The Output Directory settings specify the default location of the directory in which the project file and rendered clips are stored. There is a choice between:
Relative Path: The project directory is a subdirectory of the directory containing the original project clip. By default, the subdirectory is Results. If you often load your project clip over a network, it would be best not to choose Relative Path, because the performance of project and clip I/O will not be as fast as the local disk.
Absolute Path: The project directory as an absolute path. For the best performance choose a folder on a fast disk, with plenty of disk space available.
Disk Space Available
If Absolute Path is specified, the available space in the given disk drive.
Cache Directory
Specify here the folder to use for caching image data and storing auto-saved project files. For the best performance, choose a folder on a fast disk with plenty of disk space available. A lot of data is written out in the background while you work, approximately three times as much disk space as the taken up by the original clip will be used.
The Cache Original Clip box is selected by default. This will cache the original clip to the File Cache when a project is created or opened for a more efficient playback and workflow. It is only necessary to check this if you are getting footage from a slow network.
System
Application
Enable Autosave
The Enable box is selected by default. This will automatically save the project you are working on. Set the interval between saves by increasing or decreasing the value in the Interval (minutes) box. The default is 5 minutes. If Save Images Every Frame is checked, rendered frames are saved to disk as soon as they are created in memory; otherwise the render to disk only occurs when rendering a sequence of frames.
Undo History Size
The Maximum Size of the history is the number of user interactions stored in the undo/redo command list. The limit is used to conserve memory.
Track in mocha AE
Check the box if you want to open mocha Pro via the "Track in mocha AE" option inside After Effects, rather than loading the bundled mocha AE.
UI Look and Feel
Number of Shown Layouts
Set how many layouts you want to appear in the View menu. The default is 3.
Field Controls
You can set either:
-
Rotation Controls: Adjusts the value in the field by moving the mouse in a circular motion. The larger the circle motion, the more refined the adjustment.
-
Linear Controls: Drag left or right in the field to adjust the value.
Invert Mouse Wheel
Inverts the motion of when scrolling in a field increases the value or decreases it.
Layer Settings
Default Colors
Defines the default colors for Splines, Mattes and Points
Default Opacity
Defines the default opacity for mattes
X-Spline Default Weight
Sets the default weight of the x-spline control points
Default Bezier Length
Sets the default normalized length of the bezier tangent handles.
GPU
|
|
Any changes to GPU settings requires a restart of mocha. For standalone, this is simply closing mocha and reopening. For the mocha plugin, you need to restart the host environment to reload the plugin completely. |
Display
Use Vertical Sync
Enable vertical sync in the frame display. We highly recommend you keep this on.
Amount of Texture RAM to Reserve
The amount of memory that you want to be reserved for textures. This determines how many frames can be played back in real-time. A reasonable setting would be 3⁄4 of your graphics card’s memory.
Textured rendering may not be compatible with Microsoft Windows Remote Desktop Connection.
Stereo
Here you can enable Active Stereo viewing mode if it is available to you.
Matte Rendering
By default, mocha will generate matte clips and track mattes by rendering with OpenGL to an offscreen buffer.
If Disable Offscreen Buffers is checked, mocha will fall back to a software-based matte rendering implementation which is slower and produces lower-quality results, but will work on all hardware.
Most users should not need to use this option.
Track Using GPU
This option is on by default and sets the planar tracker to use the graphics card instead of the CPU.
If this option is disabled it means you do not have a supported graphics card for GPU tracking.
OpenCL Device
This option lets you choose the graphics card you want to use for GPU tracking.
By default this is set to Automatic, which attempts to choose the best available option.
Allow unsupported GPUs
This option lets you override the officially supported graphics card list and choose any GPU on your system.
Use this option with care as it may lead to unstable results.
Software Update
Settings to check for software updates.
Clip
If you are working on a number of shots that share the same clip attributes (the same video standard, frame rate and color space), it can be useful to set a default clip setting. Then you will not have to re-enter the same clip information each time you load a clip.
Defaults
FPS
Sets the default frame rate.
Custom PAR
Sets the default Custom option in Pixel Aspect Ratio
Frame Offset controls
Options to set you default timeline as frames or timecode, and set a fixed frame offset.
Format
Colorspace
Select Linear if your source clip is stored in linear color space, possibly with gamma applied. Select Log if your source clip is stored in log color space. Select Panalog if your clips originate from a Panavision Genesis camera, and are stored in the native Panalog format.
Convert to Float
Convert to Float causes imported clips to be generated internally as 32-bit float, increasing the precision of compositing operations but using more memory.
Format for result Clips
What to set you rendering result output to. Currently the choice is between DPX and TIFF.
Interlacing
Select the Separate Fields button if you normally use field-based clips. This will usually consist of a video clip with options for PAL (upper field first, also used for SECAM) or NTSC (lower field first) field ordering. Separate Fields will de-interlace the clip and display both fields. When a clip is rendered, the fields will automatically be interlaced back together again. There is also a 3:2 Pulldown option if you mainly work with 3:2 pulldown material.
Mask
Sets the default clip mask.
Lens
Camera Model
Sets the default distortion mode. In mocha VR the default is automatically set to 'Equirectangular'. If you are using mocha VR for non-VR projects often, you may want to set this value to 'No Distortion'.
Log
Enable Error Logging
This is selected by default. The file generated is useful for Imagineer engineers to diagnose error messages and fix any problems. You can view the log by selecting View Log from the Help menu. You can also change the location of the Log File from its default.
Error Detection
This is set to Comprehensive by default. If you are working on a labor-intensive project, you can switch to Normal only logs errors as they occur, rather than constantly checking. This provides less information in the event of an error, but can marginally improve performance.
Key Shortcuts
See the chapter on *Keyboard Shortcuts *for more information.
File Formats
|
|
Format support is only relevant to the standalone version of mocha. The mocha plugin reads the native host source, with the exception of imports done inside the mocha GUI. |
Supported in Version 5
Mocha supports most standard movie clip and image sequence formats. In order to use clips (i.e. not image sequences) you must have QuickTime installed. Level of QuickTime support can vary depending on the operating system.
Movie clip formats
-
AVI files (.avi)
-
DV Stream files (.dv)
-
MP4 files (.mp4)
-
MPG files (.mpg)
-
QuickTime Movie files (.mov and .qt)
-
RED files (.r3d)
Image formats
-
OpenEXR files (.exr)
-
OpenEXR 2.0 files (.exr)
-
Cineon files (.cin)
-
DPX files (.dpx)
-
JPEG files (.jpg and .jpeg)
-
PNG files (.png)
-
SGI files (.bw, .iris, .rgb, .rgba and .sgi)
-
TGA files (.tga)
-
TIFF files (.tif and .TIFF)
Not Directly Supported in Version 5
These formats are either not supported directly by mocha or require additional plugins for QuickTime or your system.
Movie clip formats
-
AVCHD files (.mts and .m2t)
-
Windows Media files (.wmv)
-
Cineform files (without supporting codec)
Image formats
-
RAW image files (.RAW)
What to Do if Mocha Does Not Support Your Footage
In the rare event that you are working in a format that mocha doesn’t support, we recommend converting the footage to an image sequence.
If you are just tracking, you can use any compressed format such as a JPG sequence and then use your original footage when you apply the data. If you are going to be doing rendering, such as using Mocha Pro’s remove or insert modules, then we recommend converting to a DPX or TIFF sequence.
Make sure of the following when converting to an image sequence:
-
The frame rate, aspect ratio and dimensions are the same as the original footage.
-
If you are creating proxy footage, make sure the aspect ratio and frame rate are the same.
-
If you are using a particular bit depth, make sure you convert to the same depth if you are using the footage for rendering inside mocha
-
If using compressed footage, don’t set the compression too low, as this will create artifacts that may hinder tracking and roto.
-
Make sure mocha supports the sequence you are converting to!
If you would prefer to convert to a movie clip format then we recommend a standard format that QuickTime would understand, such as Animation. If you are working on OSX, ProRes can also be a good alternative.
Command Line
Below you will find a list of command line arguments that can be used to load mocha with preset parameters.
Note that loading a project file on the command line will ignore all other parameters.
Standard usage:
+mocha [arguments] [file…] +
--in frame |
Specifies an in-point frame for your footage. The frame value is zero-indexed, so all in points assume a base of 0. For example, If your frames start at 250 and you want to begin at 261, you would type mocha --in 12 myFootage.mov. A 0.5 value will let you set on the second field in interlaced footage, for example: mocha --in 12.5 |
--out frame |
Specifies an out-point frame for your footage. The frame value is zero-indexed, so all out points assume a base of 0. For example, If your frames start at 250 and you want to end at 261, you would type mocha --out 12 myFootage.mov. A 0.5 value will let you set on the second field in interlaced footage, for example: mocha --in 12.5 |
--frame-rate fps |
Set the frame rate for the imported footage. For example mocha --frame-rate 24 myFootage.mov |
--par par |
Set the Pixel Aspect Ratio for the imported footage. For example mocha --par 0.5 myFootage.mov |
--interlace-mode mode |
Set the interlacing mode for field ordering and pulldown for the imported footage. For example mocha --interlace-mode 1 myFootage.mov See Table 18.2 below for interlace mode codes. |
0 |
Progressive |
1 |
Sets interlaced mode UPPER FIELD FIRST |
2 |
Sets interlaced mode LOWER FIELD FIRST |
3 |
Sets interlaced mode 3:2 PULLDOWN UPPER FIELD FIRST AA |
4 |
Sets interlaced mode 3:2 PULLDOWN UPPER FIELD FIRST BB |
5 |
Sets interlaced mode 3:2 PULLDOWN UPPER FIELD FIRST BC |
6 |
Sets interlaced mode 3:2 PULLDOWN UPPER FIELD FIRST CD |
7 |
Sets interlaced mode 3:2 PULLDOWN UPPER FIELD FIRST DD |
8 |
Sets interlaced mode 3:2 PULLDOWN LOWER FIELD FIRST AA |
9 |
Sets interlaced mode 3:2 PULLDOWN LOWER FIELD FIRST BB |
10 |
Sets interlaced mode 3:2 PULLDOWN LOWER FIELD FIRST BC |
11 |
Sets interlaced mode 3:2 PULLDOWN LOWER FIELD FIRST CD |
12 |
Sets interlaced mode 3:2 PULLDOWN LOWER FIELD FIRST DD |
Installing Node-Locked Licenses
Node-locked Installation
-
Make sure you have downloaded the correct version of mocha for your operating system. The licensing system for this version is different from v4 and earlier.
-
Make that your version of mocha is the product you have purchased (You will not be able to use a mocha Pro AVX Plugin activation code for mocha Pro standalone unless you have a multi-host license for example.).
-
You will need to install the mocha package:
-
Apple OS: Double-click the dmg package and drag the application to your application folder
-
Windows: Double-click the exe package and follow the instructions
-
Linux: Double-click the installation rpm file and follow the on screen instructions. (64-bit versions of the software will not run on a 32-bit version of Linux).
-
Standard Node-Locked License Activation for mocha Pro Standalone
When you purchase your license, you will be emailed a serial number. To activate:
-
Make sure you are connected to the internet
-
Open mocha and choose 'Activate' from the welcome screen or 'Licensing' from the help menu.

-
Fill out the registration details on the main page

-
Paste the serial number into the available activation field and click 'Next'
-
Your details will appear on the next page. Click 'Activate' to install the license.

-
Your license should install automatically and mocha will close.
-
Reopen mocha to start using your licensed version!
If your machine is not connected to the internet, or you are behind a firewall:
-
Open mocha and choose 'Activate' from the welcome screen or 'Licensing' from the help menu.
-
Fill out the registration details on the main page
-
Paste the serial number into the available activation field and click 'Next'
-
Your details will appear on the next page.
-
Click 'Alternative Activation' to install the license.
-
An Unique Product ID code will appear. Copy this code and send it to the customer support contacts listed in the dialog:

-
Your license should install automatically and mocha will close.
-
Reopen mocha to start using your licensed version!
Standard Node-Locked License Activation for mocha Pro Plugin
First locate the licensing button for your host plugin.
Adobe After Effects Plugin License
For After Effects this is called "License…" and sits on the bar of the effect title in your Effect Controls:

Adobe Premiere Plugin License
For Premiere, click the small icon next to the effect title:

Avid Media Composer
For Avid, click the 'License Control' checkbox under the 'License and Registration' section at the bottom of the plugin controls:

After that, the rest is the same as the process above for mocha standalone. See "Standard Node-Locked License Activation for mocha Pro Standalone" for more details.
We recommend restarting the host if you see any issues with licensing.
Node-Locked License Troubleshooting
-
It is important that your mocha software matches your activation code, so check your purchase order to make sure everything matches up version wise. It may be that you don’t have the correct version of mocha installed from our download section. This is especially important for legacy software before V5, where a different licensing method is used.
-
If you are attempting to install via a terminal instead of directly on the machine itself and you are having trouble getting mocha to install, try installing directly on the machine.
-
Check to make sure you are not restricted to using certain ports due to a firewall or other admin permissions. When in doubt, temporarily turn your firewalls off for the duration of the installation and then turn them back on when you are done.
-
Troubleshoot your machine; try uninstalling all your mocha software, restarting your machine, and installing the software again from scratch, and make sure you follow installation directions off our website exactly. It sounds redundant, but sometimes it’s a great way to figure out what is going on inside your machine.
-
If all else fails, our support team is happy to help you figure this out. Please follow the link: contact support!
Installing Floating Licenses
This guide will walk you through the process of installing floating licenses. Installing node-locked licenses does not require the use of the license manager. See above.
Floating licenses - How it works
Because many work environments have a dynamic structure, Imagineer Systems offer floating licenses. This works by keeping the license file on a central server, which can then be used by multiple client machines.
For example, if your studio has 20 machines but you only need 5 people using our software at a time, you could get a 5-machine floating license, which can then be used on any 5 machines in your network. The software can then be installed on all 20 machines without needing individual licenses for each computer. When someone stops using the software on one machine, it then frees up that license spot for another machine on the network to use.
How do I install the floating license server?
Floating licenses can be complex to set up, and if you have no previous experience of configuring network services, the process can be quite daunting.
If you need any help, please contact support
However, you may find a solution to your problem faster if you scroll down to troubleshooting below.
|
|
To configure a license server you must have Administrator (or root) privileges |
How do I point to the server license using an Environment Variable?
If you want to point to a license file via environment variable, use ISL_LICENSE_FILE. It uses the usual flexlm syntax, e.g:
ISL_LICENSE_FILE=27000@server-name
ISL_LICENSE_FILE=/path/to/file.lic
You can also set up the ISL environment variable to read all .lic files in a directory:
ISL_LICENSE_FILE=your/flexlm/directory
Installing Floating Licenses on Mac OS X
Mac OS X License Manager
-
Download the OS X license manager from the download section
-
Open the License Manager DMG file and double-click the PKG file, then follow the installation prompts
-
After installing the license manager, load it from your Applications folder and type or paste your activation code into the Activation Code field then press Activate
If you have received your license via email, please skip the rest of the section and go to "Mac OS X Server License (Manual Install)" below. -
Press the Install Server License button in the license manager to install the license to the server. The manager will install the file here: /Library/Application Support/Imagineer Systems/FLEXlm/Licenses
-
The License Manager starts the managing service automatically. You can view this in the service section of the License Manager:
The error log can be viewed by clicking Log File. This file is stored at: /Library/Logs/Imagineer Systems/lmgrd.log
-
If your license server does not start automatically, restart the computer to automatically start it
Mac OS X Server License (Manual Install)
In case where you cannot install the license via an Activation code (normally where the server is not connected to the internet) you can manually install your license to Mac OS X:
-
If you haven’t already, install the License Manager as described above in the "Mac OS X License Manager" section.
-
Copy your license file (e.g. mocha.lic) into /Library/Application Support/Imagineer Systems/FLEXlm/Licenses
-
If your license server does not start automatically, restart the computer to automatically start it
Mac OS X Client Machine
Once you have the server license installed (see above), you can then install mocha on your client machine and activate.
-
Click on Activate on the welcome screen in mocha
-
Using the same activation code, paste this into the Activation field and click Activate
-
The client license should now install to /Library/Application Support/Imagineer Systems/FLEXlm/Licenses
-
If the installation is successful, you will now be able to use mocha
Mac OS X Client Machine (Manual Install)
Once you have the server license installed, you can then install mocha on your client machine.
-
If you received your license by e-mail skip to point 5
-
Open the OS X License Manager
-
Submit your Activation Code and click on Show Detail
-
Click Install Client License and the file will save as client_license.lic
-
Drag and drop the client license file into /Library/Application Support/Imagineer Systems/FLEXlm/Licenses on the client machine
-
If the installation is successful, you will now be able to use mocha
Installing Floating Licenses on Windows
Windows License Manager
|
|
To configure a license server you must have Administrator privileges. Either login as Administrator or right-click the installer and choose "Run as Administrator". |
-
Download the Windows license manager from the download section
-
Double-click the MSI installation file and follow the prompts:
-
The installation process will also automatically start the License Manager services:
-
After installing the license manager, load it from the Start Menu and use your activation code to activate

If you have received your license via email, please skip the rest of the section and go to "Windows Server License (Manual Install)" below. -
Press the Install Server License button in the license manager to install the license to the server. The manager will install the file here:
-
The License Manager starts the managing service automatically. You can view this in the service section of the License Manager:
-
The error log can be viewed by clicking Log File.
-
If your license server does not start automatically, restart the computer to automatically start it
Windows Server License (Manual Install)
In cases where you cannot install the license via an Activation code (normally where the server is not connected to the internet) you can manually install your license to Windows:
-
You should have already installed the Windows License Manager in the steps outlined above. This also installs the FlexLM server software into the default location.
-
If you have requested to receive your floating license by e-mail, copy the license server file (e.g. mocha_Pro_cross-platform_floating_license_v3.000_server.lic), into the proper system licensing directory:
-
Windows XP: C:\Documents and Settings\All Users\Application Data\Imagineer Systems Ltd\Licensing
-
Windows Vista: C:\ProgramData\Imagineer Systems Ltd\Licensing
-
Windows 7/8/10: C:\ProgramData\Imagineer Systems Ltd\Licensing
(Legacy versions of Imagineer Software may still use the directory C:\Program Files\Imagineer Systems Ltd\Licensing\)
-
-
If your license server does not start automatically, restart the computer to automatically start it
Windows Client Machine
Once you have the server license installed (see above), you can then install mocha on your client machine and activate.
-
Click on Activate on the welcome screen in mocha
-
Using the same activation code, paste this into the Activation field and click Activate
-
The client license should now install to:
-
Windows XP: C:\Documents and Settings\All Users\Application Data\Imagineer Systems Ltd\Licensing
-
Windows Vista: C:\ProgramData\Imagineer Systems Ltd\Licensing
-
Windows 7/8/10: C:\ProgramData\Imagineer Systems Ltd\Licensing
-
-
If the installation is successful, you will now be able to use mocha
Windows Client Machine (Manual Install)
Once you have the server license installed, you can then install mocha on your client machine.
-
If you received your license by e-mail skip to point 5
-
Open the Windows License Manager
-
Submit your Activation Code and click on Show Detail
-
Click generate client license and the file will save as client_license.lic
-
The client license should now install to:
-
Windows XP: C:\Documents and Settings\All Users\Application Data\Imagineer Systems Ltd\Licensing
-
Windows Vista: C:\ProgramData\Imagineer Systems Ltd\Licensing
-
Windows 7/8/10: C:\ProgramData\Imagineer Systems Ltd\Licensing
-
-
If the installation is successful, you will now be able to use mocha
Installing Floating Licenses on Linux
Linux License Manager
If you have received an activation code you will need to use the license manager to activate your license. If you received your license file by e-mail, proceed to the "Linux License Server" section below.
-
Download the Linux license manager from the download section
-
Make sure you have downloaded the correct version for your system. 64-bit versions of the software will not run on a 32-bit version of Linux.
-
Double-click the RPM file to begin installation or install it from the terminal using sudo rpm -Uvh [PACKAGE_FILE].rpm, where [PACKAGE_FILE] is the name of the License Manager RPM file you have downloaded.
Linux License Server
To configure a license server as a service, you must have root privileges. We support license server installation for Red Hat Enterprise Linux 4 32-bit systems, Red Hat Enterprise Linux 5 64 bit systems, and their equivalents.
-
You should have already installed the Linux License Manager in the steps outlined above.
-
After installing the License Manager, load it and use your activation code to activate
-
Press the Install Server License button in the License Manager to install the license to the server.
-
The manager will install the license file here: /etc/opt/isl/licences
-
If you have requested to receive your license by e-mail, copy your License file (e.g. mocha.lic) into /etc/opt/isl/licences. Skip this step if you have used your activation code to install the server license instead.
-
The server process should already be started automatically, but you can make sure by typing: /etc/init.d/isllmgrd start
-
The server will start automatically at runlevels 2, 3, 4 and 5. FLEXlm messages are logged to: /var/log/isllmgrd.log
-
The init script accepts start, stop, restart and status commands, and also reread, which rereads the License file. The daemon is run by default as the nobody user. If this does not exist on your system, either create it or edit the script to use a different non-root user.
Linux Client Machine
Once you have the server license installed, you can then install mocha on your client machine and activate.
-
Click on Activate on the welcome screen in mocha
-
Using the same activation code, paste this into the Activation field and click Activate
-
The client license should now install to: /etc/opt/isl/licences
-
If the installation is successful, you will now be able to use mocha
Linux Client Machine (Manual Install)
Once you have the server license installed, you can then install mocha on your client machine.
-
If you received your license by e-mail skip to point 5
-
Open the Linux License Manager
-
Submit your Activation Code and click on Show Detail
-
Click generate client license and the file will save as client_license.lic
-
The client license should be installed to: /etc/opt/isl/licences
-
If the installation is successful, you will now be able to use mocha
Troubleshooting Floating Licenses
As with any software, problems may arise during the installation process. Please take a moment to read our troubleshooting section and check for common errors. You may also want to check out the FlexNet License Administration Guide
If you continue to have issues installing, please contact support and we will be happy to help you.
Verify your server license has been successfully installed
Check that your license actually exists on the Server
Mac OS X: /Library/Application Support/Imagineer Systems/FLEXlm/Licenses/mocha_Pro_cross_floating_license_v2.500_server.lic
Windows XP: C:\Documents and Settings\All Users\Application Data\Imagineer Systems Ltd\Licensing\mocha_Pro_cross_floating_license_v2.500_server.lic
Windows Vista: C:\ProgramData\Imagineer Systems Ltd\Licensing\mocha_Pro_cross_floating_license_v2.500_server.lic
Windows 7/8/10: C:\ProgramData\Imagineer Systems Ltd\Licensing\mocha_Pro_cross_floating_license_v2.500_server.lic
Linux: /etc/opt/isl/licences/mocha_Pro_cross-platform_floating_license_v2.500_server.lic
Verify your client license has been successfully installed
Check that your client license actually exists on the client machine
Mac OS X: /Library/Application Support/Imagineer Systems/FLEXlm/Licenses/mocha_Pro_v2_client.lic
Windows XP: C:\Documents and Settings\All Users\Application Data\Imagineer Systems Ltd\Licensing\mocha_Pro_v2_client.lic
Windows Vista: C:\ProgramData\Imagineer Systems Ltd\Licensing\mocha_Pro_v2_client.lic
Windows 7/8/10: C:\ProgramData\Imagineer Systems Ltd\Licensing\mocha_Pro_v2_client.lic
Linux: /etc/opt/isl/licences/mocha_Pro_v2_client.lic
Verify you are using the latest version of the license server software.
Check the download section to make sure your License Manager is up to date.
Sometimes there can be issues where a 64-bit version of the server software has been installed on a 32-bit version of Windows. If this is the case, uninstall the License Manager then go to the download section of our website and download the correct bit version of the License Manager for your version of Windows. When in doubt, 32-bit should work.
Verify the SERVER port is not being used or blocked by another process
By default the license server runs in port 27000, but this can be blocked or used by other processes. You may see a TCP error in your server log file when it cannot read the port.
Check that ports 27000-27009 are open and not in use, or allocate a different port by editing the SERVER line in the license file:
SERVER servername 000000000000to
SERVER servername 000000000000 12345where 000000000000 is the host id and 12345 is a port chosen by the system administrator.
Verify there is not a firewall running between the server and the client computer
If your organization needs to run a firewall, you will need to open the ports of the license server manually. Normally the license server runs in port 27000, but if other FLEXnet license servers are present it may take a different port. To be safe, open ports 27000-27009. Also, the vendor daemon uses a port specified at run time. If a static port allocation is required, edit the license file and change:
VENDOR islto
VENDOR isl PORT=12345where 12345 is a port chosen by the system administrator. Ideal port numbers are in the range of 49152 to 65535.
The client is receiving an error of -15 or -96
This means the server is not running correctly or there is a network problem between two computers. Please follow the steps below:
-
Open the License Manager
-
Switch to the Server tab (the third button at the top of the License Manager window)
-
Click on Log File. This will bring up the License Manager log file so you can review any errors
-
Scroll to the bottom of the log to view the most recent errors. You may have to scroll up from the bottom to see complete errors
-
If you receive a similar message to the one below (file paths may vary according to your system), the hostname of your license is not set correctly:
18:34:27 (lmgrd) "Rodrigo222": Not a valid server hostname, exiting.
18:34:27 (lmgrd) Valid license server system hosts are: "Rodrigo"
18:34:27 (lmgrd) Using license file
"Licenses//mocha_Pro_cross-platform_floating_license_v2.500_server.lic"
To fix this, edit the server host name in the server and client license by reactivating your license in the License Manager. This will affect these lines in the licenses:
SERVER Rodrigo 000000000000
VENDOR isl
You can also edit this manually in the license files themselves, but it is easier to just load License Manager and change the host name, then reactivate.
Don’t forget to click the Install Server License after you reactivate!
If you receive a similar message to the one below (file paths may vary according to your system), the Host ID of your computer and your license does not match. Please contact support to resolve the issue:
18:50:51 (isl) Wrong hostid on SERVER line for license file:
18:50:51 (isl) Licenses//mochapro_cross-platform_floating_license_v2.500.lic
18:50:51 (isl) SERVER line says 000000000000, hostid is ffffffffffff
18:50:51 (isl) Invalid hostid on SERVER line
In this case, you should contact support
For Linux and Mac OS X, you can reset the default directory location of your license server by running the command below in terminal:
rm ~/.flexlmrc
Verify how many licenses are in use and where
To check who is using the current server licenses, look for output similar to the following:
12:08:24 (isl) OUT: "mpp-ofx5" arthur@camlelot
12:08:24 (isl) OUT: "mpp-ofx.soho" arthur@camelot
12:08:24 (isl) OUT: "mpp-ofx.track" arthur@camlelot
12:08:24 (isl) OUT: "mpp-ofx.image" arthur@camlelot
12:08:24 (isl) OUT: "mpp-ofx.remove" arthur@camlelot
12:08:24 (isl) OUT: "mpp-ofx.adjusttrack" arthur@camlelot
The basic format above is:
[TIMESTAMP] (isl) [LICENSE STATE] [LICENSE FEATURE] [USER]@[HOSTNAME]This helps you determine who currently has a license checked in or out.
If you are seeing errors such as the one below, this means all available licenses are already checked out:
10:35:18 (isl) DENIED: "mpp-ofx.track" arthur@camelot (Licensed number of users already reached. (-4,342))Restarting the license server to load a new configuration.
On Mac OS X you can stop and start the license server daemon by typing the 2 commands below inside the terminal and pressing return after each:
sudo launchctl stop com.imagineersystems.lmgrd
sudo launchctl start com.imagineersystems.lmgrd
On Linux you can stop and start the license server daemon by typing the 2 commands below inside the terminal and pressing return after each:
sudo /etc/init.d/isllmgrd stop
sudo /etc/init.d/isllmgrd start
For Windows (and Linux or Mac OS X) you can stop and start the system by doing the following:
. Load the License Manager (if you are on Windows, you must right-click and choose "Run as Administrator")
. Switch to the Server tab (the third button at the top of the License Manager window)
. Click the Stop button
. Click the Start button
If neither of these methods work, try restarting the server machine.
If your computer or server is not connected to the Internet
If you are not connect to the internet (or you are running an older version of our software that does not use activation codes) you will not be able to activate your software using an activation code: Connect to the Internet or contact support for a manual license if connecting to the Internet is impossible.
You will need to provide your Host ID and if you are installing on a server you will need to provide the exact server name. Both of these can be retrieved via the License Manager in the System Info section.
You will have to contact support to activate older, legacy versions of our software whether you have an Internet connection or not.
Please contact support to send your server details.
Check to make sure your mocha software matches your activation code
Check your purchase order to make sure everything matches up version wise. It may be that you don’t have the correct version of mocha installed from our download section. This is especially important for legacy software. The usual error for the wrong software or incorrect license for the software you are trying to run is "FLEXlm error: -5 No such feature exists."
Administrator or root installation
If you are not running as root on Linux or are not logged in as administrator of the machine, try running in admin or root mode and install again.
Installing Remotely
If you are attempting to install via Remote Desktop instead of directly on the machine itself and you are having trouble getting mocha or the FlexNet software to install, try installing directly on the machine. This applies to both server and client machines.
Check for conflicting licenses installed in your licensing folder
If you have more than one mocha license installed on the server or client machine check to make sure they are not expired licenses. While rare, sometimes these licenses can conflict with any current ones you have on your system.
The client does not connect or see the server host name
If your client machine does not connect to the server based on the server name, try replacing the server name with the IP address of the server instead in the license file. You can easily do this via the License Manager or via a text editor.
When in doubt, check the logs!
Check logs and their paths: Read the logs from mocha and from your server, they will tell you all about what is happening to your machine. You can match FlexNet errors to the list of FlexNet error codes in the FlexNet License Administration Guide.
Check to see if the server process is actually running
You can check to see if the server process is running by opening your License Manager and switching to the Server tab:
You can also check if ISL Services are running in Windows task manager:
And the isl process in Mac OS X:
Install mocha on the server to test the license
If you get client license issues, see if the license works on the server by installing the version of mocha you are trying to set up on the server and opening it up. If it runs in LE mode, the license is not properly installed. If it runs without asking you to activate, the license has been installed correctly on the server and you will need to troubleshoot your client machines.
Check your firewall settings
Check to make sure you are not restricted to using certain ports due to a firewall or other admin permissions. When in doubt, temporarily turn your firewalls off for the duration of the installation and then turn them back on when you are done.
Check your host name settings
If your client machine is not able to connect to the server you may have a networking issue. Try changing the server name in the client license to the IP address of the server instead, or check to see if your host has ".local" appended to the end of it.
You can do this by selecting IP address in the License Manager when you activate.
You can also do this in any text editor by opening up the client license and server license and manually editing the server name.
Sometimes the best solution is to start again
You might roll your eyes at this one, but try uninstalling, restarting your machine, and installing the software again from scratch. Make sure you follow installation directions off our website exactly. It sounds redundant, but sometimes it’s a great way to troubleshoot what is going on inside your machine.
When all else fails…
Contact us!
Our support team are more than happy to help you fix any floating license issues you may have.
Please contact support
Installing Render Licenses
This section will discuss the installation of floating render licenses and how they differ from standard interactive floating licensed.
Render Floating Licenses vs Interactive Floating Licenses
A render license is a specific kind of floating license that only allows rendering of mocha project output, be it inside a plugin or in the standalone application.
When you are using a floating license, it is broken into two parts: The interactive portion and the rendering portion.
For plugins, this is separated like so:
-
If you open the mocha GUI in the mocha Pro Plugin (and a license is available) you are entering the interactive portion.
-
If you are back in the host and not using interactive elements such as layer choosing or opening the GUI, you are using the rendering portion of the license.
For the standalone, this is separated like so:
-
If you open the mocha Pro standalone application (and a license is available) you are entering the interactive portion.
-
If you have the mocha Pro standalone application closed and are using the mocharender.py render script, you are utilizing the rendering portion. (See the Python guide for more details on rendering with mocharender.py)
If the interactive license is in use elsewhere or missing, the mocha GUI will become unlicensed and attempting further work may encrypt your project if you choose to save.
If you have no interactive floating licenses available to render with, additional render licenses can be helpful to let you free up interactive licenses elsewhere.
Workflow for Render Licenses: Example 1
To help illustrate the Render License workflow, let’s look at the following situation:
-
5 floating licenses (interactive)
-
10 render licenses (render only)
-
There is only 1 user
The license server is operating with both sets of licenses.
-
If only one person is using mocha on the network, there are 4 interactive and 10 render licenses still available to use.
-
If only that one person was using mocha on the network, they would have 15 render machines available for use including the one they were working with.
-
If another person started working and all machines were in use for rendering, their version of mocha would be unlicensed, as there would be no available seats.
Workflow for Render Licenses: Example 2
To help illustrate the Render License workflow, let’s look at another situation:
-
5 floating licenses (interactive)
-
10 render licenses (render only)
-
There are 5 users
The license server is operating with both sets of licenses.
-
There are 5 people working in mocha.
-
If another user tries to work on a 6th machine, they will open mocha unlicensed, because all interactive licenses are in use.
-
They open an existing project with mocha in it (or render from the command line), they will be able to render, because all render licenses are available.
Now, say one person wants to send off a render to the network:
-
If 5 people are using mocha on the network already, there would be 11 render machines available for use including the one the user was presently working with.
-
If another person stopped working in mocha, the interactive license would be released, and a new machine would then be free to either use for work (interactive) or render (non-interactive) by another user.
Installing Render Floating Licenses
The installation of a render license is exactly the same as that of a standard interactive floating license. See the 'Installing Floating Licenses' for a complete guide.
File Management for Rendering on a Network
If you are planning to render either via the mocha render scripts, an Adobe watch folder or a render farm (for example in Nuke), there are some file workflows you need to adopt.
You will need to make sure the necessary source footage is available for all machines. This includes anything you have imported into the mocha GUI such as clean plates, insert clips and other imported files.
These files need to be managed by any of the following methods:
-
Placed in the same file structure on all machines
-
Relinked manually with an interactive license on all machines
-
Pointing to the same shared directory.
Failing to set this up may result in incorrect renders.
|
|
If you are using the plugin, you may have imported footage into the mocha GUI separate from the host source footage. Make sure any imported footage is also available. |


