


Do you remember those incredible transformations in movies where an animal morphs into a human? Or the iconic transformations of the T-1000 in Terminator 2: Judgment Day? If you’re curious about this effect for your films or want to transform your intro logo for your video content, morphing animation is for you.
Join me today as we learn about morphing animation, what it is, the different types, and its history in the industry. I’ll also provide you with a complete guide on how to use morphing animation in After Effects and using Boris FX Silhouette.
Let’s dive in!
What is Morphing in Animation?
Morphing is an animation technique that distorts and changes an object, shape, or subject into a different one. The result is a smooth transition that highlights a shape-shifting moment. This technique was used in early cartoon animations to morph basic shapes like an animal or liquid metal, and later in film and television to create visual effects for horror and sci-fi movies. But you can see morphing animation in action in many music videos and even in advertising!
How Does Morphing Animation Work?
To create a morphing animation, one image needs to be the source (the original object that will morph) and a morph target (what the source will morph into). You mask the features of the original object that will morph into the target shape. Then, in your compositing software, align both shapes' points to create the transitions between frames.
Different Types of Morphing Animation
Direct Morphing
Direct morphing is the most basic morphing animation type to transform shapes into different ones; for example, to turn a circle into a square. This type of morphing animation is used in logos and early cartoons such as the film Fantasmagorie (1908) by Émile Cohl.
Max Speed Morphing
Max speed is helpful in scenes where the object is moving fast, and the transformation occurs between fast-speed scenes; for example, in a scene where the superhero quickly transforms their arm into a sword to fight an enemy. This type of morphing animation is more forgiving as irregularities in the morphing transition are hidden by the movement’s speed.
3D Morphing
Morphing animation can be applied to 3D models to animate 3D objects. This type of morphing animation can be seen in graphic design, music videos, video games, commercials, and more.
History of Morphing Animation
Modern digital morphing animation comes from old animation techniques used in the beginning of filmmaking and animation. Even before then, morphing was part of human culture for centuries.
One early morphing technique was the Tabula Scalata, a technique from the 16th century that presents two images split over an irregular surface. When viewed from a different angle, this creates a morphing effect.
Fast forward to the movie-making era, early digital morphing techniques like dissolves were often used to simulate the transformation of clothes, scenarios, and even human transformation in the early years of filmmaking.
Thanks to computer software developments in the 90s, digital morphing animation made it possible to distort an image while changing into the next one in a smooth transition. It became popular in Hollywood films such as Flight of the Navigator (1986), Willow (1988), and Terminator 2: Judgment Day (1991).
Today, morphing animations can be created using compositing software such as After Effects, Fusion, and Silhouette, which we’ll talk about in the next paragraphs.
How to Use Morphing Animation?
For this first part of the tutorial, I’ll show you how to use morphing animation with Boris FX Silhouette.

Silhouette’s node-based interface allows you to work with complex compositions with a better view and workflow than any other compositing program. Silhouette provides over 400 VFX nodes organized by specialty. It also integrates other Boris FX plug-ins like Sapphire, Mocha Pro, and Particle Illusion.
Let’s hop into Silhouette to create a morphing animation effect.
Step 1: Open Silhouette and Create a New Project
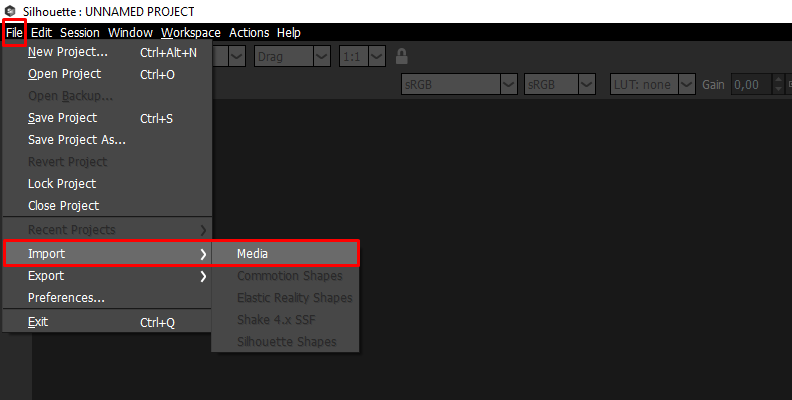
You need two media files to create a morphing animation: one source image and one target image. You can import both files into Silhouette from File > Import and browse your videos or images.
![]()
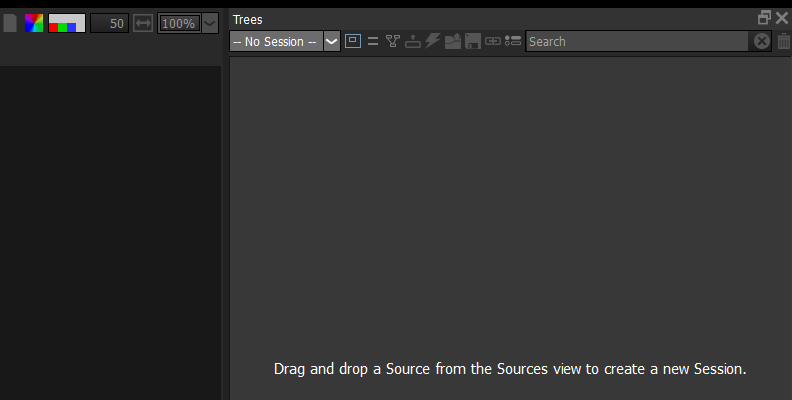
Drag the two files in the Source window to the Trees window to create a new session. You can select a template and workspace before you start.
![]()
Then, choose your project's size, aspect ratio, duration, and other settings. Click OK to start.
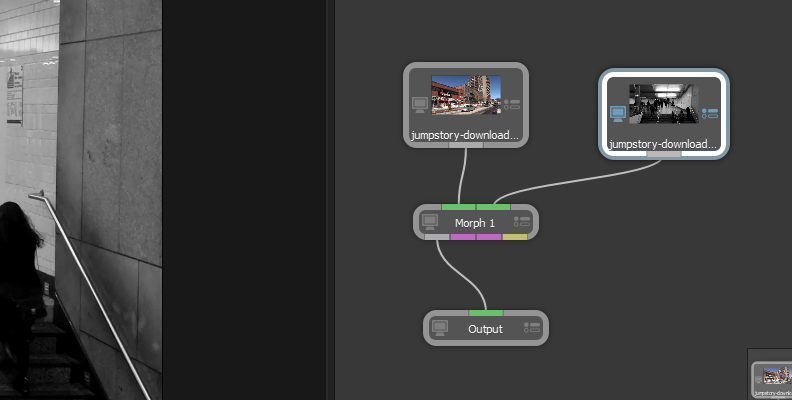
Step 2: Add the Morph Node
Now you should only have your two source clips and the output node. Let’s add the Morph node to your session.
Go to the nodes window and click on the Warp tab to open the nodes for that category. Select Morph and drag it to the Trees window between your source image and the Output node, which will automatically select the source media as input A. Connect your target image's output to the Morph node's B image.
![]()
Now, you should have several options in the View Mode to toggle between the output, A, B, and A/B view.
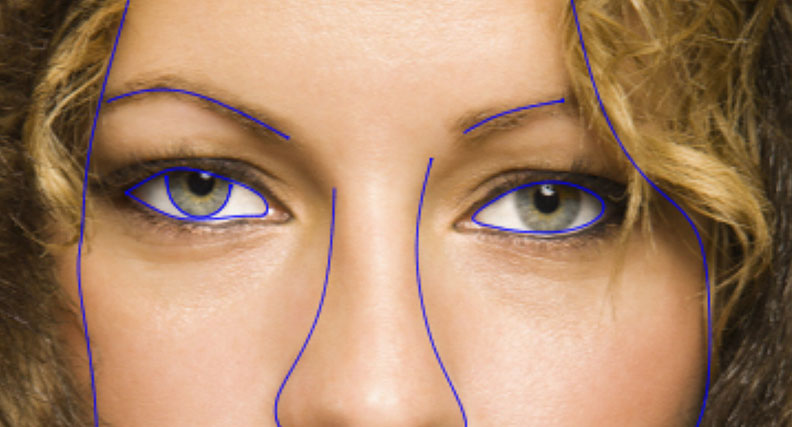
Step 3: Create a Source Shape
![]()
Switch to the A view to create the source shapes. Click on a spline tool and start masking. Create a shape for each feature in the source image. For example, if you’re working on a person's face, create shapes for the eyes, nose, mouth, ears, and the main elements that will be morphing. Rename them in the Object List window to stay organized.
Step 4: Create the Target Shape
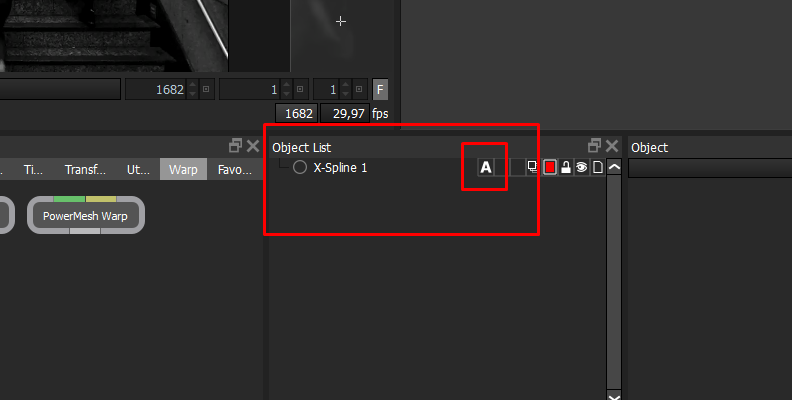
To speed up the process, you can duplicate each source shape with CTRL + D. In the Object List, next to each shape, you’ll notice the letter A. Click on it to change it to B on the duplicate shapes. Now, you can go to the B view and reshape the masks.
![]()
Step 5: Add a Correspondence
Move to the A over B view (A/B) and create a correspondence for the source and target shape to tell Silhouette how to connect those two masks. Pick the correspondence tool (press C) and click from the source to the target shape. The yellow lines show the movement of the source shape morphing into the target shape.
Step 6: Animate
You need to add some keyframes to create the morphing animation. Switch to the Output view and select a position in the video. Then, change the Distortion and Transparency in the node's parameters to keyframe it.
Play the clip to see if the morphing animation runs smoothly. Sometimes, you must adjust the correspondence points to make a seamless transition.
Morphing in AE
If you work on Adobe After Effects, I have good news! You can create a morphing animation with AE native tools too. The process is more complex, but you can make a morph transition following these steps.
Step 1: Import Source and Target Images
Import the two clips or images you want to use. If you have a single clip with the two objects, split the clip and create two separate layers. Cut the clips and align them right when you want the morphing animation to happen.
Step 2: Create Masks
Duplicate the layer with the source image and select the Pen tool to create the source mask. Create a shape around the source object and label it "source mask" or something like that to stay organized. Repeat the process with the target object. Duplicate the layer, precisely create a shape around the object, and rename it "target mask."
Copy the source mask and paste it into the duplicate layer of the target mask. Select the copied mask and select none as the blending mode. Repeat the same with the target mask and paste it into the source layer mask.
Step 3: Reshape the Source Object
Search the reshape effect in the effects library and apply it to the original layer with the source object. In the effects control panel, change the source mask to "source mask" and the destination mask to "target mask." You can adjust the Percent, Elasticity, and Correspondence points. To add correspondence points, hold Alt and click on each point in the masks to align them.
Click the stopwatch to enable animation for the Percent setting in the effects control panel. Move a few frames and change the Percent values to 100% to keyframe it.
Now, go to the source layer and animate the opacity from max to zero to make the source object disappear.
Step 4: Reshape the Target Object
Repeat the process with the target object. Add the reshape effect, but now choose the "target mask" as the source and "source mask" as the destination mask. Add the correspondence points, enable animation for Percent, and animate it from 100% to zero.
Animate the opacity in the target object from zero to 100% to make the object appear as it morphs.
Step 5: Preview the Sequence
You should see the smooth morphing animation complete if you play your sequence. Adding more masks to the objects creates more realistic transitions, especially if the object has many features such as handles, buttons, etc.
Add some effects, such as a glow or particles, and you'll get a stunning morphing sequence, almost like the ones you see in a Harry Potter movie!
Final Words
Nowadays, professional animation morph can be achieved without spending a fortune thanks to tools like Silhouette. This software speeds up the process for complex compositions and integrates other Boris FX plug-ins, allowing users to add particles, Sapphire effects, and track effects in the same interface.
Try Silhouette for free and start your journey into morphing animation!
FAQ
Is There Any Difference Between Morphing and Tweening?
Morphing is a movie industry technique that allows you to transform a shape into another one to add special effects to a video. Tweening (also inbetweening) is an animation process that fills images between frames to create motion. Tweening is used to streamline the animation process (like in Adobe Animate) while morphing technology is used as a visual effects tool.
How Do I Learn Morphing Animation?
You can learn to create morph effects with Silhouette. It’s easy to use, and its workflow is intuitive even for beginners. You can learn morphing animation with our online Intro to Morphing Animation training.


