


Using tracker markers on your footage will make your camera tracking process smoother than ever. However, once you complete your tracking process and move on to the next post-production steps, those markers can become an issue. You don’t want them to be in your final product and need to get rid of them.
In this tutorial, I‘ll show you how to remove the tracking marker from a green screen. Here, you’ll find different methods and software to choose from, depending on the tools you have at your disposal.
Let’s dive in!
How to Remove Tracking Markers from Green Screen
Method 1: Remove with After Effects
Use this method for easy painting in After Effects. Depending on your footage, you may need to adjust the tracking and paint values.
Track each marker with the native After Effects tracker.
Click on Layer above the preview window to change to the Layer view.
Under the preview window, change the View mode to None.
Select the Paint panel. If you don’t see it, click on Window > Paint. Select the Clone Stamp and adjust the brush size from the Paint panel. Make sure the Channel is in RGBA.
Hold ALT, click on the image to grab a sample, and then click on the marker to clone.
Display the Tracking Point and Paint settings in the timeline to attach the Clone position to the tracking data using the whip. Display Paint > Clone > Transform: Clone > Position and drag the whip to Motion Trackers > Track Point > Feature Center. Your painting should follow the marker now.
Method 2: Remove Markers with DaVinci Resolve’s Fusion
Remove tracking markers with this simple trick in DaVinci Resolve. This method works with the free version of Resolve.
Drag your footage to the timeline, and from the Edit tab, right-click the clip, select "New Fusion Clip," and go to the Fusion tab.
Select the Media In node, press Shift + Spacebar to pull up the Select Tool, and search for the Paint tool. Select it and click Add.
Select the stroke brush from the option above the viewer.
Open your inspector and select Clone in Apply Mode. You can adjust the brush size under Brush Controls.
To begin cloning, press ALT + Click to select a sample, then release ALT and use the left click to paint the marker in one stroke. Let go when you’re done and change to the Select cursor (the arrow).
Let's track the cloning to follow the Marker in all frames. Select the area you painted, and you should see the strokes. Go to the inspector and display the Stroke Controls options. Right-click on Center to display a menu and click on Modify With > Tracker position. A tracker will be placed over your marker.
Go to the inspector and change the tab to “Modifiers.” Click and drag the MediaIn node to “Track source.” Track your footage with Track Forward and wait. Repeat the process with the other markers.
Go back to the timeline and preview your footage.
Method 3: Remove Tracking Markers with Blender
Follow these steps after you have tracked your markers with Blender.
Go to the Masking workspace and create a mask for the tracking points, with CTRL - Click to create points and ALT + C to close them. You can create one mask, copy it with Shift + D, drag it to the other markers, and adjust its size.
To connect the mask with the tracking data, select all the points in the mask, Shift, Click the tracking point, and press CTRL + P. Repeat this with all your tracking markers. Check the timeline to ensure all masks are following the trackers.
In the Composite workspace, press Shift + A, type Mask to bring the Mask node, and select the mask created.
Add a Blur node with Shift + A and search Blur under Filter. Connect your footage to the node and adjust the amount of Blur. Play with the settings that work for your scenario.
Add a color Mix or shuffle node with Shift + A > Color > Mix to merge the image. Connect the footage to the first Image input and the Blur to the second. Finally, connect the Mask node to the Factor input.
If you notice rough edges, feather them by adding a Dilate Erode node. Use Feather Mode and adjust the amount until you see the mask merge with the rest of the footage.
How to Remove Tracking Markers from Green Screen Using Mocha Pro
Step 1: Open Your Project on Mocha Pro
If you’re in the standalone app, go to File > New Project. Click Choose to browse for your video footage on the New Project window and click Open.
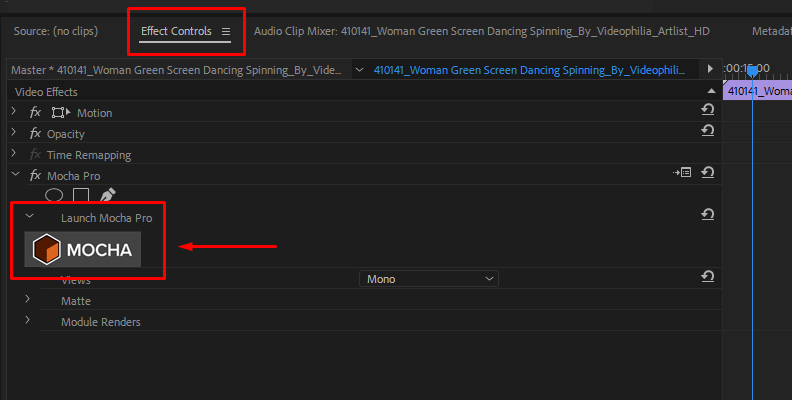
If you’re working from the plug-in version of Mocha Pro, add Mocha Pro to your footage and launch the Mocha interface from your effects settings.
Step 2: Track Your Markers
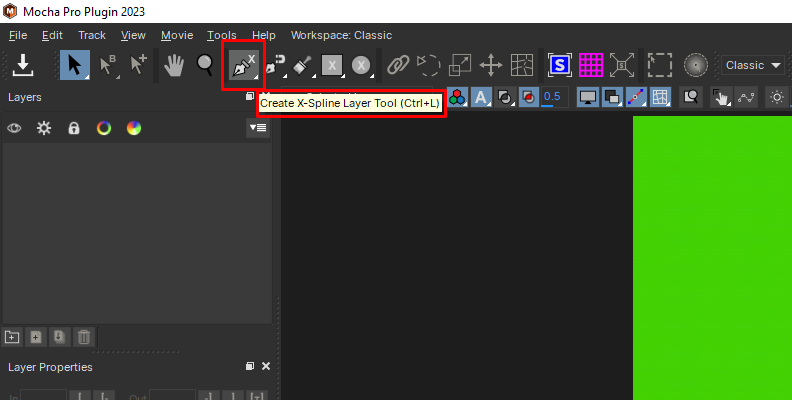
Select a spline tool and draw a shape around your marker. Add a point with a left click and close the shape with a right click.
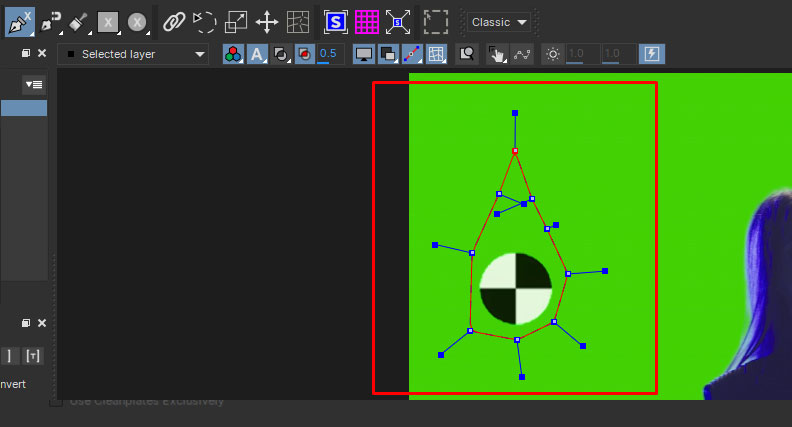
This layer will be for tracking movement only, not for removal, so don't worry about being very precise with the shape.
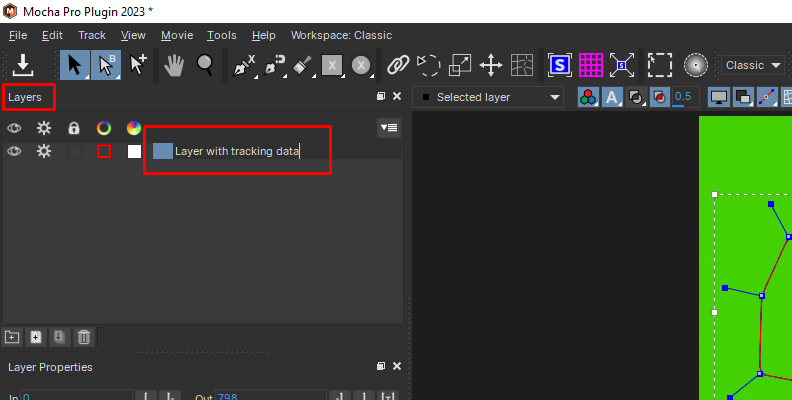
Rename your layer to something that tells you this layer has the tracking data to stay organized.
Under your track motion options, select the options to track: transition, scale, rotation, shear, and perspective. Depending on your scene, you might choose fewer or more options here.
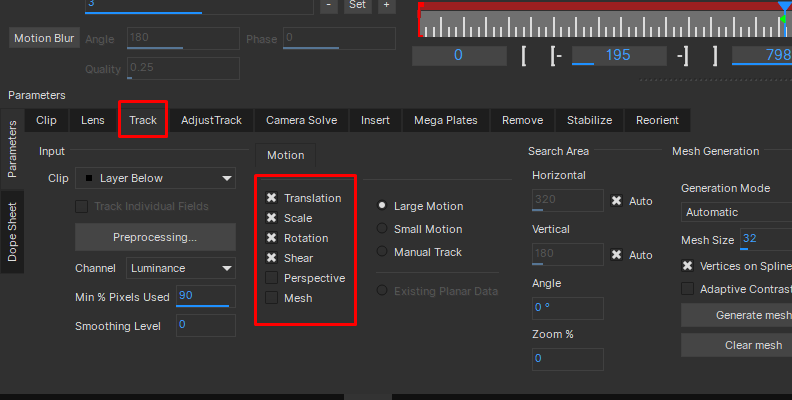
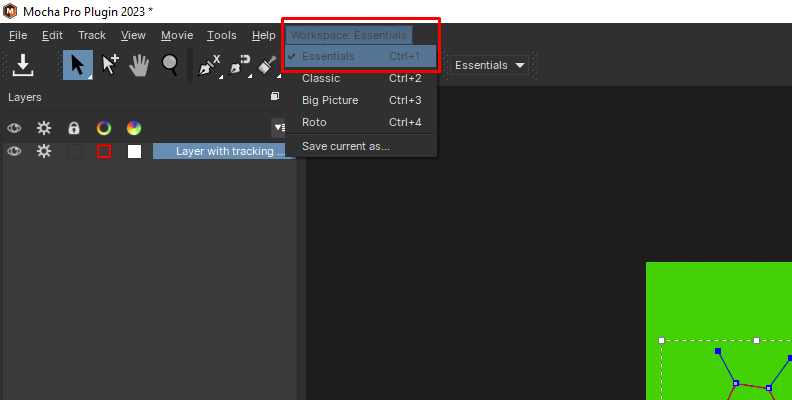
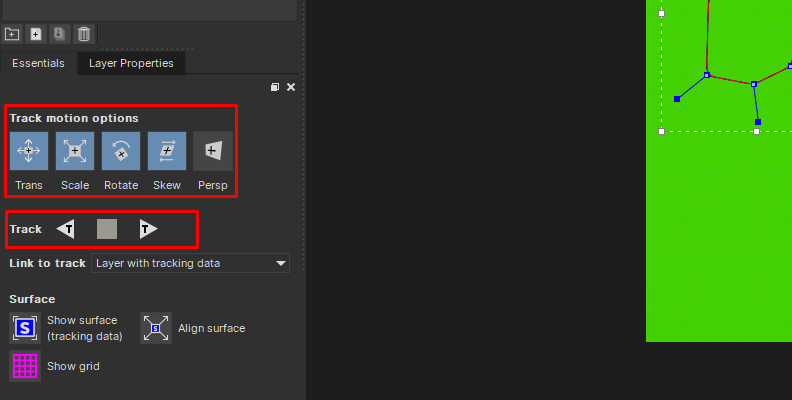
If you’re in the Essentials workspace, your track motion options will be on your left side, under the layer panel.
If you’re in the Classic workspace, they will be on the Track tab at the bottom of your screen. I’d suggest you use the Classic workspace for this tutorial because we’ll be using other features from this workspace.
Click track forward and wait for Mocha to track your marker. Check your footage to ensure the track is correct. You can adjust your shape if you see something off. I recommend you enable the Planar Surface (the blue icon with an S) and the Planar Grid. They will allow you to see if your tracking is correct.
Step 3: Mask Your Tracking Markers
The next step is to create a shape for the tracking marker you will remove. Create a new layer by selecting a spline tool and drawing it around the marker. This time, try to make it more precise.
You can create more shapes under the same layer if you have multiple markers on your footage. Select the new layer and choose the spline tool "Add X-spline to Layer," it will let you continue drawing shapes under the same layer. Rename the layer to know if this layer has the marker masks.
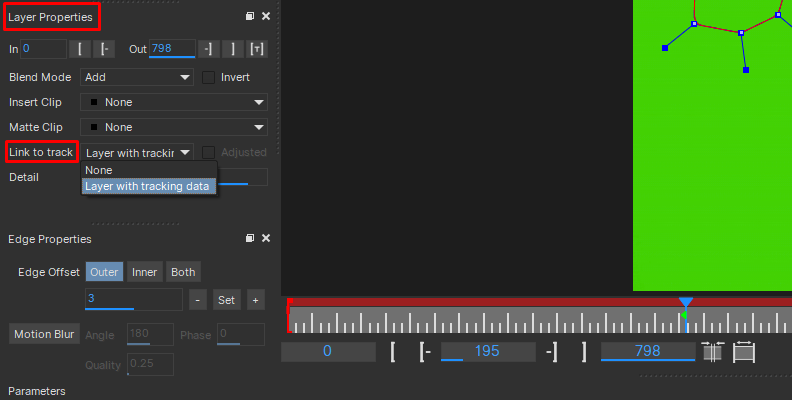
Step 4: Link Tracking Data
You need to link your markers layer to your tracking layer. Under the layer panel, you have the layer properties. Select the markers layer, go to "Link to track," and select your tracking layer from the dropdown menu. Review the footage to ensure the layers are linked correctly.
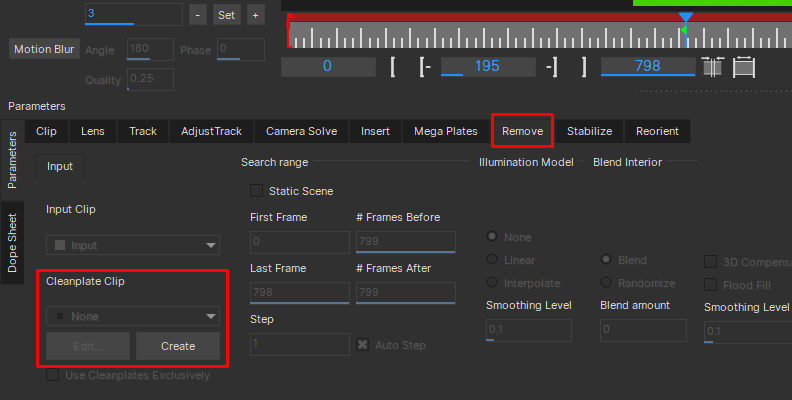
Step 5: Create A Clean Plate
Creating a clean plate will help you paint the marker away and use that clean plate on the rest of your footage. Go to the Remove tab from the options at the bottom. In the first option to the left, click on "Create." It will create a clean plate in the project folder in a TIFF file. You can open this file with Photoshop or another photo editor that supports this format.
Step 6: Paint the Clean Plate
Open the TIFF file in your photo editor. Basically, you need to erase the markers manually. You can use the clone, blur, and repair tools to help you. Once you remove the markers, save the file to overwrite the original plate and return to Mocha Pro.
Step 7: Remove Markers
On the Remove tab, click "Use Cleanplates Exclusively.” Under the illumination settings, Linear usually gives a good result, but you can try Interpolate if Linear doesn’t suit your needs. Select Blend for Dissolve mode and play with the Dissolve Width that works for you.
Click Render Forward and let Mocha Pro do its job. Then, play the footage to see how Mocha Pro has removed the markers.
Final Thoughts
There are plenty of ways to remove tracking markers, even within the same software we spoke about today. These methods might work for specific cases, and you must adjust values and settings to make them work for you. Try new methods and find your own way to remove tracking markers from your footage, so the next time you work with footage with tracking markers, you'll know what to do.
Good luck!


