


It's uncommon to capture a photo and immediately consider it ready for sharing on social media without thinking about doing any modifications or touch-ups.
Although we should completely understand that perfection doesn't exist, it's difficult to resist the temptation to "fix" even the slightest imperfections we're not fond of when creating any type of material, in this case, digital photos, with all the modern digital tools available at our disposal.
After all, showcasing our work, or even our private life, is often done in the best possible light. Knowing how to correct imperfections (a.k.a remove blemishes) and do proper photo editing is a skill you should master in this digital age.
Fortunately, this tutorial will help you learn all about the blemish removal process, fixing uneven skin tone, how to remove blemishes, what the best blemish remover apps are, and a lot more, so without further ado, let's get straight into it.
What is Blemish Remover and Why We Need One?
A photo correction tool, also known as a blemish remover app, is a standalone software or an integrated tool within a photo editing app that's used to reduce or completely eliminate imperfections within a photo.
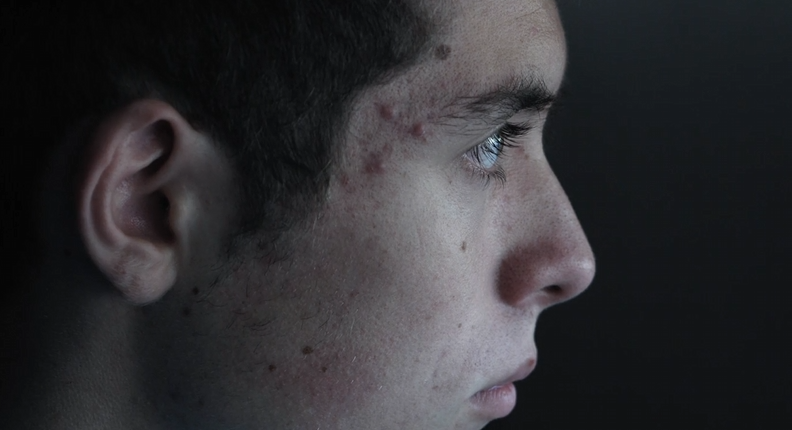
These imperfections may be spots on a person's skin, like wrinkles, dark spots, scars, pimples, acne, or other irregularities. They can also be things like blurry objects or unwanted artifacts.
A blemish remover tool allows you to digitally retouch and enhance your images by either reducing the visibility of such marks and imperfections or completely eliminating/replacing them.
There are numerous reasons why you may need a blemish remover.
To Retouch Portraits
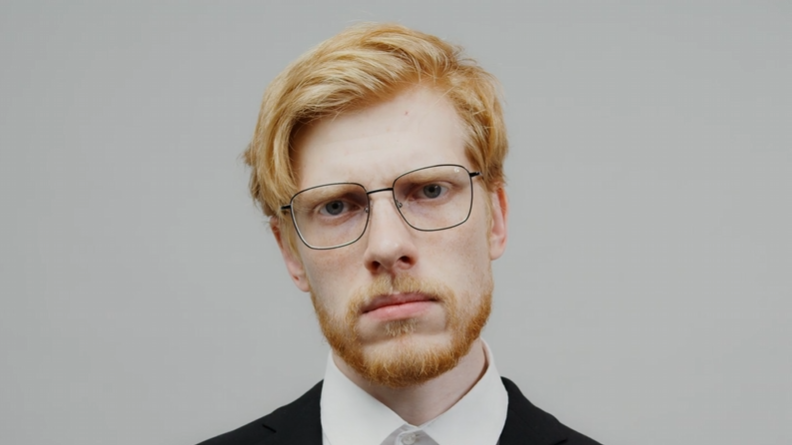
When taking portrait photos, we aim to capture the subject in the best possible light. Usually, these photos are zoomed in and focused on the face, or at least a good portion of the upper body, making all details very visible.
![remove blemishes from photos]()
This often leads to the subject becoming self-aware of natural imperfections, and since these types of photos are often framed or posted on social media, they prefer having those imperfections corrected.
A blemish remover app or tool can help smooth out the skin, remove any marks, scars, or wrinkles, and give us a portrait that won't make the person showcased in it self-aware or upset about some of their imperfections.
To Prepare Professional Photos For Advertising
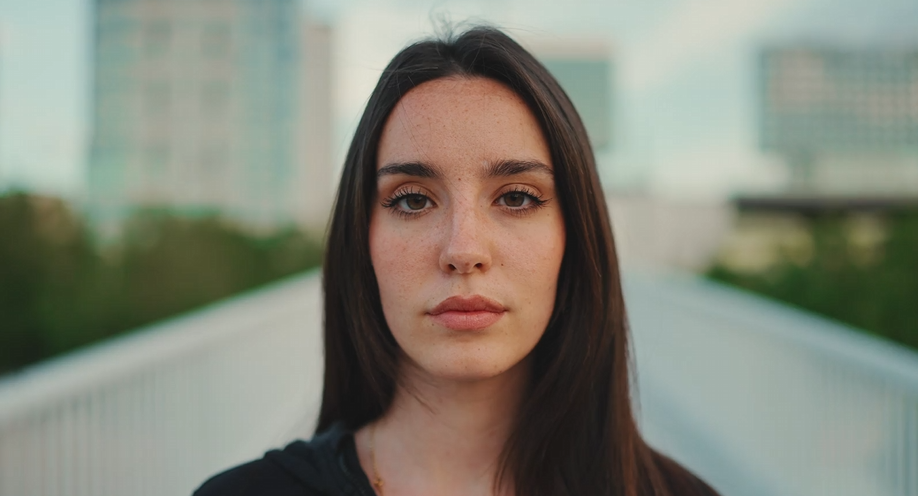
When preparing any type of advertising material, especially for industries that involve fashion and beauty, the visual presentation of your subjects/models is crucial for success. Smooth skin will help sell the product much better.
![]()
Knowing how to properly remove blemishes and work with a blemish remover app will determine the success of your campaign or advertisement.
Although we believe in showing the natural side of things, it's undeniable that there are some industry standards we must follow when working on projects in fields like fashion and beauty.
To "Clear Up" Images Used for Graphic Design and Posters
Posting an image on a social media platform for only your friends and followers to see is one thing. Still, your face being used for a massive advertising campaign on a billboard or a poster in the city center is quite different and the idea could be much more intimidating when aware of natural imperfections.
Graphic designers use blemish remover apps to fix anything that could make a person involved in the advertising poster feel insecure, as well as modify some things to make the project look more professional, like removing tattoos or whitening teeth, for example.
![]()
Blemish remover apps are also utilized to remove imperfections on various product packages, items, logos, and more. However, they are most often used to retouch images of people. Blemish remover apps are a significant tool in the industry with many use cases.
To Practice Removing Imperfections
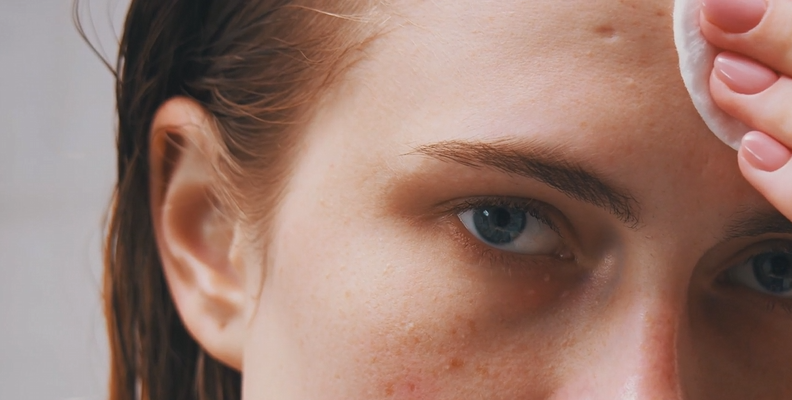
If you're striving to become a professional photo retoucher or must learn this skill as a part of your job, it's important to start practicing.
The best way to learn to use a blemish remover is to find a blemish remover photo tool software you're comfortable with, learn it, and start removing blemishes for practice.
![]()
Although it sounds straightforward at first, there is a major difference between an amateur and a professional regarding who a client will choose to remove blemishes from their photos.
Excessive retouching can lead to obvious, exaggerated results that are way over the top and noticeable, which is not what blemish removal should be.
Knowing exactly how much to retouch an image in photo editing software without making it look unnatural is the key to getting professional results.

How to Remove Blemishes from Photos with Boris FX Optics
There are many tools that allow you to remove blemishes nowadays, but our recommendation for the best blemish remover app is a software by Boris FX called Optics.
Optics is known for its ability to completely transform images through the wide variety of filters and tools it offers, one of which is Beauty Studio which we'll be using to remove blemishes in this tutorial.
The best thing about Boris FX products, including Optics, is that they're often available as a standalone version or as a plug-in for all popular photo and video editing software, meaning no matter what software you prefer to work in, you don't have to change it to use these helpful tools.
Along with all other Boris FX products, you can download Optics as a free app from the website as a trial version and test it out before purchasing. Once you get the hang of it, you can learn how to improve skin texture, remove blemishes, and learn how to do professional photo retouching without much effort.
Here's how to remove blemishes from photos using Optics by Boris FX.
Launch Optics (as a Standalone Software or in Your Photo Editing App of Choice) and Import the Image
If you've downloaded and installed Optics as a standalone app, launch it and create a new project.
For this specific example, we'll be using it as a plug-in for Adobe Photoshop.
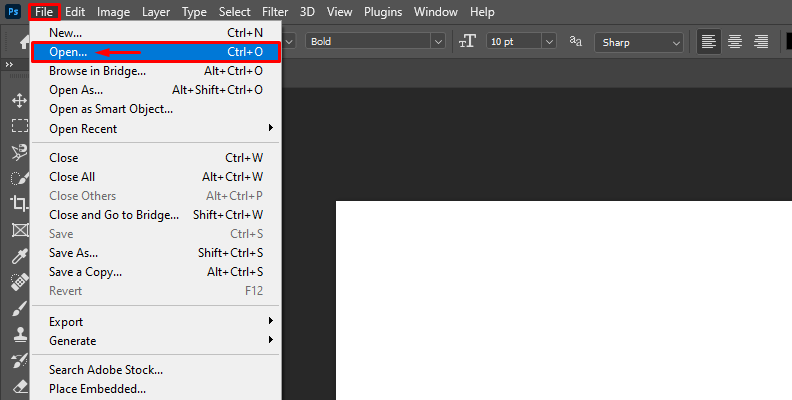
So, load Photoshop and import an image, using the File -> Open navigation as shown in the image below.
![]()
Launch Optics Within Photoshop (Skip if Using Standalone Version)
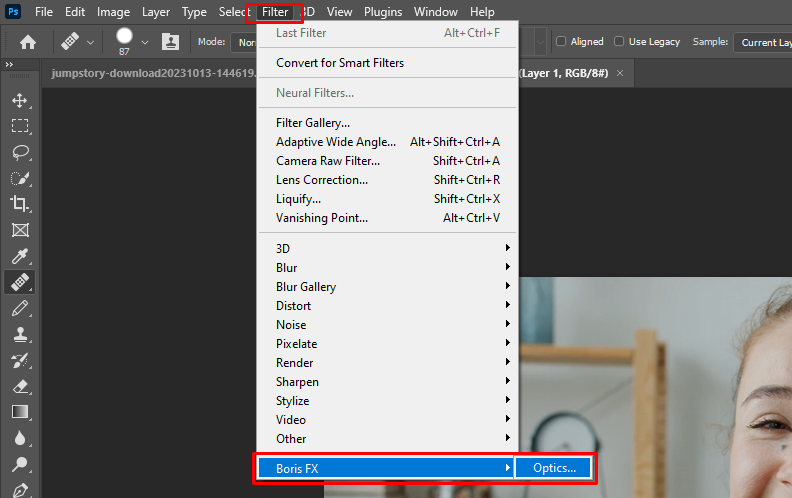
To launch Optics as a plugin for Photoshop, click on Filter -> BorisFX -> Optics, as shown in the image below.
![]()
Now Optics will launch.
Once the interface fully loads, move on to the next step.
Search for Beauty Studio and Apply it
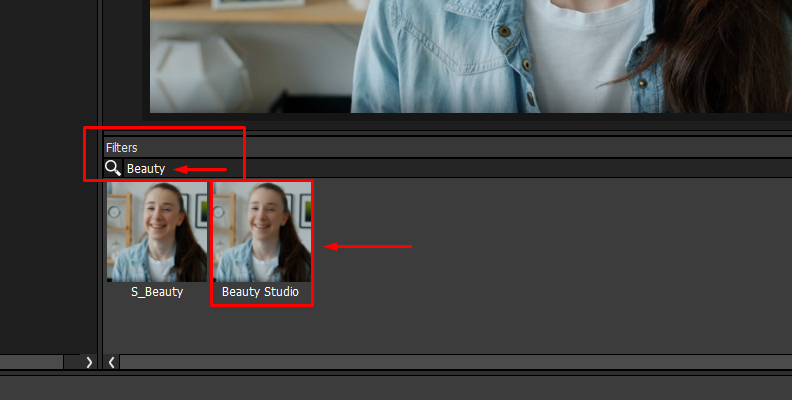
Using the search bar under the "Filters" section, find the Beauty Studio effect and click on it.
![]()
You will immediately notice a difference in the image.
Most skin blemishes, wrinkles, rough spots, scars, and other imperfections will already look much better right off the bat.
Adjust Parameters
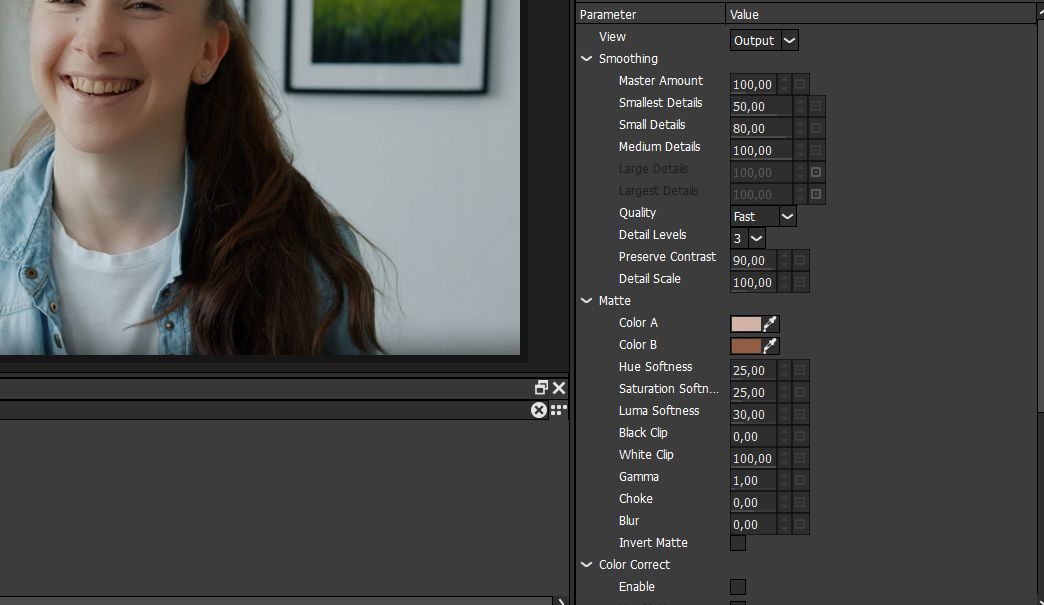
One of the things BorisFX plug-ins are known for is the wide variety of customization options and parameters offered, which allow for extensive customization and modifying of even the slightest detail in your images and videos.
Beauty Studio offers a full panel of settings that you can adjust to bring perfection to your work.
![]()
From here, all you need to do is experiment with the different settings and their values, then decide what works best for your image. For example:
Smoothing
Determines the amount of overall smoothing you'll get in the image.
Master Amount
This is the main tool for smoothing. Moving the settings between 100 and 200 will overdrive smoothing on all selected surfaces.
Quality
Setting this on "Fast" will provide quicker processing with lower quality. Setting it to "Quality" will result in higher quality with slower processing.
Glow
This will enable the "glow" look across the entire image. Good for when you want to make the skin look much smoother.
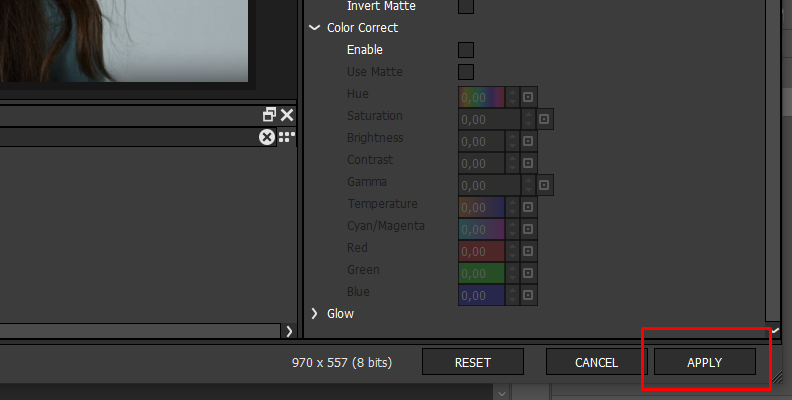
Important Note: Starting on page 174 of this Optics guide by Boris FX, you can find an explanation for every setting offered in the Beauty Studio panel. This will give you enough insight to know exactly what to change to make your image look as professional as possible.When done adjusting, click the "Apply" button in the bottom-right corner.
![]()
Finish Up With Final Touches Using Photoshop's Tools
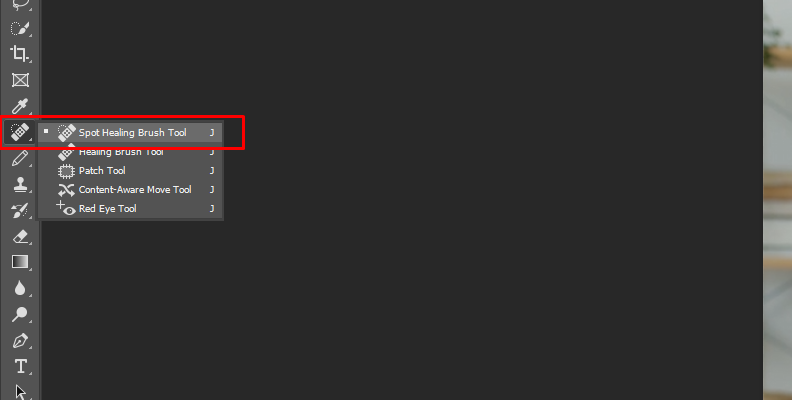
If there are still some details that need manual retouching, you can always rely on Photoshop's well-known tools, like the spot healing brush tool or clone stamp tool to sort them out.
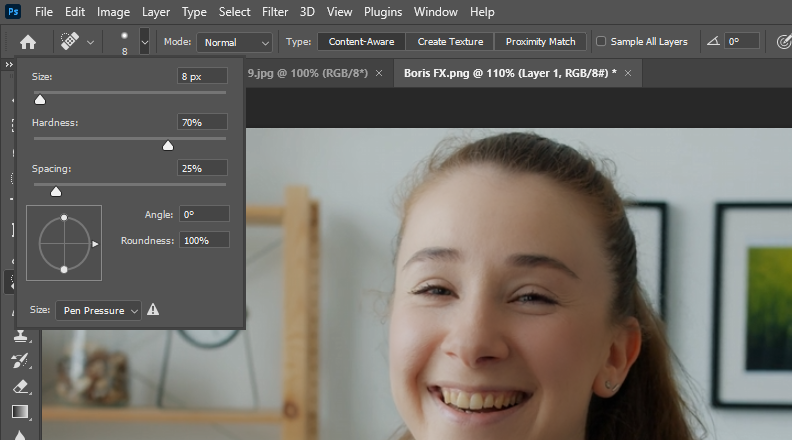
For example, the spot under the girl's eye in the first photo can be easily corrected using the spot healing brush tool which in this case we use as a face blemish remover. Simply select the tool, adjust the parameters for the "Size" and "Hardness" settings, then click on the spot you wish to "heal".
![]()
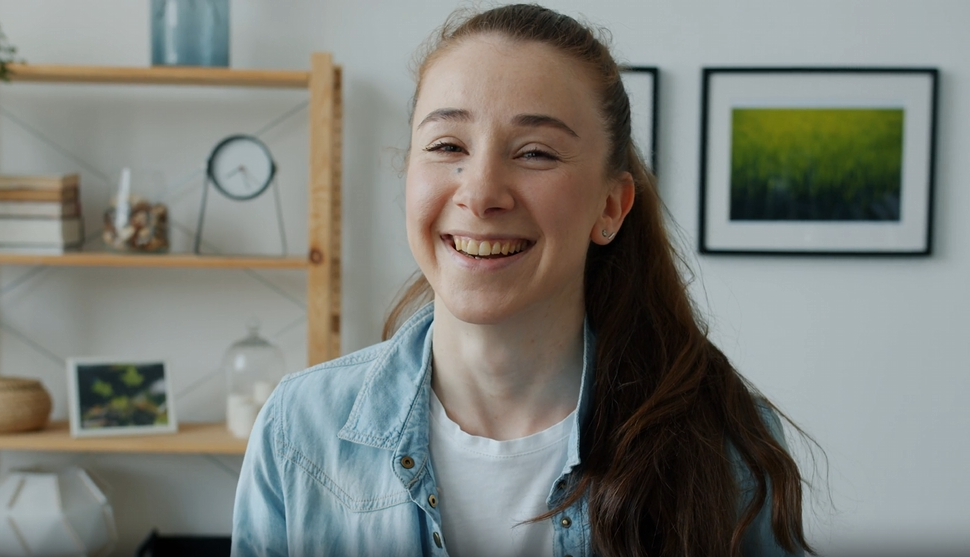
This is what we started with
![]()
And this is what we ended up with.
![]()
As you can see, there's a lot more skin glow and no spot under the eye.
Optics, combined with a photo editor like Adobe Photoshop, can be a powerful blemish remover, and with the right skill set, you can really transform images.
Blemish Remover FAQs: Types of Blemish Elimination
There are different types of blemish eliminations. Some focus on removing imperfections on all natural skin, while others are situational and depend on what the image will be used for.
In certain situations, removing a blemish from a person's appearance can be necessary. For instance, if the director of a marketing campaign desires to select a person who fits the cause, but they have tattoos that may seem controversial with the message, then it is one type of blemish removal that could be implemented.
Another would be to remove acne scars or whiten teeth, which is something that would make the person shown in the photo feel more comfortable and confident about their appearance.
Then, we have red eye correction, which is quite common.
Using the tools we listed in this tutorial, you can do many different types of blemish elimination. Remove pimples, make the skin look more hydrated and "glowy", as well as even remove unwanted objects from a photo.
Final Words
That's about everything you need to know about removing blemishes from photos.
Hopefully, what you learned in this tutorial will help you improve your work in the near future. Good luck and thank you for reading!


