


Taking sharp, precise, clean photos is the goal of every photographer. However, it might happen that your camera doesn’t take images as sharp as you’d like. It may occur for several reasons, including some user error, and it's more common for beginner photographers who are still learning the techniques or don't use a tripod to keep their camera steady.
But if you're 100% sure you’re doing everything right, another cause might be an issue in your lens. To fix this, you will need to do a lens calibration. This process is usually straightforward, and as a photographer, your camera lens calibration should become part of your maintenance routine.
In today's article, you will learn about camera lens calibration, when to perform one, how often, and how to do it yourself to ensure your camera takes sharp photos every time.
Let’s dive in!
What is Lens Calibration?
First, let's talk about how your lens works with your camera. When you take a picture with your DSLR camera, there's communication between your camera's autofocus chip, its focusing sensor, and your lens. When everything is working correctly, you will take sharp images, but sometimes, this communication might need to be more accurate, and that's where problems usually lie.
Camera lens calibration, also called AF fine-tune, AF micro adjustment, or autofocus calibration, is a process to fine-tune your lens when the focus point in your camera is inaccurate, creating blurry photos that are out of focus. In short, calibrating your lens will make your lens and the camera autofocus chip work together and compensate for this miscommunication.
To a certain extent, there's always a slight variation between what you see in the viewfinder and the resulting image, but it's barely noticeable, especially with low-res pictures. However, you must calibrate your lens when this variation is more noticeable.
For modern DLSR cameras, lens calibration can be done directly in the camera. Most mirrorless cameras do not need calibration.
Causes of Blur
There are a few reasons your camera makes your images blurry. You can "naturally" make an image blurry when you shoot fast-moving objects with a slow shutter speed. However, this is often an intentional effect to add motion blur to your photos.
Unwanted blur can occur when you focus on a subject using the viewfinder, but when you see your photo, the focus point is either behind or in front of your desired focus point. When the focus point is in front of the intended focus, it's called front focus, and when it falls behind, it's back focus. It causes the actual subject you're focusing on to be blurry in the final photo and the surroundings (either behind or in front) to be sharp.
This next cause of blur is simple to detect but harder to solve. It's due to an error or bad focusing technique. The good news about this issue is that it only requires you to keep practicing and get familiar with your camera settings to solve it.
How to Tell If Your Lens Needs Calibration
The first sign that tells you you need to calibrate your lens is when you start to see a variation between what you focus on through the viewfinder and where the focus appears on your camera or computer screen. As I mentioned, it could be due to a wrong technique or a mistake during shooting. However, if the issue appears regularly, then it's a good idea to make a quick test shot.
You don't need a calibration tool for now since you first want to be sure the lens requires calibration. Take some pictures of the same object focusing on a static target. You can place similar objects in front and behind the main subject to see where your focus falls.
If you find most of the pictures in your test shots are out of focus, then the best option is to calibrate the autofocus system on your camera.
How Often Should You Calibrate Your Lenses?
This will depend on how much workload you’re willing to invest in your camera and lens. Professional photographers recommend calibrating for regular use at least once every six months to one year. However, what “regular use” means varies from photographer to photographer. So here are some examples of when you will need to perform an autofocus system calibration:
Whenever you notice blurry and out-of-focus images, even with a new expensive lens,
Every six months, if you give them rough use, if you constantly shoot with the widest aperture or shooting under extreme temperatures.
Calibrate every year to adjust the auto focus settings, as the internal parts in the lens might move due to wear, drops, and regular use.
More than a year if you use your equipment occasionally or just for recreation.
How to Calibrate Your Lens
The process is straightforward but requires attention to detail and a controlled environment for a successful calibration. When you calibrate your lens, you are correcting that variance between your camera's focusing and imaging sensor and your lens. Bear in mind you'll need both your lens and the camera body to do the calibration.
What You Will Need
Depending on your time and budget, there are some essential things that you need to have, buy, or create yourself for your lens calibration.
Shoot in a well-lit environment, preferably a room with natural light. You can do it outdoors in a safe place (keep an eye out for rain or windy days) or indoors for a more controlled experience. However, always calibrate with good lighting.
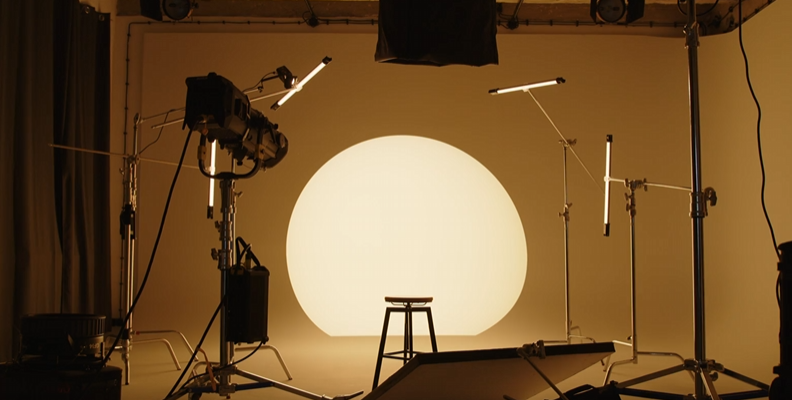
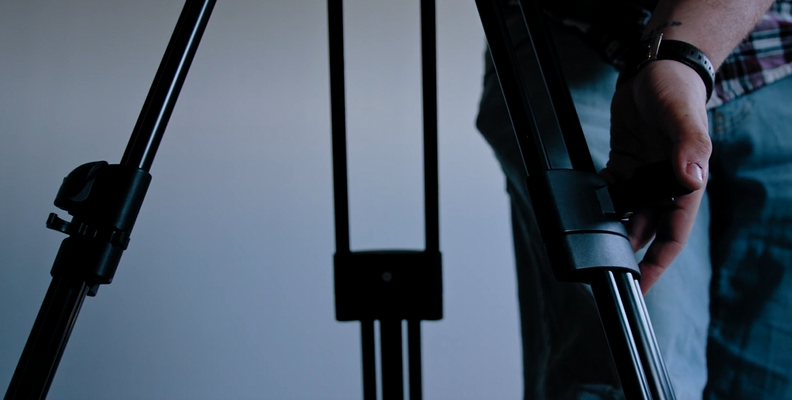
Use a tripod to maintain the stability of your camera. This item is an essential tool for every photographer.
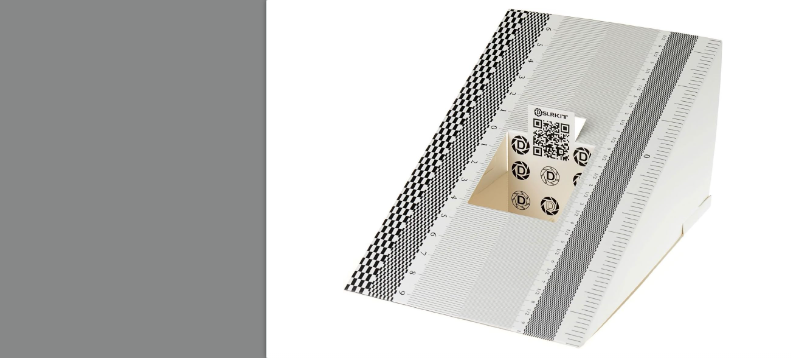
Calibration tools will make your task much easier. You can find different options for calibration tools, such as calibration charts or focus pyramids. You can buy one or get creative with other objects to build your lens calibration kit.
Here are some calibration kits you can buy from Amazon:
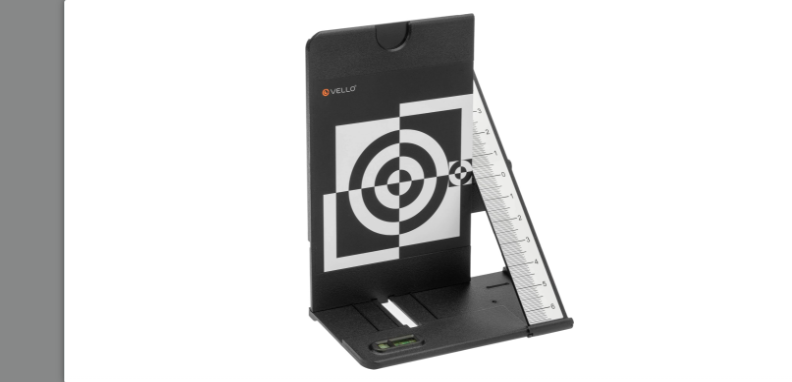
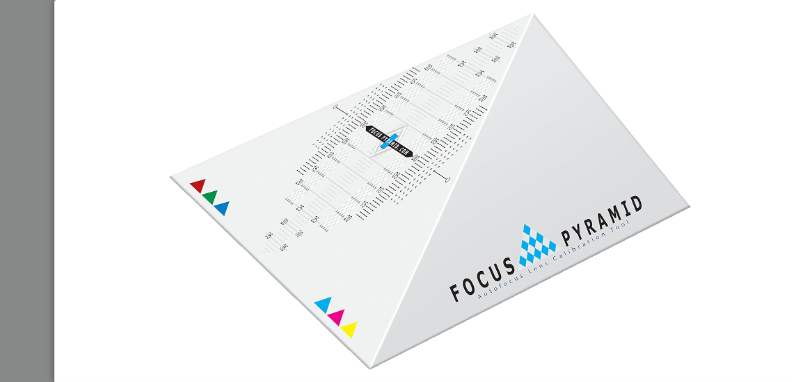
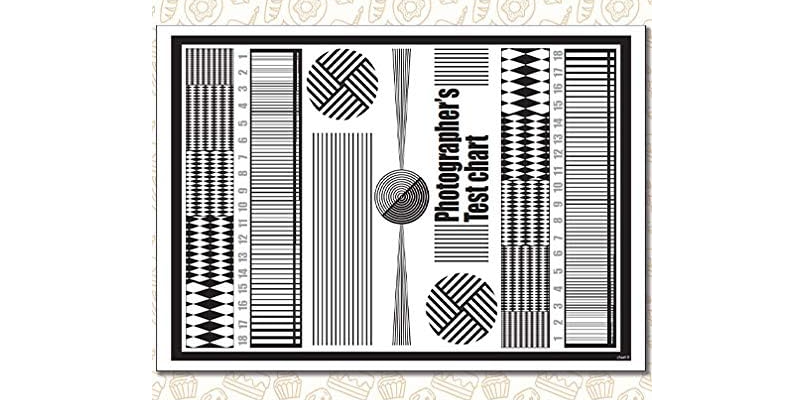
If you want to go the DIY route, you can find printable versions of the chart on the Internet, then place a ruler to its side in angle to find the spot where your camera is focusing. Ensure the calibration chart you use has the measurement marks visible so you'll know where the focus is exactly.
A remote trigger is recommended to take photos and avoid moving the camera once it's set.
Finally, you need a flat and stable surface on which to place your lens calibration kit and camera (if you don't have a tripod) to control any involuntary movement.
Step 1: Find Your Camera Settings
First, you must know if your camera allows you to calibrate lenses. Most cameras do, but you want to ensure before proceeding.
Go to your camera settings. Depending on your camera manufacturer, you may find an option on your settings called "AF Microadjustment" for Canon cameras, "AF Fine Tune" for Nikon cameras, "AF Micro Adjustment" if your camera is Sony, "AF Focus Adjust" for Olympus cameras and "AF focus adjust Pentax" for Pentax camera.
Step 2: Preparing Your Set for Lens Calibration
Place your calibration chart on the table (or any flat surface) and the camera on the other end. They must be leveled and at the same level. Some calibration tools have a bubble level to help you set it up correctly. Use a tripod to keep the camera steady and ensure the calibration tool does not move. If you're using a print calibration chart, place it firmly on another surface, like a book, and ensure the rulers will not fall or move slightly during calibration.
Step 3: Determine if Your Lens is Back-Focus or Front-Focus
Once everything is in place, set your lens to the widest aperture and adjust ISO and shutter speed for a suitable exposure. Using the viewfinder, focus on the center or designated area in your calibration tool and take a photo. Wait to adjust anything in the camera’s autofocus settings yet.
Determine if your lens is currently back-focusing or front-focusing. If your focus falls on the 0 (or your middle point if you're using a regular ruler), your lens is fine, and you don't need to calibrate it. If it falls above 0, then your lens is front-focusing. And if it falls below 0, then your lens is back focusing.
Take multiple images to verify that all photos fall on the same number in the ruler. If you're using your props as calibration tools, ensure there are visible marks that you can reference for back and front focusing.
If you're having problems seeing the focus on your camera when zooming, analyze the photo on your computer. You can use Lightroom or another photo editing software that allows tethering to avoid moving the camera.
Step 4: Lens Calibration
Now, go back to your AF adjustment settings in your camera. You will see calibration values to adjust the focus point from -20 to +20. The process is simple: if the camera lens is back-focusing, you need to adjust it to make it front-focus by moving the chart in the camera to the negative numbers. If your lens is front-focusing, you will adjust the chart toward the positive numbers. Verify your camera's user manual to verify the correct process to adjust front and back focus.
Working with a commercial lens calibration tool will make things easier. The numbers in the ruler represent those on your camera AF settings. Hence, if it lands on number 5 below 0 (closer to the camera), adjust it to +5.
However, if you are using props, the basics are the same. You will need to guess a number in the negatives or positives. You can start, for example, at 10 (depending on how far or close the focus is), take some shots, and keep adjusting, increasing, or decreasing the calibration values on your camera.
Step 5: Adjust and Repeat
The lens calibration process can take a lot of time because you need to take photos of the calibration subject, adjust, shoot more photos, adjust, and repeat. You may find the focus point and adjust it very fast, but most of the time, it will take a few tries to fine-tune your lens and guarantee that your next photo shoot will deliver sharp photos.
Step 6: Adjusting Auto Focus for Multiple Lenses and Cameras
If you have multiple cameras and lenses, you must do this process for each camera and lens combination that requires calibration. The lens calibration process is safe as you don't need to physically open the lens or change something inside it. The adjustments you make are done and saved on the camera and will work perfectly with that camera only.
Alternative Lens Calibration Methods
There are other methods for lens calibration. One option is calibrating via software like Reikan FoCal, but you need to verify if your DSLR camera is compatible with this software. Another one is taking it to your local camera shop or directly to your manufacturer. Still, you usually need to send your lens and camera, leaving you without equipment for some time.
Final Words
It's always good to check your focus system periodically to see if your lens needs calibration when you feel something is off. In this way, you’ll avoid starting a shooting session only to find out the autofocus system is not working correctly.
Remember that learning and using optimal focusing techniques and modes will solve most of the common issues with focusing. Learning to calibrate your lens is a must-have skill for any photographer shooting with a DSLR camera. You'll achieve the best sharp focus photos you can take when properly calibrated.
Have fun!


