Changing the appearance of a digital photo was once a daunting task, but thanks to modern editing software and plug-ins, it's now quite easy to do.
It's no secret that technological advances transformed the world of digital art forever, with tools such as AI, plug-ins, and filters helping artists take their inspiration and work to a whole new level. It even allows someone with minimal experience to give a complete overhaul to photos to create wall art or for a wedding gift.
In this guide, we'll talk about transforming a regular photo into a watercolor painting, so if you're interested in learning how to do this, whether for work or a fun little project, you've come to the right place.
There's quite a bit to cover, so without further ado, let's get into it.
Why Transform a Photo with a Watercolor Effect?
In one of our previous guides, we've explained how to cartoonize a photo and what the possible benefits of doing so could be. We've also talked about converting a photo into a charcoal drawing.
When it comes to transforming photos into beautiful watercolor paintings, besides the obvious desire to do this due to aesthetic reasons, if you're a fan of the style, there are a few other potentially interesting benefits that we can get into.
One good example would be adjusting the art style to match the project you're working on. For example, suppose you're making a stylized video game and want to use pictures of a specific location. In that case, you won't be able to implement them in their original style, as it simply won't match the game's aesthetics. Converting them into a watercolor painting first, however, will be a much better way to do it.
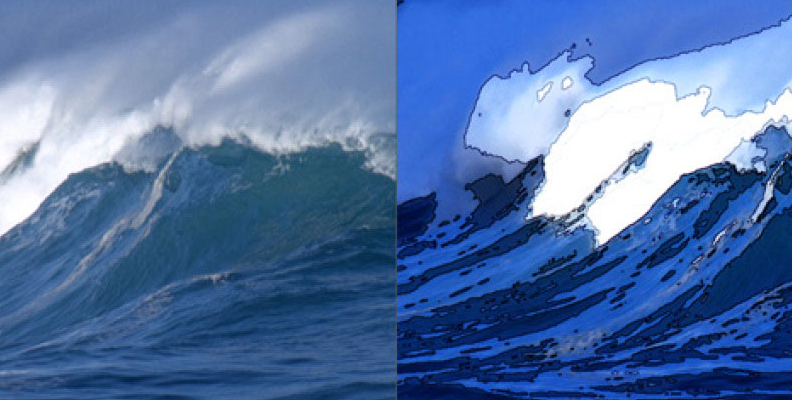
Another example would be the fact that using a watercolor effect on your original digital image will make it timeless. Watercolor paintings have a unique, aesthetic style that doesn't go out of fashion. It's the same as with every other stylized content with a specific, unique set of visuals.
Using watercolor filters to transform your photos will also allow you to express yourself uniquely. Every artist has a unique style that others recognize their work by, and modern tools that allow you to convert photos into something entirely different also offer a lot of customizability. You can create a look that has a specific feel to it, marking it as your authentic style.
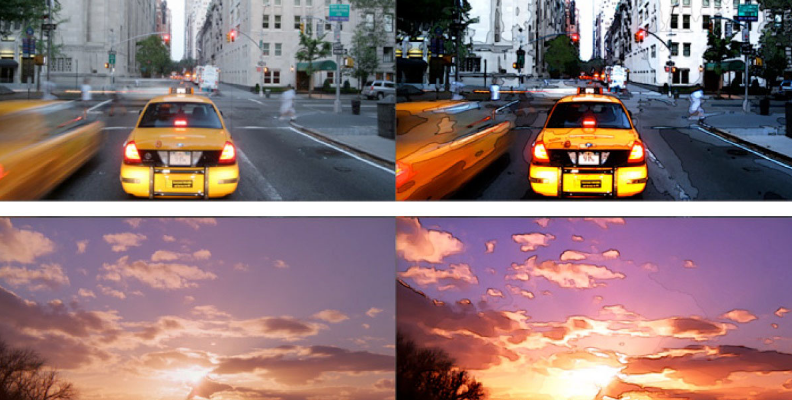
Last but not least, if you're trying to become better at editing photos, it's important to be familiar with all the possible ways you may need to work on an image. If a client requests such changes, it's much better if you've previously experimented with watercolor effects and are already familiar with the process.
With that said, let's take a look at the next section where you'll learn how to turn portraits, landscape photos, wall art, or images of just about anything into watercolor art with an easy to use watercolor effect.
How to Turn a Photo into Watercolor Art with Optics's S_Brush
There are numerous ways to transform photos into watercolor instantly. With the S_Brush filter, you can instantly transform photos into something completely different than what they originally were, such as an oil and watercolor painting, or a chalk drawing.
Optics is a plugin for Photoshop and Lightroom that allows you to add artistic effects to a photo and enhance your artwork with a single click.
Using the Optics S_Brush filter to create a watercolor painting effect feels like magic. With one click on a preset, your photo can turn into beautiful watercolor art.
For this example, we'll be using Adobe Photoshop.
Here are the steps you need to follow:
- Open Photoshop, Create a New Project, and Import an Image:
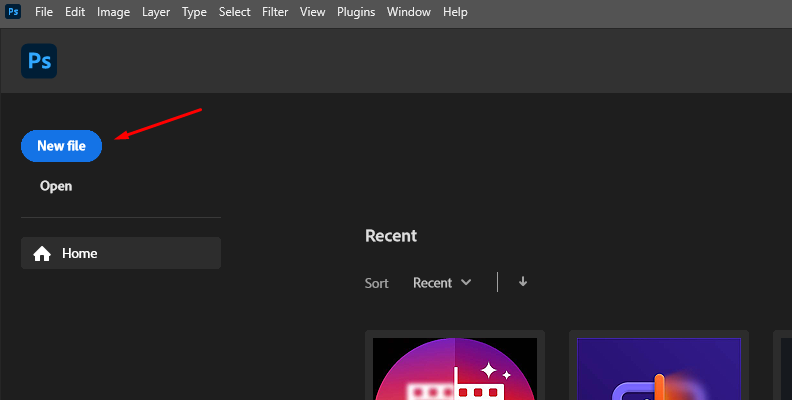
Launch Photoshop, then click "Create New".
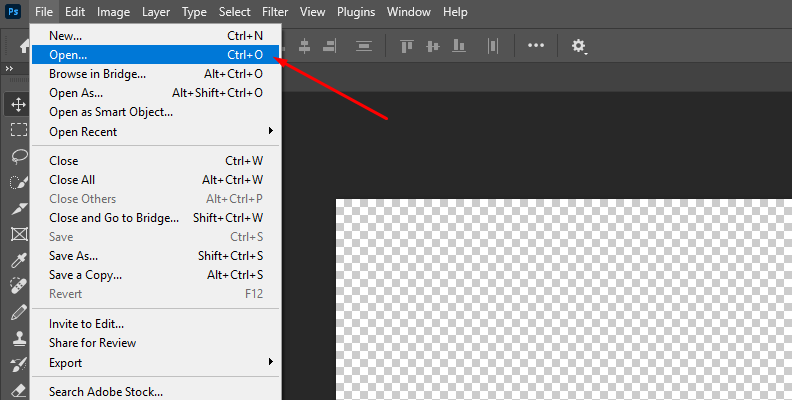
Import a photo into the document by navigating to File > Open.
- Search for the Optics Filter and Apply it to the Image You Imported:
Before adding Optics, right-click the layer and convert it to a smart object to make nondestructive changes to the original photo. Then, head over to the "Filter" menu and search Boris FX > Optics.
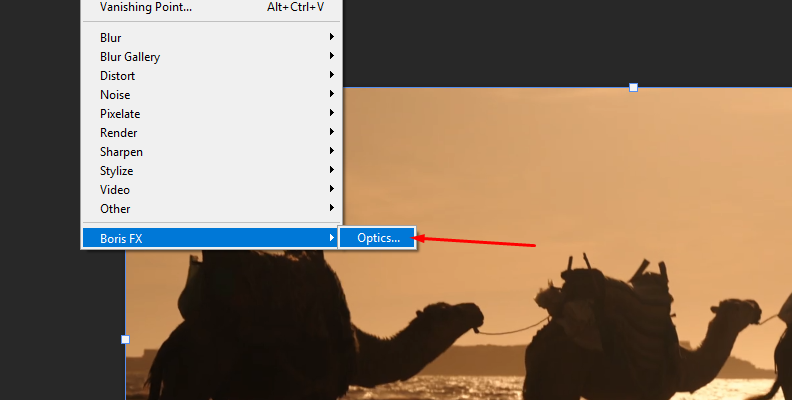
- Apply S_Brush to create the Watercolor Effect:
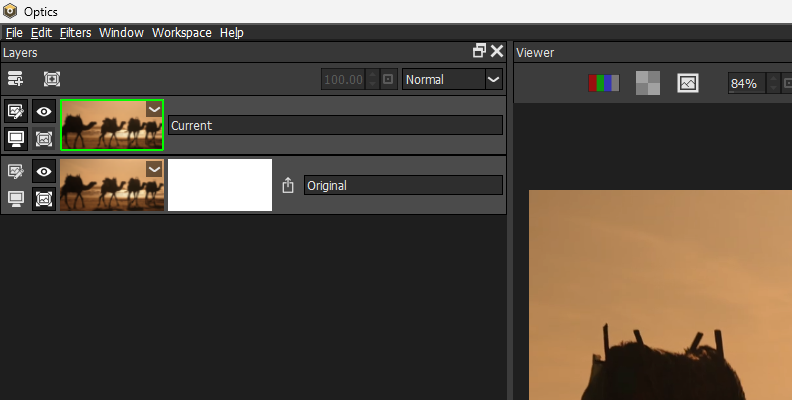
Once inside Optics, you should have the original photo and a copy in another layer. Select the current layer and search for S_Brush in the filter's browser at the bottom center of the screen.
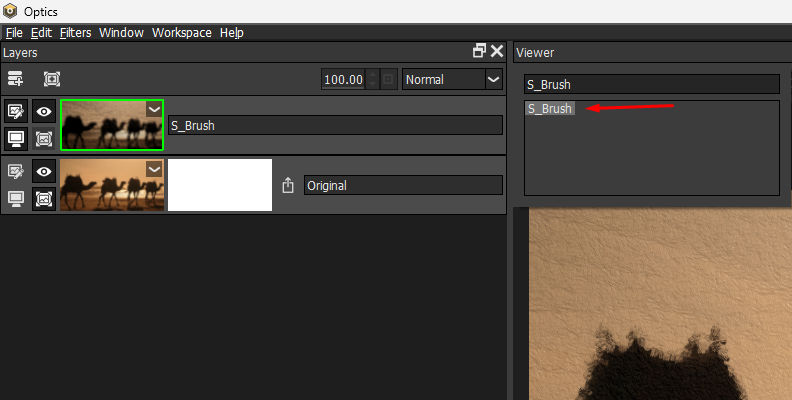
You can manually browse it under the Stylize category. When you find it, just click on it to apply it to the current layer.
You can choose a preset from the left panel.
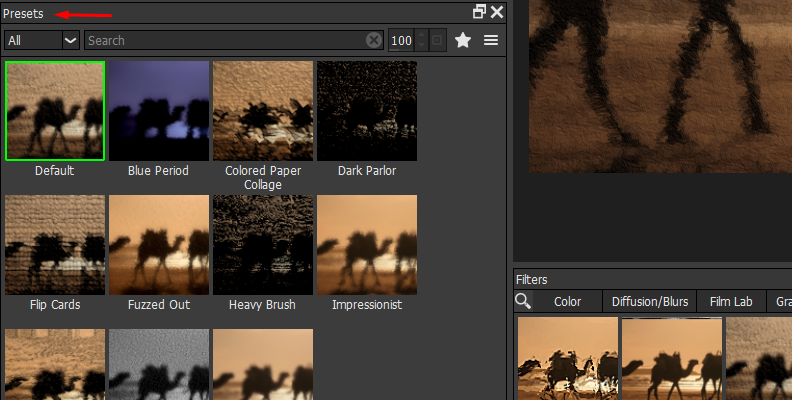
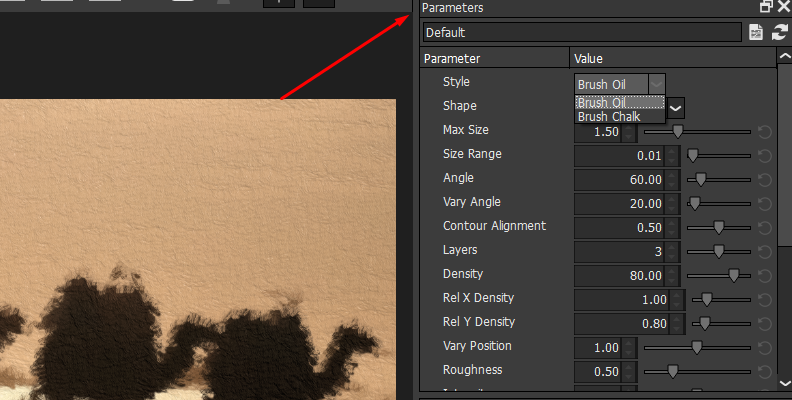
To craft watercolor effects, select a Style. Use Brush Oil for a painting look or Brush Chalk for a drawing look. For the final watercolor touch, use the Watercolor shape.
Adjust the size, angle, density, and intensity of the brush to customize the image.
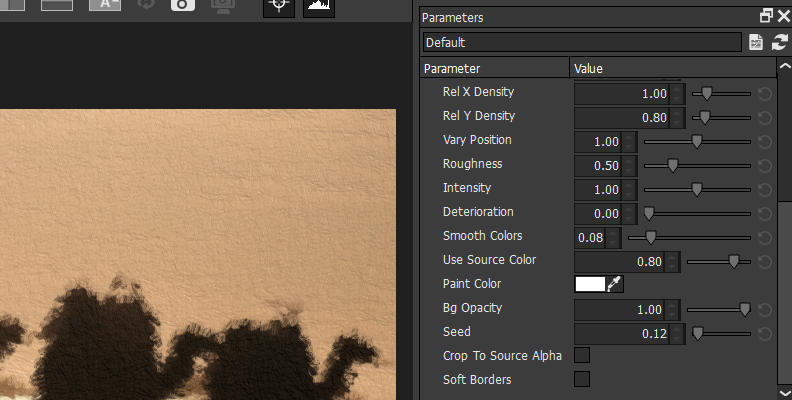
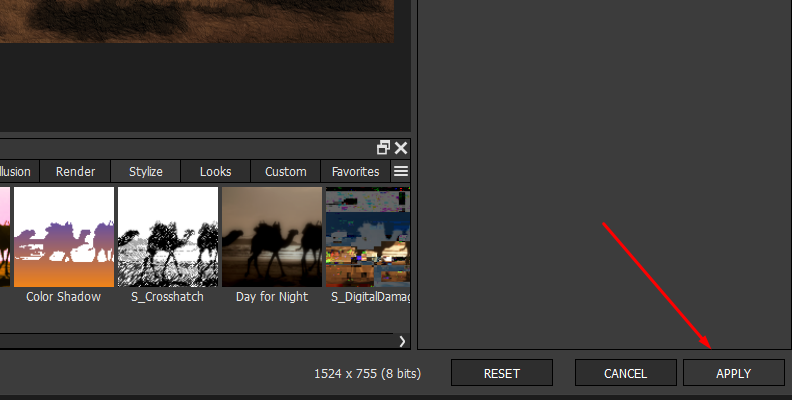
Once you're satisfied with the results, click Apply to export the image to Photoshop.
Here is our before and after with just the simple application of a preset:

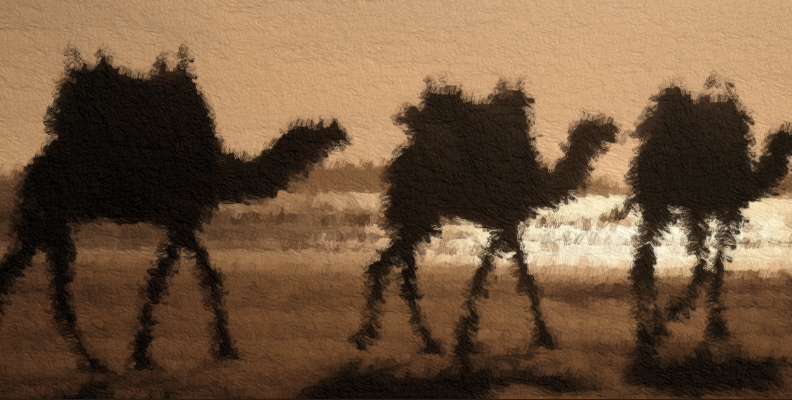
That's all there's to it to turn photos into watercolor.
3 Best Apps to Turn a Photo into a Watercolor
There are quick and easy ways to turn a photo into a watercolor art piece that require you to simply upload the images to the service, adjust a few settings, then click save and be done with it.
However, due to the overly saturated search results page, it may be difficult to find the ones that are worth looking into.
This is why we've decided to help you filter out and choose.
Our Choices:
- Waterlogue App:

This is a fun app that's already quite popular on the iOS operating system, made by Tinrocket, and has a desktop version available for you to try if you don't have a mobile Apple device. It works great and is well-rated by the community.
- Befunky Photo Editor:

Befunky is an online photo editor with a well-designed, user-friendly interface, offering a myriad of effects and a watercolor filter to apply to your photos. It does require you to register an account for the best possible experience, but also allows a tryout as a guest.
- Fotor Online Editor

Fotor is another popular online photo editing app that you can use for free for various purposes, including adding a watercolor effect to an image of your choice. The interface is simple and would allow anyone without advanced photo-editing knowledge to complete this task.
Final Words
Knowing how to create artistic watercolor paintings using a watercolor effect within editing software is so much fun and useful, offering endless possibilities once you know how to do it correctly.
Whether you're working on an art class project or just looking to learn, the methods shown above will help you achieve your goal.
Thanks for reading, and we wish you good luck on all of your future projects!


