


Have you ever recorded a video thinking everything went by the book, only to find an anomaly in the recording that is now a very expensive problem to solve possible only through re-shooting? If so, you are not alone.
Luckily, we have modern, sophisticated post-production tools that allow us to fix such issues without having to recreate the whole recording set, which in most cases is impossible.
In this guide, we'll talk about light flickering, what it is, and why it could occur in some videos. Most importantly, we'll help you learn how to fix it using BCC Flicker Fixer, a helpful tool that's part of the renowned Continuum creator pack by Boris FX.
If you've recently recorded something and it has flickering lights that are quite obvious to the viewer's eye, you'll find the solution in the sections below.
We have lots to cover, so without further ado, let's get straight into it.
What is Flickering?
In videography, the term light flickering is used to describe the constant change of light's brightness and intensity within the footage. The fluctuations can be distracting to the viewer's eye and often leave an impression of a lack of professionalism.
Sometimes, the light flicker within the shot can be very intense, so much so that the material is borderline unwatchable, especially if it's a more serious topic during which the viewer needs to focus on important details, a story, or something similar.
Both aesthetically and functionality-wise, flickering is an issue when present within your footage. That said, let's take a look at the main reasons flicker occurs in your recordings so that you can prevent it on time.
Reasons Your Lights Flicker on Camera
The reason you see light flickering on camera is often due to the mismatch between recording frame rate and the frequency of the lights.
For example, lights that do not provide constant illumination, such as LEDs, are often known to cause flicker within footage. This is because they work on alternating current or "AC" for short, and based on the current's frequency, they flicker at a specific rate/interval. If this is not well synchronized with the camera's frame rate, it shows up as a light flicker in the final product.
There are other reasons for seeing light flicker in your videos too, such as a mismatched shutter speed that's not properly aligned with the light flicker frequency, or what's called a "natural flicker" that can occur when clouds are passing and obstructing the light, or other environmental conditions. Although this type is rarer and more gradual, it's still something that can be noticed on film.
Another, even rarer cause of light flickering is an issue with the power supply. In areas with slightly more unstable power grids, the power supply can change, and this can cause fluctuations in the light source's intensity, which can end up looking like a flicker in your recordings. This is not the same type of flicker that can be prevented by adjusting settings on your camera and is usually more difficult to deal with.
Preventing Flicker on Camera
If you want to know how to stop light flickering in video material you record, the first step is to address the cause.
For example, if you're getting LED lights flicker from recording under LED artificial lightning or any other type, such as fluorescent lights, your first step would be to get informed about the frequency of the electrical supply in that area. If it's 60 Hz, you need to use a framerate that's a multiple of 60, such as 30 fps or 60 fps, for example. If it's 50 Hz, 25 fps or 50 fps would work.
You can also adjust your shutter speed based on this information.
Another way of preventing the flickering effect from showing up in your footage is by investing in a flicker-free light source for your scenes where you require artificial lighting. You can avoid LED light flickering without adjusting shutter speeds or frame rate camera settings simply by purchasing lights that were designed to work without flickering.
Regarding natural flickering, your best bet would be to plan your sets based on the weather information. Try to shoot on days when there aren't many changes and the sky is clear. This way, you'll get "stable" natural lighting.
How to Stop Light Flickering in Video
You can stop light flickering in video by adjusting your shutter speed to roughly double the frame rate at which you record, setting the frame rate to a multiple of the electrical supply's frequency in the area you record, and investing in flicker-free lights if you must record under artificial lighting.
How to Stop Light Flickering in Your Videos With BCC Flicker Fixer
Now, if you've already recorded all your material and noticed flicker, whether due to misaligned frame rates or power frequency issues, it's likely too late to work on prevention unless it's a smaller project and you can re-shoot easily.
In such cases, what was recorded through the camera lens is now locked and sent to post-production.
The next step here is to try and remove the flicker using BCC Flicker Fixer, an effect that's part of Continuum by Boris FX, along with hundreds of other filters, effects, transitions, and more.

Please note that Continuum can be used with all popular video editing programs, such as After Effects, DaVinci Resolve, Avid, VEGAS Pro, Premiere Pro, and more.
For this specific example, we'll use Adobe Premiere Pro, but you can do this in any of the other above-mentioned programs.
That said, here's what you need to do:
Step 1: Launch Adobe Premiere Pro and Create a New Project
Your first step is to launch Premiere Pro on your PC and wait for it to load. Once it does, use the "New Project" button on the home screen to create a new, empty project file.

Step 2: Import Media and Create a Sequence
The next step is to import media. Once you create a new project file, you need to import media, which in this case are videos that have flicker.
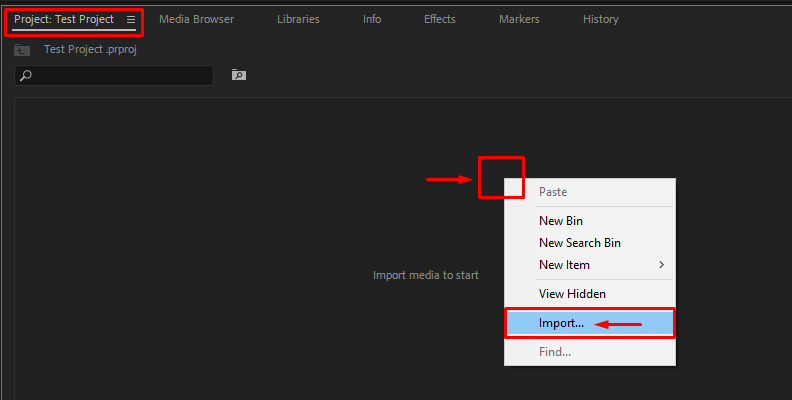
To do this, go to the "Project" tab and right-click on an empty area near the box where it says "Import media to start" as in the image below.
Then, choose the "Import" option from the menu.
Find the video files on your computer and import them within Premiere Pro.
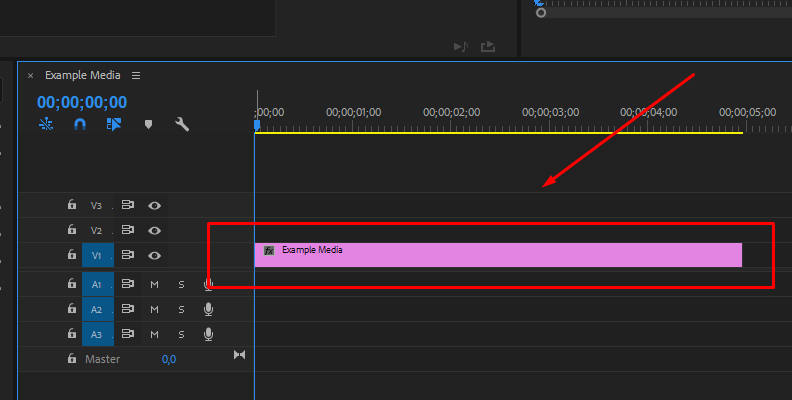
When done with that step, you need to create a sequence/timeline from the files you just imported. To do this, simply drag the file(s) from the "Project" tab over onto the timeline/sequence area.

Now, you should see your video clip on the timeline.
Step 3: Apply BCC Flicker Fixer to Your Video
Since we now have a sequence/timeline, we need to find the BCC Flicker Fixer effect and add it to our video.
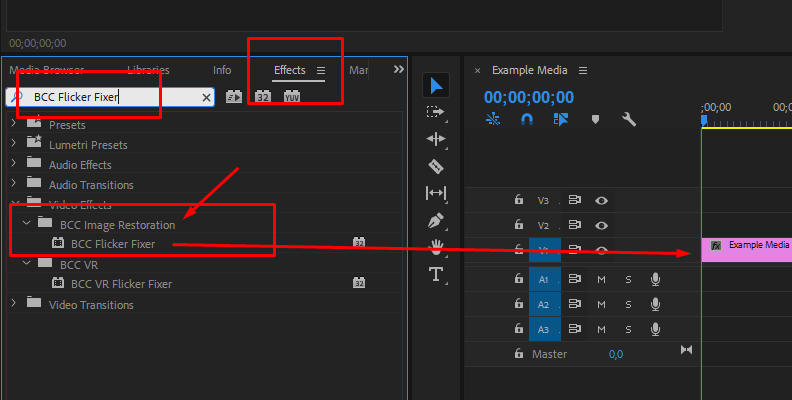
To do this, head over to the "Effects" tab and use the search bar to type in "BCC Flicker Fixer". If Continuum is properly installed on your PC for Adobe Premiere Pro, you'll see the effect listed under the BCC Image Restoration folder.
Simply drag and drop the effect over the video on your timeline.
Step 4: Modify/Adjust Settings Until You Get Satisfying Results
Now, the final step is to open the "Effect Controls" panel located in the top-left corner of Premiere Pro and change settings based on your project's requirements.
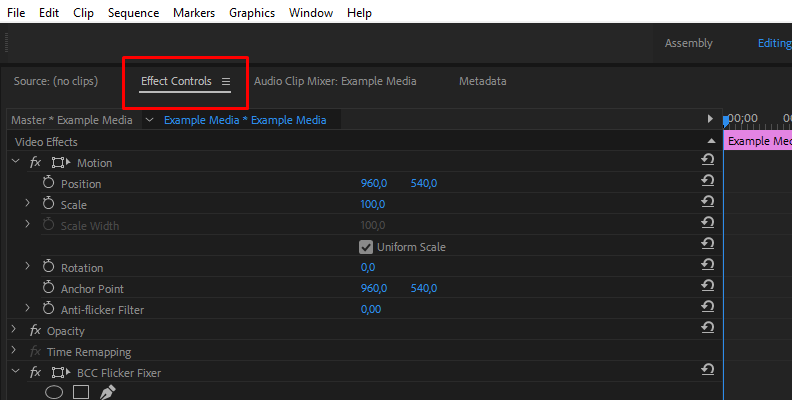
Once you open the Effect Controls panel, you'll need to scroll down a bit and find the effect's settings and parameters.
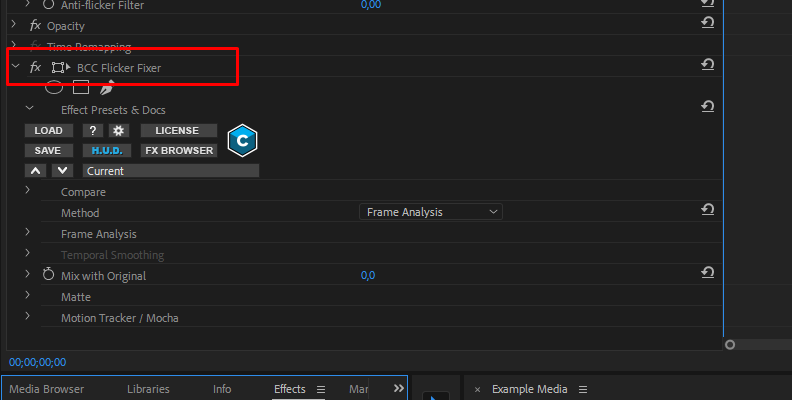
For the method, select Frame Analysis if your flicker is uniform throughout your clip, like with shutter speed or aperture issues. You should select Temporal Smoothing if you're footage has flickering lights that vary throughout. Temporal also works great with clips that don't have fast moving objects in them.
Once again, don't forget to check out the official webpage for the BCC Flicker Fixer effect where you can read more in detail about every available setting this effect has to offer.
Fine-tune and adjust until your project is free of any light flicker issues. When done, save the project, then simply render and export.
That's all there's to it!
Final Words
You now know more about the light flicker effect, why it happens, how to prevent it, and most importantly, how to fix it in post-production when re-shooting the scene using our prevention tips is simply impossible or way too costly.
Hopefully, this will help you with all your future work.
We wish you the best of luck and thank you for reading!


