


Recording videos nowadays happens mostly with smartphones, and since that's not a professional setting with all the equipment required to produce professional footage. The result is often shaky, and it's obvious that it came from an amateur, handheld recording device.
We rarely want to post footage on social media or anywhere else on the internet without refining it first, so when we end up with shaky footage, the first thought that comes to mind is how to fix it.
Fortunately, modern technology makes the task of stabilizing shaky footage seem not so daunting at all.
In this guide, we'll help you learn the best way to stabilize shaky footage and achieve smooth motion for your videos using Premiere Pro, one of the most popular video editing programs.
Without further ado, let's get into it.
Why Do We Need to Stabilize Video in Premiere Pro?
The reason for putting the effort in to stabilize any video material we record is often clear. If we end up with shaky video footage, it can look unprofessional when shown to clients or used for work. Or, if used for entertaining purposes, it could make the viewer lose attention due to the constant camera motion caused by unstable hands.
Even on social media, we want our posts to look as refined and professional as possible, especially when used for a business or brand page.
Additionally, we stabilize footage for cinematic purposes, such as when we want to make it seem like something was recorded with a drone that flies in a straight line, or when a stable and smooth shot simply matches the atmosphere of the movie.
Applying a warp stabilizer effect to your footage has many benefits, and regardless if you need it for a quick video or for a real project you're working on, it's useful to know how to do it properly.
In the following section, we'll talk about adding a warp stabilizer effect to your footage in Adobe Premiere Pro, so if you're looking to smooth out camera movement and avoid camera shake, here's how to do it.
How To Stabilize Video In Premiere Pro For Free
Adobe Premiere Pro is one of the most popular video editing programs, offering a set of tools needed to turn any amateur video material into professional-looking footage.
Within the Adobe Premiere Pro effects panel, there's a warp stabilizer effect that's available for free, and we'll be using it in the following step-by-step tutorial for stabilizing footage.
Here are the simple steps you need to do:
Import Media Within Adobe Premiere Pro and Create a Sequence
Once you have the recorded video material (your shaky footage) on your PC, it's time to load up Adobe Premiere Pro and lay the foundation of your project.
The first step is to import the footage that needs a warp stabilizer within the software. To do this, click on the "Project" tab in Premiere and right-click an empty area where it says "Import media to start" to bring up the menu shown in the image below.
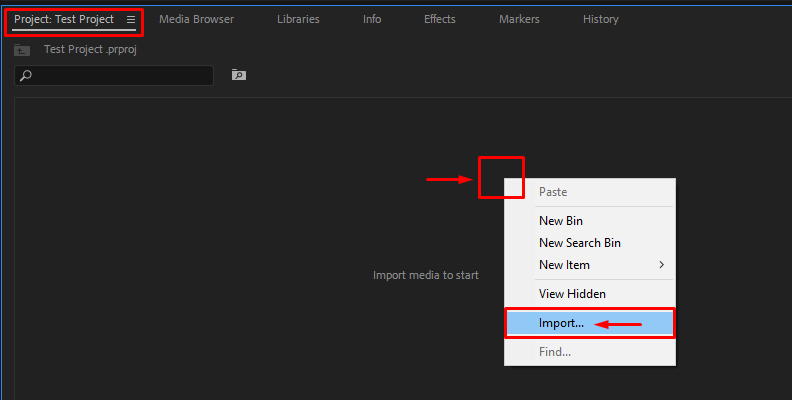
From here, click "Import" and choose the file(s) you wish to work on to add them to the project.
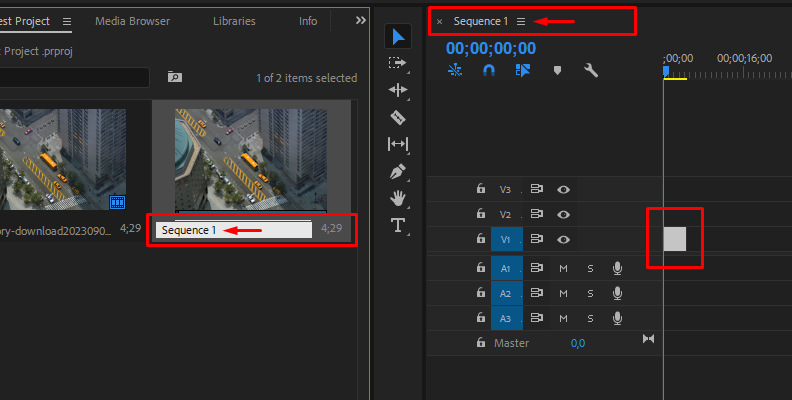
This will create a sequence. You can rename the sequence for better project organization or leave it as it is and continue working on your footage.
Apply The Warp Stabilizer Effect to Your Footage
Now, you can apply a warp stabilizer effect to your footage since your videos are laid out on the timeline.
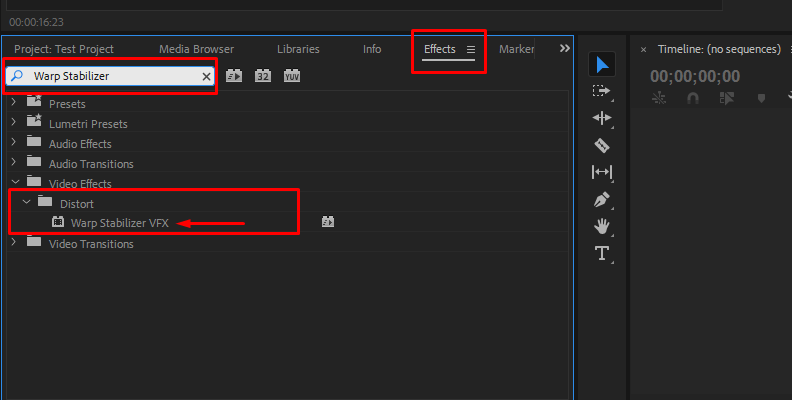
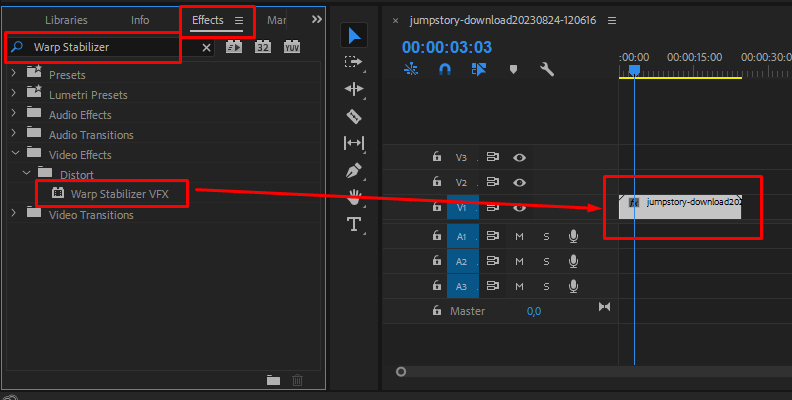
Select the clip you want to stabilize first. Next, in the Effects panel, choose Distort › Warp Stabilizer. Then, apply the effect by double-clicking or by dragging the effect to the clip in the Timeline or the Effect Controls panel. Analysis of the clip begins immediately in the background after the effect is added.
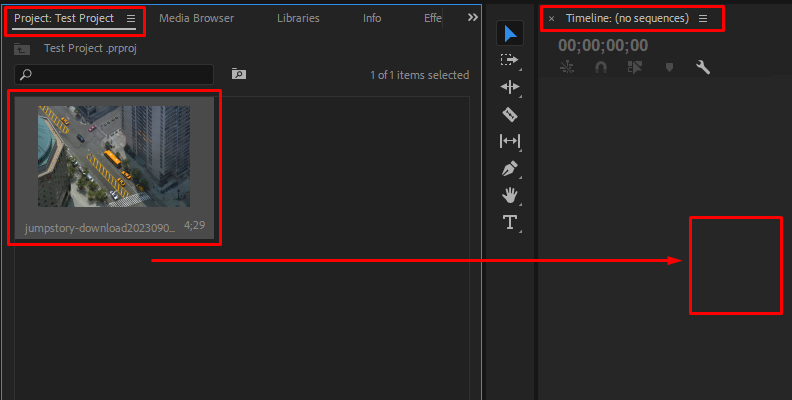
Simply drag and drop the video footage from the "Project" tab to the timeline area, as shown in the image below.
Drag and drop the warp stabilizer over the video you want to stabilize.
You'll notice that Premiere will start working in the background, and you'll see the "Analyzing" message over your video, as shown in the image below.
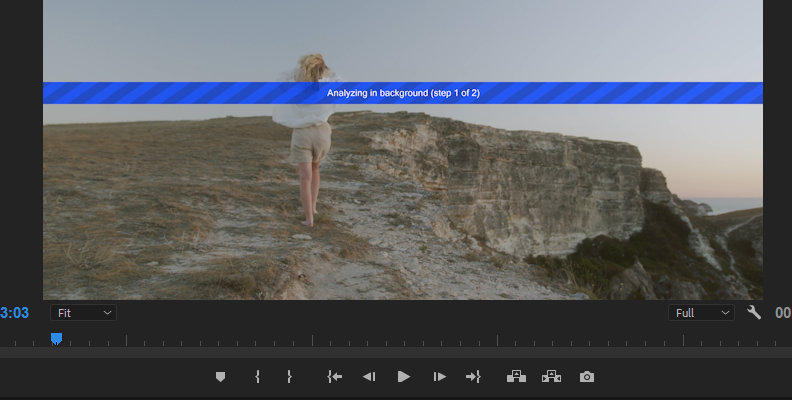
This could take some time (based on how long the video clip is and the performance of your computer) and you can preview the progress in the Effect Controls panel.

Once done, you will immediately notice a smooth motion effect when you play it back for preview.
However, this is far from what the maximum potential of the warp stabilizer is.
Modify The Effect Parameters and Preview The Results
The last and final step of this process is to fine-tune the warp stabilizer using the Effect Controls panel and the advanced settings offered so that you end up with the best possible result for your project.
To do this, access the Effect Controls panel by clicking on it, then expand the warp stabilizer settings by clicking on the arrow next to the effect.
Here, you can choose to have smooth motion or no motion at all, depending on whether you want the original camera movement to be retained, the method to use, like subspace warp or perspective, the rolling shutter ripple setting, whether to use automatic reduction or enhanced reduction, and much more.
In the "Framing" setting, you can choose "stabilize only" to see the entire frame and what the stabilizer is doing to enhance your footage without it automatically cropping and auto-scaling it.
Test out different combinations of settings on the same clip to see what works best. When done, save and export your footage.
That's really all there's to it!
Stabilize Video and Fix Shaky Footage With Boris FX Continuum
Plug-ins make the work of every editor much simpler and easier. They also provide a lot more presets and customization options to help you fine tune your footage compared to the default effects that come free with the software you use.
Continuum is a renowned plug-in used by many professional studios and independent editors, and amongst the many other effects, it offers a professional stabilizer that you can use in Premiere Pro to make your footage have less camera shake.
A free trial version of Continuum is available for download at the official Boris FX website. Once you download and install the Continuum pack for Adobe Premiere Pro, the rest of the process is simple and straightforward.
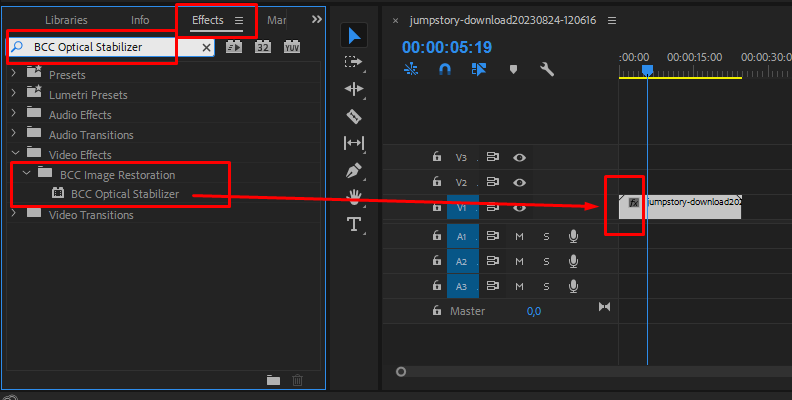
Apply the BCC Optical Stabilizer
You can apply a stabilizer by following the exact same steps from the previous section, except now you'll use the "BCC Optical Stabilizer" effect that you can find under the "BCC Image Restoration" folder within Premiere.
Once you apply the effect, you'll need to click the "Click to analyze" button in the Effect Controls panel and wait until the process is complete to see the changes.
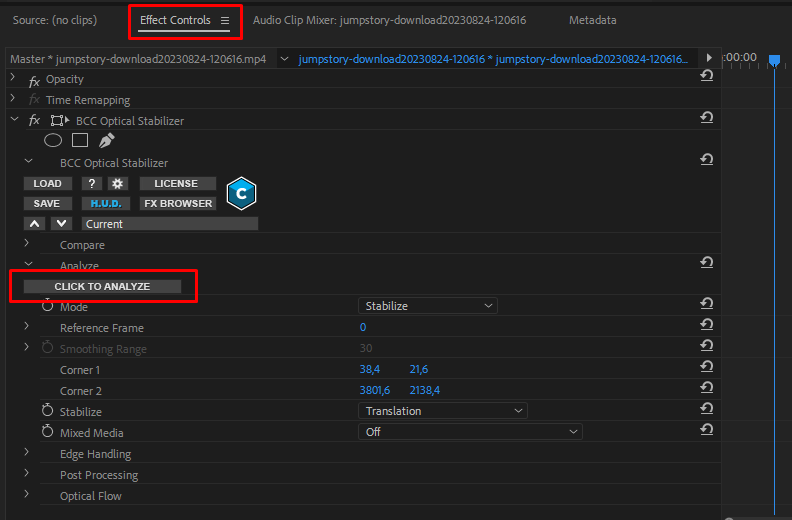
The process can take some time, but you can track the progress for each frame, as shown in the image below.
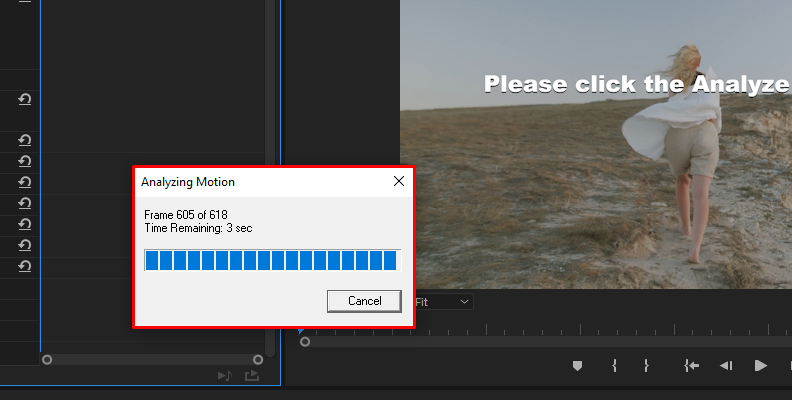
When done, you should see immediate changes to your video.
Customize Your Settings
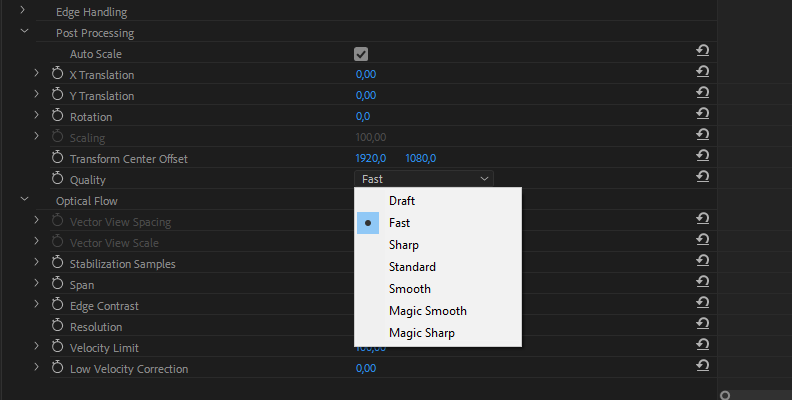
If you want more than what this effect's default settings have to offer, there's a lot of customizing you can do within the Effect Controls panel. Boris FX's plug-ins are known for extensive customization panels, and the case is no different for this specific effect.
You can add post-processing, modify parameters within the optical flow category, and much, much more to get the best possible result for your project.
Try different combinations of settings to see what works best. You can also save and load presets, as with most Boris FX effects, which can make future work much easier and effortless.
Tips and Tricks to Avoid Shaky Video
Achieving stable footage begins with proper filming techniques and equipment usage. Here are some tips and tricks to help you avoid shaky and unstable footage when recording:
Invest in Image Stabilization Technology
The simplest way to ensure stability is by mounting your camera on a tripod or monopod. This eliminates handheld shakes and provides a steady foundation for your shots.
Choose cameras or lenses equipped with optical or in-body image stabilization. This technology compensates for small movements, reducing the impact of shakes during handheld shooting.
Consider using a three-axis gimbal stabilizer for dynamic shots. These devices allow smooth camera movement while counteracting unwanted shakes, providing professional-looking results.
Maintain Proper Posture
When shooting handheld, maintain a stable stance with your feet shoulder-width apart. Keep your elbows close to your body to minimize unintentional movements.
Smooth Movements
Practice smooth panning and tilting movements. Avoid sudden jerks or rapid motions, as they can introduce instability into your footage.
Control Your Breathing
If shooting handheld, focus on your breathing. Take deep breaths and exhale slowly to minimize the impact of your natural body movements on the camera.
Slow Zooms and Focus Pulls
When adjusting zoom or focus, do so slowly and steadily to avoid sudden movements that can introduce shake. Also, avoid shooting with lots of zoom, as the more zoomed in your camera is, the easier it will detect every slight movement of your body. Learning to fine tune these skills will make a big difference.
Weighted Rigging
Add weight to your camera rig to increase stability. This can be achieved through the use of counterweights or by attaching additional accessories to create a more balanced setup, which will reduce the amount of post-production work you need to complete.
Final Words
That's everything you should know about the best way to stabilize your footage in Premiere Pro, one of the most widely used editing programs.
Hopefully, this will make your future work look a lot more professional.


