


Any skilled video editor should know how to stabilize shaky video footage! But if you've just entered the world of video production, DaVinci Resolve offers different stabilization modes that deliver a quick and easy way to fix shaky videos.
Today, I’ll show you how to stabilize shaky footage in DaVinci Resolve, first by using its stabilization feature and a second option using Mocha Pro from Boris FX.
Let’s dive in!
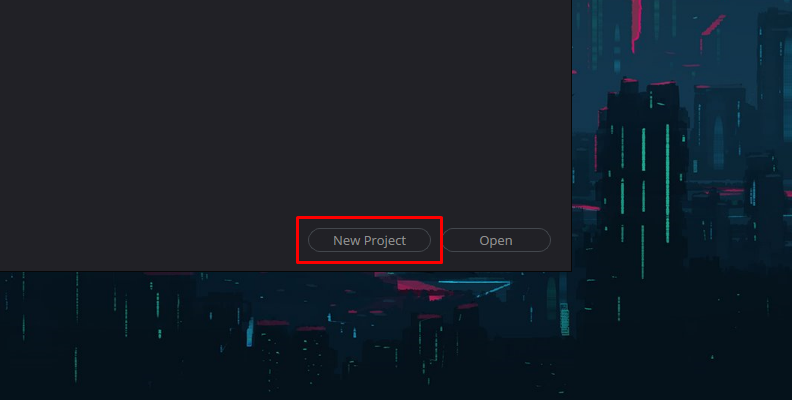
How to Stabilize Video in DaVinci Resolve
The most straightforward way to stabilize your footage is to import it into your timeline and select it. Then, head over to the inspector window and scroll down to the bottom. You'll see a submenu named Stabilization, which contains various stabilization modes. Simply open this submenu to access them.
There are three methods to stabilize video footage in DaVinci Resolve: the Edit tab, the Color tab, and the Cut tab.
Method 1: The Edit Tab
This method is the most used because it’s intuitive and fast and gives you some control over the stabilization process. Although its settings offer a good solution for stabilization, it may be limited to advanced users who want more control.
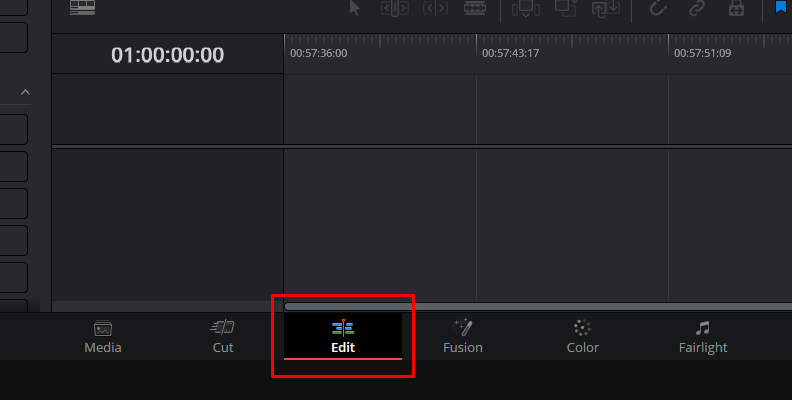
Step 1: Switch to the Edit Page
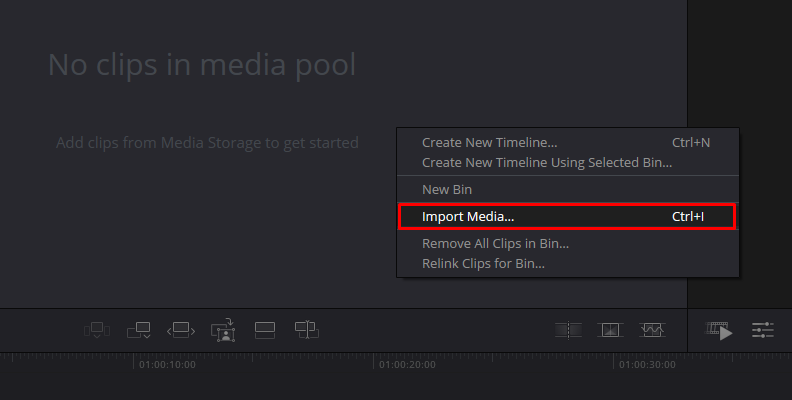
Drag your shaky video from the media pool and switch to the Edit page. If you don't have the pages at the bottom of the screen, enable them from Workspace > Show Page Navigation. You can use Shift + 4 if you like using keyboard shortcuts. The Edit page is the third one from left to right. You'll see each page name if you hover the mouse over each icon.
Step 2: Stabilization Menu
Select the clip with the footage you want to stabilize from the timeline. Then, open the inspector window to access more settings. It should be on the upper left of your screen. In the inspector, ensure you’re in the video tab and scroll down until you find the Stabilization option. Click on Stabilization to display its settings.
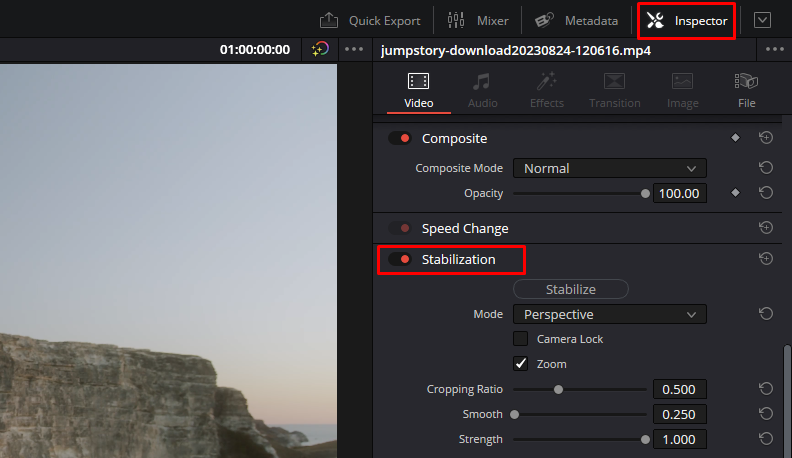
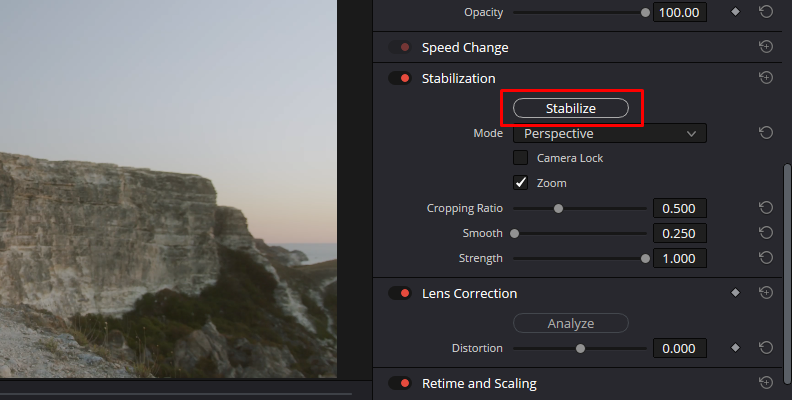
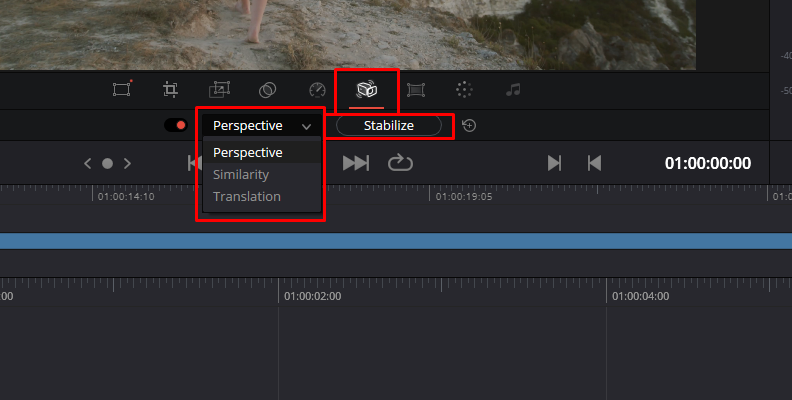
Step 3: Stabilization Modes and Settings
DaVinci Resolve offers three stabilization modes depending on your video footage.
Perspective. The default settings are set to Perspective, which analyzes the jitter in your video footage and uses pan, tilt, zoom, and rotation to stabilize the video, maintaining perspective.
Similarity also uses pan tilt, zoom, and rotation analysis. When the default Perspective mode gives you unwanted motion artifacts, you can use this mode.
Translation is the best option when there's little movement only to the sides in an X and Y area, as it only uses pan and tilt analysis.
Under the modes, you can select to enable Camera Lock, which will simulate using a tripod to eliminate shakiness. The Zoom function hides the black bars caused by the stabilization.
When Camera Lock is not enabled, you can fine-tune the stabilization with the three more settings: Cropping Ratio to determine how much of your footage will be cropped, Smooth when you don’t want the stabilization to be aggressive, keeping some movement, and Strength determines how much stabilization will be applied to the video footage.
Step 4: Stabilize Your Video Footage
Click Stabilize once you've set your settings to analyze your video footage, and DaVinci Resolve will identify the shaky movements from the video and remove them. Once the progress bar is complete, replay the video to see the result and adjust the settings to find the best result. Click the Stabilize button each time you make changes to preview them.
Method 2: The Color Tab
Now, we'll use the tracker on the color page to stabilize your footage.
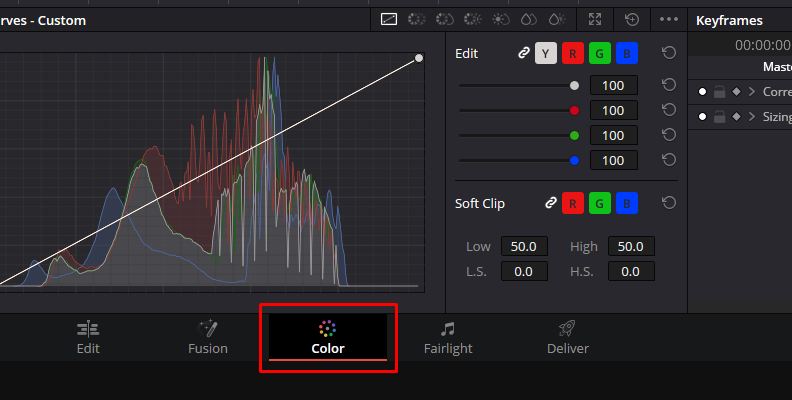
Step 1: Go to the Color Tab
The first step is going to the Color page. Remember, you can enable pages from Workspace > Show Page Navigation. The Color tab is the third one from right to left, and its icon is a color wheel. You can also press Shift + 6.
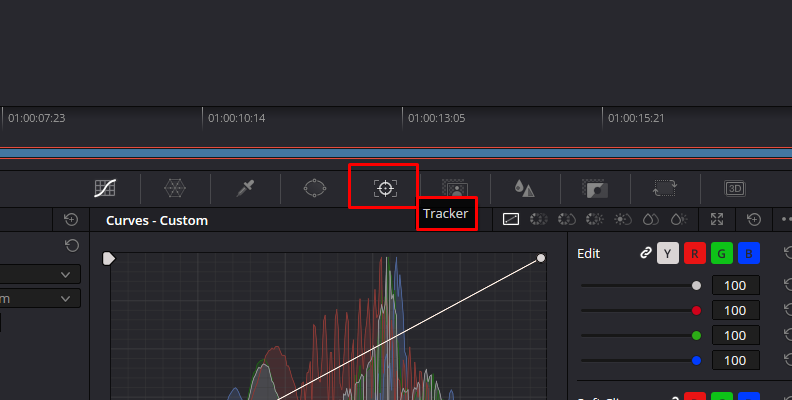
Step 2: Open the Tracker Window
Under the preview, you have a panel with tools. Find the icon with the target to open the tracker window. Click the shaky video camera icon between the Window and FX icons.
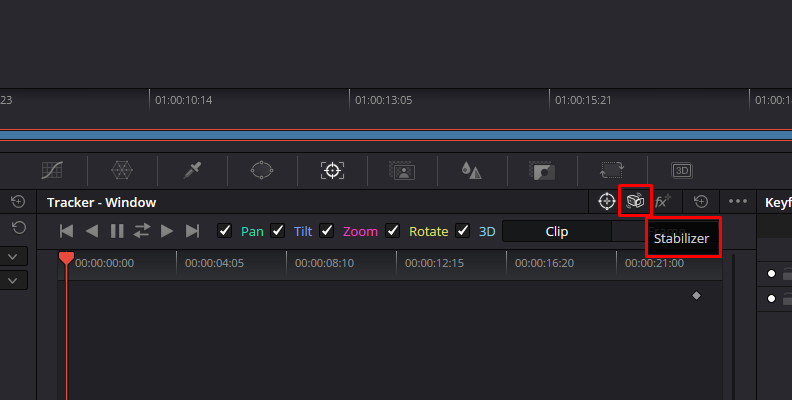
Step 3: Stabilization Options in the Tracker Window
In this window, you’ll find the same settings as the ones in the Edit tab. At the bottom, you have Crop for Cropping Ratio, Smooth, Strength, Lock for Camera Lock, and Zoom. At the bottom right, you have a dropdown menu where you can choose the stabilization modes.
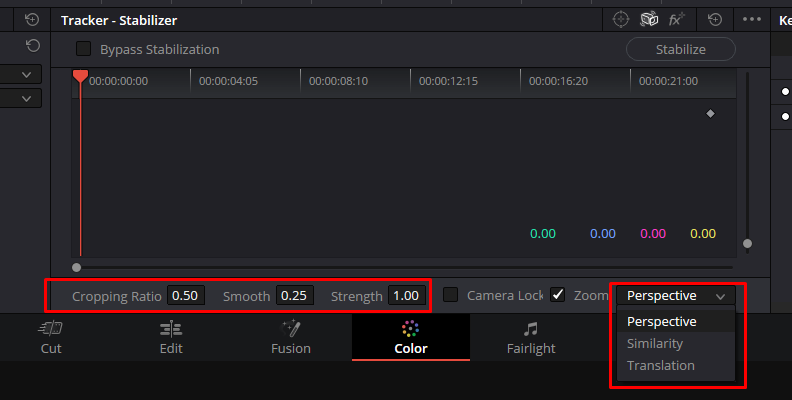
Remember, Perspective mode analyzes pan, tilt, rotation, and perspective; the Similarity mode only analyzes pan, tilt, and rotation, and Translation mode pan and tilt. Select one and click the Stabilize button.
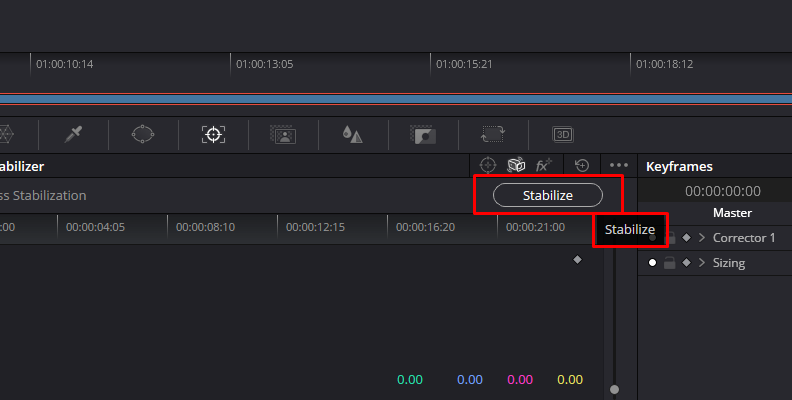
Wait until DaVinci Resolve analyzes and stabilizes the video. Unlike the Edit page, the Tracker window shows a graph of the stabilization process. Adjust settings or use a different mode until you achieve the perfect stabilization.
Method 3: The Cut Tab
The last method is the easiest, but you have less control than with the others.
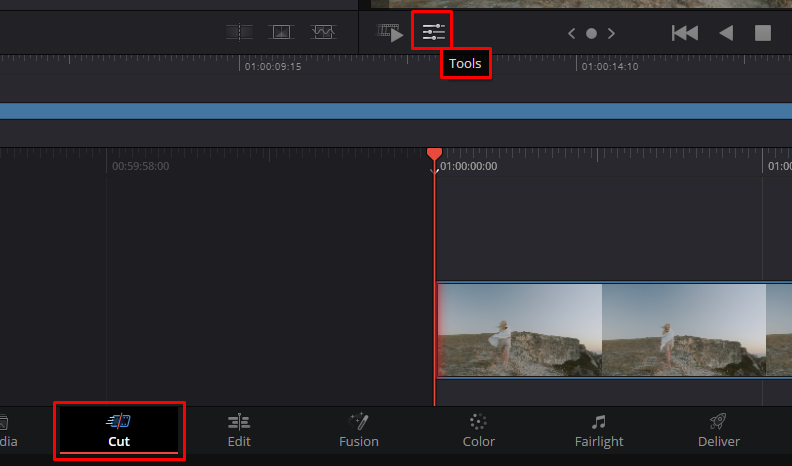
Step 1: Display the Tools
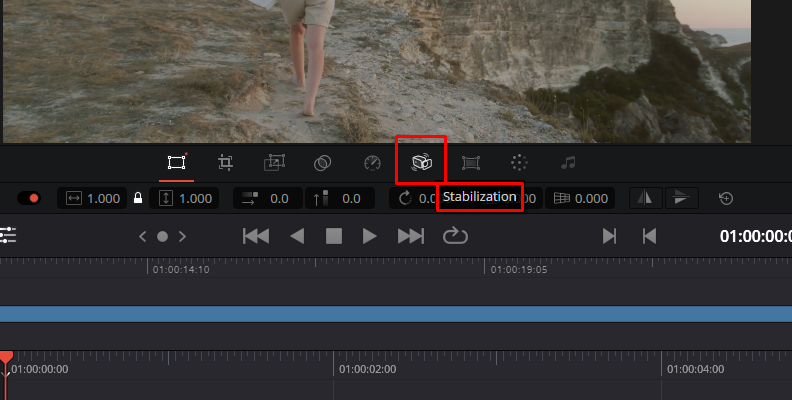
On the Cut page, select the clip to stabilize. Click the icon with three sliders to display the Tools. Select the stabilize icon to get to the stabilization feature.
Step 2: Stabilize
Select a stabilization mode and click the Stabilize button. This method is a good option when you want something quick and your video has no complex shots.
How to Stabilize Video with Boris FX Mocha Pro
Mocha Pro is a planar motion tracking tool that features a stabilization module that is very useful for shots that are difficult to track. You can follow these steps whether you use the plug-in version inside DaVinci Resolve or the standalone application of Mocha Pro.
Step 1: Launch Mocha Pro
If you’re using the plug-in version, you can launch Mocha Pro from your host. Search for Mocha Pro on your software effects library and apply it to the clip that requires stabilization. Then open the effects control and click Launch Mocha UI.
Step 2: Track your Video Footage
With Mocha Pro, you have more control over the tracking data used. Analyze your shot and decide which background elements can be used to track your footage. Draw shapes using the x-spline tools. Choose something in the background, like a building, the floor, etc. Enable the surface and grid and align it to your tracking object.
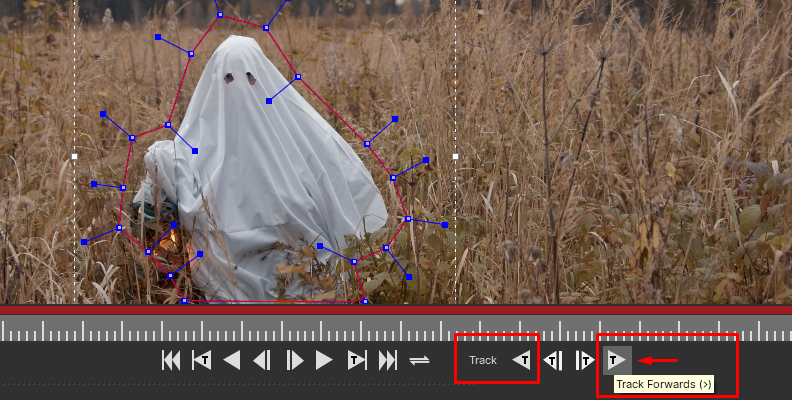
Select what you’re going to track, depending on your video. With Mocha Pro, you can track translation, scale, rotation, shear, and perspective. Click track forward or background, wait for Mocha to track all your footage, and then verify that everything is tracked correctly.
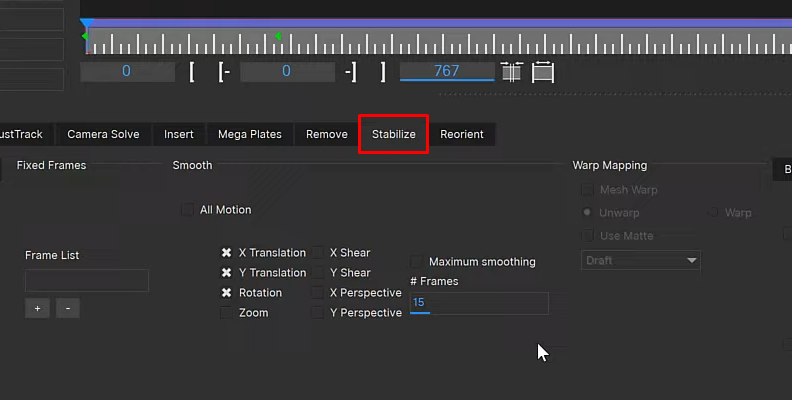
Step 3: The Stabilization Module
To see Mocha Pro modules, make sure you're in Classic mode. Go to the menu bar Workspace > Classic. On the bottom, click Stabilize and choose the motion you want to stabilize: X and Y translation, rotation, zoom, X and Y shear, and X and Y perspective. Use Maximum Smooth to lock your image or select a range of frames to smooth the stabilization.
In the Borders tab, you can enable Centre, Zoom, and Apply Crop to help remove the black areas from the stabilization. In the AutoFill tab, you can enable AutoFill to fill those black regions by copying pixels from adjacent frames using the tracking data.
Step 4: Render the Full Video
Click Render Forward to preview the result and make the necessary adjustments. Experiment until you find the best result for your video footage. If you’re using the standalone application, you can render from File > Export Rendered Clip.
If you’re using the plugin version, you can render it in DaVinci Resolve. Save the project and exit Mocha Pro to return to DaVinci Resolve. Open the inspector and display the Module Renders submenu under the Mocha Pro settings. In the module dropdown menu, select Stabilize and check Render. Now you have your footage stabilized inside DaVinci Resolve.
Final Words
Stabilizing shaky footage in DaVinci Resolve is easy and fast using the different modes, saving time to continue editing your videos. Mocha Pro offers more tools for advanced users who work with more complex and cinematic shots or want more control over the tracking and how to use it for stabilization. You get to decide what elements in the footage to track, including the foreground subject, to give a different stabilization effect to your shaky videos.
Download a trial version of Mocha Pro to experiment with the creative tools that Mocha Pro offers you and improve your DaVinci Resolve workflow.
Good luck!


