


One of the oldest and most common "tricks" in film and video editing is time manipulation. Slowing down or speeding up a video is a technique that can be used in many different ways, giving a whole new dimension to your storytelling.
In this guide, we'll talk about speeding up and slowing down a video using BCC Optical Flow, as well as some of the main reasons why you should consider implementing this in your videography and what the benefits could be from utilizing both techniques.
If you're interested in learning more, keep on reading, and without further ado, let's get straight into it.
How to Speed Up or Slow Down a Video with BCC Optical Flow
Before we get into the process, it's important to mention that the tool we'll be using, BCC Optical Flow, is part of a renowned creator pack called Continuum, developed by Boris FX.

Continuum is a collection of plug-ins, filters, transitions, editing tools, presets, effects, and everything else you need to take your video and photo editing work to a whole new level.
The best thing about it is that it is available for all popular video editing programs, meaning you don't need to learn a whole new working environment and get away from your comfort zone to use it.
Simply download and install Continuum for your software of choice, whether that is Adobe After Effects, Adobe Premiere Pro, Avid, DaVinci Resolve, Final Cut, VEGAS Pro, or any other OFX host, and enjoy the large collection of tools in software you're already familiar with.

That said, if you want to learn how to speed up a video (or slow down) here's what you need to do to do using BCC Optical Flow within Premiere Pro.
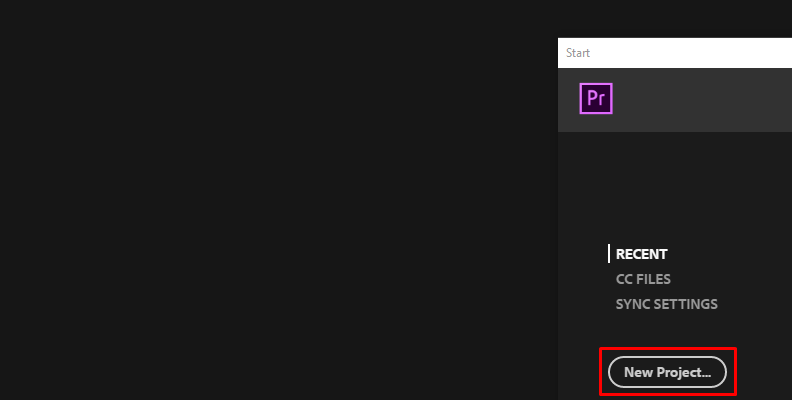
Step 1: Launch Your Software of Choice and Create a New Project
Our first step would be to launch our software of choice and create a new project to which we can add the video we wish to speed up. In this case, this would be Adobe Premiere Pro, as mentioned above, so launch the software and wait for it to load.
On the home screen, which is the first panel you see after the program loads, you'll need to create a new project. We recommend this over working on an already-started project to avoid making any unwanted changes.
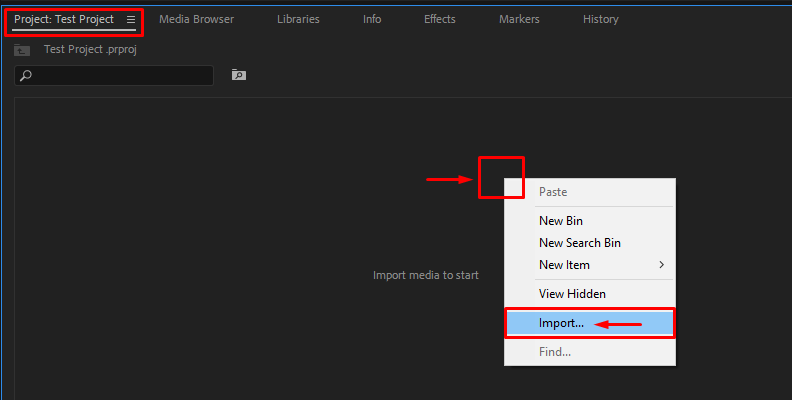
Step 2: Import Media (the Video You Wish to Speed Up/Slow Down)
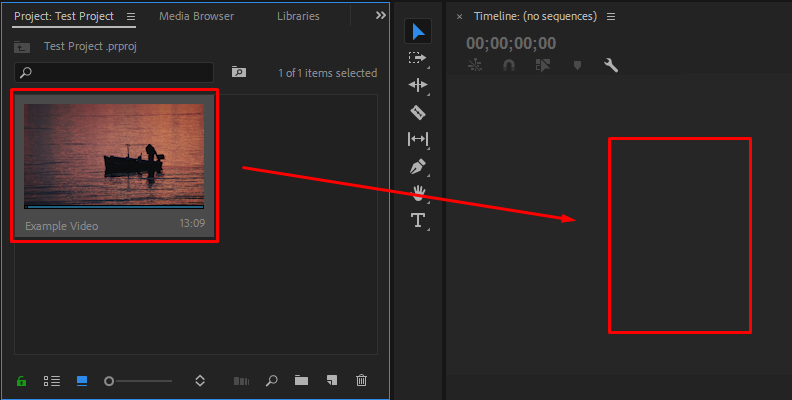
Once you create your new project, it's time to import media into the software.
To do this, you need to head over to the "Project" tab in Premiere Pro and right-click anywhere in the empty area where it says "Import media to start" as shown in the image below.
Then, from the list of options, you need to choose "Import" and find the file on your computer.
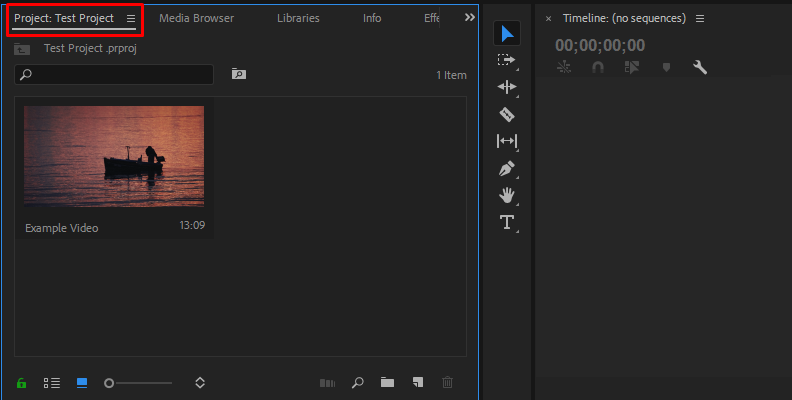
Once you import the video you want to speed up or slow down, you'll see it within the "Project" tab, as shown in the image below.
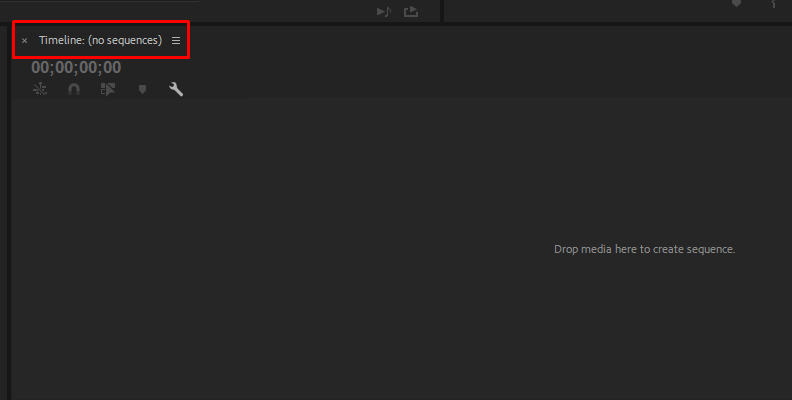
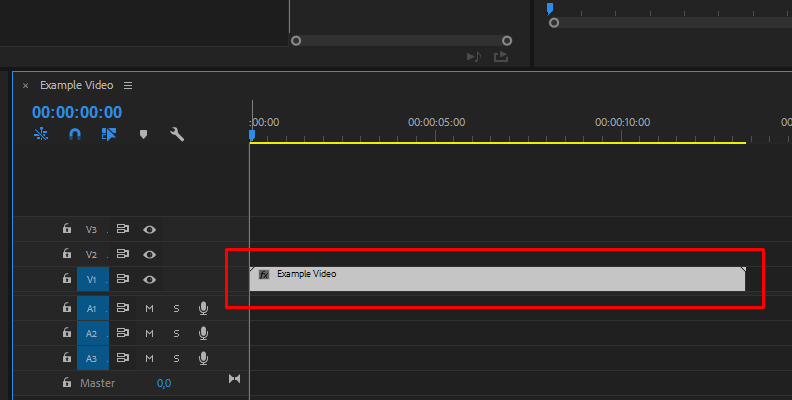
Step 3: Create a Timeline/Sequence of the Media You Imported
Now, you need to create a sequence out of the video you imported. As you can already see, it says "Timeline (no sequences)" above the timeline area, meaning it's empty, and you need to create one.
To do this, simply drag and drop the video from the "Project" tab onto the timeline area.
When done, the video should be placed on your timeline like so.
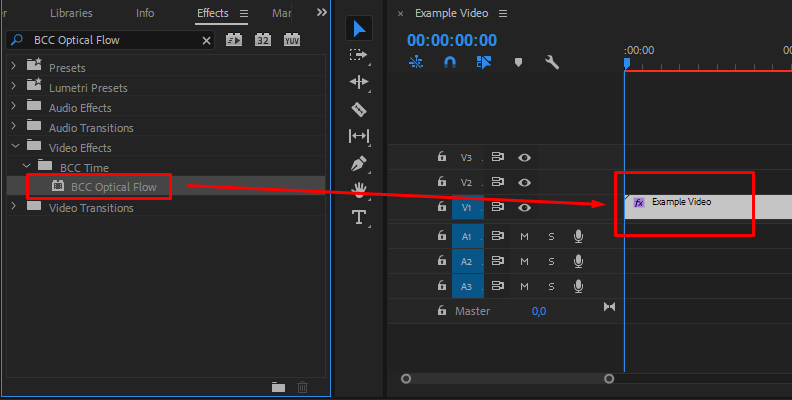
Step 4: Search and Apply the BCC Optical Flow Effect to Your Media
Now that you have successfully created a timeline, it's time to apply the BCC Optical Flow effect to your video clip. This will allow you to adjust the video speed whether you want to make it faster or slower.
First, access the "Effects" tab by clicking on it.
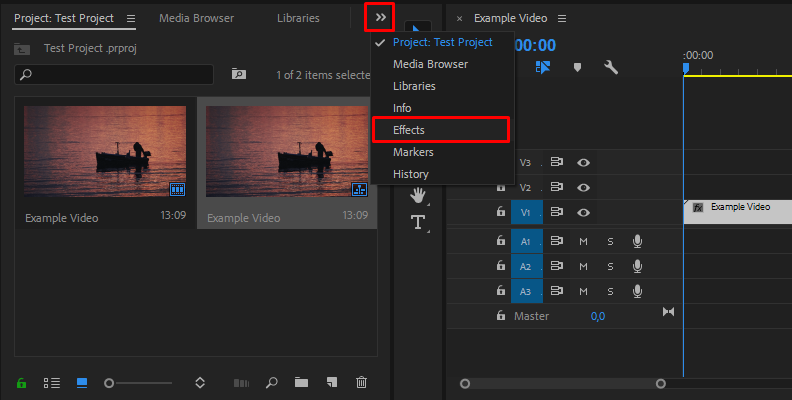
Then, use the search bar to look up the effect.
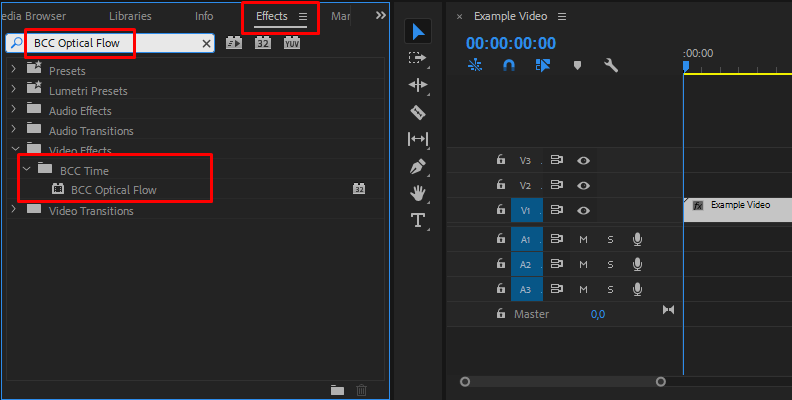
If Continuum is installed properly and is compatible with your video editing software of choice, you will find the effect in the results list under the "BCC Time" folder.
From here, all you need to do is drag and drop the effect over your video on the timeline.
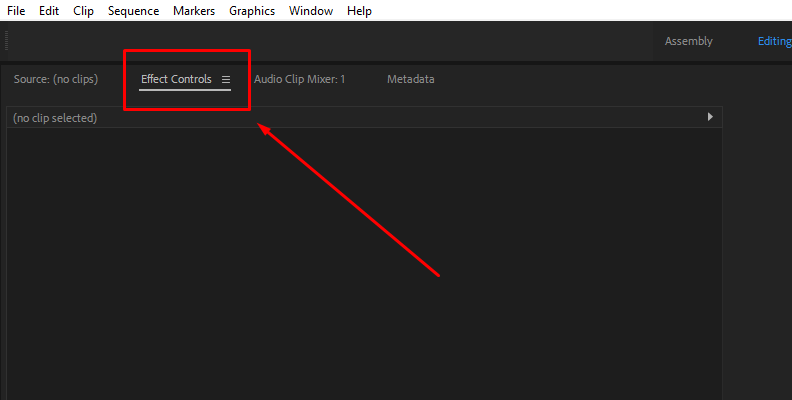
Step 5: Modify Settings and Parameters in the Effect Controls Panel
Now that the effect is applied to your video, you need to open the "Effect Controls" panel and adjust a few settings and parameters to make the changes you need regarding the video playback speed.
Here, you will find the BCC Optical Flow effect along with all settings available.
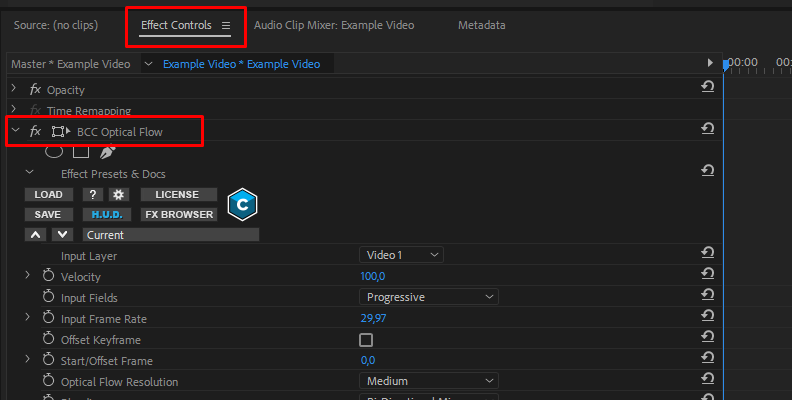
In the "Input Layer" field, you need to select the video track to which your video clip is added. In our case, that's V1.

Then, to change video speed for your clip, all you need to do is adjust the "Velocity" parameter. Depending on whether you increase or decrease the value, you will make your video file play faster or slower.
For the rest of the available settings and options, depending on your project's needs, you can find a detailed explanation on the BCC Optical Flow webpage.
It's also worth noting that if you want to create an optical flow effect that is longer than the source media's length, you'll need to create a black video slug first and then apply the BCC Optical Flow effect to it and not the source video. Then, in the effect controls panel, you need to choose the video track of your source video, as stated on the BCC Optical Flow info page.
You can use BCC Optical Flow to create a slow-motion video or adjust video speed to make it quicker, speeding it up. The way BCC Optical Flow works is by generating new frames in between already existing ones to simulate a video recorded using a higher framerate, which is essential when creating a slow-motion clip that looks smooth and realistic.
Why Would You Speed Up or Slow Down a Video?
There are multiple reasons you would consider changing video speed of one or multiple video files. Sometimes, doing so can affect the storytelling in a creative way that can help the viewer immerse more, but other times, it can help with more technical reasons, such as allowing for better representation of details (when slowing down) or saving time through creating timelapses (when you speed up a video).
BCC Optical Flow can be used as a video speed changer, and although it's slightly more complex than what you would usually find as a free online tool for the same purpose, the advantage is you can get much cleaner results and with a lot more customization options.
Here are some reasons you may want to consider speeding up or slowing down an entire video or just some parts of it in your video editor program of choice.
Reasons to Speed Up a Video Clip:
- Time-Lapse: To show a long process in a short amount of time, like a sunset, a construction project, or a road trip.
- Summarization: To condense lengthy content into a shorter format, such as tutorials, presentations, or events.
- Humor or Entertainment: To create a comedic effect, making actions appear exaggerated or funny.
- Efficient Viewing: To allow viewers to consume information quickly, especially in educational or informational videos.
- Highlighting Change: To emphasize changes over time, like growth, movement, or transformation.
- Speedy Tutorials: For advanced users who can follow along quickly without needing detailed explanations.
Reasons to Slow Down a Video Clip:
- Detailed Examination: To allow viewers to see details that would be missed at normal original speed, such as in sports replays or scientific experiments.
- Dramatic Effect: To create a dramatic or emotional impact in storytelling, enhancing key moments.
- Instructional Clarity: To make it easier for viewers to follow along with complex instructions or movements, such as in dance tutorials or DIY projects.
- Artistic Expression: To achieve a particular aesthetic or artistic effect, giving the video a more cinematic feel.
- Analyzing Motion: To study and analyze specific movements or actions, often used in sports, science, and training videos.
- Suspense or Tension: To build suspense or tension in a narrative, making scenes feel more intense or prolonged.
Final Words
That covers everything you need to know about making speed changes to your videos using BCC Optical Flow, and some of the main reasons editors decide to speed up or slow down videos.
Hopefully, this will help you level up all your future work and get your audience engaged in even more creative ways.
We thank you for reading and wish you the best of luck!


